Thursday, August 26, 2021

Sneak Peek: Pristine Poinsettia, Winter Greenery & Lacy Snowflake Dies

Hello and welcome to day 5 of our 2021 Holiday Peek Week!  Each morning this week I am showcasing cards using our newest fall & winter collections which will begin shipping on August 27th.

Today I am sharing three new standalone dies for the holidays called Pristine PoinsettiaWinter Greenery and Lacy Snowflakes. I had so much fun using these three dies and I'm super excited to finally share my cards using them!

Card No. 1: My first card combines our new Pristine Poinsettia Dies with a couple of the dies from our Winter Greenery Dies set. I go more into detail about how I assembled these poinsettia flowers near the bottom of my post today, but when layering three layered sets together this die creates a finished flower that is 2.5" wide in size. For these poinsettias I arranged our Red Zircon Jewels in the center using the largest size in the center and a set of smaller jewels around the perimeter which I adhered with a strong liquid adhesive.
 

For this card I started with a red checked print from our All Is Bright Paper pack for my background. I then cut our Scalloped Oval Mat 2 Dies from black cardstock and cut out the center using our Stitched Oval 2 Dies. I then backed the opening with our Frilly Frames Quatrefoil Dies background cut from grey cardstock and a second oval using our Scalloped Oval Mat 1 Dies cut from white cardstock. I completed my card using our Season's Greetings Stamps for my greeting, stamping it using VersaFine Onyx Black Ink.
Sunny Studio Holiday Christmas Card (using Season's Greetings Stamps, Pristine Poinsettia, Winter Greenery, Scalloped Oval Mat 2, Stitched Oval & Frilly Frames Quatrefoil Dies, All Is Bright Paper)


Card No. 2:
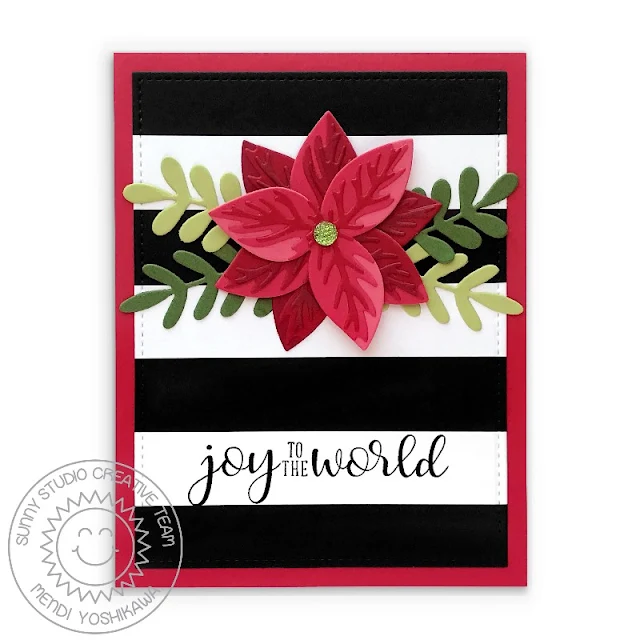
 For my next card I utilized the same Pristine Poinsettia Dies and Winter Greenery Dies, but this time I used two different leaf dies from the set. For my flower center I used an old Queen & Co. Goosebumps jewel from my stash. My bold striped background was created by cutting 3/4" wide strips from Black and white cardstock which I then taped together on the back side with Scotch tape before running it through my die-cutting machine with our Stitched Rectangle Dies. I then mounted them onto a red stock panel to match my poinsettia and stamped my "joy to the world" sentiment using our Festive Greetings Stamps. This card came together really quickly, but I love the bold impact!
Sunny Studio Joy To The World Classy Black & White Striped Holiday Christmas Card (using Festive Greetings Stamps, Pristine Poinsettia, Winter Greenery & Stitched Rectangle Dies)


Card No. 3: For this card featuring our new Pristine Poinsettia Dies and Winter Greenery Dies, I paired them with a green checked patterned paper from our All is Bright Paper pack. For my greeting I turned to our Inside Greetings Christmas Stamps, stamped with VersaFine Onyx Black ink onto a cutout cut from white cardstock using our Scalloped Oval Mat 1 DiesI then used our Stitched Oval 2 Dies to cut a red gingham mat behind my sentiment using our Classic Gingham Paper. As final finishing touches, I added some Ruby Red Pearls in the center of my poinsettia flower and scattered a few random Iridescent Clear Jewels on my card background.

Sunny Studio Holiday Card (using Inside Greetings Christmas Stamps, All Is Bright Paper, Classic Gingham Paper, Pristine Poinsettia, Winter Greenery, Stitched Oval 2 & Scalloped Oval Mat 1 Dies)

Card No. 4: For my next card I thought I would switch gears and go soft and sweet with a pink Pristine Poinsettia card. I was a bit limited for some of my cardstock colors so I was able to expand my choices by inking up some of the layers using distress inks prior to assembly. When I was done I added some green pearls to the center using our Iridescent Pearls and added some sparkle to the completed flower using Ranger Stardust Stickles.

For the rest of my card I used our Frilly Frames Quatrefoil Dies for the background, Striped paper from our Sleek Stripes Paper pack and a heat embossed sentiment from our Retro Ornaments Stamps. For the rest of my floral grouping, I stamped the layered pinecones from our Christmas Trimming Stamps onto kraft colored cardstock and used more of the vines and sprigs from our Winter Greenery Dies.

Sunny Studio Pink Christmas Card (using Pristine Poinsetta, Winter Greenery, Frilly Frames Quatrefoil Dies, Retro Ornaments Stamps & Sleek Stripes Paper)

Card No. 5: For my last Winter Greenery card showcase the holly and berries, I started by stamping the tree branches from our Christmas Trimmings Stamps, Classy Christmas Stamps and Holiday Style Stamps with clear VersaMark Ink onto black cardstock and then heat embossed them using Ranger's Leaf Green & Fern Green embossing powders by Wendy Vecchi. I first sprinkled the darker color near the center and dumping that portion back into the container before sprinkling the tips with the lighter color. I like the small variation it gave my grouping.

I trimmed down my card panel using stitched rectangle from our Frilly Frame Retro Petals Dies and then mounted them onto a larger red cardstock panel sized 4.25" x 5.5". My sentiment was a combination of stamps from our Christmas Trimming Stamps and Merry Mice Stamps which I heat embossed using Ranger's Red Geranium embossing powder. I am such a fan of Ranger's colored opaque embossing powders. They heat up so smoothly with beautiful bold results!  As a final touch, I went back with my Sharpie White Extra Fine Point Pain Pen to add my dots to the background.

Sunny Studio Holly Card (using Winter Greenery Dies, Holiday Style, Christmas Trimmings & Classy Christmas Stamps)

Card No. 6: I have one last Pristine Poinsettia card to share. I realized when nearly all my cards were done that I failed to use one of my favorite patterned papers from the new All Is Bright Paper pack. For this card I used a sketch by Page Maps that Scrapbooks & Cards Today is sharing on their website right now. I was able to cut out all my rectangles and pennants using the dies from our Stitched Rectangle Dies, shortening the poinsettia background slightly to make room for my sentiment by running the die through my machine a second time. I tied a red gingham bow using some American Crafts ribbon and stamped my sentiment using a greeting from our Holiday Style Stamps. Lastly, I added the Ruby Red Pearls to the center of my poinsettia flower.
Sunny Studio: Wishing You Joy Christmas Card (using Pristine Poinsettia Dies, Stitched Rectangle Dies, All Is Bright Paper & Holiday Style Stamps)

Card No. 7: Switching gears, my next card showcases our new Lacy Snowflake Dies with a bold, modern design. I used the three snowflake designs from the set to create a background pattern on black cardstock. When I was done I stamped the over-sized greeting from our Deck the Halls Stamps onto our Stitched Oval Dies and mounted them onto a die from our new Scalloped Oval Mat 1 Dies. At this point I was feeling my sentiment was looking a little dwarfed in the center of my card, but I didn't want to cover more of my snowflake background that I had worked so hard on. To compromise I die-cut our Stitched Oval 2 Dies from vellum to give my sentiment more weight and prominence, but I like how the translucent quality still allows me to see those snowflakes down below.Sunny Studio Holly Jolly Christmas Colorful Snowflake Card with Black Background (using Deck The Halls Stamps, Lacy Snowflakes, Scalloped Oval Mat 1 & Stitched Oval 2 Dies)

Card No. 8: For this card I started by creating a 4.5" stitched square using the middle rectangle from our Stitched Rectangle Dies. I used the long side of the die to create the width of my square and then elongated it by hanging the edge of the die off my cutting plate when running the die through my die-cutting machine. This allowed me to not cut one edge so that I could then flip the die over and cut the other half of my square using the same method. I then mounted it onto a piece of checked paper from our Gingham Pastels Paper pack which I had cut down to 4.75" square.

To create my wreath I used our Lacy Snowflakes Die cut from 5 different shades of pink, lilac and aqua cardstock to add up to a total of 15 snowflakes. I lightly traced around a 3" circle die on the back of my die-cut square and then used a light box to see through the cardstock for my snowflake placement. I could have just as easily traced it on the front and erased it later, but that can sometimes get messy with intricate dies and lots of glue so I thought I would try this option instead and it actually worked really nice. I tried my best to form visual triangles with each of the five colors so that they were all evenly space around my circle. I then picked them up one at a time and carefully added some glue to the backs using my Zig Glue Pen and adhered them one by one.
To embellish the center of my snowflakes I used Ranger's multi-matte medium to adhere our Pink Spinel Jewels, Lavender Quartz Jewels and Aquamarine Jewels. This adhesive dries as the name would indicate with a clear matte finish so if a little gets somewhere it shouldn't then it won't leave a glossy shine to draw attention to it later.  

For my greeting I stamped the "Happy New Year" sentiment first with dye ink using our Season's Greetings Stamps and then a second time with clear 
VersaMark Ink so that I could heat emboss using some clear glitter embossing powder for extra sparkle. I then cut my Scotch Foam Tape into thin strips and removed the paper backing before adhering them so that I could bend and mold the tape to match the curve of my letters, while keeping all the little pieces hidden.Sunny Studio Winter Wreath Happy New Year Holiday Card (using Lacy Snowflakes Die, Stitched Rectangle Dies, Season's Greetings Stamps & Gingham Pastels Paper)

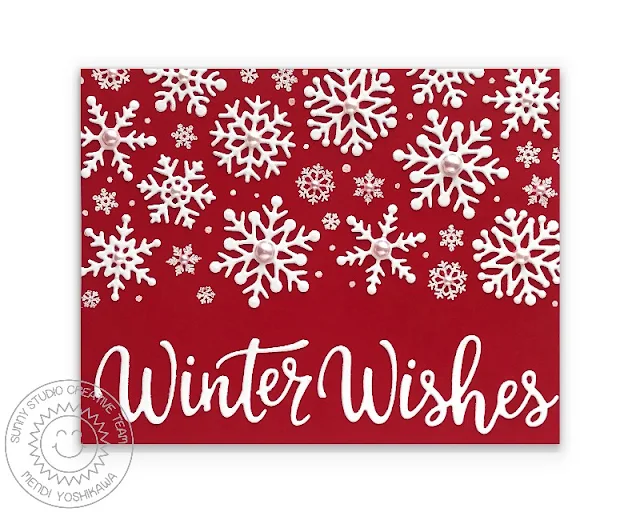
Card No. 9: For my last card of the day using the new Lacy Snowflakes Die I returned to my favorite red and white color scheme. In addition to cutting two of each of the lacy snowflakes from white cardstock, I also cut out a few of the snowflakes and "winter wishes" greeting from our Layered Snowflake Frame Dies to add to the mix. Before adhering anything I visually arranged them on my red cardstock panel, leaving a tiny room between them for some smaller snowflakes from our Deck The Halls Stamps which I stamped with VersaMark Ink and heat embossed using Hero Arts White Detail Embossing Powder. After everything was adhered I added some white dots using my favorite Sharpie White Extra Fine Paint Pen and some White Pearls to the center of some of the snowflakes.
Sunny Studio Red & White Winter Wishes Holiday Christmas Card (using Lacy Snowflakes Die, Layered Snowflake Frame Dies & Deck The Halls Stamps)

Pristine Poinsettia Assembly: I die-cut and assembled a number of poinsettias all in one sitting using cardstock scraps I had in my stash which I store in Ziploc gallon sized freezer bags by color. When sorting through my cardstock scraps I had enough paper to create six flowers that leaned peachy-red and six that leaned pinkish-red for the lightest layers. 

To keep my petals from falling apart, I used a strong paper piercer and a foam mat to pierce through all 9 layers and a small brad of a similar color to strongly hold all the petals together and still give me the opportunity to not fully glue all 9 petals down my card to give them a more realistic look. After closing the brad, I positioned them over a self healing mat and then took a small craft hammer to them so that the brad head would completely flatten out so that I could apply other embellishments over the center without the brads getting in the way.

Sunny Studio Stamps Blog: Examples of Layered Flowers using Pristine Poinsettia Metal Cutting Dies)

To help you line up our layered stamps like a pro I've created a special layering guide (you can click on the photo below to view it larger). The guide shows the stamps starting with the lightest ink color, working towards the darkest, but sometimes I find it easier to start backwards. They both work depending on what your preference is.  The black outline indicates where that layer touches the previously stamped layer.  :)
Sunny Studio Stamps Blog: Pristine Poinsettia Layered Metal Cutting Dies Layering Guide

That wraps up today's sneak peeks. I'm so happy you spent part of your day with me today. I read all your comments and they mean so much!  I'd love to give a $25 gift code to one lucky winner using the rafflecopter below.  Make sure to come back tomorrow for one last set of sneak peeks & another prize, plus there's still time to hop along with our 6th birthday blog hop HERE where you could potentially win one of twelve prizes. The contests run through Friday, August 27th at Midnight PST with winners announced here on Sunday, August 29th. :)

a Rafflecopter giveaway

Here's a closer look at the our new Pristine Poinsettia Dies, Winter Greenery Dies and Lacy Snowflake Dies used today (which are available for pre-order as part of our birthday festivities and will begin shipping on August 27th):

Sunny Studio Stamps: Pristine Poinsettia Layered Flower Metal Cutting DiesSunny Studio Stamps: Winter Greenery Holly, Berries, Sprigs, Vines & Leaves Metal Cutting Dies 

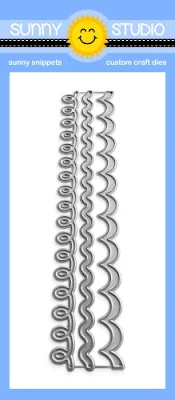
Sunny Studio Stamps: Lacy Snowflake Set of 3 Winter Metal Cutting Dies

This week we also have three different discount codes to chose from, however you are limited to one discount code per order so please chose the one with the biggest savings for you. ❤️

Sunny Studio Blog Hop: Use discount code SIXYEARS at checkout to save 20% off on Sunny Studio Branded products (excluding clearance & new release items) through 8/30/21 at Midnight PST. Limit one discount code per order

Sunny Studio Stamps: Save $5 on orders of $49 or more using Promo code SAVE5 at checkout OR use promo code FREESHIP on orders of $25 or more to receive free US shipping. Limit One Discount code per order.

Other Sunny Studio Supplies Used:

Holiday Style Stamps
Shop at:
Sunny Studio
Stitched Rectangle Dies
Shop at:
Sunny Studio
Deck The Halls Stamps
Shop at:
Sunny Studio
Versafine Onyx Black Ink
Shop at:
Sunny Studio

Classic Gingham 6x6 Paper
Shop at:
Sunny Studio
Christmas Trimmings Stamps
Shop at:
Sunny Studio
Christmas Trimmings Dies
Shop at:
Sunny Studio
Stitched Oval Dies
Stitched Oval Dies
Shop at:
Sunny Studio
Frilly Frames Retro Petals Dies
Shop at:
Sunny Studio
Season's Greetings Stamps
Shop at:
Sunny Studio
Merry Mice Stamps
Merry Mice Stamps
Shop at:
Sunny Studio
Layered Snowflake Frame
Shop at:
Sunny Studio
Frilly Frames Quatrefoil
Shop at:
Sunny Studio
Classy Christmas Stamps
Shop at:
Sunny Studio
Inside Greetings-Christmas
Shop at:
Sunny Studio
Retro Ornaments Stamps
Shop at:
Sunny Studio
Sleek Stripes Paper
Sleek Stripes Paper
Shop at:
Sunny Studio
Season's Greetings Word Dies
Shop at:
Sunny Studio
Scalloped Oval Mat 1 Dies
Shop at:
Sunny Studio
Scalloped Oval Mat 2 Dies
Shop at:
Sunny Studio
Stitched Oval 2 Dies
Shop at:
Sunny Studio
All Is Bright Paper
All Is Bright Paper
Shop at:
Sunny Studio
Red Zircon Jewels
Red Zircon Jewels
Shop at:
Sunny Studio
Pink Spinel Jewels
Pink Spinel Jewels
Shop at:
Sunny Studio
Aquamarine Jewels
Aquamarine Jewels
Shop at:
Sunny Studio
Lavender Quartz Jewels
Shop at:
Sunny Studio
Iridescent Pearls
Iridescent Pearls
Shop at:
Sunny Studio
White Pearls
White Pearls
Shop at:
Sunny Studio
Ruby Red Pearls
Ruby Red Pearls
Shop at:
Sunny Studio
Hero Arts White Detail
Shop at:
Sunny Studio
Iridescent Clear Jewels
Shop at:
Sunny Studio
VersaMark Watermark Ink
Shop at:
Sunny Studio
Festive Greetings Stamps
Shop at:
Sunny Studio

Wednesday, August 25, 2021

Sneak Peek: Introducing Deck The Halls, Christmas Cookies, Gingerbread House Dies & Icing Border Dies

Hello and welcome to day 2 of our 2021 Holiday Peek Week!  Each morning this week I am showcasing cards using our newest fall & winter collections which will begin shipping on August 27th.

Today I am sharing two new Christmas stamp sets for the holidays, their matching dies and two new standalone dies. Let's dive right in!

Card No. 1:  Up first I have a card that showcases 6 of the 10 playful ornament stamps that come with our new Deck The Halls Stamps and Dies. There's something so irresistible about characters that fit into one adorable, chubby circle! For this card I started by die-cutting my stitched grid pattern using our Window Trio Square Dies, cutting them out twice side-by-side on my A2-sized card panel and rounding the bottom two corners. To fill the spaces behind my square openings I alternated different colored tone-on-tone checked prints from our new All Is Bright Paper pack. I completed the card with a "season's greetings" sentiment from the new Holiday Express Stamps which I stamped onto a banner from Banner Basics Stamps.
Sunny Studio Season's Greetings Critter Christmas Ornaments Grid Style Card (using Deck the Halls, Holiday Express & Banner Basics Stamps, Window Trio Square Dies and All Is Bright Paper)

Card No. 2: For this card I started by creating a background using one of the three new border dies that come with our new Icing Border Dies. I cut a number of them in four different colors that I alternated on a piece of white cardstock. I arranged my three ornaments from the Deck The Halls Stamps onto our Scalloped Oval Mat 3 Dies which was backed using the Scalloped Oval Mat 1 Dies to fill the openings with a solid white cardstock. I hung my ornaments using gold embroidery thread and added some tree branches using our new Winter Greenery Dies that I will be sharing more of tomorrow.  I completed my card with a banner from the Banner Basics Stamps, a heat embossed sentiment from our new Holiday Express Stamps (which I'm sharing on Friday) and some scattered Red Zircon Jewels.
Sunny Studio Stamps Polar Bear, Snowman & Santa Claus Ornaments Christmas Card (using Deck The Halls & Banner Basics Stamps, Scalloped Oval Mat 3, Winter Greenery and Icing Border Dies)

Card No. 3: For this card I used the peppermint candy ornament image from our new Deck The Halls Stamps to create a candy themed holiday wreath, combining them with the two tree branches from our Classy Christmas Stamps. I arranged the pieces on a 4.5" square pinked checked print card panel cut from our All Is Bright Paper which I mounted onto a 4.75" square cardbase. At this point I felt like my card was really missing the oomph I was looking for when our Aqua Ombre Pearls came to my rescue. They give my card a fun vintage feel and are just the little touch of something special I was looking for. I then completed my card by stamping a sentiment in the center using a greeting from our Holiday Style Stamps.
Sunny Studio Peppermint Candy Ornament Christmas Wreath Card (using Deck The Halls, Classy Christmas & Holiday Style Stamps and All Is Bright Paper)

Card No. 4: This is another card that started as a background created using the loopy border dies from our new Icing Border Dies set. I'm a sucker for a bold red and white color scheme so this background was so fun to create! I turned the penguin ornament from the Deck The Halls Stamps into a boy and girl couple using the bow from our Floating By Stamps. To frame my ornaments and help them stand out against the busy background, I layered our Scalloped Circle Mat 1 Dies, Scalloped Oval Mat 2 Dies, Stitched Circle Large Dies and Stitched Circle Small Dies. I hung my ornaments from a tree branch from our Holiday Style Stamps, but as the ink started to dry it started to blend a bit more than I was hoping with my green cardstock background so I added some darker accents near the center of each sprig by flicking my Copic G07 Marker following the stamped tree needles. As my last touch I stamped the "deck the halls" greeting on a curve to match the circle using a sentiment from that same Holiday Style set.
Sunny Studio Penguin Ornament Christmas Card with Red & White Loopy Background (using Deck The Halls & Holiday Style Stamps, Icing Border, Scalloped Circle Mat 2 and Stitched Circle Dies)

Card No. 5: I mass produced this simple design for our brick & mortar stores to display using our Deck The Halls Stamps. To stamp the tree branches along the top, I stamped the two branches from our Classy Christmas Stamps and single branch from our Christmas Trimming Stamps all at once, lining them up in my MISTI tool. After stamping them in one color of green using PinkFresh Studio's Over the Hills Ink Cubes set, I then rearranged the images and stamped them in a second color. This allowed me to stamp the entire top border in two passes which really sped up my process. Another time saving measure was using my ruler with a black pen to draw in the strings my ornaments were hanging from, rather than using actual thread or trying to stamp them with a straight line stamp.

The Deck the Halls set comes with an awesome oversized "Have a holly jolly Christmas" greeting which I just adore. Sometimes having a large sentiment to take center stage is so nice to have on hand. I stamped mine using VersaFine Onyx Black Ink and then added the loopy border along the bottom on my card from our Icing Border Dies which was mounted over a green checked strip from our All is Bright Paper pack. 
Sunny Studio Holly Jolly Christmas Santa, Reindeer, Gingerbread & Elf Ornament Card (using Deck The Halls & Classy Christmas Stamps, Icing Border Dies & All Is Bright Paper)

Card No. 6: Switching gears, I now have a series of cards to share using our new Gingerbread House Dies and Christmas Cookies Stamps. I just love how versatile this new die set is!  As you will see it can be used for so much more than just Christmas cards. 

My first card focuses on the holidays though, cutting out the body of the house using a scalloped print from our All is Bright Paper and decorating the roof with our Icing Border Dies and some Red Zircon Jewels. All the other elements on my house came with the Gingerbread House dies and the gingerbread girl and boy from our new Christmas Cookies Stamps are the perfect compliment!

For my background I inked it up using a mix of Spun Sugar and Kitsch Flamingo Distress Ink, adding a snowy bank of icing using our Slimline Nature Border Dies. For my sentiment, I pulled out our Christmas Home Stamps, stamping it with VersaMark Ink and heat embossing it with Hero Arts White Detail Embossing Powder (once I was certain the background was fully dry). Sunny Studio Girl & Boy Card (using Christmas Cookies & Christmas Home Stamps, Slimline Nature Border, Icing Border & Gingerbread House Dies)

Card No. 7: Up next is a Christmas Cookies card! For my red gingham borders I pulled out our Background Basics Stamps. Next to add a little trim to my edge, I added the gumdrop borders, stamping them twice for both the top and bottom using our Jolly Gingerbread Stamps. I then used that same set to stamp my house with my tree cookies, inking up behind them with some Evergreen Bough distress ink using my favorite Jumbo Dauber. 

I finished my card by adding some white highlights with a Sharpie White Extra Fine Paint Pen and stamped my sentiment with VersaMark ink before heat embossing it with Hero Arts detail white embossing powder.Sunny Studio Stamps: Jolly Gingerbread, Christmas Cookies & Background Basics Gingham House Handmade Card by Mendi Yoshikawa


Card No. 8: For my next card using the Christmas Cookies Stamps I wanted to make my card base mimic the feel of a gingerbread cookie with white scalloped icing so I cut my background from some kraft cardstock which I die-cut using our Window Quad Circle Dies. To create scalloped decorative edge I used three separate dies from our Slimline Basic Border Dies set. I backed my gingerbread men with a piece of pink snowflake patterned paper from our Holiday Cheer Paper pack, once again adding white highlights to my cookies with a Sharpie white paint pen.Sunny Studio Stamps: Christmas Cookies, Window Quad Circle Dies, Slimline Basic Border Dies & Holiday Cheer Paper Gingerbread Men Handmade Card by Mendi Yoshikawa

Card No. 9: Our cute Gingerbread House Dies can be assembled onto a card front or used together with their accompanying shadow die to become shaped cards or larger gift tags. I elected to create a pair of shaped cards decorating them with various elements that come with the die set. This set comes with a small die that cuts a number of small circles (for the m&m inspired candies on the roofline and the door knob) and a trio of gumdrops all in one pass and more importantly a single die so you don't have 7 tiny dies to lose. To add some realism I coated my candies and peppermints in Ranger Glossy Accents and the gumdrops using Ranger Stardust Stickles.
Sunny Studio Stamps Shaped Christmas Card using Gingerbread House Dies)

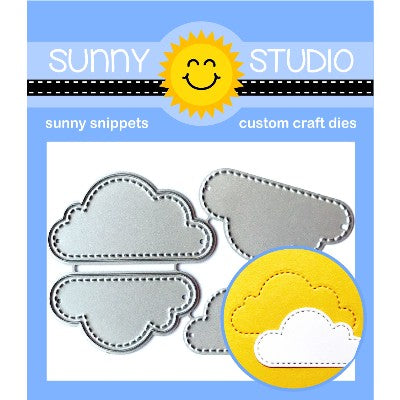
Card No. 10: Switching gears, I thought it would be fun to show how easily these Gingerbread House Dies can be transformed into a cute everyday themed house using our yellow striped print paper from our Sleek Stripes Paper pack. The die set comes with a chimney and two connected brick dies which I used on this card. For my cloud background, I used our Summer Splash Paper and the grass print paper from our Spring Fling Paper pack which I die-cut using the grass border die from our Picket Fence Dies set. I embellished my card further adding clouds using our Fluffy Cloud Dies, a fence with our Scalloped Fence Dies, mini flowers from our Sweet Treats House Add-on Dies and mini hearts from our Basic Mini Shape 2 Dies.
Sunny Studio Stamps New Home Card (using Gingerbread House, Scalloped Fence, Fluffy Cloud Dies & Spring Fling Paper)

Card No. 11: For my last card I used the doors and windows from the new Gingerbread House Dies to turn our Nutty For You Dies into a cute acorn house for Fall for these little mice from our Harvest Mice Stamps. For my background, I inked up my night's sky using Salty Ocean, Blueprint Sketch, Chipped Sapphire and Black Soot distress inks. I then inked up the ground using Vintage Photo and a little more Black Soot distress inks around the outside edges. Our Picket Fence Dies were a great addition to my scene and also help hide the transition between my ground and sky. For my string of hanging lights I used a border stamp from our Scenic Route Stamps and then tucked in a row of corn stalks behind my fence using images from both our Harvest Mice Stamps and Barnyard Buddies Stamps. Lastly I added a couple of pumpkins from our new Fall Friends Stamps to the foreground and heat embossed sentiment from our Harvest Mice Stamps.
Sunny Studio Mouse with Acorn House Fall Card (using Harvest Mice, Barnyard Buddies & Scenic Route Stamps, Nutty For You, Picket Fence & Gingerbread House Dies)

That wraps up today's sneak peeks. I'm so happy you spent part of your day with me today. I read all your comments and they mean so much!  I'd love to give a $25 gift code to one lucky winner using the rafflecopter below.  Make sure to keep checking back all this week for more peeks & prizes, including our birthday blog hop HERE where you have the opportunity to win one of twelve prizes. The contests run through Friday, August 27th at Midnight PST with winners announced here on Sunday, August 29th. :)

a Rafflecopter giveaway Here's a closer look at the our new Deck The Halls Stamps & Dies, Christmas Cookies Stamps & Dies, Gingerbread House Dies and Icing Border Dies used today (which are available for pre-order as part of our birthday festivities and will begin shipping on August 27th):

Sunny Studio Stamps Deck The Halls Holiday Christmas Ornament 4x6 Clear Photopolymer Stamp SetSunny Studio Stamps Deck The Halls Holiday Christmas Ornament Metal Cutting Dies

Sunny Studio Stamps Christmas Cookies Gingerbread Man and Girl Holiday Mini 2x3 Clear Stamp SetSunny Studio Stamps Christmas Cookies Gingerbread Man and Girl Holiday Metal Cutting Dies

Sunny Studio Stamps Gingerbread House Shaped Christmas Holiday Metal Cutting Dies Sunny Studio Stamps Icing Border Set with Loopy, Scalloped and Ric Rac Edges Metal Cutting Dies

This week we also have three different discount codes to chose from, however you are limited to one discount code per order so please chose the one with the biggest savings for you. ❤️

Sunny Studio Blog Hop: Use discount code SIXYEARS at checkout to save 20% off on Sunny Studio Branded products (excluding clearance & new release items) through 8/30/21 at Midnight PST. Limit one discount code per order

Sunny Studio Stamps: Save $5 on orders of $49 or more using Promo code SAVE5 at checkout OR use promo code FREESHIP on orders of $25 or more to receive free US shipping. Limit One Discount code per order.

Other Sunny Studio Supplies Used:

Holiday Style Dies
Holiday Style Dies
Shop at:
Sunny Studio
Holiday Style Stamps
Shop at:
Sunny Studio
Picket Fence Border Dies
Shop at:
Sunny Studio
Scalloped Fence Die
Scalloped Fence Die
Shop at:
Sunny Studio

Fall Friends Dies
Fall Friends Dies
Shop at:
Sunny Studio
Tsukineko Jumbo Dauber
Shop at:
Sunny Studio
Versafine Onyx Black Ink
Shop at:
Sunny Studio
Barnyard Buddies Dies
Shop at:
Sunny Studio
Barnyard Buddies Stamps
Shop at:
Sunny Studio
Christmas Home Stamps
Shop at:
Sunny Studio
Window Trio- Square Die
Shop at:
Sunny Studio
Nutty For You Dies
Nutty For You Dies
Shop at:
Sunny Studio
Fluffy Clouds Dies
Fluffy Clouds Dies
Shop at:
Sunny Studio
Summer Splash 6x6 Paper
Shop at:
Sunny Studio
Scenic Route Stamps
Scenic Route Stamps
Shop at:
Sunny Studio
Scenic Route Dies
Scenic Route Dies
Shop at:
Sunny Studio
Sweet Treats House Add-on
Shop at:
Sunny Studio
Banner Basics Stamps
Shop at:
Sunny Studio
Banner Basics Dies
Banner Basics Dies
Shop at:
Sunny Studio
Spring Fling Paper
Spring Fling Paper
Shop at:
Sunny Studio
Slimline Nature Borders
Shop at:
Sunny Studio
Classy Christmas Stamps
Shop at:
Sunny Studio
Classy Christmas Dies
Shop at:
Sunny Studio
Harvest Mice Stamps
Harvest Mice Stamps
Shop at:
Sunny Studio
Harvest Mice Dies
Harvest Mice Dies
Shop at:
Sunny Studio
Scalloped Circle Mat 1 Dies
Shop at:
Sunny Studio
Scalloped Circle Mat 2 Dies
Shop at:
Sunny Studio
Stitched Circle Small Dies
Shop at:
Sunny Studio
Stitched Circle Large Dies
Shop at:
Sunny Studio
Scalloped Oval Mat 1 Dies
Shop at:
Sunny Studio
Scalloped Oval Mat 3 Dies
Shop at:
Sunny Studio
Winter Greenery DIes
Shop at:
Sunny Studio
All Is Bright Paper
All Is Bright Paper
Shop at:
Sunny Studio
Red Zircon Jewels
Red Zircon Jewels
Shop at:
Sunny Studio
Hero Arts Fresh Foliage Ink
Shop at:
Sunny Studio
Hero Arts White Detail
Shop at:
Sunny Studio

Fall Friends Stamps
Fall Friends Stamps
Shop at:
Sunny Studio
VersaMark Watermark Ink
Shop at:
Sunny Studio
PinkFresh Over The Hills Ink
Shop at:
Sunny Studio
Aqua Ombre Pearls
Aqua Ombre Pearls
Shop at:
Sunny Studio
Christmas Trimmings Stamps
Shop at:
Sunny Studio
Floating By Stamps
Floating By Stamps
Shop at:
Sunny Studio
Floating By Dies
Floating By Dies
Shop at:
Sunny Studio