It is with a ton of stress and great sadness that I realize I must push back the release date for our Spring Release by a week and move it to January 1st. I am still feeling my way through this industry and learning that even when extra padding in timelines is added, the stamp and die manufacturers get overwhelmed and push back their ship dates.
Rather than have you wait so long after you've paid for an order (and to literally help me sleep better at night) I have decided it would be best to move the release date all together. All next week I will be featuring the new stamps though so I hope you will hold tight and enjoy all the ideas I have to share using them. :)
For those who have ordered the fishtail banners on pre-order I promise to make those a priority and package those up for shipment the moment they arrive which I'm hoping is just after Christmas.
Big Hugs!
Monday, December 21, 2015
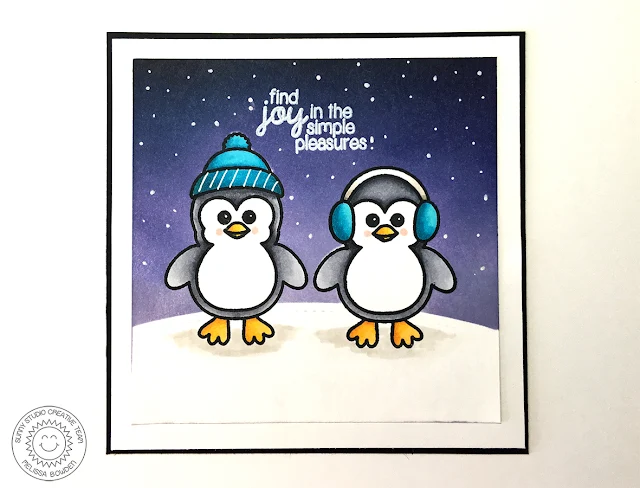
Bundled Up Snowy Night Peguin Christmas Card with Melissa
Hello everyone, Melissa Here! Today I have a card to share with you
using one of my favorite stamp sets of this release, Bundled Up. I love
making cute winter scenes, which this little penguin is perfect for!
To create the card for today I first cut a square of white cardstock. I stamped the two penguins with their accessories and masked them off with masking paper, I also masked off a snowy hill underneath them. I then stamped the sentiment above the two penguins with VersaMark ink and heat embossed it using white embossing powder.
I made the sky by first blending several different purple shades of Simon Says Stamp ink together, and then adding little dots with a white gel pen for the snow. I then pealed up the masks and colored the penguins with Copic markers. To finish the card I mounted it onto a piece of white card with a black border. That finishes up the card for today.
We're down to our last few sneak peeks before the stamps and dies are available for purchase on January 1st. For today's peek, we have another look at the Sending My Love stamp set. Depending on the choices you make, this fun set can also be stretched to work for Easter and has loads of fun sentiment options revolving around the theme of "sending".
I hope you all have a fantastic Christmas!
Sunday, December 20, 2015
Spring Release Peeks of Backyard Bugs & Sweet Script
Hi there! I hope you are enjoying one last holiday weekend getting ready for Christmas. I can't believe how much I still have left to do... I have bought all the ingredients for my holiday baking, but wouldn't it be wonderful it they would just magically assemble themselves? When life gets busy I would much rather be in my craft studio than in the kitchen and I'm still not sure when I'm going to find the time to squeeze that in but I'm ready when the small window presents itself. ;)
I thought I would pop in and share a couple more sneak peeks with you. This first one shows a couple more images from our Backyard Bugs set which includes a separate flower and flowerpot (to be used together or separately), a butterfly, a couple different trails and several fun punny sentiments.
For my second peek we have another look at our Sweet Script Alphabet, this time for the uppercase letters. This was my first attempt at creating a font from scratch and while it felt daunting, I am really happy with how it turned out.
Here's a little look at the stamp set in action... I used it for the names on some Christmas tags I created for Pebbles Inc. this past week (the to and from sentiments are by Lawn Fawn). ;)
Thanks for taking a peek. I hope you enjoy the rest of your day!
Friday, December 18, 2015
Santa's Helpers Happy Howliday Card with Marion
Hello - it's Marion again with some more inspiration for you using the Santa's Helpers stamp set and the coordinating dies. I've also used the popular Fishtail banners dies to create the focal panel on my card.
I stamped the puppy image and then die cut it before colouring it with Copic markers. I added the dots on the box with a white Uniball Signo gel pen and also added some clear Wink of Stella glitter brush pen to the ribbon. I sewed the banner on with my sewing machine for some added interest.
Products used:
For today's sneak peek we have a second look at our Sunny Borders stamps. I think you are going to love the way you can use these on their own or along with the coordinating border dies.
Thanks for stopping by today,
Marion
I stamped the puppy image and then die cut it before colouring it with Copic markers. I added the dots on the box with a white Uniball Signo gel pen and also added some clear Wink of Stella glitter brush pen to the ribbon. I sewed the banner on with my sewing machine for some added interest.
The sentiment is from the same set and was white heat embossed. The
holly was die cut from the Santa's Helpers die set and also colored
with Copic markers. The berries are covered with Glossy Accents and add a Christmas element, to a very non-traditional Christmas card.
For today's sneak peek we have a second look at our Sunny Borders stamps. I think you are going to love the way you can use these on their own or along with the coordinating border dies.
Thanks for stopping by today,
Marion
Thursday, December 17, 2015
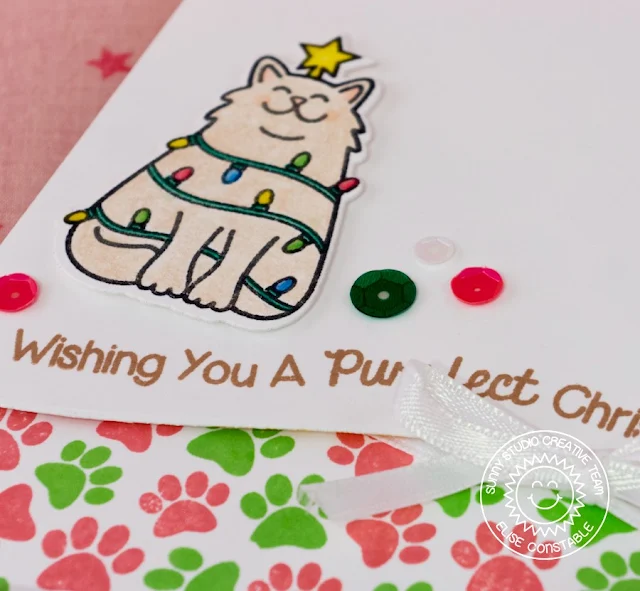
Santa's Helpers Purrfect Christmas Card with Elise
Hi everyone! It's Elise here to share a fun Christmas card with you that features the Santa's Helpers stamp set and dies! I really like the punny sentiments that are included in this set!
I chose to use the "Wishing you a Purrfect Christmas" sentiment with the cute kitty decorated in Christmas lights! It's hard to tell from the picture, but I added glossy accents to the light bulbs and star to make them shine a little bit. I also used the paw prints stamps to create a fun background along the bottom edge of the card with some green and red inks! I finished the card by adding some Christmas colored sequins and a white bow. Here is a close up on the kitty and the paw print background:
Before I go we have another sneak peek of the day with second look at the Sunny Sentiments set coming soon. This set includes a second sun image (look familiar?) that can be used with or without the happy face, along with a large cloud and three stars in varying sizes. You're going to love all the happy sentiments in this set perfect for brightening someone's day!
Thanks for stopping by and I hope you have a great day! :)
Subscribe to:
Comments (Atom)


