Sunday, May 4, 2025

Fabulous Flamingos Card with Hanh

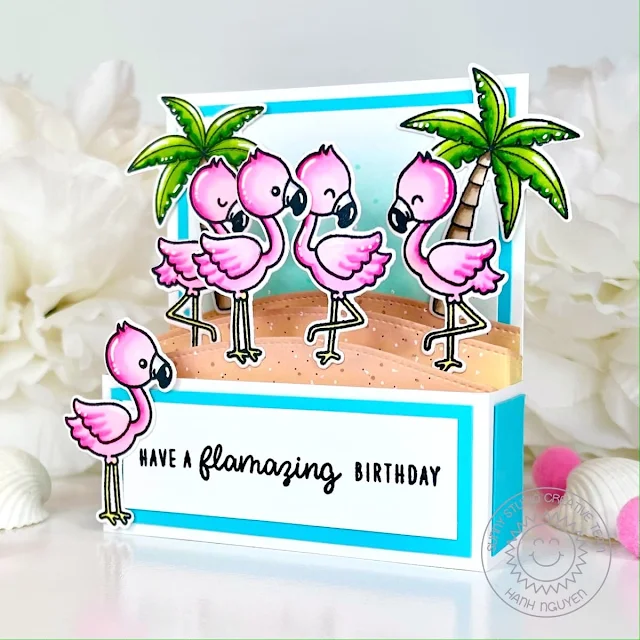
Hello Crafty Friends! This is Hanh on the Sunny Studio Stamps blog with a fun birthday boxcard to share with you featuring the adorable images from the Fabulous Flamingos and Sending Sunshine sets. Aren't these flamingos just the cutest?! Today I'm going to share a quick and easy way to make a homemade boxcard to add just a little pizzazz to your birthday cards. So let's get started. 

Sunny Studio Stamps: Fabulous Flamingos Birthday Boxcard by Hanh Nguyen (featuring Sending Sunshine, Slimline Nature Border Dies)

I stamped the flamingos and palm trees from the Fabulous Flamingos and Sending Sunshine Stamps sets onto a piece of Neenah Solar White 110 lb cardstock with Memento Tuxedo Black ink and used the coordinating Fabulous Flamingos Dies and Sending Sunshine Dies to die cut them out. I colored them with Copic markers and highlighted them with a white gel pen.

COPIC COLORS:
Flamingos: RV000/00/02/06, Y13, C1
Palm Trees: YG01/03/17/67, E41/42/43/44

For the boxcard, I used a few pieces of sturdy white cardstock: base (1.5" x 10.5"), back panel (3.75" x 4.25"), background panel (3.25" x 3.75"), sentiment strip (3.25" x 1") and 3 shelves (4.75" x 2"). I also trimmed a few pieces of a contrasting teal cardstock for decorations: back mat (3.5" x 4"), sentiment strip mat (3.5" x 1.25") and 2 side panels (1" x 1.25").

Sunny Studio Stamps: Fabulous Flamingos Birthday Boxcard by Hanh Nguyen (featuring Sending Sunshine, Slimline Nature Border Dies)

To assemble the boxcard, I used a score board to score the base strip at the 0.5", 1.75", 5.5" and 6.75" marks. I folded the strips at the score lines and used a strong double sided tape on the 0.5" end tab to enclose the boxcard base.

Next, I lightly blended some Salvaged Patina Distress Oxide ink onto the background panel. Once it was dry, I added a few dots with a BG11 Copic marker and a white gel pen for a bit of interest. I adhered this background panel to the teal back mat, then to the white back panel with liquid adhesive. I adhered these panels as well as the teal sentiment strip mat and teal side panels to the boxcard base with liquid adhesive. 

For the shelves, I used one of the stitched slope dies from the Slimline Nature Borders Dies to die cut a slope with a nicely finished edge onto the 3 white shelves. I lightly blended some Scattered Straw and Tea Dye Distress Oxide inks onto the top finished edge of the shelves. I added a few dots with a E33 Copic marker, a black Pigma Micron pen (or you can use a Copic Multiliner pent) and a white gel pen to give the mounds a more realistic sand appearance. Once the inks were dried, I trimmed off 0.5" from each end of one of the shelves and adhered it to the inked background panel of the boxcard. Next, I used a score board to score at the 0.5" mark on each end of the remaining two shelves. I folded at the score line, added some double sided tape to the end tabs and adhered them into the boxcard.

Sunny Studio Stamps: Fabulous Flamingos Birthday Boxcard by Hanh Nguyen (featuring Sending Sunshine, Slimline Nature Border Dies)

For the sentiment, I stamped the "Have a" and "birthday" from the Harvest Mice Stamp set and the "flamazing" from the Fabulous Flamingos Stamp set onto the white sentiment strip with Memento Tuxedo Black ink. I adhered the strip to the front of the boxcard with liquid adhesive.

Finally, I decorated the boxcard with my colored images using liquid adhesive. HINT: for extra sturdiness, I sometimes use a thin strip of clear acetate to adhere behind my colored image (especially for thin images like these flamingos and their thin legs) before adhering the other end of the clear acetate strip to the boxcard shelf. These clear acetate strips are also super handy for adhering images that appear to be floating in midair like balloons, birds or clouds.

Sunny Studio Stamps: Fabulous Flamingos Birthday Boxcard by Hanh Nguyen (featuring Sending Sunshine, Slimline Nature Border Dies)

I love boxcards. I think they take a regular card to a whole new level of fun for the recipient. I also love that they can be flattened and fit into a regular envelope for mailing. My card today fit nicely into a standard A2 sized envelope

I appreciate you taking the time to stop by and visit today. I hope you liked my boxcard. For more info and ideas, be sure to visit the Sunny Studio Stamps Shop. Please also visit my INSTAGRAM feed for more inspirations.

Have a wonderful and crafty day!

Sunny Studio Supplies Used:

Fabulous Flamingos Stamps
Shop at:
Sunny Studio
Fabulous Flamingos Dies
Shop at:
Sunny Studio
Sending Sunshine Stamps
Shop at:
Sunny Studio
Sending Sunshine Dies
Shop at:
Sunny Studio
Slimline Nature Borders
Shop at:
Sunny Studio
Harvest Mice Stamps
Harvest Mice Stamps
Shop at:
Sunny Studio

Saturday, May 3, 2025

Sunny Saturday Share: Customer Cards


Hey everyone, how are you all doing this weekend? I'm so excited to be popping in today with a Sunny Saturday Share. There have been so many amazing cards popping up on Instagram that have made my jaw drop so I couldn't wait to share them with all of you! 


Sunny Studio Stamps: Breakfast Puns Customer Card by Jennifer K Elliot

Thank you for sharing all these fabulous ideas with us! I hope you will continue to share your gorgeous projects with us--It always makes my day to see them. Please tag us on instagram @sunnystudiostamps or share your projects with us in our flickr group. Sadly we are no longer able to view all the posts using our hashtag on Instagram so it's super important for you to also tag us @sunnystudiostamps so we can find them and they don't get missed.


Sunny Studio Supplies Used:

Breakfast Puns Stamps
Shop at:
Sunny Studio
Breakfast Puns Dies
Breakfast Puns Dies
Shop at:
Sunny Studio
Tool Time Stamps
Tool Time Stamps
Shop at:
Sunny Studio
Tool Time Dies
Tool Time Dies
Shop at:
Sunny Studio
Country Carnival Stamps
Shop at:
Sunny Studio
Country Carnival Dies
Shop at:
Sunny Studio
Birthday Mouse Stamps
Shop at:
Sunny Studio
Birthday Mouse Dies
Birthday Mouse Dies
Shop at:
Sunny Studio
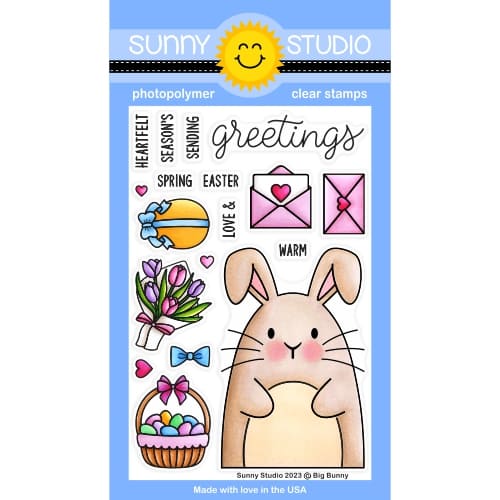
Big Bunny Stamps
Big Bunny Stamps
Shop at:
Sunny Studio
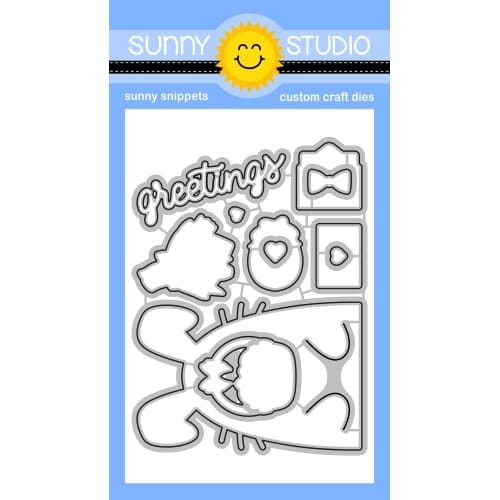
Big Bunny Dies
Big Bunny Dies
Shop at:
Sunny Studio
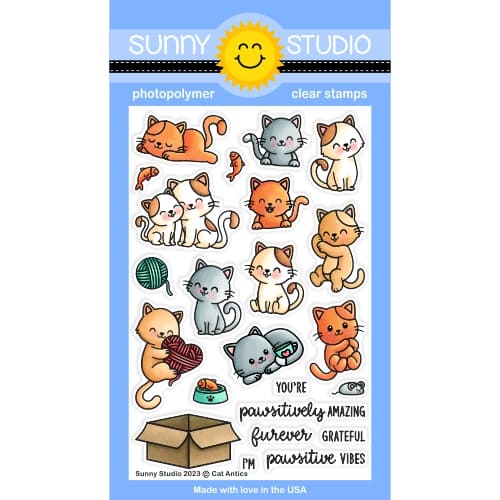
Cat Antics Stamps
Cat Antics Stamps
Shop at:
Sunny Studio
Cat Antics Dies
Cat Antics Dies
Shop at:
Sunny Studio
Party Pets Stamps
Party Pets Stamps
Shop at:
Sunny Studio
Party Pets Dies
Party Pets Dies
Shop at:
Sunny Studio
Happy Home Stamps
Happy Home Stamps
Shop at:
Sunny Studio

Friday, May 2, 2025

Cheerful Daisies Layered Daisy Cards with Mendi

Hello and welcome! This is Mendi here today, popping in to share some floral cards for Spring using our Cheerful Daisies Stamps and Dies. These have always been a favorite set of mine, so I had so much fun revisiting them for these two clean and simple cards.

Sunny Studio Daisy Birthday & Mother's Day Card using Cheerful Daisies & Layered Basket Clear Stamps & Botanical Backdrop Die

For my first card today featuring the Cheerful Daisies Stamps, I started by stamping a classic white daisy using only the top petal layer of the daisy image, which I stamped with a very pale ink called Barely Beige by Simon Says Stamp. I kept my color scheme yellow and green to match my daisies, filling the background with a yellow polka-dot patterned paper from our Polka-dot Parade Paper pack. I then layered our Botanical Backdrop Die over the top, which I cut from olive green cardstock. 

I cut three extra groupings of leaves by positioning some of my leftover cardstock to run through my machine again with the same die so I could fill in more of my edges with the leafy vines since my two daisies grouped on the bottom were pretty large and obstructed the view of many of the leaves. To add interest, I added some vein details to each leaf with my G07 Copic sketch marker. For my sentiment, I stamped the oversized "Happy Birthday" phrase from our Big Bold Greetings Stamps in Versafine Onyx Black ink. Lastly, I adhered some yellow Citrine Jewels to add a little sparkle and help fill in some visually empty spots.

Sunny Studio Daisy Birthday Card using Cheerful Daisies & Big Bold Greetings Clear Craft Stamps & Botanical Backdrop Die

Ink Color used for White Daisy: 

Ink colors used for Green Leaves:

For my second card today, I inked up all my gerber daisies from our Cheerful Daisies Stamps in various pink hues, pairing them with the woven basket from our Layered Basket Stamps. To embrace my country feel, I paired the flowers with a scalloped mat cut using our Frilly Frames Hexagon Dies from a lilac gingham print. However, the lilac gingham from our Gingham Pastels Paper pack is a bit more vibrant and it felt like it was competing for attention with the flowers in the foreground. I considered covering it with a piece of vellum, but decided I didn't want to mess with finding a way to hide the adhesive. Instead I applied a layer of white Hero Arts Unicorn Pigment Ink over the top of my patterned paper with a Jumbo Dauber to tone it down and make it appear more muted. This was my first time attempting something like this and while the background is still a bit busier than I wanted, it helped give me the look I was after. I finished my Mother's Day card with a small sentiment from our Puppy Parents Stamps.

Sunny Studio Daisy Mother's Day Card using Cheerful Daisies & Layered Basket Clear Layering Craft Stamps & Metal Cutting Dies

Ink colors for pale pink daisy:

Ink colors for medium pink daisy:

Ink colors for hot pink daisy:

Ink colors for lilac daisy:

Ink colors for centers of each daisy:

Ink colors for leaves:

Ink colors for layered basket: 
  • Skipped Lightest Layer
  • Hero Arts Soft Sand
  • Memories Soft Sand or Gina K. Sandy Beach
  • Memories Sand

That wraps up my projects for this morning. I hope I've inspired you in your own cardmaking and that you spread a little happiness by sending out a card to a loved one today.💗

Don't forget to check out our Cheerful Daisies Stamps, Layered Basket Stamps, Botanical Backdrop Die, and 6x6 Patterned Paper Pads in our online shop, which are all currently on sale!

I also encourage you to check out all the card ideas with these sets on each of their product pages. I always make sure to upload tons of ideas for each set following the product image so there are lots of ideas to scroll through there organized by set.

Supplies Used:

Versafine Onyx Black Ink
Shop at:
Sunny Studio
Polka-dot Parade 6x6 Paper
Shop at:
Sunny Studio
Gingham Pastels 6x6 Paper
Shop at:
Sunny Studio
Puppy Parents Stamps
Shop at:
Sunny Studio
Botanical Backdrop Die
Shop at:
Sunny Studio
Frilly Frames Hexagon Dies
Shop at:
Sunny Studio
Cheerful Daisies Stamps
Shop at:
Sunny Studio
Cheerful Daisies Dies
Shop at:
Sunny Studio
Layered Basket Stamps
Shop at:
Sunny Studio
Layered Basket Dies
Layered Basket Dies
Shop at:
Sunny Studio
Big Bold Greetings Stamps
Shop at:
Sunny Studio
Citrine Jewels
Citrine Jewels
Shop at:
Sunny Studio
Tsukineko Jumbo Dauber
Shop at:
Sunny Studio
PinkFresh Studio Blending Brushes
Shop at:
Sunny Studio
Hero Arts Unicorn Pigment Ink
Shop at:
Sunny Studio

Thursday, May 1, 2025

Plane Awesome Card with Marine

Hello crafty friends, Marine here with you today! I'm so glad to be back with this super colorful and extra cute card showcasing the adorable Plane Awesome stamp set. I love those adorable planes so much I decided to feature three of them on my card, so I went for a slimline design to make them fit well, and used a color palette I've used before on this Party Pets card and enjoyed it very much.

Sunny Studio Stamps: Plane Awesome Card by Marine Simon (featuring Slimline Scalloped Frame Dies)

All the images are from Plane Awesome. I know: shocking, right? I'm more of a "let's use all my stamp sets on one card" kind of a card maker, but for this one, everything I needed to create my scene was already in the set. So, I started off by stamping the images on 110lb Neenah solar white cardstock using an alcohol marker friendly black ink, I cut them all using the matching dies, and then colored everything using my Ohuhu markers and my Graph'it brush, with neutrals on the critters and brights on the planes. And once the coloring was finished, I added highlights and details to the images using a white gel pen.

Sunny Studio Stamps: Plane Awesome Card by Marine Simon (featuring Slimline Scalloped Frame Dies)

Next I cut a slimline panel out of Strathmore bristol smooth cardstock using a die from the Slimline Scalloped Frame die set, covered that panel with tumbled glass oxide ink first, and then used a slimline cloud stencil from my stash along with broken china oxide ink to add a cloudy pattern to my background. I splattered water all over the panel and dried it with a paper towel, mixed a bit of copic opaque white ink with water and used a slim brush to add white splatters to the panel, and then did the same with broken china, faded jeans and black soot oxide inks to add more contrast and interest to the clouds.

I cut an 8 x 3 inches white panel and attached my cloudy background to it using liquid glue. Next I cut a scalloped blue panel using another die from the Slimline Scalloped Frame die set and stuck my white panel to it using 1mm foam tape, and then I attached my scalloped blue panel to a khaki green card base using 1mm foam tape again.

Sunny Studio Stamps: Plane Awesome Card by Marine Simon (featuring Slimline Scalloped Frame Dies)

I stamped "Hoping your day is just plane awesome" from Plane Awesome at the bottom of the cloudy panel using black versafine ink, attached all the images using 1mm and 2mm foam squares, and finished my card by adding glossy accents to the hearts to make them super shiny. 

And that's it! How fun it was to color those planes in this super fun color palette, what a great coloring session I had! I hope that you like this super colorful card, too! Thanks so much for stopping by, and see you next time.

Sunny Studio Supplies Used:

Plane Awesome Stamps
Shop at:
Sunny Studio
Plane Awesome Dies
Plane Awesome Dies
Shop at:
Sunny Studio
Slimline Scalloped Frame
Shop at:
Sunny Studio