Sunday, August 18, 2024

Sneak Peek: Autumn Garland, Buffalo Plaid Dies, & Striped Stencils

Hello and welcome to the first day of our Holiday Sneak Peek Week!  All this week I will be sharing cards showcasing our newest collection which will be available for purchase this Friday!

Card No. 1: I'm thrilled to kick off today sharing a beautiful new stamp set for fall called Autumn Garland. There is no need to work at layering individual images in a perfect way because they have already been grouped together in a gorgeous arrangement that is so easy to use! For my first card, I chose to stamp them using Hero Arts Contour Ink for a no-line coloring technique with my Copic Markers. 

When positioning the garland on my vertical card, I didn't want the leaves and berries I cut off to go to waste so I tucked them under the main garland to fill out some of the white space around my sentiment from the stamp set. I then added a matching orange striped tone-on-tone print from our Sleek Stripes Paper pack and rounded the bottom two corners of my card using a Corner Chomper.

Sunny Studio Fall Leaves & Pinecones No Line Coloring Handmade Greeting Card (using Autumn Garland Stamps and Sleek Stripes Paper)

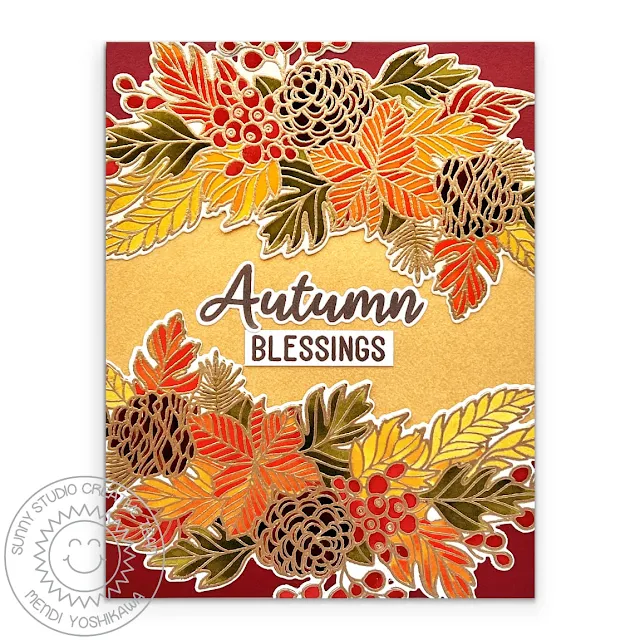
Card No. 2: For my next card I chose to stamp the Autumn Garland Stamps onto Bristol Paper using clear VersaMark Ink, which I then heat embossed using Brass Embossing Powder, and colored using watered-down distress re-inkers. To compliment my brass embossing, I used a strip of metallic gold cardstock for the center of my card and layered it with another greeting from the Autumn Garland Stamps.

Sunny Studio Fall Leaves & Pinecones Gold Embossed Watercolor Handmade Greeting Card (using Autumn Garland 4x6 Clear Stamps)

Card No. 2 Detail Shot: Seeing the card at an angle better shows how the beautiful metallics catch the light.

Sunny Studio Fall Leaves & Pinecones Gold Embossed Watercolor Handmade Greeting Card (using Autumn Garland 4x6 Clear Stamps)

Card No. 3: For this next card, I used the new Autumn Garland Stamps to stamp a repeating tone-on-tone background. I then used the layered leaves from our Crisp Autumn Stamps to form a wreath framing my greeting from the Autumn Garland Stamps. To help keep my wreath symmetrical, I used a circle from our Stitched Circle Large Dies. A trio of hearts from our Basic Mini Shape 2 Dies topped with Glossy Accents was the perfect finishing touch.

Sunny Studio Kelly Green Fall Leaves Wreath Handmade Hello Greeting Card (using Autumn Garland & Crisp Autumn 4x6 Clear Craft Stamps)

Card No. 4: Next up I returned to my favorite Copic Markers to color the Autumn Garland Stamps. When I decided to use the rich dark blue for my background, I didn't like how the stark white background around my stamp image stood out so to help it blend better, I colored around them with my B95 marker to help them better blend with the background. 

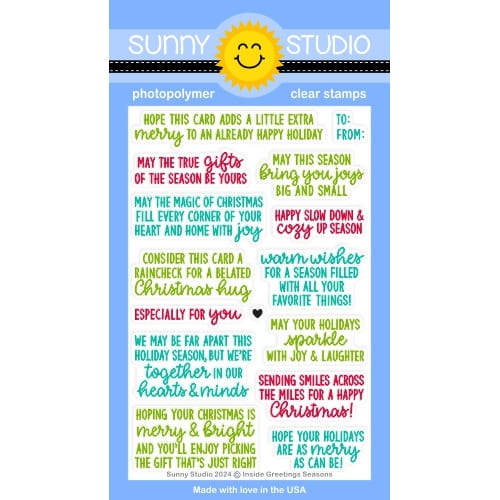
Using the garland piece as my guide I then lightly penciled in a cut line between the top and bottom portion of my card where I could cut them apart with my scissors. For the bottom portion, I added the embossed texture using our new Buffalo Plaid Diagonal Die. Cutting the two sides apart, gave me the smooth portion to heat emboss my sentiment onto from our Inside Greetings Seasons Stamps (which I will be sharing more of throughout the week). Lastly, I popped up my focal point image with black foam squares. Shockingly this was my first time using them and it was life-changing when working with darker colors. Where white would have easily caught the eye when viewing this card at an angle in person, the black foam adhesive completely fades into the shadows! I'm sold and will be ordering a big roll of THIS very soon.

Sunny Studio Fall Leaves Card (using Autumn Garland & Inside Greetings Seasons Stamps, and Buffalo Plaid Diagonal Die)

Card No. 5: For this card, I thought it would be fun to show that these Autumn Garland Stamps don't have to be limited to only fall-themed cards. I started by stamping the images onto masking material and then fussy cut the mask with scissors, using the outside portion to protect the negative parts of my image so I could quickly ink them with a rainbow blend of distress inks. I was able to reuse the masks to ink up multiple images for my card and then went back and added some white highlights with a gel pen. To add interest to my background and still keep things clean and simple, I cut a panel using our new Buffalo Plaid Straight Die. Lastly, I colored a scrap of cardstock with a similar rainbow blend and die-cut out the "Happy Birthday" phrase using a die that comes with our Blooming Frame Dies.

Sunny Studio Rainbow Leaves Handmade Birthday Card (using Autumn Garland Stamps, Buffalo Plaid Straight Die & Blooming Frame Dies)

Here's a closer look at the mask I created to ink my stamped images in a rainbow of Distress inks. For the berries, I found it easier to not mask around the individual berries so I colored them to seamlessly blend in using my Copic markers.

Example of how to color a rainbow ombre using a hand-stamped & fussy cut mask with Sunny Studio Autumn Garland Clear Stamps

Card No. 6: Keeping with the idea of stretching these stamps for other seasons, my next two cards showcase Christmas cards using the Autumn Garland Stamps. I stamped the main images using clear VersaMark Ink, heat-embossed them using White Detail Embossing Powder, and colored them with watered-down Distress re-inkers.

For this card, I created the textured gingham print for the bottom portion of my card using our new Buffalo Plaid Diagonal Die with our new Diagonal & Straight Stripes Stencils. I cut my panel in half and saved the other half to have on hand for a future card. I finished my card by adding an oversized sentiment from our Season's Greetings Stamps.

Sunny Studio Holiday Christmas Card (using Autumn Garland & Season's Greetings Stamps, Buffalo Plaid Diagonal Die & Stencils set)

Card No. 7: I love pink and green Christmas cards so for my last card today I used the complimentary fir tree sprig that comes with the Autumn Garland Stamps to repeatedly stamp pink tree branches in my background and then inked up around them using Spun Sugar Distress ink. I cut off some of the berries in one spot on the garland and added them on the other end to balance out the pops of red on both sides of my card and then filled in the arrangement with the extra pinecones from the set. I then cut a little bit off the bottom of my card panel to tuck in a small strip of pink gingham paper from our Gingham Pastels Paper pack and added a sprinkle of pink pearls from our Iridescent Pearls. Lastly, I added the word "Season's" from our Holiday Greetings Stamps which I paired with the word "greetings" from our Autumn Garland Stamps. I love the way this came together!

Sunny Studio Pink Holiday Christmas Card (using Autumn Garland & Holiday Greetings Stamps, Gingham Pastel Paper, & Iridescent Pearls)

That wraps up today's sneak peek. I'm so happy you joined me today! I'd love to give a $25 gift code to one lucky winner using the Rafflecopter below. Our daily contests will run through Monday, August 26th at Midnight PST with winners announced here on Friday, August 30th.

a Rafflecopter giveaway
Here's a closer look at our new Autumn Garland Stamps & Dies, Buffalo Plaid Straight Die, Buffalo Plaid Diagonal Die, and 
Diagonal & Straight Stripes Stencils used today and available for purchase on Friday, August 23rd.

Sunny Studio Autumn Garland Fall Leaves & Pinecones 4x6 Clear Photopolymer Craft StampsSunny Studio Stamps Autumn Garland Fall Leaves Metal Cutting Craft Dies

Sunny Studio Stamps Buffalo Plaid Straight Gingham Background Backdrop Metal Cutting Craft DieSunny Studio Stamps Buffalo Plaid Diagonal Gingham Background Backdrop Metal Cutting Craft Die

Sunny Studio Stamps Diagonal & Straight Stripes Striped 2-piece 6x6 Stencil Set

And here's a look at some of the additional ways the Buffalo Plaid Dies and new stencils can be used together. The stencils work best with a stencil spray to prevent the stripes from wobbling or moving with ink application so with that in mind, I was able to create a number of backgrounds in a single sitting while the stencils were still tacky since cleaning the stencils afterward is the most time-consuming part of the process.

Gingham & striped card background examples using Buffalo Plaid Diagonal Metal Cutting Craft Dies and 6x6 Stripes Stencils

The combinations are truly endless! I had so much fun with them and it was equally fun having these backgrounds pre-made to grab for quick cards. I will be sharing so much more with them throughout the week, including a rainbow gingham I made with a little masking.

Gingham & striped card background examples using Buffalo Plaid Straight Metal Cutting Craft Dies and 6x6 Stripes Stencils

Other Supplies Used:

Crisp Autumn Stamps
Crisp Autumn Stamps
Shop at:
Sunny Studio
Crisp Autumn Dies
Crisp Autumn Dies
Shop at:
Sunny Studio
Tsukineko Jumbo Dauber
Shop at:
Sunny Studio
Gingham Pastels 6x6 Paper
Shop at:
Sunny Studio

Season's Greetings Stamps
Shop at:
Sunny Studio
Blooming Frame Die
Blooming Frame Die
Shop at:
Sunny Studio
Sleek Stripes Paper
Sleek Stripes Paper
Shop at:
Sunny Studio
Season's Greetings Word Dies
Shop at:
Sunny Studio
Stitched Circle Large Dies
Shop at:
Sunny Studio
Holiday Greetings Stamps
Shop at:
Sunny Studio
Holiday Greetings Dies
Shop at:
Sunny Studio
Iridescent Pearls
Iridescent Pearls
Shop at:
Sunny Studio
Versafine Clair Ink- Acorn
Shop at:
Sunny Studio
Brass Embossing Powder
Shop at:
Sunny Studio
Hero Arts White Detail
Shop at:
Sunny Studio
VersaMark Watermark Ink
Shop at:
Sunny Studio
Basic Mini Shape Dies 2
Shop at:
Sunny Studio
Inside Greetings Seasons
Shop at:
Sunny Studio
PinkFresh Over The Hills Ink
Shop at:
Sunny Studio
Ranger Glossy Accents
Shop at:
Sunny Studio

Saturday, August 17, 2024

Guest Designer Spotlight: Big Panda Cards with Hanh Nguyen

Hello Crafty Friends! This is Hanh. I am thrilled to be back to Guest Design for Sunny Studio Stamps. Today I am sharing a couple of fun birthday cards that I made with the adorable Big Panda set. I love this series of larger sized critters! They are so versatile and can be used individually as well as paired up with critters from other previously released sets.

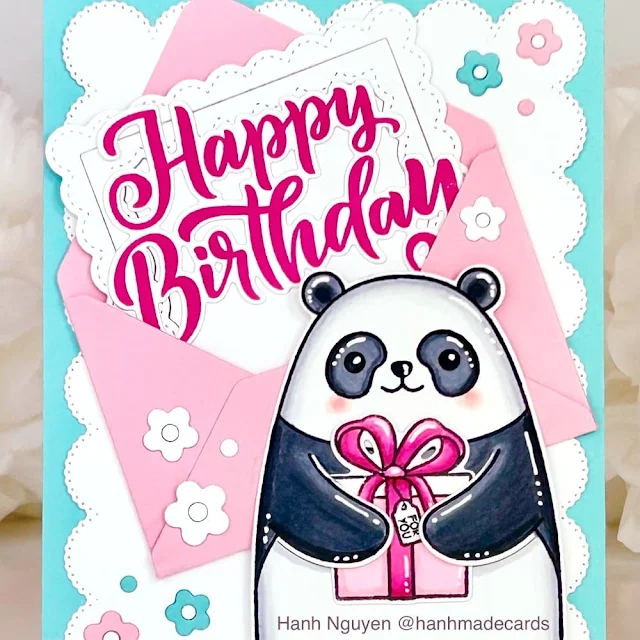
Sunny Studio Stamps: Big Panda Birthday Cards by Hanh Nguyen (featuring Gift Card Envelope Dies, Frilly Frame Dies)

Happy Birthday!  For my first card, I paired this super cute panda with the Gift Card Envelope set to create a complete birthday theme with card, present and all. 

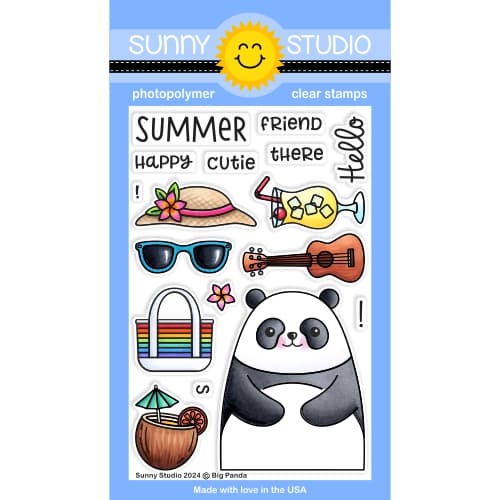
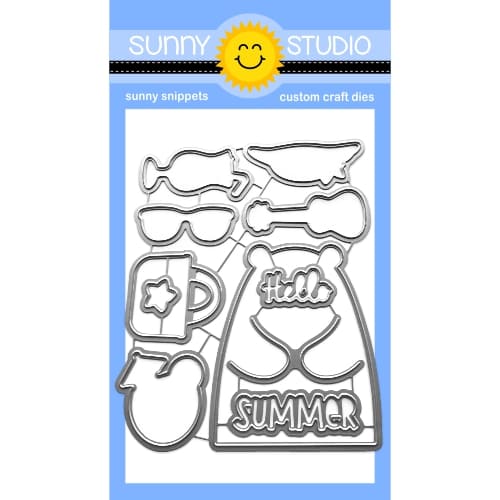
I stamped the panda from the Big Panda stamp set and the present from the Holiday Hugs Stamp set onto some Neenah Solar White 110 lb cardstock with Memento Tuxedo Black ink and used the coordinating Big Panda Dies and Holiday Hugs Dies to die cut them out. I love that these bears have a special die that allows you to die cut the arms to allow the her to hold a present. I colored them with Copic markers and accented with a white gel pen.

COPIC COLORS:
Panda: C00/0/1/3/5/7, R00/20
Present: RV10/21, C1, RV02/04/06/09

Sunny Studio Stamps: Big Panda Birthday Cards by Hanh Nguyen (featuring Gift Card Envelope Dies, Frilly Frame Dies)

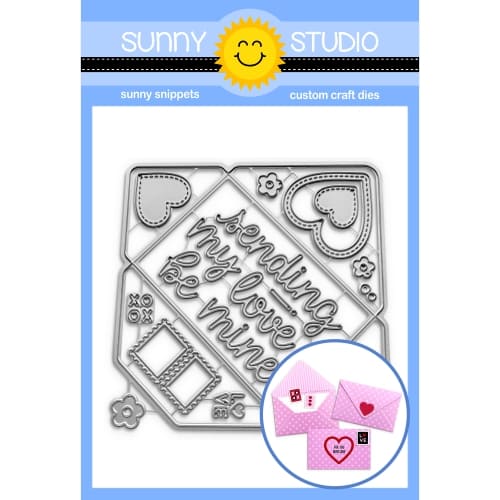
I used the Gift Card Envelope to die cut the envelope and a few flowers out of white, pink and teal cardstock. I assembled the envelope with liquid adhesive.The smaller die from the Fancy Frames Rectangle Dies was used to die cut a little notecard to slip into the envelope. This was intended to be a frame die but I attached all of the parts onto a slightly smaller piece of paper in order to keep all of the parts together. I trimmed the bottom so that the notecard was just short enough to fit into the envelope. 

For the sentiment, I stamped the Happy Birthday sentiment from the Big Bold Greetings Stamp set with a pink ink and die cut it out with the coordinating Big Bold Greetings Dies before adhering it onto the top of the notecard. 

The outer die of the Frilly Frames Eyelet Lace Die was used to die cut a white panel. I adhered the envelope and bear and decorated the panel with some of the die cut flowers. Finally, I adhered the panel onto a piece of teal cardstock before adhering it to a white cardbase (4.25" x 5.5").

Sunny Studio Stamps: Big Panda Birthday Cards by Hanh Nguyen (featuring Big Panda, Panda Party, Stitched Square Dies)

Happy Birthday From All of Us! For my second card, I created a Polaroid-style selfie photo card featuring the adorable Big Panda and some of his bear friends from the Holiday Hugs and Panda Party Stamp. I thought that this would be a fun way to create a card from the whole family.

I stamped and colored the bears and accessories from the Big Panda Stamp, the Holiday Hugs Stamp and the Panda Party Stamp sets in the same manner as I did for the first card. The coordinating Big Panda DiesHoliday Hugs Dies, and Panda Party Dies were used to die cut them out. 

COPIC COLORS:
Brown Bear 1: E50/51/53/33/35, W5/7, R00/20
Pandas: C00/0/1/3/5/7, R00/20
Brown Bear 2: E50/51/53/33, E25/27/29, R00/20
Red: R22/24/29
Blue: B000/00/02/04

Sunny Studio Stamps: Big Panda Birthday Cards by Hanh Nguyen (featuring Big Panda, Panda Party, Stitched Square Dies)

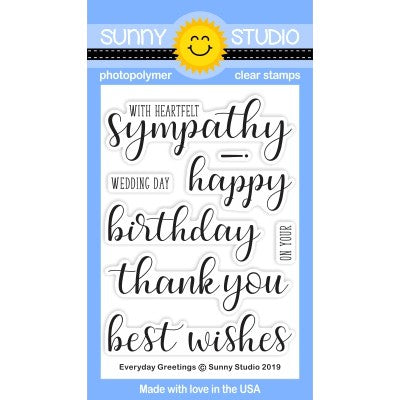
For the Polaroid-style frame, I took a piece of white cardstock (4.25" x 5.5") and used the third largest die from the Stitched Square Dies set to cut out the square opening. I pieced together the sentiment using the words from the Panda Party StampEveryday Greetings Stamps and Inside Greetings - Holiday Stamps. The sentiment was stamped onto the frame with Versafine Onyx Black and Versafine Satin Red inks.

For the background, I took a piece of Bristol Smooth cardstock (4.25" x 5.5") and lightly ink blended with Tumbled Glass Distress Oxide ink. I added a few dots with a Copic marker (B00) and a white gel pen to resemble confetti. I used the Polaroid frame to layout the colored images. Once I achieved the layout that I wanted, I adhered the colored images to the inked panel and trimmed off any of the excess parts hanging off the edges. I adhered the Polaroid frame to the front of the card before adhering the entire panel to a white cardbase (4.25" x 5.5").

As always, I appreciate you taking the time to stop by and visit today. I hope you liked my cards. Be sure to check out the Sunny Studio Stamps Shop for more info and ideas. Please also visit my INSTAGRAM feed for more inspirations.

Have a wonderful and crafty day!

Sunny Studio Supplies Used: 

Fancy Frames- Rectangles
Shop at:
Sunny Studio
Everyday Greetings Stamps
Shop at:
Sunny Studio
Frilly Frames-Eyelet Lace
Shop at:
Sunny Studio
Inside Greetings-Holidays
Shop at:
Sunny Studio
Big Bold Greetings Stamps
Shop at:
Sunny Studio
Big Bold Greetings Dies
Shop at:
Sunny Studio
Panda Party Stamps
Panda Party Stamps
Shop at:
Sunny Studio
Panda Party Dies
Panda Party Dies
Shop at:
Sunny Studio
Holiday Hugs Stamps
Holiday Hugs Stamps
Shop at:
Sunny Studio
Holiday Hugs Dies
Holiday Hugs Dies
Shop at:
Sunny Studio
Gift Card Envelope Die
Shop at:
Sunny Studio
Big Panda Stamps
Big Panda Stamps
Shop at:
Sunny Studio
Big Panda Dies
Big Panda Dies
Shop at:
Sunny Studio
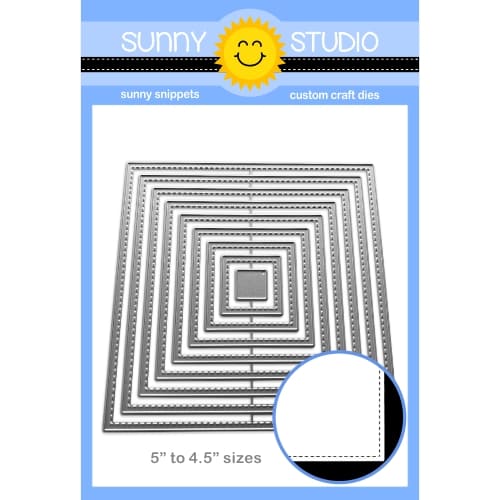
Stitched Square Dies
Shop at:
Sunny Studio