Hello and welcome to day 2 of our Sneak Peek Week! Each morning this week I am showcasing projects using our newest Summer collection which will be available to purchase on April 21st!
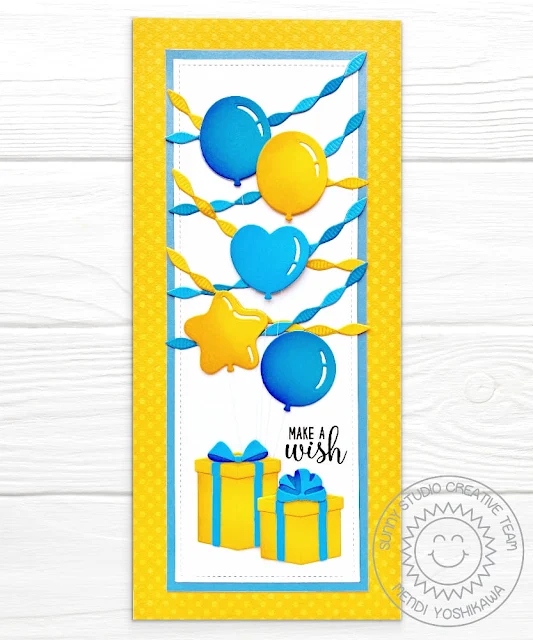
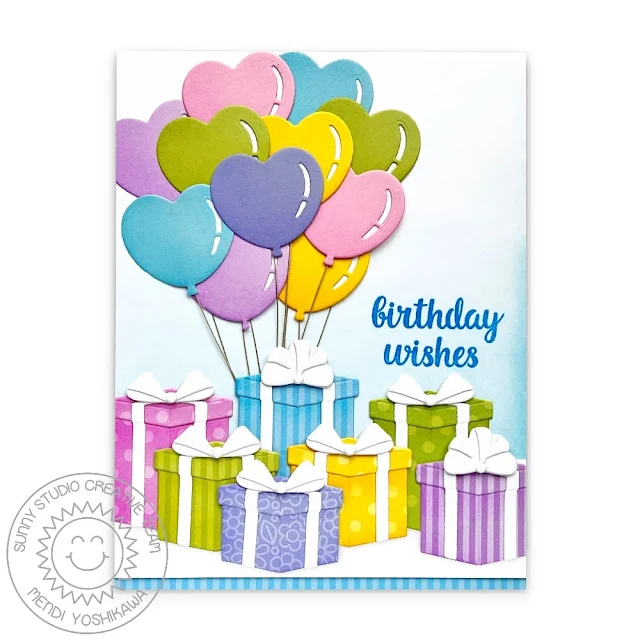
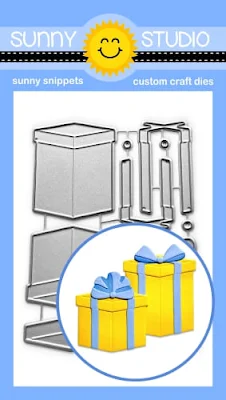
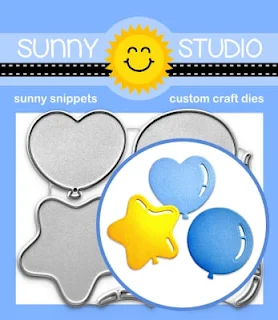
Card No. 1: Today I am showcasing three new versatile standalone die sets, which I combined for this fun and festive slimline-style birthday card. First, we have our new Bright Balloons Dies which comes with four balloons in unique shapes. The shiny marks are optional depending on how you want to use them. Behind my balloons, I layered our new Crepe Paper Streamers Dies which include curved streamer borders in two lengths and optional pieces to cut out and layer over the top to give the option of two-toned and multi-colored streamers. Lastly, I used our new Perfect Gift Boxes Dies which come with two different box sizes, a separate lid, and two unique box options. To frame my scene I used the stitched rectangle from our Slimline Scalloped Frame Dies and then added a sentiment from our Make A Wish Stamps.Card No. 3: When I was working with our new Perfect Gift Boxes Dies, I kept having a vision of using them to create a Tiffany box so that's what inspired my next card. I started by die-cutting the small stitched circle from our Scalloped Circle Mat 1 Dies which I alternated on my background to create an oversized polka-dot pattern. I then added a Stitched Rectangle in the center of my card to frame my little gift box and sentiment. My "congrats" greeting comes from our Slimline Scalloped Frame Dies and I paired it with the words "on your engagement" which I stamped out using our Kinsley Alphabet Stamps (with Gina K. Sea Glass & Altenew Lagoon inks) and the pennant strip from our Stitched Rectangle dies. I love the simple, monochromic Tiffany Blue color scheme!
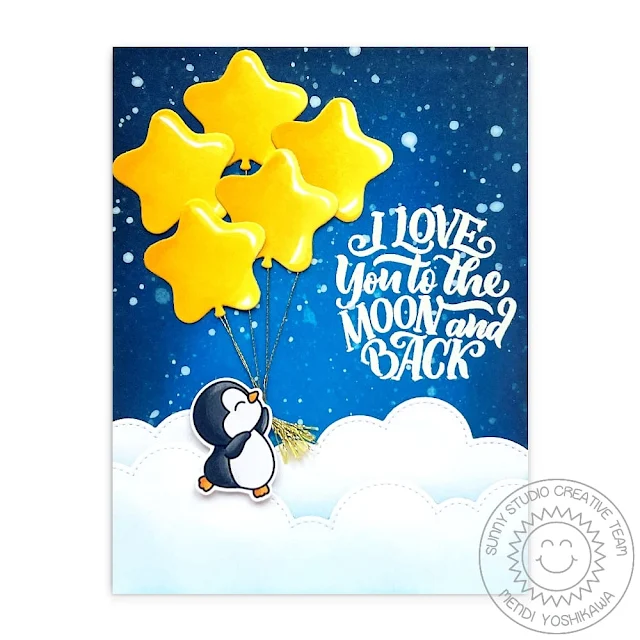
Card No. 4: For this card featuring the Bright Balloons Dies, I die-cut the star balloons from white cardstock and then colored and shaded them using my Copic Markers, leaving parts of the white cardstock showing through for my shiny highlights. My background was created by inking my white cardstock panel using various shades of blue Distress inks and then splattering it with water and Picket Fence Distress spray. I then heated it with my heat gun to make sure it was completely dry before heat embossing my sentiment from our Lovey Dovey Stamps. I added to the bottom of my card two layers of fluffy clouds using our Slimline Nature Border Dies and applied Tumbled Glass Distress ink along the bottom edges to give the illusion of shadows. Lastly, I taped gold metallic thread to the back of each balloon and tied them in a knot for my little penguin from the Passionate Penguins Stamps to hold.
Card No. 5: Next up is a clean and simple card die-cutting the balloons from colored vellum using the Bright Balloons Dies. I love how the vellum material gives the true feeling of transparent balloons. I happened to have this vellum on hand in my stash, but I did find a number of colorful assortments available on Amazon HERE, HERE, and HERE. I was struggling to find the right adhesive as my spray mount had apparently gone bad so I ended up quickly rubbing some Beacon's 3-in-1 clear glue with my finger and pressing it down firmly before it dried with any ridges or bubbles. The only issue was there was zero forgiveness with this solution so once I put it down I didn't have the flexibility to move it, which you can see created a bit of an odd angle with the orange balloon once I added the strings and positioned my elephant from our Baby Elephants Stamps.
I framed my simple scene using our Stitched Rectangle Dies and poked holes using a paper piercer with coordinating colors of thread which I pulled to the back of my panel using a needle and taped down before adding the panel to my card base. Lastly, I stamped a greeting from our Balloon Rides Stamps, cutting apart the sentiment with my scissors to give myself the ability to easily stamp the phrase in two rows rather than one.
Card No. 6: I created another clean and simple, graphic card using the round balloon shape from the Bright Balloons Dies. This time rather than using vellum, I cut the balloon shape from masking material and then used it as a stencil with foam daubers to color the balloons onto my cardstock panel using 6 different rainbow shades of distress inks. I then used a small clear ruler with my .01 multi-liner pen to add simple string ties. I completed my card by mounting my completed background onto a slightly larger piece of 5x7 black cardstock, adding shine to each of my balloons with a white gel pen and a birthday greeting stamped with VersaFine Onyx Black Ink using our Big Bold Greetings Stamps. To add a little interest I decided to die-cut one extra balloon to pop up with foam tape.
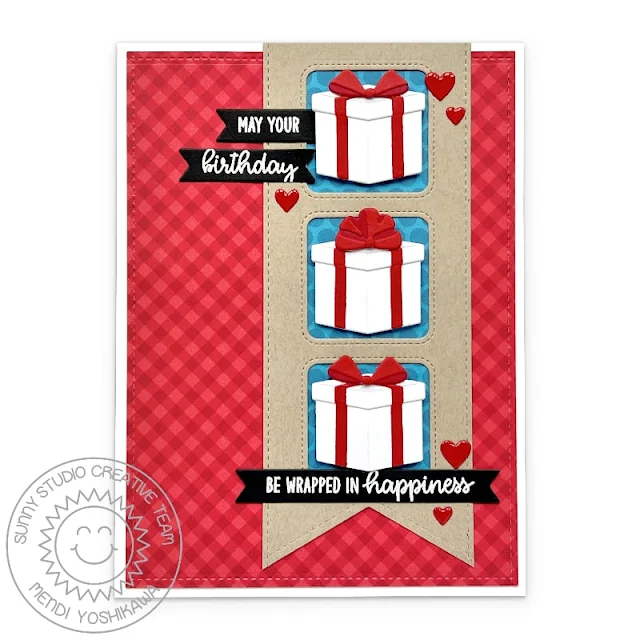
Card No. 7: For this card I focused on our new Perfect Gift Boxes Dies, keeping them extra simple with white boxes and red ribbons and bows. I took inspiration from a cute card Leanne West created for us awhile back and I lined up my presents and framed them using our Window Trio Square Dies which I put onto a pennant created using our Fishtail Banner Dies (along the bottom) and the simple stitched edge from our Ribbon & Lace Border Dies (for the sides).
I filled my square openings using a strip of blue polka-dot patterned paper from our Dots & Stripes Jewel Tones Paper pack and then mounted it onto a red gingham from our Classic Gingham Paper pack using the same Stitched edge from the ribbon & lace border dies. This is a slightly larger A6-sized card that measures 4-5/8" x 6-1/4". For my greeting, I heat embossed a sentiment, borrowing the "birthday" word from our Happy Thoughts Stamps with the "wrapped up in happiness" phrase from our Cozy Christmas Stamps. Some small red hearts cut using our Basic Mini Shape Die 2 Dies and coated in Glossy Accents completed my card.
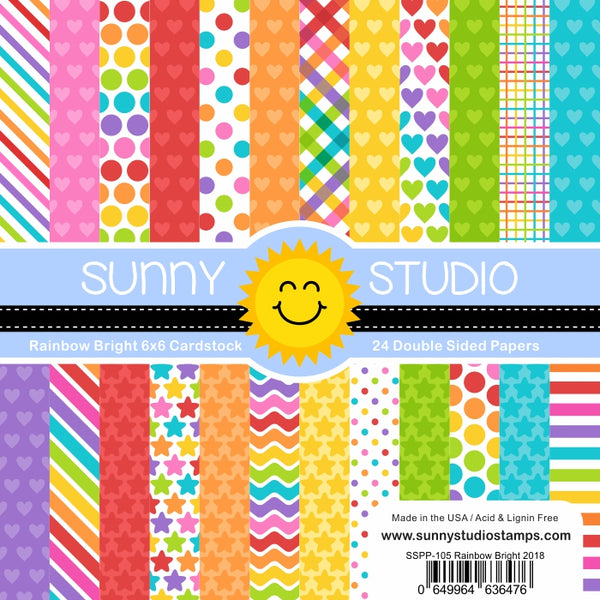
For my journaling I typed it on my computer and printed it onto my patterned paper by temporarily adhering it to a piece of printer paper using photo tabs and then die-cut it with the notebook die. I created the look of rainbow polka-dot wrapping paper using the Perfect Gift Boxes Dies together with patterned paper from that same Rainbow Bright Paper pack. Lastly, I added a dated tab to the top right corner by layering two of the tabs from our new Notebook Tabs Dies (which I will also be sharing more later this week).
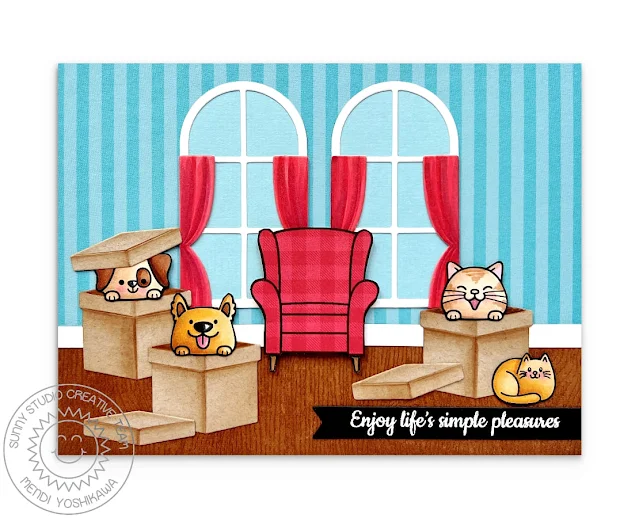
Card No. 8: For my last card of the day, I used our new Perfect Gift Boxes Dies to create cardboard boxes for my little dog and cat critters from our Beach Buddies Stamps and Christmas Critters Stamps. For my backdrop, I created a living room scene using a blue striped print from our Sleek Stripes Paper pack as wallpaper and our Wonderful Windows Dies. For my wood floor, I inked up Memory Box textured woodgrain cardstock using Vintage Photo Distress ink and then layered it with a white strip of cardstock to form my baseboard moldings. To continue my home theme, I added the armchair and kitty (which looks like a kitten in this setting) from our Cozy Christmas Stamps. Lastly, I heat embossed the sentiment from our City Streets Stamps onto a pennant strip from our new Notebook Photo Corners Dies.
Scrapbook Layout: Switching gears a bit, I couldn't resist creating a scrapbook layout with these fun new dies. Scrapbooking will always be my first love and I still love the opportunity to document special family memories. My kids are no longer fans of me sharing photos of them publicly though so our photos have been substituted with stock photos.
To create the basic structure of my page, I lined up six of our new Notebook Photo Corner Dies (to be shared more later this week) in bright and happy colors which I cut from our Classic Gingham Paper. Since we only offer 6x6 patterned papers, I had to line up the rainbow stripes from our Rainbow Bright Paper and tape two strips together on the back, before die-cutting my scalloped border using our Ribbon & Lace Border Dies. Luckily by matching the prints, the seam becomes almost invisible. I love when I can stretch 6x6 paper pads to work for 12x12 scrapbook pages!
I cut my Bright Balloons using our Polka-Dot Parade Paper and cut colorful rainbow streamers to match using coordinating colors of cardstock and our new Crepe Paper Streamers Dies. For my title I cut the word "birthday" using the phrase from our Blooming Frame Dies,the number "8" from our Chloe Number Dies, and the word "party" from our Chloe Alphabet Dies. I lucked out that I could steal the "th" for "eighth" from the same birthday word and just clip off the extra letters with my scissors.
For my journaling I typed it on my computer and printed it onto my patterned paper by temporarily adhering it to a piece of printer paper using photo tabs and then die-cut it with the notebook die. I created the look of rainbow polka-dot wrapping paper using the Perfect Gift Boxes Dies together with patterned paper from that same Rainbow Bright Paper pack. Lastly, I added a dated tab to the top right corner by layering two of the tabs from our new Notebook Tabs Dies (which I will also be sharing more later this week).
That wraps up today's sneak peeks. I'm so happy you spent part of your day with me today. I read all your comments and they mean so much! I'd love to give a $50 gift code to one lucky winner using the Rafflecopter below.
a Rafflecopter giveaway
 Fishtail Banner Dies Shop at: Sunny Studio |
 Heartfelt Wishes Stamps Shop at: Sunny Studio |
 Chloe Alphabet Dies Shop at: Sunny Studio |
 Chloe Number Dies Shop at: Sunny Studio |
|||
 Classic Gingham 6x6 Paper Shop at: Sunny Studio |
 Polka-dot Parade 6x6 Paper Shop at: Sunny Studio |
 Rainbow Bright 6x6 Paper Shop at: Sunny Studio |
 Happy Thoughts Stamps Shop at: Sunny Studio | |||
 Flirty Flowers 6x6 Paper Shop at: Sunny Studio |
 Dots & Stripes Pastels 6x6 Paper Shop at: Sunny Studio |
 Make A Wish Stamps Shop at: Sunny Studio |
 Basic Mini Shape Dies 2 Shop at: Sunny Studio | |||
 Blooming Frame Die Shop at: Sunny Studio |
 Slimline Scalloped Frame Shop at: Sunny Studio |
 Cozy Christmas Stamps Shop at: Sunny Studio |
 Big Bold Greetings Stamps Shop at: Sunny Studio | |||
 Big Bold Greetings Dies Shop at: Sunny Studio |
 Ribbon & Lace Dies Shop at: Sunny Studio |
 Notebook Photo Corners Dies Shop at: Sunny Studio |
 Notebook Tabs Dies Shop at: Sunny Studio | |||
 Hero Arts Morning Glory Ink Shop at: Sunny Studio |
 Hero Arts White Detail Shop at: Sunny Studio |
 VersaMark Watermark Ink Shop at: Sunny Studio |
 Ranger Glossy Accents Shop at: Sunny Studio |
|||
 City Streets Stamps Shop at: Sunny Studio |
 Beach Buddies Stamps Shop at: Sunny Studio |
 Beach Buddies Dies Shop at: Sunny Studio |
 Stitched Rectangle Dies Shop at: Sunny Studio |
|||
 Christmas Critters DIes Shop at: Sunny Studio |
 Tsukineko Jumbo Dauber Shop at: Sunny Studio |
 Versafine Onyx Black Ink Shop at: Sunny Studio |
 Window Trio- Square Die Shop at: Sunny Studio | |||
 Kinsley Alphabet Stamps Shop at: Sunny Studio |
 Slimline Nature Borders Shop at: Sunny Studio |
 Sleek Stripes Paper Shop at: Sunny Studio |
 Balloon Rides Stamps Shop at: Sunny Studio | |||
 Scalloped Circle Mat 1 Dies Shop at: Sunny Studio |
 Lovey Dovey Stamps Shop at: Sunny Studio |
 Passionate Penguins Stamps Shop at: Sunny Studio |
 Passionate Penguins Dies Shop at: Sunny Studio | |||
 Christmas Critters Stamps Shop at: Sunny Studio |
 Baby Elephants Stamps Shop at: Sunny Studio |
 Baby Elephants Dies Shop at: Sunny Studio |
 Wonderful Windows Dies Shop at: Sunny Studio |

