Hello Crafty Friends, Marie here! Thank Heavens, it's officially Spring! Out
with the cold and in with the warmth! Spring brings about renewal, and rebirth
within nature as well as within ourselves. Spring can also be a reminder to
revive or nurture past friendships. In my case, Spring couldn't have come at a
better time as I reconnect with a dear friend from my high school days! My card
creation today is a friendship card I created for my friend to show her my
gratitude for finally reconnecting after so many years. This card features
the Wonderful Windows Dies from Sunny Studio Stamps' Spring 2023 collection. It sure is wonderful as it's
one of my favorite dies from this release! I also paired this window scene with
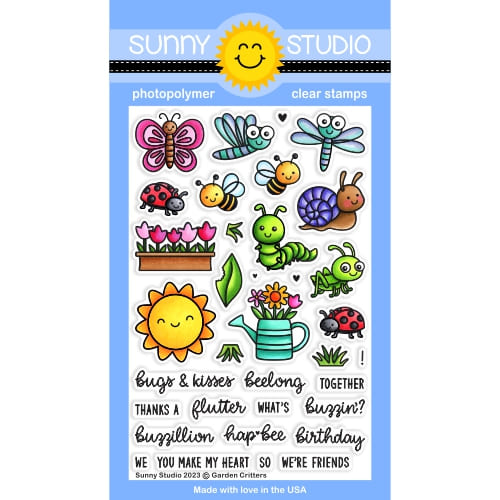
tiny, adorable bees from their Garden Critters Stamps.

The first step to create this friendship card was to cut out two
A2 sized card panels from Bristol Smooth Cardstock paper. This paper is super
smooth and perfect for ink blending. Then taking the background panel, I used a
brick stencil, and ink blended a light lavender color using Milled Lavender
Distress Oxide Ink. To darken the edges, I went in with Shaded Lilac Distress
Ink. For the bottom portion of the card, I inked it with some Mowed Lawn
Distress ink and splattered some water droplets to create some texture.
For all my die cuts except the flowers, I used Bristol smooth
cardstock because it takes Copic markers very well. Starting with my window
frame, I colored it using copic markers in cool grey tones. I used the colors
Cool Gray No.3 (C-3) , and Cool Gray No 1. (C-1). For the window curtains I
used some beautiful yellow pattern paper from the Spring Fever Paper.
For the inside window portion and the top triangle window pieces, I used
Vintage Paper Distress Oxide to mimic the warmth of a softly lit room. I used
some gold metallic paper for the curtain holders. And for the flower box, I
used Copic Markers in the colors Chamois ( E35) and Sepia (E37) and to make it
a terracotta color, I layered over top Rose Blush (PP4) from Spectrum Noir
Illustrator Markers. All the dainty and adorable mini flower blooms were cut
from various colors of red, and shades of pink cardstock. For all the tiny
leaves, I used Yellow Green Copic marker in (YG03) and did some Mowed Lawn
distress ink for shading on the base. For the cute fence, I used Sunny's Scalloped Fence Dies and colored it using Mauve Shadow (BV00) and Cool Grey No. (C-1) Copic Markers.
I positioned all my die cut elements and adhered them to my card front panel
with Bearly Art Precision Craft Glue.

Next, I stamped out all the bee images onto watercolor
paper. I used Faber-Castell watercolor pencils to color all the images. I
cut out the bees using their corresponding die from the Garden Critters Dies.
I adhered the bees using repositionable double sided tape adhesive. For some
detailing, I used a white Gelly Roll pen to create some flying bee
trails.
Moving on to the inside of my card, I did the same brick
stenciling and ink blending as I did on the front to create continuity. I
stamped out my Sentiment from the Garden Critters Stamp onto 110 lb. cardstock,
and used some banner dies to cut them out. I also inked around the edges for
some added interest with Vintage Photo Distress Oxide. Finally, I used some bee
images on the inside, and voila all finished and ready to personalize!
That's it for this week's spring time friendship card inspiration!
Thank you so much for joining me today! Until next time, Happy
Cardmaking!
------------------------------------------
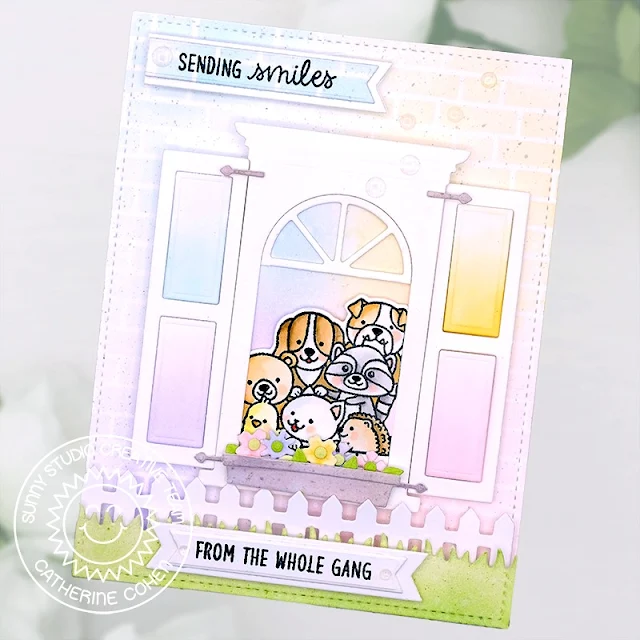
Hello Crafty Friends! Catherine here, and today I am
sharing a card created with the Wonderful
Windows Dies. This die set is so versatile, it comes with an arched
radius frame, outer rectangular frame, curtains, flower box, and shutters which
you can add to your design. For my card,
I used the arched radius frame, shutters, and flower box.
For the background, I die cut A2 white cardstock with a
stitched rectangle die. I ink blended
the background with Spun Sugar, Dried Marigold, Shaded Lilac, and Tumbled Glass
Distress Oxides. I lightly splattered Hickory Smoke Distress Oxide mixed with
water for added interest and set the background aside to dry.
Next, I die cut the outer rectangular frame, shutters,
flower bed, flowers, hinges, and arched frame out of white cardstock. I ink
blended the shutter panels and flowers with the same color combination as the
background. I added a few leaves ink blended with Shabby Shutters Distress
Oxide. I ink blended the flower bed and hinges with Hickory Smoke Distress
Oxide.
For the “gang,” I stamped the critters from Cruising
Critters Stamps onto white cardstock. To fit as many of the critters
into the frame as possible, I masked off the bunny with a post it note. I fussy
cut the gang and colored the critters with Copic Markers listed in my blog link
below. For the window background, I ink blended a piece of white cardstock
trimmed to the same size as the arched frame and ink blended with the same
color combination. I adhered the gang onto the window background and then onto
the card background along with the remaining window pieces.
I added the flower bed along with some flowers. For the
bottom of the card, I added a white fence and grass ink blended with Shabby
Shutters and Twisted Citron Distress Oxide using the Picket
Fence Border Die.
I finished off the card with sentiments from Holiday
Express Stamps stamped onto white banners. I added some clear enamel
dots for added details.
Thank you so much for stopping by today! Please feel free to visit me at Crafti-Cat and
have a wonderful week!
Sunny Studio Supplies Used:


