Hello and welcome to the first day of our Sneak Peek Week! Each morning this week I am showcasing cards using our newest Fall & Holiday collections which will be available to purchase on Friday, August 26th.
Today I am sharing ideas using our new Squirrel Friends Stamps, Fall Scenes Stamps, Critter Country Paper, Autumn Tree Dies and Autumn Greenery Dies. Let's jump in!
Card No. 1: Up first is a card combining the squirrels, tree stump, tree branch and acorns from our new Squirrel Friends set with the tree and fence border from the new Fall Scenes set. The Fall Scenes dies only cut above the fence line and around tree to give you maximum flexibility when it comes to how long your want your scene to go and I elected to color around my die-cuts with a Copic Marker to help them blend in with my inked up sky background to make my cut lines disappear. For my grass, I masked off the tree trunk and space above the grass and think blended Twisted Citron and Mowed Lawn Distress ink
For my sentiment I heat embossed my birthday greeting using Hero Arts White Detail Embossing Powder and Versamark Ink, stamping them onto a brown tone-on-tone polka-dot print from our new Critter Country Paper pack. To finish off my scene, I added a stitched edge along the bottom of my scene using our Slimline Basic Border Dies and added clouds to my background from our Plane Awesome Stamps.

Card No. 3: For this card I let our new Autumn Tree Die take center stage, adding the optional apples that come with the set. I had so much fun making this and I love how versatile this tree die is depending on the leaves you use! In fact you can use it without any leaves at all for winter and Halloween cards to really stretch it. To start, I inked up a panel with Tumbled Glass distress ink and adhered a grassy border I had leftover from another card which had been colored with Copic Markers and cut with our Slimline Nature Border dies. I then die-cut it to add the stitching to my card's edge using our Frilly Frames Quatrefoil Die.
For my tree, I added definition to each leaf with a quick swipe of my Copic Marker on one half of the leaf and then added some shading in the same way to one side of each apple. I then added a little shine with my favorite Sharpie White Extra Fine Point Paint Pen. To compliment my scene, I added the apple barrel from our Fall Friends Stamps and the squirrels from Squirrel Friends Stamps (I'm realizing I really need to get more creative with my stamp names. LOL). For my greeting I heat embossed a sentiment from our Fruit Cocktail Stamps.
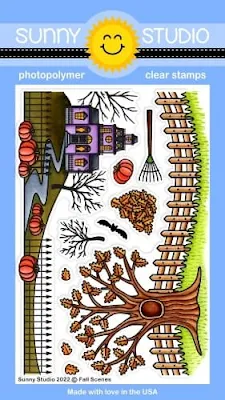
Card No. 4: For this Squirrel Friends card I used one of the new patterned paper backgrounds from our Critter Country Paper pack. I always love working with these scene style papers and have fallen in love with how easy they make things. I incorporated the girl from our Fall Kiddos Stamps to rake the leaves from our Fall Scenes Stamps and used a greeting from the Fall Kiddos set as well. Somehow my images didn't quite feel like they were looking right with the white borders from the dies against the patterned paper backdrop so I elected to fussy cut the images out and go around the edges with a Memento Tuxedo Black Marker to hide any imperfections in my cutting. To complete my card I added a stitched edge once again with our Slimline Basic Border Dies and a little striped patterned paper strip from that same new Critter Country Paper pack to tie all the colors in my card together and add a little extra interest to my card.

Card No. 6: For my last Squirrel Friends card of the day, I used our Nutty For You die turning it into an acorn house with the window and door elements from our Gingerbread House Dies and then hung it from a tree branch using Out on a Limb Die and two oak leaves from our new Autumn Greenery Dies. I was so happy with how all the elements came together!
To add interest to my oak leaves I inked them using Fossilized Amber, Wild Honey, Spiced Marmalade & Rusty Hinge distress inks. These are not colors that get a ton of use in my craft room, but they are so gorgeous for fall and after making this card it made me want to be better about pulling them out more often. Once again I used our Frilly Frames Quatrefoil Die to add the simple stitched border to the edge of my A2 sized card panel--I felt like it subtly framed my scene and made my card feel complete.
Card No. 7: Switching focus to our new Autumn Greenery Dies, I created a fall wreath of sorts by inking up a number of different leaves with a variety of distress inks. I have been in the habit of always starting with white cardstock for my die-cutting, but in this case I shaved considerable time by cutting out my leaves from colored cardstock and added definition with the darker inks to the edges. I love how vibrant they turned out with very little effort and I think these dies have the most incredible detail with the veins. So pretty!
For my background I cut a colorful polka-dot print from our new Critter Country Paper pack trimmed down to 5" square and then die-cut a circle from white cardstock using our Stitched Circle Small Dies. I then arranged my leaves around the circle, doing my best to space out and alternate the colors and styles of leaves. When I was satisfied, I carefully moved them one at a time and adhered them to my background using liquid adhesive before adding my stitched circle over the top. For my greeting, I inked up a piece of cardstock using Broken China Distress Ink and layered several stacked "thank you" word die-cuts using our Slimline Scalloped Frame Dies. Lastly I added a couple of acorns from the Autumn greenery dies which had been inked with Tea Dye and Vintage Photo distress inks.
Card No. 8 & 9: Next up are two cards using the same layout and design with two different patterned papers from our Critter Country Paper pack, together with our new Autumn Greenery Dies. To frame my leaves and help them standout from the background, I used our new Mini Mat & Tag 1 Dies and Mini Mat & Tag 4 Dies, layered over our Gingham Jewel Tones Paper which had been cut out using our Stitched Rectangle Dies. 
As a last touch I added border strips to each card using the border print paper from the same Critter Country Paper pack and stamped the greeting from our Beautiful Autumn Stamps using Versafine Clair Pinecone Ink.
Both these cards came together very quickly using leftover leaves from my wreath style card and yet I really love the finished results! This would be such an easy design to mass produce if you were wanting to make a bunch of cards at once. The patterned paper really does most of the work for you which I love!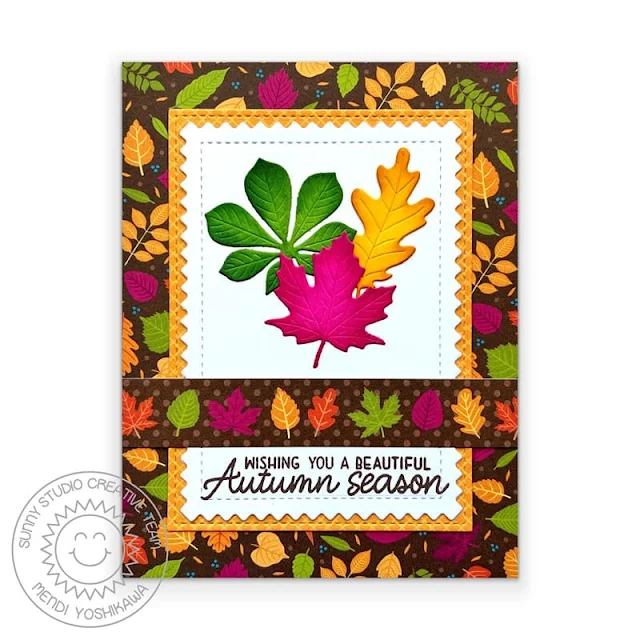
Card No. 10: For my last card of the day I couldn't leave without sharing an idea for the House border from our new Fall Scenes Stamps. I started by inking my background using Mermaid Lagoon, Prize Ribbon and Chipped Sapphire Distress Ink and then spritzed it with water splatters to lift some of the ink. I then added a few white dots in varying sizes using my Sharpie White Extra Fine Point Paint Pen. However, something felt off and I had this nagging feeling my spots looked more like snowflakes than stars so I ended up going back over them with a yellow Copic marker to turn the dots yellow and I really like the results.
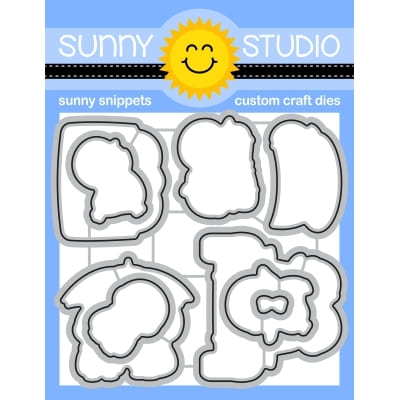
For my scene I cut it out using the coordinating dies, however the trees and fence stood out with it's bright white background against my night's sky so I ended up coloring my die-cut edges again to match the background using Copic makers which I thought disguised it well. For my kitty and cauldron in the foreground I used images from our Bewitching Stamps and a pumpkin from our new Too Cute To Spook Stamps which I will be sharing more of with you tomorrow. I also used the moon from our Scared Cat Stamps and our Chloe Alphabet Dies to spell out the word "happy" which I paired with the word "Halloween" from our Happy Thoughts Stamps.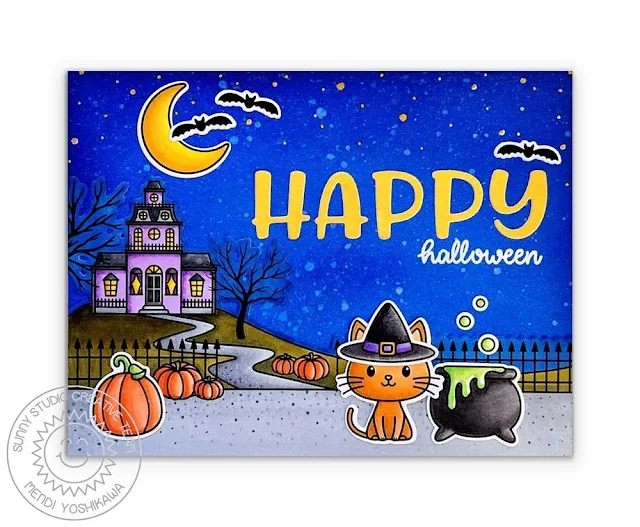
We will be having daily contests and a big 7th birthday Blog Hop this Friday with more giveaways at every stop on the hop. All contests will run through Friday, September 2nd at Midnight PST with winners announced here on Sunday, September 4th. :)
a Rafflecopter giveaway Here's a closer look at the our new Squirrel Friends Stamps, Fall Scenes Stamps, Critter Country Paper, Autumn Tree Dies and Autumn Greenery Dies used today (which will be available to purchase starting on August 26th):
Other Sunny Studio Supplies Used: Chloe Alphabet Dies Shop at: Sunny Studio |
 Stitched Rectangle Dies Shop at: Sunny Studio |
 Bewitching Stamps Shop at: Sunny Studio |
 Bewitching Dies Shop at: Sunny Studio |
|
 Fall Friends Dies Shop at: Sunny Studio |
 Gingerbread House Dies Shop at: Sunny Studio |
 Memento Tuxedo Black Ink Pad Shop at: Sunny Studio |
 Tsukineko Jumbo Dauber Shop at: Sunny Studio | |
 Versafine Onyx Black Ink Shop at: Sunny Studio |
 Gingham Jewel Tones 6x6 Paper Shop at: Sunny Studio |
 Beautiful Autumn Stamps Shop at: Sunny Studio |
 Fruit Cocktail Stamps Shop at: Sunny Studio | |
 Happy Thoughts Stamps Shop at: Sunny Studio |
 Nutty For You Dies Shop at: Sunny Studio |
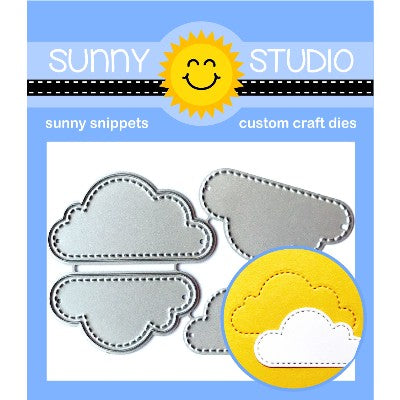 Fluffy Clouds Dies Shop at: Sunny Studio |
 Plane Awesome Stamps Shop at: Sunny Studio | |
 Frilly Frames Quatrefoil Shop at: Sunny Studio |
 Slimline Basic Borders Shop at: Sunny Studio |
 Slimline Nature Borders Shop at: Sunny Studio |
 Slimline Scalloped Frame Shop at: Sunny Studio | |
 Scaredy Cat Stamps Shop at: Sunny Studio |
 Scaredy Cat Dies Shop at: Sunny Studio |
 Stitched Circle Small Dies Shop at: Sunny Studio |
 Out on A Limb Dies Shop at: Sunny Studio | |
 Hero Arts Intense Black Ink Shop at: Sunny Studio |
 Versafine Clair Ink- Acorn Shop at: Sunny Studio |
 Versafine Clair Ink- Pinecone Shop at: Sunny Studio |
 Hero Arts White Detail Shop at: Sunny Studio | |
 Fall Friends Stamps Shop at: Sunny Studio |
 Fall Kiddos Stamps Shop at: Sunny Studio |
 Fall Kiddos Dies Shop at: Sunny Studio |
 VersaMark Watermark Ink Shop at: Sunny Studio |


