Hello and welcome to our final Sneak Peek! All this week I have been showcasing cards using our newest Summer collection which is now available for purchase! Yay!
I've created a video showcasing not only today's sneak peeks, but all the new products from our Summer 2022 release and a closer look at the 40+ cards I made with them (which you can view below or at our YouTube channel HERE).
Today I'm also sharing one last set of ideas using our new Country Carnival Stamps. Before you run off to shop, I hope you will also join me for a closer look at this fun set and all the cards I made using them.
Card No. 1: For my first card I paired our darling new Country Carnival Stamps with the train from our Holiday Express Stamps and the teddy bears to match from our Beach Buddies Stamps. To get everything to fit that I wanted to add to my scene, I went with a larger "canvas", creating a 5.5" square card base. I colored all my images in bright, happy primary colors with small touches of orange and green using Copic Markers.
To separate my larger bears in the foreground from the smaller bears in the background, I inked up and trimmed two sloping hillsides using our Slimline Nature Border Dies which were inked up using Twisted Citron and Mowed Lawn Distress inks. For my sentiment I combined the words "Wishing You a" from our Bear Hugs Stamps, "Thrilling" from the Country Carnival Stamps, and "Birthday!" from our Kiddie Pool Stamps. Lastly to continue with my birthday theme and add some additional rainbow colors to my card I added two striped party hats to the bears on my train using our Froggy Friends Stamps. 
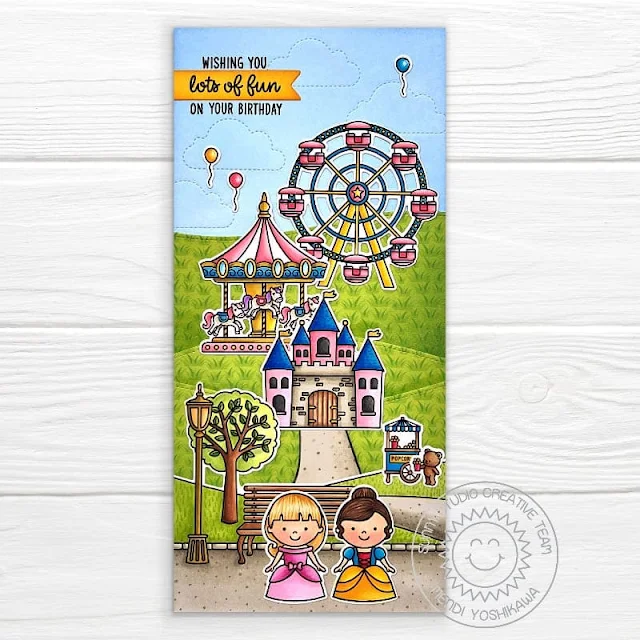
To create the walkway to my castle, I colored some scratch paper using Copic Markers and then traced the edge with a sharpie (using some copy paper below to protect my desk). This gave the path the look of a stamped image so that it would blend perfectly to match the stamped path in the Spring Scenes park border in the foreground. I then added two my Sleeping Beauty and Snow White characters to stand in front of the park bench. Lastly I stamped my greeting using a birthday sentiment from the Country Carnival set using Versafine Onyx Black Ink, stamping the words "lots of fun" onto a small pennant strip to add interest and a touch of color to the top portion of my card.
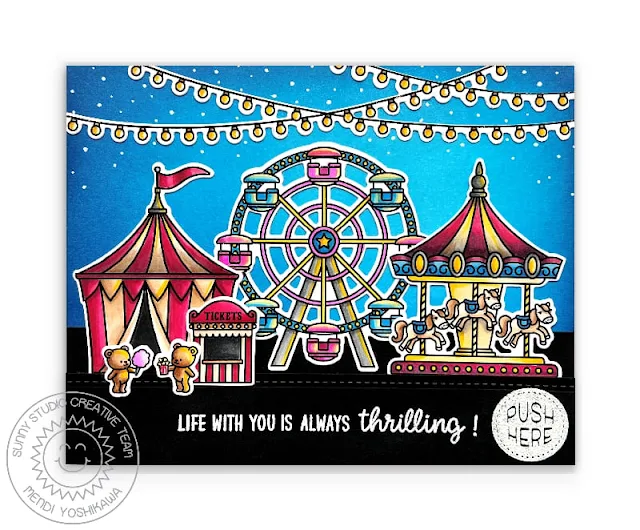
Card No. 3: For my next Country Carnival project to share, I have a fun interactive light-up card using Chibitronics White Lights. To start I inked my background blending Mermaid Lagoon, Salty Ocean, Prize Ribbon and Chipped Sapphire for my night's sky. I then added a string of lights using a border from our Scenic Route Stamps, adding stars to my sky using a white Sharpie Paint Pen. For my Country Carnival images I tried to color them with more dramatic shadows and yellow glowing highlights to sell the bright lights. I also made sure to keep my background lighter and brighter where my ferris wheel and carousel would be positioned to lend to the glowing effect. To build up the area around my battery, I added two layers of foam tape along the bottom inch of my card, adding stitching to my second strip of black cardstock with our Slimline Basic Border Dies.
Lighted View: For my "Push Here" button, I stamped and heat embossed an image from Lawn Fawn's Push Here Stamps. These super cool Chibitronics Lights retail for about $1 per LED light bulb so unfortunately I wasn't able to light up my entire string of lights as much as I would have liked to so I limited myself to three bulbs for the hanging lights and added two more to my scene, with one in the center of my ferris wheel and another just above the center horse on my carousel. To see how you can create a light-up card of your own, I found this to be a super helpful video tutorial HERE. The only other supplies I needed to purchase to was Copper Tape and batteries and I now have plenty of them on hand for lots of future cards.
Card No. 4: As I was looking at our Beach Buddies Critters, I realized their ears might be able to be colored like mouse ears. Unfortunately they didn't quite look like mouse ears when I did it though so I exaggerated them by tracing around a small circle template with my Copic Multi-liner pen and coloring them a solid black to hide the original stamped lines. I also used that same pen to trace around the edge of a larger circle to form the bottom brim of the hat and then fussy cut them out by hand since my altered ears wouldn't have cut properly with the dies.

With each new collection we always have a new free mini die we include automatically with orders placed in our online store. For this release we have a fun little dragonfly die!
Our five daily contests this week run through tomorrow, April 23rd at Midnight PST with winners announced here on Sunday, April 24th. :)
a Rafflecopter giveaway Here's a closer look at the our new Country Carnival Stamps & Dies used today:
Other Supplies Used: Froggy Friends Dies Shop at: Sunny Studio |
 Froggy Friends Stamps Shop at: Sunny Studio |
 Beach Buddies Stamps Shop at: Sunny Studio |
 Beach Buddies Dies Shop at: Sunny Studio |
|
 Fall Friends Stamps Shop at: Sunny Studio |
 Fall Friends Dies Shop at: Sunny Studio |
 Holiday Express Stamps Shop at: Sunny Studio |
 Holiday Express Dies Shop at: Sunny Studio | |
 Tsukineko Jumbo Dauber Shop at: Sunny Studio |
 Versafine Onyx Black Ink Shop at: Sunny Studio |
 Polka-dot Parade 6x6 Paper Shop at: Sunny Studio |
 Frilly Frames Polka-Dot Shop at: Sunny Studio | |
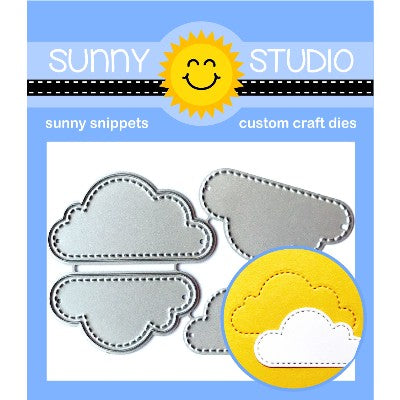
 Fluffy Clouds Dies Shop at: Sunny Studio |
 Scenic Route Stamps Shop at: Sunny Studio |
 Scenic Route Dies Shop at: Sunny Studio |
 Enchanted Stamps Shop at: Sunny Studio | |
 Enchanted Dies Shop at: Sunny Studio |
 Floating By Stamps Shop at: Sunny Studio |
 Floating By Dies Shop at: Sunny Studio |
 Spring Scenes Stamps Shop at: Sunny Studio | |
 Spring Scenes Dies Shop at: Sunny Studio |
 Spring Fling Paper Shop at: Sunny Studio |
 Slimline Basic Borders Shop at: Sunny Studio |
 Slimline Nature Borders Shop at: Sunny Studio | |
 Farm Fresh Stamps Shop at: Sunny Studio |
 Balloon Rides Stamps Shop at: Sunny Studio |
 Baby Elephants Stamps Shop at: Sunny Studio |
 Baby Elephants Dies Shop at: Sunny Studio | |
 Kiddie Pool Stamps Shop at: Sunny Studio |
 Hero Arts White Detail Shop at: Sunny Studio |
 VersaMark Watermark Ink Shop at: Sunny Studio |
 Domed Ink Blending FoamShop at: Sunny Studio | |
 Picket Fence Border Dies Shop at: Sunny Studio |
 Bear Hugs Stamps Shop at: Sunny Studio |
 Comic Strip Everyday Dies Shop at: Sunny Studio |
 Happy Thoughts Stamps Shop at: Sunny Studio |
|
 Spring Sunburst 6x6 Paper Shop at: Sunny Studio |
 Comic Strip Speech Bubble Dies Shop at: Sunny Studio |
 Eyelet Lace Borders Shop at: Sunny Studio |
 Wonky Windows Die Shop at: Sunny Studio |
|
 Stitched Rectangle Dies Shop at: Sunny Studio |
 Mini Basic Shape Dies 2 Shop at: Sunny Studio |
 Frilly Frames Retro Petals Dies Shop at: Sunny Studio |
 Basic Mini Shape Dies 4 Shop at: Sunny Studio |


