Thursday, January 6, 2022

Sneak Peek: Introducing Little Birdie & Bunnyville Easter Stamps

Hello and welcome to day 4 of our 2022 Sneak Peek Week!  Each morning this week I am highlighting cards using our newest collection for Spring which will be available to purchase on January 7th.

Today's cards showcase a new bird themed set called Little Birdie that compliments our previously released A Bird's Life Stamps. The set includes a new birdhouse to coordinate the others, a new tree branch going the opposite direction, a nest, 10 adorable birds, a small banner and a number of punny sentiments. The second new set is a Spring and Easter themed bunny stamp set called Bunnyville featuring 7 cute bunnies and a variety of carrot images.

Card No. 1: Up first is a Little Birdie card which I paired with our new Out On A Limb Dies I shared on Tuesday. For my card I started by cutting the tree branch from white cardstock and then coloring it with my Copic Markers to add extra shading and details. I did the same for my leaves which already come embossed with the veins, but I accentuated them by adding a little extra pen detailing as well. I colored my birds to resemble robins and then inked up my background using distress inks, splattering on some of the coordinating reinker and water to give it a speckled look like robin's eggs. I cut my mat behind the tree branch using our Stitched Rectangle Dies inking on a light amount of Peacock Feathers distress ink behind them and splattering on some more of the watered down reinker with an old toothbrush. A sentiment from the stamp set, stamped with VersaFine Onyx Black Ink, completed my card.

Sunny Studio Robin Birds with Nest, Eggs & Tree Branch Birthday Card (using Little Birdie Stamps, Out on A Limb & Stitched Rectangle Dies)

Card No. 2: For my next card I inked up my white cardstock with pink clouds using Picked Raspberry distress ink together with homemade masks created using our Slimline Nature Border Dies. I then cut the panel down using our Slimline Scalloped Frame Dies which I paired with the Hot Pink Striped Silly Paper. To make the 6 x 6 paper fit my 4" x 9" card, I trimmed them down using a very sharp paper trimmer right next to the edge of the stripe and adhered the pieces side by side almost making the seam completely disappear. 

This card uses both the tree branches & bird houses from our new Little Birdie Stamps together with our A Bird's Life Stamps. I used my ruler with a hot pink sharpie for the string for my birdhouses to hang from and then found a matching ink in my stash to stamp the bows from the set. I colored the banner from the set with Copic Markers and then heat embossed a punny sentiment from the set using VersaMark Ink together with Hero Arts White Detail Embossing Powder.

Sunny Studio Happy Bird-day Punny Birdhouse Spring Card (using Little Birdie & A Bird's Life Stamps, Slimline Scalloped Frame & Striped Silly Paper)

Card No. 3: For this Little Birdie card I once again used the Out On A Limb Die, but this time I embossed the tree branch using our Woodgrain Embossing Folder. I inked the edges of the leaves using Mowed Lawn Distress ink to accentuate the embossed vein details and paired the birdhouse from the Little Birdie set with two of the birdhouses from A Bird's Life. For my backdrop, I die-cut the cloud paper from our Summer Splash Paper pack using our Stitched Rectangle Dies and double mounted it onto white and kraft cardstocks. A punny Mother's Day greeting nestled between the hanging pink bird houses completed my card.


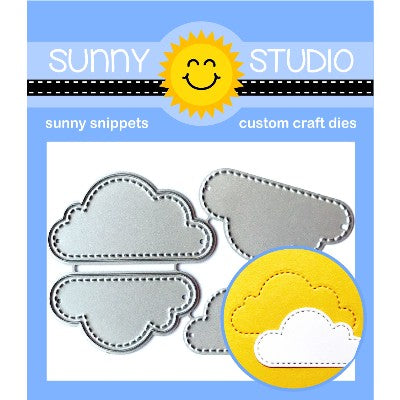
Card No. 4: For my last Little Birdie card I started by die-cutting my background from blue cardstock using our new Quilted Hearts Landscape Dies which I backed with a piece of navy blue cardstock. I then cut the largest stitched heart from our Stitched Heart 2 Dies from that same blue cardstock, layered over a white heart cut with our Scalloped Heart Dies. A trio of stitched clouds using our Fluffy Cloud Dies and three mini hearts from that same Stitched Heart 2 Dies helped embellish my little scene. I then stamped a punny greeting onto the smaller banner from the Little Birdie set. These last two cards involved zero distress ink, but sometimes I think it's fun to mix things up and utilize patterned paper or colored cardstock to speed up the creative process.

Card No. 5: Switching gears my next card showcases our new Bunnyville Stamps and the darling carrot house from this set. I started by adhering the lavender flower print paper to my cardbase from our Flirty Flowers Paper pack. I then cut a scalloped mat using our Frilly Frames Eyelet Lace Dies which I inked up with Tumbled Glass and Twisted Citron distress inks. I followed by stamping some tufts of grass using our Chickie Baby Stamps and set to work layering my scene using all the images from the Bunnyville set. Lastly I stamped the greeting "hi cutie" from our Happy Hamsters Stamps using VersaFine Onyx Black Ink.


Card No. 6: My next Bunnyville card focuses on the cute carrot balloon image from the stamp set. I used some Embroidery Floss for my balloon strings taped to the back of each balloon and then tied them in a knot which I tucked behind a gift from the Holiday Express Stamps. I positioned my bunny on a tree stump from our Fall Friends Stamps and arranged my scene on an arched mat from our Stitched Arch Dies. I added a bow to my bunny's ear from our Little Birdie Stamps. Finally I mounted my scene on a piece of orange patterned paper from our Gingham Pastels Paper pack.

Card No. 7: Next up is an Easter card featuring the egg, tulips, butterflies and greeting from the Bunnyville Stamps. I started by cutting my window from the rainbow striped Spring Sunburst Paper using our Stitched Semi-Circle Dies. I then heat embossed my greeting from the stamp set using VersaMark Ink with Hero Arts White Detail Embossing Powder on a blue polka-dot print from our Dots & Stripes Pastel Paper pack. For my grass I used our Slimline Nature Border Dies cut from our Classic Sunburst Paper pack. Finally I just layered all the darling images from the set around my sentiment, popping up the butterflies with foam tape.

Card No. 8: For my last card of the day I created a slimline card by stretching our Stitched Rectangle Dies and then lining up our new Stitched Heart 2 Dies to cut out a row of heart windows. To get my hearts to line up perfectly I drew a faint pencil line down the center of my card panel and then positioned the heart points on the line and securing them with a little washi tape before running them through my die-cutting machine each time. I then backed the windows with an aqua polka-dot print from our Dots & Stripes Pastel Paper pack and filled the windows with the bunny rabbit images from the Bunnyville set and a sentiment from our new Lovey Dovey Stamps.

That wraps up today's sneak peeks. I'm so happy you spent part of your day with me today. I read all your comments and they mean so much!  I'd love to give a $50 gift code to one lucky winner using the rafflecopter below. Our daily contests this week run through Saturday, January 8th at Midnight PST with winners announced here on Sunday, January 9th. :)

a Rafflecopter giveaway

Here's a closer look at the our new Little Birdie Stamps & Dies and Bunnyville Stamps & Dies used today (which will be available to purchase starting on January 7th):

Sunny Studio Blog: Introducing New Little Birdie 4x6 Clear Photopolymer Bird, Nest, Birdhouse & Tree Branch StampsSunny Studio Blog: Introducing New Little Birdie Bird Themed Matching Metal Cutting Dies

Sunny Studio Blog: Introducing New Bunnyville 4x6 Clear Photopolymer Easter Bunny with Carrot House StampsSunny Studio Blog: Introducing New Bunnyville Easter Bunny Matching Metal Cutting Dies

Other Sunny Studio Supplies Used:

A Bird's Life Stamps
Shop at:
Sunny Studio
A Bird's Life Dies
A Bird's Life Dies
Shop at:
Sunny Studio
Stitched Rectangle Dies
Shop at:
Sunny Studio
Fall Friends Stamps
Fall Friends Stamps
Shop at:
Sunny Studio

Holiday Express Stamps
Shop at:
Sunny Studio
Holiday Express Dies
Shop at:
Sunny Studio
Tsukineko Jumbo Dauber
Shop at:
Sunny Studio
Versafine Onyx Black Ink
Shop at:
Sunny Studio
Striped Silly 6x6 Paper
Shop at:
Sunny Studio
Gingham Pastels 6x6 Paper
Shop at:
Sunny Studio
Spring Sunburst 6x6 Paper
Shop at:
Sunny Studio
Flirty Flowers 6x6 Paper
Shop at:
Sunny Studio
Dots & Stripes Pastels 6x6 Paper
Shop at:
Sunny Studio
Fluffy Clouds Dies
Fluffy Clouds Dies
Shop at:
Sunny Studio
Summer Splash 6x6 Paper
Shop at:
Sunny Studio
Woodgrain Embossing
Woodgrain Embossing
Shop at:
Sunny Studio
Chickie Baby Stamps
Chickie Baby Stamps
Shop at:
Sunny Studio
Frilly Frames-Eyelet Lace
Shop at:
Sunny Studio
Stitched Arch Dies
Stitched Arch Dies
Shop at:
Sunny Studio
Stitched Semi-Circle Dies
Shop at:
Sunny Studio
Slimline Basic Borders
Shop at:
Sunny Studio
Slimline Nature Borders
Shop at:
Sunny Studio
Slimline Scalloped Frame
Shop at:
Sunny Studio
Out on A Limb Dies
Out on A Limb Dies
Shop at:
Sunny Studio
Quilted Hearts Landscape
Shop at:
Sunny Studio
Scalloped Heart Dies
Shop at:
Sunny Studio
Stitched Heart 2 Dies
Shop at:
Sunny Studio
Hero Arts White Detail
Shop at:
Sunny Studio
Fall Friends Dies
Fall Friends Dies
Shop at:
Sunny Studio
VersaMark Watermark Ink
Shop at:
Sunny Studio
Cottontail Embossing Powder Tool
Shop at:
Sunny Studio

Wednesday, January 5, 2022

Sneak Peek: Paris Afternoon, Charming City & Critters on the Go Stamps

Hello and welcome to day 3 of our 2022 Sneak Peek Week!  Each morning this week I will be showcasing cards using our newest Spring collection which will be available to purchase on January 7th.

Today I am sharing three sets that can work on their own, but I found they complimented each other so well and worked together perfectly that I found myself mixing and matching them on almost all my card examples today. There is a French themed set called Paris Afternoon, a set of eclectic city buildings called Charming City that I think could pass for a number of European and larger American cities depending on how they are colored and then finally a set called Critters on the Go that comes with a variety of animals riding scooters and skateboards which can also ride the bicycle and sit in the cafe chairs from the Paris Afternoon set. Let's get started!

Card No. 1: My first card features the Paris Afternoon Stamps and Charming City Stamps in a fun evening scene on a larger 5x7 card. I colored my images using Warm Grey Copic Markers and lighting up the windows with yellow inks. For my night's sky I colored it using the new Prize Ribbon Distress Ink together with Chipped Sapphire and Black Soot around the outside edges before spritzing on some Picket Fence distress spray. For my string of lights I turned to our Scenic Route Stamps and used the dog and scooter from our City Streets Stamps. Lastly I inked up one of our Small Stitched Circle Dies with Squeezed Lemonade and Mustard Distress ink to sort of feel like a moon in my scene while also giving me a good place to stamp my "bonjour" greeting from the Paris Afternoon set. I love all the little images available to place on the cafe table from this set and how cute everything looks colored with a yellow moonlit glow!


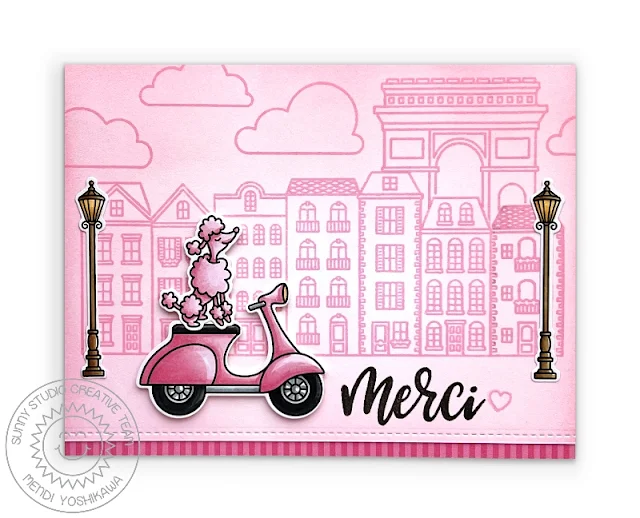
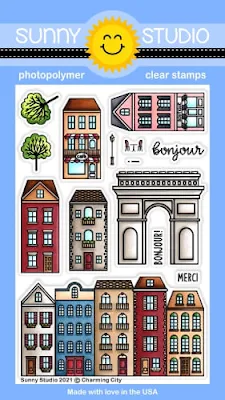
Card No. 2: When I think of Paris I think of pink striped hat boxes, posh boutiques & the wide avenue of Champs-Élysées so I tried my best to capture a little bit of that magic with a simple card featuring all three new stamps sets. I started by inking up a piece of white cardstock using Spun Sugar distress ink and then stamped my row of shops using both the border and individual buildings from our new Charming City Stamps in a pink ink. I then crudely covered the top of the roofs with some post-it notes and stamped the Arc de Triomphe in my background. I think this arch is generic enough though that you could use it also as the Washington Square Park Arch in New York City. Aside from a couple small sentiments I purposely tried to make this stamp set a bit more ambiguous to stretch it's usefulness to work for other locations. I finished my background with some clouds from our Spring Showers Stamps. I love how stamping things in a tone-one-tone color adds some detail to my scene without stealing too much focus from my focal point images. It's also a great way to greatly speed up the cardmaking process without looking like you cut corners.

When I was done I trimmed off the bottom edge of my panel and added the stitching detail using our Slimline Basic Border dies with a small strip of pink striped patterned paper from our Striped Silly Paper pack peeking out from below. For my foreground, I stamped and colored the scooter from the Critters on the Go set and the poodle and two lamp posts from the Paris Afternoon set. Finally the "Merci" sentiment was stamped using Versafine Onyx Black Ink and I added a little pink heart next to it, both from Paris Afternoon set.
Sunny Studio Pink Poodle on Scooter Merci Thank You Card (using Paris Afternoon, Charming City & Critters on the Go Stamps)

Card No. 3: For my next card I recreated the look of a street cafe pairing the cafe table and chairs from Paris Afternoon with the park background from our Spring Scenes Stamps and the bunny, raccoon and dog from the new Critters on the Go Stamps. I just love the way they can sit at the table and enjoy their cups of coffee! For my greeting I heat embossed a sentiment from our City Streets Stamps onto a little banner strip from our Slimline Pennants Dies.

Card No. 4: I went a bit artsy for this card showcasing the latte and macarons from our Paris Afternoon Stamps. For my background I started by inking small circles of distress ink using the Bitty Bunny Blending Brushes, allowing the colors to overlap each other and then using that same distress ink color to stamp one of the macarons in the center. I then essentially trimmed off the edges of my panel using our Stitched Rectangle dies and mounted it onto a piece of brown cardstock to coordinate with the brown from my latte. To frame my focal point images I used our Scalloped Circle Mat 1 dies and stamped a punny greeting from our Breakfast Puns Stamps using VersaFine Clair Pinecone Ink.

Card No. 5: For this Charming City card I wanted to create a bright and happy neighborhood whether it be a street in Manhattan or Copenhagen. I utilized the Spring Sunburst Paper for the background of this uniquely sized 4x6 sized card, stamping it with a greeting from our Happy Home Stamps. Lastly I added some cars and a scooter to my bustling street using images from our City Street Stamps.
Sunny Studio From Our Home To Yours Neighborhood Card (using Charming City, City Streets & Happy Home Stamps with Spring Sunburst Paper)

Card No. 6: Up next is a card showcasing Paris in the spring time, coloring my little trees from the Charming City Stamps to look like blooming Cherry Blossom Trees. I paired them with the boutique and cafe from the same set. I heat embossed the Eiffel Tower from the set using Hero Arts Brass embossing powder and layered some clouds around it using the small dies from our Comic Strip Everyday Dies. For the bottom portion of my card I layered our Scalloped Fence Dies and added the bunny from Critters on the Go with the bicycle from Paris Afternoon. A small and simple "bonjour" greeting from the Charming City set completed my card.
Sunny Studio Bunny Riding Bicycle In Paris Spring Card (using Critters on the Go, Paris Afternoon & Charming City Stamps, Scalloped Fence & Comic Strip Everyday Dies)

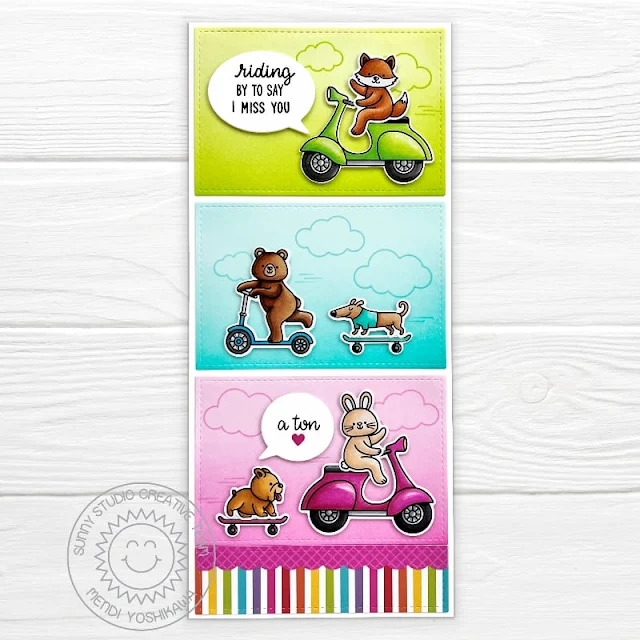
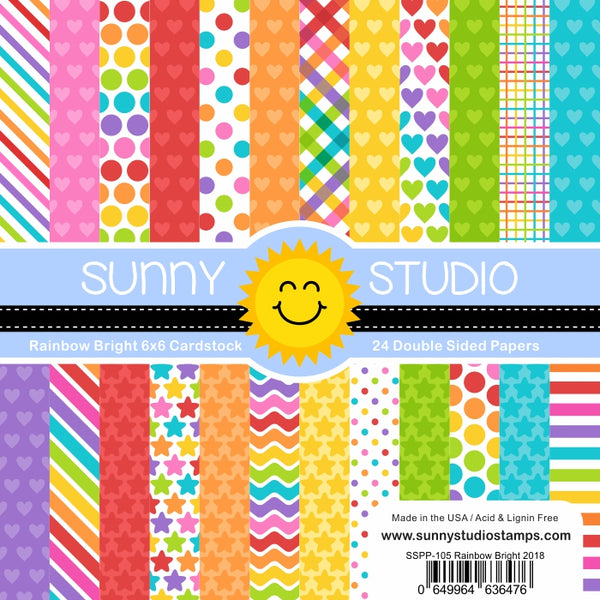
Card No. 7: For my last card of the day I wanted to create a bright and happy card that focused 100% on the Critters on the Go Stamps and all the fun critters with their different modes of transportation on wheels. For each of the monochromatic scenes on my slimline style card, I inked up an ombre panel using Twisted Citron, Peacock Feathers or Picked Raspberry distress inks which I then cut out using our smallest Stitched Rectangle dies. For my clouds in the background I used or Plane Awesome Stamps and then stamped the little whirling wind in the same colors using the images from the Critters on the Go set. For my greetings I cut two speech bubbles using our Comic Strip Speech Bubbles dies and then stamped them with greetings from Critters on the Go and Savanna Safari. I had some leftover space at the bottom of my 4" x 9" slimline card base so I filled it with some Rainbow Bright Paper topped with small scalloped border cut from our Classic Gingham Paper using our Slimline Basic Border dies.

Sunny Studio Animals Riding Scooters & Skateboards Slimline Card (using Critters on the Go Stamps, Stitched Rectangle & Comic Strip Speech Bubble Dies, Rainbow Bright & Classic Gingham Paper)

That wraps up today's sneak peeks. I'm so happy you spent part of your day with me today. I read all your comments and they mean so much!  I'd love to give a $50 gift code to one lucky winner using the rafflecopter below. Our daily contests this week run through Saturday, January 8th at Midnight PST with winners announced here on Sunday, January 9th. :)

a Rafflecopter giveaway

Here's a closer look at the our new Paris Afternoon Stamps & Dies, Charming City Stamps & Dies and Critters on the Go Stamps & Dies used today (which will be available to purchase starting on January 7th):

Sunny Studio Blog: Paris Afternoon French Cafe Themed 4x6 Clear Photopolymer StampsSunny Studio Blog: Introducing Paris Afternoon French Themed Matching Metal Cutting Dies

Sunny Studio Blog: Charming City European Neighborhood 4x6 Clear Photopolymer StampsSunny Studio Blog: Introducing Charming City European Neighborhood Matching Metal Cutting Dies

Sunny Studio Blog: Introducing Critters on The Go Animals on Scooters 4x6 Clear Photopolymer StampsSunny Studio Blog: Introducing Critters on The Go Animals on Scooters Matching Metal Cutting Dies

Other Sunny Studio Supplies Used:

City Streets Dies
City Streets Dies
Shop at:
Sunny Studio
City Streets Stamps
City Streets Stamps
Shop at:
Sunny Studio
Happy Home Stamps
Happy Home Stamps
Shop at:
Sunny Studio
Scalloped Fence Die
Scalloped Fence Die
Shop at:
Sunny Studio

Tsukineko Jumbo Dauber
Shop at:
Sunny Studio
Versafine Onyx Black Ink
Shop at:
Sunny Studio
Breakfast Puns Stamps
Shop at:
Sunny Studio
Classic Gingham 6x6 Paper
Shop at:
Sunny Studio
Rainbow Bright 6x6 Paper
Shop at:
Sunny Studio
Comic Strip Everyday Dies
Shop at:
Sunny Studio
Gingham Pastels 6x6 Paper
Shop at:
Sunny Studio
Spring Sunburst 6x6 Paper
Shop at:
Sunny Studio
Dots & Stripes Pastels 6x6 Paper
Shop at:
Sunny Studio
Summer Splash 6x6 Paper
Shop at:
Sunny Studio
Plane Awesome Stamps
Shop at:
Sunny Studio
Comic Strip Speech Bubble Dies
Shop at:
Sunny Studio
Scenic Route Stamps
Scenic Route Stamps
Shop at:
Sunny Studio
Scenic Route Dies
Scenic Route Dies
Shop at:
Sunny Studio
Spring Scenes Stamps
Shop at:
Sunny Studio
Spring Scenes Dies
Spring Scenes Dies
Shop at:
Sunny Studio
Spring Showers Stamps
Shop at:
Sunny Studio
Savanna Safari Stamps
Shop at:
Sunny Studio
Slimline Basic Borders
Shop at:
Sunny Studio
Scalloped Circle Mat 1 Dies
Shop at:Sunny Studio
Stitched Rectangle Dies
Shop at:
Sunny Studio
Slimline Pennant Dies
Shop at:
Sunny Studio
Stitched Circle Small Dies
Shop at:
Sunny Studio