Thursday, October 7, 2021

Forest Tree Stencil Focused Cards with Anja and Marine

Hi everyone, Anja here and today I'm back with a clean and simple Christmas card in pretty pinks using the fabulous Forest Trees Stencils.

Sunny Studio Stamps: Forest Tree Stencils Stitched Oval Dies Christmas Card by Anja Bytyqi

I started off with an A2 landscape card base and die cut a white cardstock panel with the stitched rectangle included in the Frilly Frames Quatrefoil Dies set. I also cut out a window using the largest of the Stitched Oval 2 Dies.

Next, I cut down a piece of smooth Bristol cardstock to go behind the window and started applying Distress Oxide Inks through the stencils. I wanted to create an ombré look and went from light to dark pink (Spun Sugar, Kitsch Flamingo, Picked Raspberry and Seedless Preserves). I used all three stencils and one even twice to fill the whole panel. I let it dry before adding white and moonlight ink splatters with a small brush for a bit of snowfall. I adhered the stenciled panel directly to my card base and popped up the oval window frame with foam tape.

Sunny Studio Stamps: Forest Tree Stencils Stitched Oval Dies Christmas Card by Anja Bytyqi

For the sentiment, I combined a die cut with a heat embossed text. The word 'merry' is included in the Christmas Garland Frame Die set. I cut it from silver glitter cardstock as well as white cardstock since it is quite delicate. I stamped the word 'Christmas' from the Hedgey Holidays set in VersaMark Ink onto a small cardstock strip and white heat embossed it. To finish off the card, I adhered the sentiment in the middle and added three white star sequins around it.

Thank you so much for stopping by! Hope you have an amazing day!

------------------------------------------------

Hello crafty friends, Marine here, I'm super happy to be back this week with an enchanted shaker card featuring two cute fairies decorating a pink Christmas tree.

Sunny Studio Stamps: Forest Tree Stencils Holiday Express Bear Hugs Garden Fairy Christmas Card by Marine Simon

As always I stamped a bunch of images using an alcohol marker friendly black ink, I used the coordinating dies to cut them all and before coloring everything using my alcohol markers, I used my memento black pen to give my cute fairies long sleeves, it's winter time and we wouldn't them to get cold.

Here are the stamp sets I used on this card:

Next I moved on to the background and covered a 5,5 x 4,25" bristol panel with spun sugar distress ink. And I used the Forest Trees Stencils to create a pretty forest background using worn lipstick distress ink. And once I was happy with the result, I added some texture to this background: water droplets first, and then I mixed some festive berries distress ink with water to create tiny splatters on the paper and this way bring a little bit more contrast.

I cut some elements to create my window frame. I started by cutting a 5,5 x 4,25"  white panel, and to cut an opening out of this panel, I used the largest die from the Stitched Oval 2 die set. And to give this window panel some texture and interest, I used the Woodgrain embossing folder. I just placed my panel in that folder and I sent it to my die cutting machine.

I attached this woodgrain window panel on a piece of clear acetate, and then attached foam tape at the back of that panel, all around the oval shape and on the four corners as well. I applied a generous amount of powder along the inside edges of the oval foam tape to get rid of any stickiness, and I cleaned up the acetate using a microfiber cloth.

Sunny Studio Stamps: Forest Tree Stencils Holiday Express Bear Hugs Garden Fairy Christmas Card by Marine Simon

I poured lots of clear sequins directly on the acetate window, and stuck my forest tree panel right on top of the window panel to create and totally close the shaker panel.

And to bring more interest to this window panel and make it even more pretty, I created a frame: I cut a scalloped oval shape using the largest die from the Scalloped Oval Mat 1 die set, and used the largest die from the Stitched Oval 2 die set to cut an opening in that scalloped oval shape and this way create a frame, that I attached on my woodgrain window panel using liquid glue.

I cut a white grass border using the Picket Fence die, and stamped my sentiment on it, I attached that border at the bottom of my panel using foam squares at both ends, and then I stuck all my cute images using foam squares mostly and also liquid glue. And once everything was attached, I added lots of details and highlights on the images and stuck my panel on a white card base.

Sunny Studio Stamps: Forest Tree Stencils Holiday Express Bear Hugs Garden Fairy Christmas Card by Marine Simon

And that's it! I hope that you like this magical Christmas shaker scene in the forest. Feel welcome to check the video above (click on the photo to be re-directed)! Thanks for stopping by, and see you next week!

Sunny Studio Supplies Used:

Picket Fence Border Dies
Shop at:
Sunny Studio
Bear Hugs Stamps
Bear Hugs Stamps
Shop at:
Sunny Studio
Bear Hugs Dies
Bear Hugs Dies
Shop at:
Sunny Studio
Holiday Express Stamps
Shop at:
Sunny Studio
Holiday Express DIes
Shop at:
Sunny Studio
Seasonal Trees Stamps
Shop at:
Sunny Studio
Seaonal Trees Dies
Seaonal Trees Dies
Shop at:
Sunny Studio
Woodgrain Embossing
Woodgrain Embossing
Shop at:
Sunny Studio
Scenic Route Stamps
Scenic Route Stamps
Shop at:
Sunny Studio
Scenic Route Dies
Scenic Route Dies
Shop at:
Sunny Studio
Christmas Garland Frame
Shop at:
Sunny Studio
Enchanted Stamps
Enchanted Stamps
Shop at:
Sunny Studio
Enchanted Dies
Enchanted Dies
Shop at:
Sunny Studio
Frilly Frames Quatrefoil
Shop at:
Sunny Studio
Hedgey Holidays Stamps
Shop at:
Sunny Studio
Hedgey Holidays Dies
Shop at:
Sunny Studio
Penguin Pals Stamps
Penguin Pals Stamps
Shop at:
Sunny Studio
Penguin Pals Dies
Penguin Pals Dies
Shop at:
Sunny Studio
Garden Fairy Stamps
Garden Fairy Stamps
Shop at:
Sunny Studio
Garden Fairy Dies
Garden Fairy Dies
Shop at:
Sunny Studio
Scalloped Oval Mat 1 Dies
Shop at:
Sunny Studio
Stitched Oval 2 Dies
Shop at:
Sunny Studio
Forest Trees Stencils
Shop at:
Sunny Studio

Wednesday, October 6, 2021

Bewitching Cards with Julia and Franci

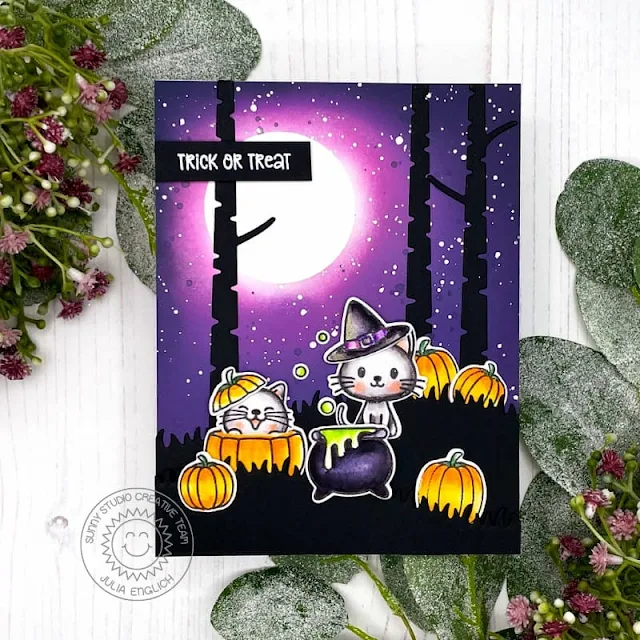
Hello crafty friends! It’s Julia here and I am so excited to share this fun Halloween card with you!

Sunny Studio Stamps: Bewitching Rustic Winter Dies Fall Friends Halloween Card by Julia Englich

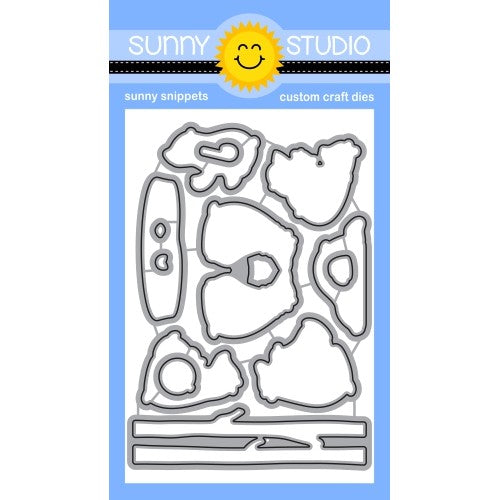
First, I stamped the images from BewitchingChristmas Critters, and Fall Friends onto Bristol Smooth Cardstock and colored them in using Zig Clean Color Real Brush Markers.

For my background, I added a circle mask to the top left corner to create a little moon and ink blended the background with Spun Sugar, Picked Raspberry, Wilted Violet, Picked Raspberry, and Black Soot. I die-cut two grassy hills using the Slimline Nature Borders as well as the trees from Rustic Winter out of black cardstock to set my spooky scene.

Sunny Studio Stamps: Bewitching Rustic Winter Dies Fall Friends Halloween Card by Julia Englich


I adhered the background and the grassy hills and trees to an A2-sized card base and then I added all my cute little images! 

I absolutely love making Halloween cards, even though we don't really celebrate it here in Germany. I had so much fun on this one and I really hope you like it!

Thanks so much for stopping by today and have a wonderful day!!

----------------------------------------------------

Hi there! It's Franci here with you today, with some cute Halloween gift tags. This little witch cat is so cute with his potion cauldron and all the little bubbles blowing out of it, isn't he?!

Sunny Studio Stamps: Bewitching Scalloped Tag Dies Halloween Tag by Franci Vignoli

First of all I die cut the tags out of some white cardstock and patterned paper from the Subtle Grey Tones pack using the Scalloped Tag Square Dies set. I stamped all my images from the Bewitching set, colored with Copics and die cut them out. 

I stamped my sentiment onto the white tags, added a little heart and glued everything together, then added my images at the front with some foam adhesive. 

Sunny Studio Stamps: Bewitching Scalloped Tag Dies Halloween Tag by Franci Vignoli

Finally I added some bubbles with all my colorful Nuvo Drops and drew a few details with a white gel pen. I chose a lilac ribbon but green would have been so much fun as well or a classic black.

You could add these to your trick or treat bags or just to the sweets you will give away! Hope you like them as much as I do and thanks a lot for stopping by!

Sunny Studio Supplies Used:

Bewitching Stamps
Bewitching Stamps
Shop at:
Sunny Studio
Bewitching Dies
Bewitching Dies
Shop at:
Sunny Studio
Christmas Critters Stamps
Shop at:
Sunny Studio
Christmas Critters DIes
Shop at:
Sunny Studio
Fall Friends Stamps
Fall Friends Stamps
Shop at:
Sunny Studio
Fall Friends Dies
Fall Friends Dies
Shop at:
Sunny Studio
Rustic Winter Dies
Rustic Winter Dies
Shop at:
Sunny Studio
Subtle Grey Tones Paper
Shop at:
Sunny Studio
Scalloped Tags-Square
Shop at:
Sunny Studio
Slimline Nature Borders
Shop at:
Sunny Studio

Tuesday, October 5, 2021

Stitched Oval Die Focused Cards with Kavya and Isha

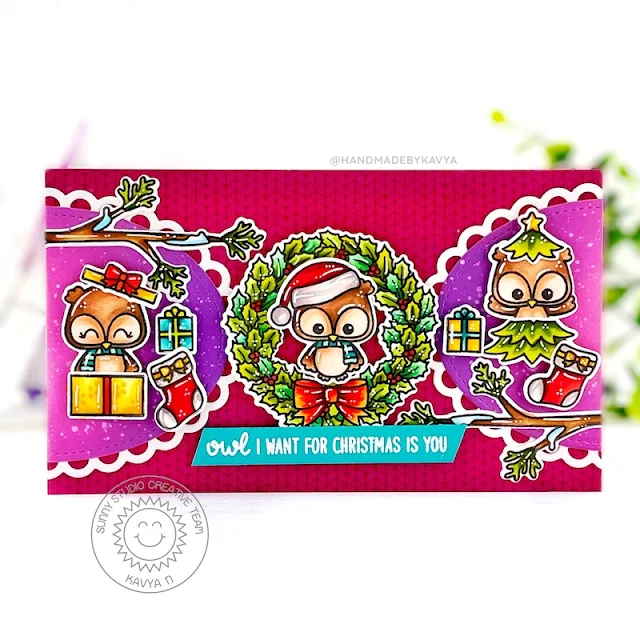
Hi folks, Kavya here with another fun card to share with you all! I have been trying to find different layouts for cards and I found out that the new Oval set of dies are just perfect for creating the card below!

Sunny Studio Stamps: Stitched Oval Dies Happy Owlidays Christmas Card by Kavya

For this card, I decided to use a pink sweater pattern paper from Sweater Weather in 6” x 3.5”. Then, I die cut two ovals from Stitched Oval 2 dies and Scalloped Oval Mat 3. I ink blended the inner oval using Seedless Preserve and Picked Raspberry distress oxide inks and splattered some water! I cut this in half and placed them at either end of the card to place a wreath in the middle. 

Sunny Studio Stamps: Stitched Oval Dies Happy Owlidays Christmas Card by Kavya

Then, I stamped a bunch of images from Happy Owlidays and colored them using alcohol markers and added some extra details using white gel pen. Finally, I heat embossed a sentiment from the same stamp set to finish off the card :) 

That’s it! I hope you liked this fun card :) Happy Crafting!

-----------------------------------------------

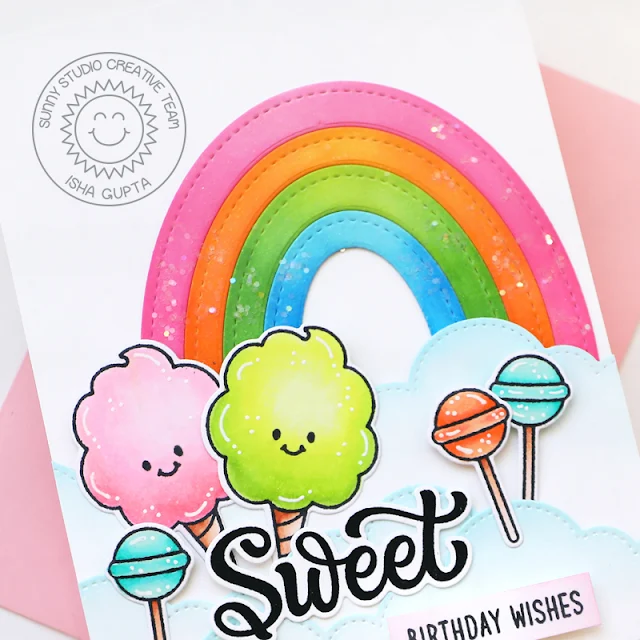
Hello everyone, Isha here! Today I am featuring our Stitched Oval 2 dies with a fun and sweet rainbow card. I created the rainbow as this die created perfect layers for my liking.

Sunny Studio Stamps: Stitched Oval Dies Slimline Dies Candy Shoppe Birthday Card by Isha Gupta

I started by die-cutting the oval layers using white cardstock. I then sponged them using distress oxide (picked raspberry, kitsch flamingo, spiced marmalade, mowed lawn, salty ocean) inks. Apply spectrum noir clear sparkle. Adhere some chunky glitter to the rainbow. Adhere to a white card base.

Die-cut some clouds using the Slimline Nature Borders die. Sponge tumbled glass distress oxide ink to the edges. Adhere to the card using 3d foam.

Sunny Studio Stamps: Stitched Oval Dies Slimline Dies Candy Shoppe Birthday Card by Isha Gupta

Stamp the images from the Candy Shoppe, color using Copic markers and die-cut using the coordinating dies. Add white details using a gel pen. Adhere to the card. Add the sentiment. To finish, add a clear sparkle pen to the candies.

Thank you for dropping by. Have a nice day!

Sunny Studio Supplies Used:

Candy Shoppe Stamps
Candy Shoppe Stamps
Shop at:
Sunny Studio
Candy Shoppe Dies
Candy Shoppe Dies
Shop at:
Sunny Studio
Happy Owlidays Stamps
Shop at:
Sunny Studio
Happy Owlidays Dies
Happy Owlidays Dies
Shop at:
Sunny Studio
Slimline Nature Borders
Shop at:
Sunny Studio
Scalloped Oval Mat 3 Dies
Shop at:
Sunny Studio
Stitched Oval 2 Dies
Shop at:
Sunny Studio
Sweater Weather Paper
Shop at:
Sunny Studio