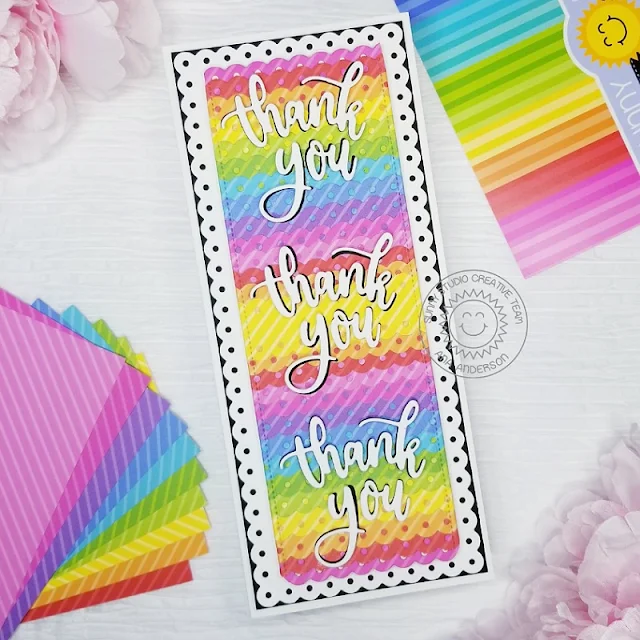
Hi crafties and welcome back! It’s Ana here today with a slimline thank you card featuring Slimline Scalloped Frame dies, Slimline Basic Border dies and Sleek Stripes paper.
I was in the mood for a rainbow card today and decided to use some beautiful patterned papers from the newest release, in combination with new Slimline dies. For this design I used all colors (except for black), from Sleek Stripes paper pack and cut each piece with scalloped border die (from Slimline Basic borders die set). Since the dies are so long, I was able to cut three borders at once, so the process of die cutting actually didn’t take that long.
I
used stitched panel die (Slimline Scalloped Frames)
to cut a piece of cardstock, then started to adhere patterned paper pieces,
starting with the yellow in the middle. Once all the pieces were adhered, I “trimmed”
the excess using the same die.
I die cut thank you word 6 times (3 white and 3 black) and added them to the panel. Finally, I die cut the background scalloped panel which I backed with black cardstock to match the letters.
I just love the way this
card turned out! That bright rainbow background just makes me so happy. Thank
you so much for stopping by, I hope you have a fantastic day!
----------------------------------------------
Hey friends,
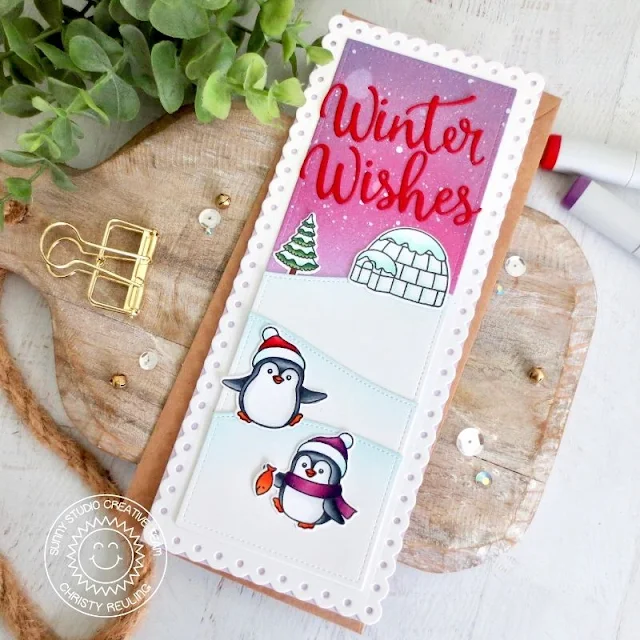
it's Christy here with a fun slimline card! I stamped out images from Penguin Pals and Winter Scenes and colored them with Copic markers, then trimmed them out
with the matching dies.
For the background, I die cut the center rectangle from the Slimline Scalloped Frame out twice from Bristol Smooth Surface Cardstock. On the first, I created a night sky by blending on Distress Ink in Shaded Lilac, Seedless Preserves, and Dusty Concord. The second I die cut into three pieces using the Slimline Nature Borders, and sponged on a little Tumbled Glass at the top of each hillside. I also cut the scalloped border out of white cardstock and made a slimline card base out of light purple.
To assemble, I adhered the scalloped frame to the card base, then added the background panel, and the three snowy hillsides. I adhered my images with liquid glue. As a finishing touch, I die cut the scripty word sentiment from the Layered Snowflake Frame out of red cardstock and added that to the top of my scene.
If you'd like to see how this card came together, check out the video tutorial on my YouTube channel, Christy Gets Crafty.
In honor or National Card Making Day on Saturday we're having a little fall flash sale. Use discount code "WCMD2020" at checkout to save 25% off these 21 fall favorites through tonight at Midnight PST. Limit one promo code per order.
Sunny Studio Supplies Used:
 Layered Snowflake Frame Shop at: Sunny Studio |
 Slimline Basic Borders Shop at: Sunny Studio |
 Slimline Nature Borders Shop at: Sunny Studio |
 Slimline Scalloped Frame Shop at: Sunny Studio |
 Penguin Pals Stamps Shop at: Sunny Studio |
 Penguin Pals Dies Shop at: Sunny Studio |
 Winter Scenes Stamps Shop at: Sunny Studio |
 Winter Scenes Dies Shop at: Sunny Studio |
 Sleek Stripes Paper Shop at: Sunny Studio | |

