Monday, November 4, 2019

Season's Greetings Cards with Eloise and Leanne

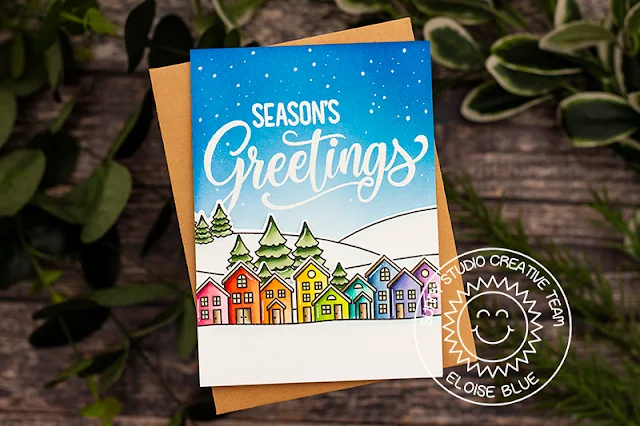
Hi everyone, Eloise here and today I’m using the Season’s Greetings Stamp Set along with Scenic Route to create a Christmas card.

Sunny Studio Stamps: Season's Greetings Scenic Route Winter Holiday Card by Eloise Blu

I started off with ink blending some blue Distress Inks onto a white piece of cardstock. I then white heat embossed the large ‘Season’s Greetings’ from the stamp set onto the piece also.

(Copic Markers Used: BV01, BV02, BV04, BV08 / V01, V12, V15, V17 / BG10, BG11, BG13, BG49 / RV10, RV13, RV25, RV19 / R12, R14, R17, R27 / YR00, YR02, YR14, YR18 / Y11, Y13, Y15, Y19 / YG01, YG03, YG23, YG17 / B91, B93, B95, B97 / YG61, YG63, YG67, G28 / B000, B000, 0 / Y00 / E41, E42, E43, E44)

Sunny Studio Stamps: Season's Greetings Scenic Route Winter Holiday Card by Eloise Blu

Next I stamped out a couple of the images from Scenic Route Stamp Set and coloured them in with Copic Markers. Once they were coloured, I cut them out. I then added foam tape onto the backs and adhered them down onto the bottom of the panel. Lastly, I added white gel pen details onto the images and added snow into the sky.

Thanks so much for stopping by today and I’ll see you next week.

----------------------------------------------

Hello everyone and happy November! Leanne here, and I have a mix and match card design to share today. I've mixed old and new stamps to create a little holiday scene with a bold greeting.

Sunny Studio Stamps: Season's Greetings Gleeful Reindeer Santa Claus Lane Christmas Card by Leanne West

I started with an A2 size card base. I used Chipped Sapphire Distress Oxide ink to color the top half of the card front. I generously splattered the sky with thinned white paint. I then white heat embossed Merry Christmas from the Season's Greetings stamp set. I also added a few heat embossed snow flakes to the sky. I stamped the additional greeting ... "have a magical holiday" which is from the Santa Claus Lane set. 

Sunny Studio Stamps: Season's Greetings Gleeful Reindeer Santa Claus Lane Christmas Card by Leanne West

I Copic colored images from Santa Claus Lane and Gleeful Reindeer to build my little holiday scene. I created two layers of snowy hills from glitter card stock using the Woodland Border dies. Instead of having the hills go all the way down to the bottom of the card, I decided to add a decorative border. I used a stamp from the Background Basics set to create the diagonal red and white stripes and that completed my card.  

Sunny Studio Supplies Used:

Gleeful Reindeer Dies
Shop at:
Sunny Studio
Gleeful Reindeer Stamps
Shop at:
Sunny Studio
Background Basics Stamps
Shop at:
Sunny Studio
Season's Greetings Stamps
Shop at:
Sunny Studio
Season's Greetings Dies
Shop at:
Sunny Studio
Santa Claus Lane Stamps
Shop at:
Sunny Studio
Santa Claus Lane Dies
Shop at:
Sunny Studio
Scenic Route Stamps
Scenic Route Stamps
Shop at:
Sunny Studio
Scenic Route Dies
Scenic Route Dies
Shop at:
Sunny Studio

Saturday, November 2, 2019

Sunny Saturday Share: Customer Cards


Hey everyone, how are you all doing this weekend? I'm so excited to be popping in today with a Sunny Saturday Share. There have been so many amazing cards popping up on Instagram that have made my jaw drop so I couldn't wait to share them with all of you! 

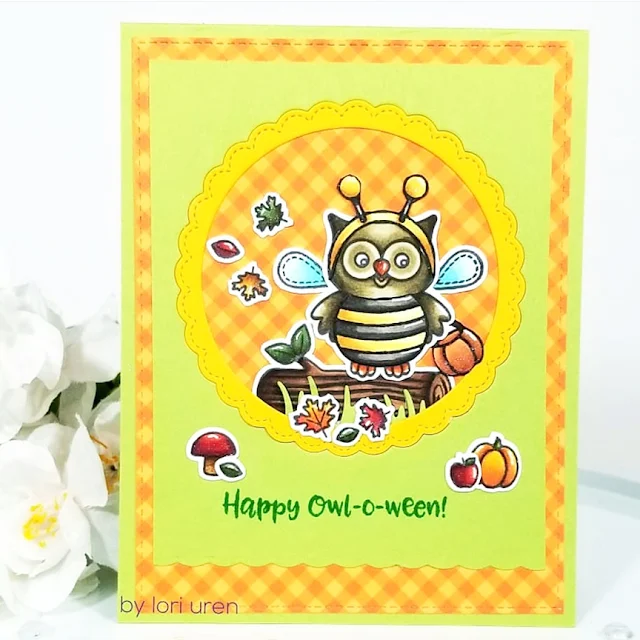
Happy Owl-o-ween and Fancy Frame Circle dies card by Lori Uren

Sunny Saturday Shares: Happy Owl-o-ween Customer Card by Lori Uren

Elegant Leaves card by Toni Maddox

Sunny Saturday Shares: Elegant Leave Customer Card by Toni Maddox

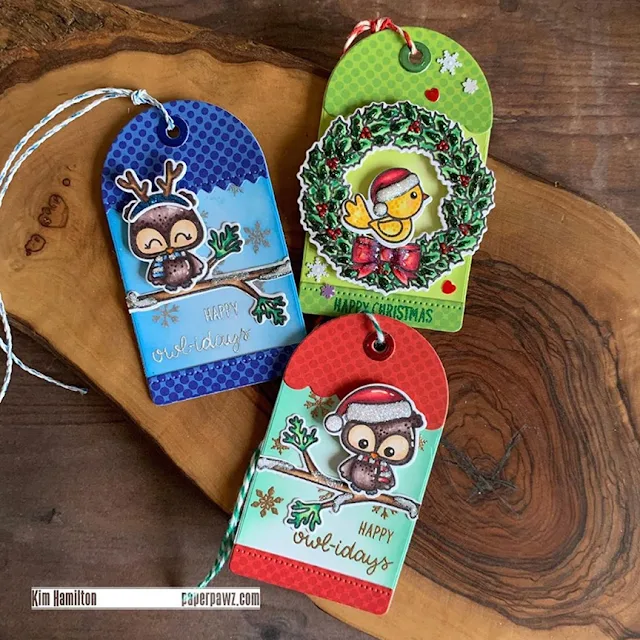
Happy Owlidays and Build-A-Tag #1 dies tags by Kimberley Hamilton

Sunny Saturday Shares: Happy Owlidays Build-A-Tag dies Customer Card by Kimberly Hamilton

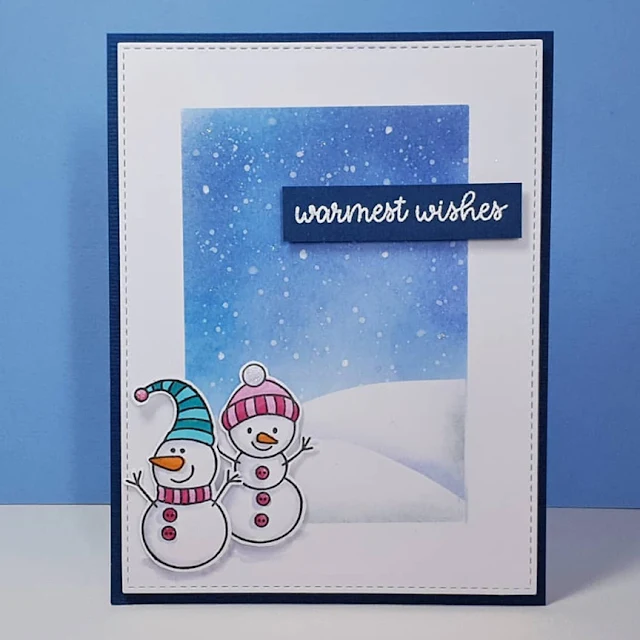
Feeling Frosty and Scalloped Tag dies tags by Amy Tsuruta


Sunny Saturday Shares: Feeling Frosty Scalloped Tag dies Customer Card by Amy Tsuruta

Feeling Frosty card by Christine


Sunny Saturday Shares: Feeling Frosty Customer Card by Christine

Merry Mice and Sliding Window dies card by Anita Madden


Sunny Saturday Shares: Merry Mice Sliding Window Dies Customer Card by Anita Madden

Merry Mice card by Caren Bartholomew


Sunny Saturday Shares: Merry Mice Customer Card by Caren Bartholomew

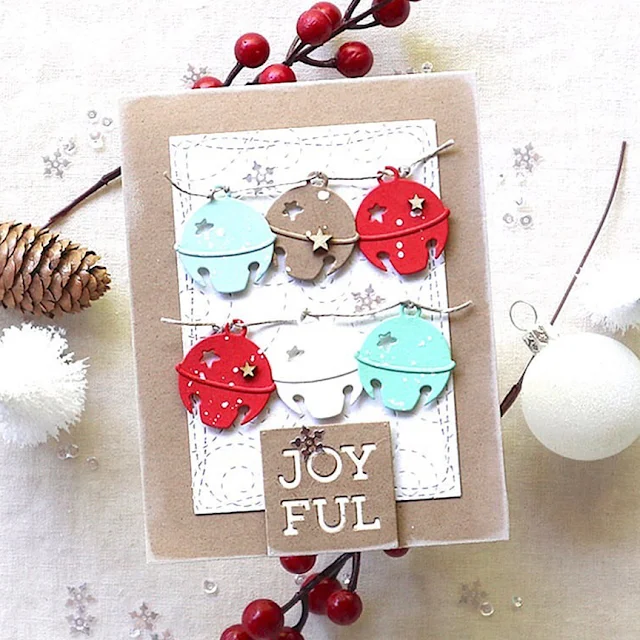
Silver Bells dies card by Yoonsun Hur


Sunny Saturday Shares: Christmas Garland Frame dies Customer Card by Jenn Brown

Christmas Garland Frame dies card by Jenn Brown


Sunny Saturday Shares: Christmas Garland Frame dies Customer Card by Jenn Brown

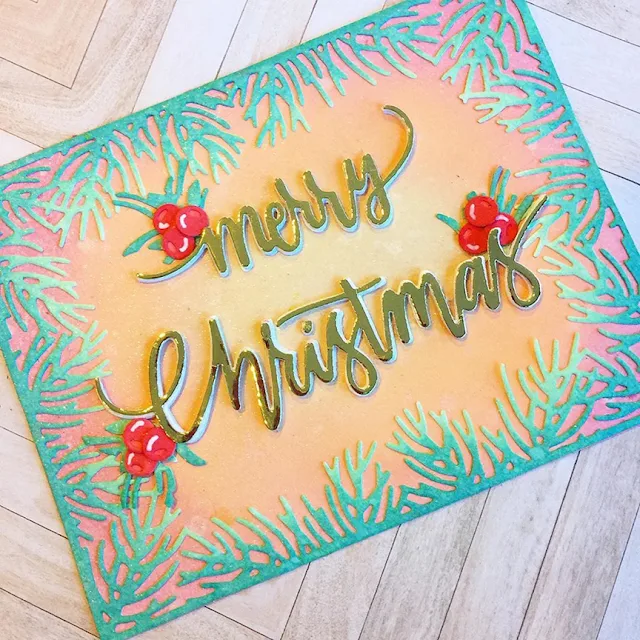
Season Greetings and Layered Poinsettia dies card by Judy Tuck


Sunny Saturday Shares: Season Greetings Layered Poinsettia dies Customer Card by Judy Tuck

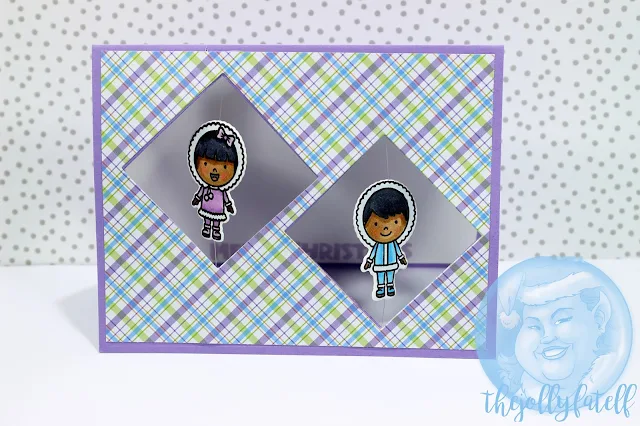
Eskimo Kisses card by Misty


Sunny Saturday Shares: Eskimo Kisses Customer Card by Misty

Thank you for sharing all these fabulous ideas with us! I hope you will continue to share your gorgeous projects with us--It always makes my day to see them. You can tag us on instagram with the hashtag #sunnystudiostamps or share your projects with us in our flickr group or on our facebook page. ☺


Sunny Studio Supplies Used:

Happy Owl-o-ween Dies
Shop at:
Sunny Studio
Happy Owl-o-ween Stamps
Shop at:
Sunny Studio
Silver Bells Die
Silver Bells Die
Shop at:
Sunny Studio
Fancy Frames-Circle Dies
Shop at:
Sunny Studio
Sliding Window Dies
Sliding Window Dies
Shop at:
Sunny Studio
Happy Owlidays Stamps
Shop at:
Sunny Studio
Happy Owlidays Dies
Happy Owlidays Dies
Shop at:
Sunny Studio
Build-A-Tag #1 Dies
Build-A-Tag #1 Dies
Shop at:
Sunny Studio
Elegant Leaves Stamps
Shop at:
Sunny Studio
Elegant Leaves Dies
Elegant Leaves Dies
Shop at:
Sunny Studio
Season's Greetings Stamps
Shop at:
Sunny Studio
Season's Greetings Dies
Shop at:
Sunny Studio
Feeling Frosty Stamps
Shop at:
Sunny Studio
Feeling Frosty Dies
Feeling Frosty Dies
Shop at:
Sunny Studio
Merry Mice Stamps
Merry Mice Stamps
Shop at:
Sunny Studio
Merry Mice Dies
Merry Mice Dies
Shop at:
Sunny Studio
Layered Poinsettia Dies
Shop at:
Sunny Studio
Scalloped Tags-Square
Shop at:
Sunny Studio
Christmas Garland Frame
Shop at:
Sunny Studio

Friday, November 1, 2019

Santa Claus Lane Cards with Rachel and Candice

Hello everyone! It's Rachel here and I am sharing a 3D card with you today that focuses on the new Santa Claus Lane Stamp Set. I love the added depth that a box card brings, and I thought it would be fun to create a cozy little scene with Santa delivering his gifts on Christmas Eve.

Sunny Studio Stamps: Santa Claus Lane Christmas Interactive Card by Rachel Alvarado

To start, I stamped all of my images from the Santa Claus Lane Stamp Set with Memento Tuxedo Black Ink onto some Neenah Solar White 110lb card stock. I love the heavy weight of this card stock, especially for box cards, because my stamped images tend to stay standing upright instead of bending or flopping over as lighter weight card stocks would do. I colored all of my images with Copic Markers and then used the coordinating Santa Claus Lane Dies to cut them out.

Sunny Studio Stamps: Santa Claus Lane Christmas Interactive Card by Rachel Alvarado

I used a paper trimmer, one sheet of white card stock, scissors, adhesive, a scoring board, and some patterned paper to create an A2 sized box for my card base. For my patterned paper, I used some scrap pieces from both the Holiday Cheer 6x6 and Very Merry 6x6 Paper Pads. I adhered all of my images to the inside shelves of my box using some liquid adhesive. Lastly, I heat embossed my sentiment onto some black card stock with Fine Detail White Embossing Powder. I then used my paper trimmer to trim these down to size and attached them to the front flap of my card.

I hope you enjoyed my card today! Once folded, it fits easily into a standard A2 sized envelope. Thank you all so much for stopping by! Have a wonderful day!

------------------------------------------------------------

Welcome back my crafty friends! Candice with you today sharing a film strip of Santa caught on Christmas Eve! I only used the one Santa Claus Lane stamp set to create all the scenes! I love that Sunny Studio Stamps are always packed with lots of accessories.

Sunny Studio Stamps: Santa Claus Lane Fall Flicks Filmstrips Dies Christmas Card by Candice Fisher

For my film magic I used a few Sunny Studio products:
I began my card by creating the 8 1/2 x 3 1/2 card base which fits nicely into the size 9A envelopes. First, I made the film strip by die cutting multiples out of thick black cardstock and layered for a sturdy strip, lining up at the ends to make one large strip. I then trimmed the backgrounds using patterns in the Very Merry pack and glued to the film strips.

Sunny Studio Stamps: Santa Claus Lane Fall Flicks Filmstrips Dies Christmas Card by Candice Fisher

Next, I stamped all the images from the Santa Claus Lane stamp set, colored with Copic markers, and cut out with the coordinating dies. I then adhered them into the film strips, popping up some for dimension. Lastly, I stamped the sentiment and trimmed to fit and pop dotted on the card.

I would love to see what you could create using just one set from Sunny Studio Stamps and share with us on IG by tagging #sunnystudiostamps or sharing on the Sunny Studio Stamps FB page!

Sunny Studio Supplies Used:

Fall Flicks Filmstrip Dies
Shop at:
Sunny Studio
Holiday Cheer 6x6 Paper
Shop at:
Sunny Studio
Very Merry 6x6 Paper
Shop at:
Sunny Studio
Santa Claus Lane Stamps
Shop at:
Sunny Studio
Santa Claus Lane Dies
Shop at:
Sunny Studio