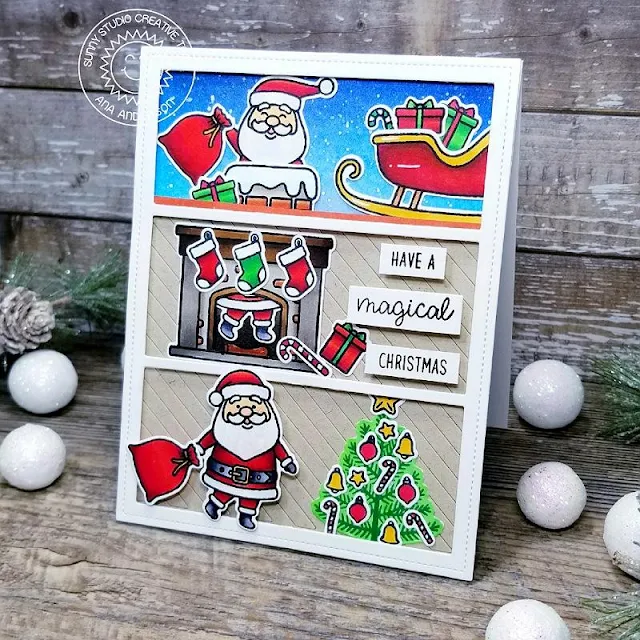
Hello everyone!! It’s Ana here today with a card featuring
super adorable Santa Claus Lane stamps and dies from the newest 2019 holiday release.
I started with stamping, coloring and cutting the images from
the stamp set. I decided to create 3 little scenes with Santa coming through
the chimney and bringing presents. I used Comic Strip Everyday Dies which
I altered to create 3 identical windows for my scenes. Comic Strip Everyday
Dies cut 5 windows – I used scissors to cut the partitions and created a custom
3 widow die cut.
I started working on my background next. For the sky I used Chipped Sapphire and Black Soot distress inks then added white splatter for the falling snow.
For the bottom light brown wall backgrounds I die cut kraft cardstock using Frilly Frames Stripes Dies. To create the look of wood planks I left all die cuts in place and adhered them all as one piece.
Once the background panels were completed, I added comic strip frame popping it up with craft foam. I adhered the images then added the sentiment (from Santa Claus Lane Stamps) and my little Christmas scene was finished.
Thank you so much for stopping by today! Until next week I wish you happy crafting!
-----------------------------------------------
Hi there and happy Wednesday! Franci here with you and I'm so excited I can finally start showing you all the projects I made/ I'm making (I love this release so much I can't stop creating!!) with the new Sunny Studio products. Today's card is a Christmas traditional card with Santa, lots of presents and a little darling snowman.
Awww.. how sweet and festive is this? I love love, looove making Christmas/ winter projects as many of you may know and all these new goodies make me so happy!
First of all I created my card base out of white cardstock and I covered the front with this gorgeous new patterned paper from the new Very Merry 6x6 Paper pack. Then I stamped my snowy landscape from the Scenic Route stamp set, I colored it with my Copics, die cut it with its coordinated dies, trimmed to size and glued it down to my card.
Then I stamped, colored and die cut more images from all these new sets: Santa Claus Lane + coordinated dies, Feeling Frosty + coordinated dies and Hog and Kisses + coordinated dies. I assembled my little scene and I glued everything down with a combo of liquid glue and foam tape.
I
love having the sentiment in a speech bubble here, seems like my images are
having fun chit chatting about Holidays! And look at that background moon,
it's not the photo guys, I'm telling you, it seems like it's shining for
real!! Finally I added lots of details with a white gel pen to all my
images plus rosy cheeks as I usually do :)
Hope you like my Christmas card today and thanks a lot for stopping by!
Hope you like my Christmas card today and thanks a lot for stopping by!
Sunny Studio Supplies Used:
 Comic Strip Everyday Dies Shop at: Sunny Studio |
 Frilly Frames Stripes Die Shop at: Sunny Studio |
 Very Merry 6x6 Paper Shop at: Sunny Studio |
 Santa Claus Lane Stamps Shop at: Sunny Studio |
 Santa Claus Lane Dies Shop at: Sunny Studio |
 Feeling Frosty Stamps Shop at: Sunny Studio |
 Feeling Frosty Dies Shop at: Sunny Studio |
 Scenic Route Stamps Shop at: Sunny Studio |
 Scenic Route Dies Shop at: Sunny Studio | |
 Hogs & Kisses Stamps Shop at: Sunny Studio |
 Hogs & Kisses Dies Shop at: Sunny Studio |


