Saturday, March 9, 2019

Guest Designer Spotlight: Cards with Wanda Guess

Hi everyone! Wanda Guess here! I'm very happy and excited to be the guest designer today on the Sunny Studio Blog! I'm always delighted to work with the beautiful and fun stamps and dies from Sunny Studio! They are some of the faves in my craft room for sure. For today's post I combined a bunch of different stamp sets and created two cards. One is super bright and cute, and the other is more sophisticated with a neutral palette. I hope you enjoy my projects. Please visit me on my blog sometime! You can find me at A Blog Called Wanda! Let's get to the projects!

Sunny Studio Stamps: Love Monkey Staggered Circles Everything's Rosy Birthday Card Well Wishes Card by Wanda Guess

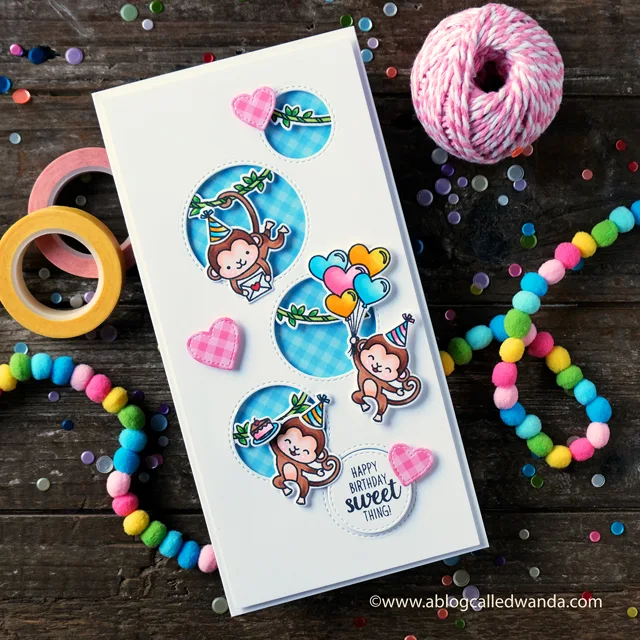
First up today is a super fun birthday card with those adorable new monkeys! I love them! I stamped and die cut out a bunch of monkeys and vines. I also made them some accessories like cake and party hats! I used the Purrfect Birthday stamp set for those add-ons. 

Sunny Studio Stamps: Love Monkey Staggered Circles Everything's Rosy Birthday Card Well Wishes Card by Wanda Guess

Then, for the sentiment I used the Two Scoops stamp set. Really, when I make cards, I love to mix and match to create my own unique creation. This is a long card - measuring 8" x 4". I love the Staggered Circles die cut and cut that out of a white panel. 

Sunny Studio Stamps: Love Monkey Staggered Circles Everything's Rosy Birthday Card Well Wishes Card by Wanda Guess

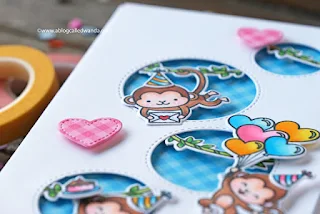
I backed the circles with beautiful blue gingham paper. I had fun coloring everything with my Copics in shades of blue, yellow and pink. Who wouldn't want to party with these guys? The top white layer with the circles was mounted to the card using foam tape. 

Sunny Studio Stamps: Love Monkey Staggered Circles Everything's Rosy Birthday Card Well Wishes Card by Wanda Guess

Then I attached the monkeys and vines with foam tape also. Just the right amount of dimension, but not too much that it won't fit into an envelope. 

Sunny Studio Stamps: Love Monkey Staggered Circles Everything's Rosy Birthday Card Well Wishes Card by Wanda Guess

My second project is a card made with lots of neutral colors and the gorgeous Everything's Rosy stamp set. I also used the beautiful Quilted Hearts embossing folder and some brown gingham. This card is an A2 size with a kraft card base. 

Sunny Studio Stamps: Love Monkey Staggered Circles Everything's Rosy Birthday Card Well Wishes Card by Wanda Guess

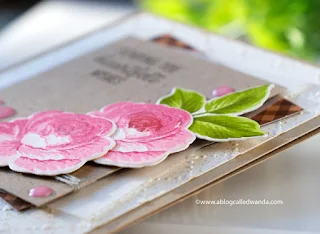
The flowers were stamped onto cream cardstock. The embossed background is also on cream cardstock. I layered gingham, vellum and kraft for my focal point of the card. I wrapped the kraft layer with pretty natural twine. 

Sunny Studio Stamps: Love Monkey Staggered Circles Everything's Rosy Birthday Card Well Wishes Card by Wanda Guess

I used gold paint to splatter gold flecks onto the cream embossed layer and the small kraft layer. Just a bit of added elegance. I stamped the roses using my MISTI in dark pink and pretty green shades. The sentiment is from the Happy Harvest stamp set! 

Sunny Studio Stamps: Love Monkey Staggered Circles Everything's Rosy Birthday Card Well Wishes Card by Wanda Guess

See - you don't have to only use that set for autumn! The roses and leaves were mounted onto the card with foam tape. I added a few sparkly pink enamel dots to finish it off. 

Big thanks to Mendi for having me as a guest! Have a wonderful day everyone! 

Sunny Studio Supplies Used:

Two Scoop Stamps
Two Scoop Stamps
Shop at:
Sunny Studio
Purrfect Birthday Stamps
Shop at:
Sunny Studio
Purrfect Birthday Dies
Shop at:
Sunny Studio
Window Trio- Circles Die
Shop at:
Sunny Studio
Gingham Jewel Tones 6x6 Paper
Shop at:
Sunny Studio
Happy Harvest Stamps
Shop at:
Sunny Studio
Gingham Pastels 6x6 Paper
Shop at:
Sunny Studio
Quilted Hearts Embossing
Shop at:
Sunny Studio
Love Monkey Stamps
Love Monkey Stamps
Shop at:
Sunny Studio
Love Monkey Dies
Love Monkey Dies
Shop at:
Sunny Studio
Everything's Rosy Stamps
Shop at:
Sunny Studio
Everything's Rosy Dies
Shop at:
Sunny Studio
Staggered Circles Die
Shop at:
Sunny Studio

Friday, March 8, 2019

Miss Moo Cards with Lexa and Rachel

Hi everyone! Lexa here today with a card that featuring Miss Moo Stamps and the coordinating dies. Couple weeks ago I saw the tutorial video on Jennifer McGuire's YouTube channel how to create a side pull on card. It's so easy to make and pretty fun too. So I try to create one for today's blog.

Sunny Studio Stamps: Miss Moo Barnyard Buddies Build-A-Tag Background Basics Fancy Frames Punny Card by Lexa Levana

Here's how the card looks like when it's closed. It looks like a regular 4.25"x5.5" card, but actually the message is on the right side of the card.

Sunny Studio Stamps: Miss Moo Barnyard Buddies Build-A-Tag Background Basics Fancy Frames Punny Card by Lexa Levana

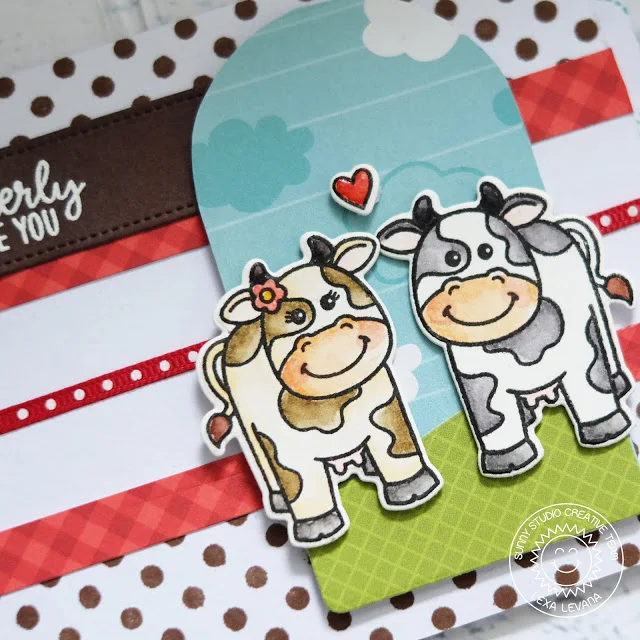
First, I stamp the cows from Miss Moo and Barnyard Buddies with Versafine black ink and watercolor them with Distress Markers. After I finished with coloring I use the coordinating dies and run them through die cutting machine. For the scene background I use Build-A-Tag #1 Dies and cover the top part which has a hole on it with clouds patterned paper. 

Sunny Studio Stamps: Miss Moo Barnyard Buddies Build-A-Tag Background Basics Fancy Frames Punny Card by Lexa Levana

I white embossed "I udderly adore you" sentiment on a piece of brown cardstock and use the fishtail banner dies from Fancy Frames Rectangle Dies. At the top and bottom part of my card base, I stamped brown polka dots using Background Basics Stamps. I keep the color coordinate red, brown and white to make the little scene pops out more. 

Sunny Studio Stamps: Miss Moo Barnyard Buddies Build-A-Tag Background Basics Fancy Frames Punny Card by Lexa Levana

Here how it looks like when you fully pull out the side tab. Take a look at these adorable cows. I add glossy accent to the red heart. 

Thank you so much for stopping by today. I hope you like today's card and have a wonderful day!

-------------------------------------------------------

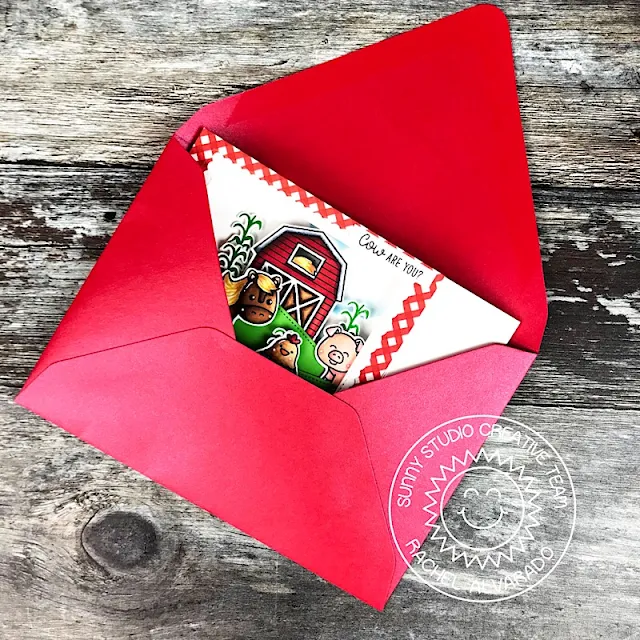
Hello everyone! Rachel here and I have a card to share with you today featuring the new Miss Moo Stamp Set combined with the previously released Barnyard Buddies Set.  The cute little Miss Moo Cow goes perfectly with her farm friends from this other set.

Sunny Studio Stamps: Miss Moo Barnyard Buddies Woodland Borders Fancy Frames Punny Card by Rachel Alvarado

I created an A6-sized Shadow Box Card that measures at 4 1/2" x 6 1/4" when folded. To start, I cut 2 pieces of white card stock to 7 3/4" x 4 1/2". I then scored each piece along the long side at 1 1/5" & 6 1/4". These two pieces will be the front and back of your shadow box. Simply choose whatever shape you want to die cut into the front piece. I used a square-shaped die to cut my card window.

Sunny Studio Stamps: Miss Moo Barnyard Buddies Woodland Borders Fancy Frames Punny Card by Rachel Alvarado

I stamped all of my images with Copic friendly black ink, colored with Copics and then cut them out with their coordinating dies. I added some grassy hills on the inside of the card using the Woodland Borders Die Set. These grassy strips measured at 5 1/2" (varying heights) and were scored along the 5.5" side at 3/8" and 5 1/8" prior to die cutting my hilly border.


Sunny Studio Stamps: Miss Moo Barnyard Buddies Woodland Borders Fancy Frames Punny Card by Rachel Alvarado


I attached all of my images with liquid adhesive to the inside of the card and used 3D foam adhesive squares to the images on the outside.

Sunny Studio Stamps: Miss Moo Barnyard Buddies Woodland Borders Fancy Frames Punny Card by Rachel Alvarado

This card collapses and fits perfectly into an A-6 sized envelope but fits nicely into a 5x7 as well (shown above).

I hope you enjoyed my card today! I appreciate you taking the time to stop by. Have a wonderful day!

Sunny Studio Supplies Used:

Barnyard Buddies Dies
Shop at:
Sunny Studio
Barnyard Buddies Stamps
Shop at:
Sunny Studio
Fancy Frames- Rectangles
Shop at:
Sunny Studio
Background Basics Stamps
Shop at:
Sunny Studio
Woodland Borders Dies
Shop at:
Sunny Studio
Build-A-Tag #1 Dies
Build-A-Tag #1 Dies
Shop at:
Sunny Studio
Miss Moo Stamps
Miss Moo Stamps
Shop at:
Sunny Studio
Miss Moo Dies
Miss Moo Dies
Shop at:
Sunny Studio

Thursday, March 7, 2019

Botanical Backdrop Cards with Vanessa and Anja

Hi there! Vanessa here today with a soft pastel card using the Botanical Backdrop Die. I am so ready for spring and have been enjoying a few warmer days! So I was in the perfect mood for creating this.

Sunny Studio Stamps: Botanical Backdrop Hello Word Die Hello Card by Vanessa Menhorn

I started with a card base made from watercolor paper and inked it with various watercolors. Then I added ink droplets and let it dry. Now I die-cut the leafy frame and colored the leaves. After I had adhered the frame to the card, I die-cut the flowers from purple cardstock, bend the petals upwards, added a white pearl to the center and adhered the flowers to the card.

Sunny Studio Stamps: Botanical Backdrop Hello Word Die Hello Card by Vanessa Menhorn

I die-cut the Hello Word Die from watercolor paper, inked it, layered it with a word die-cut from purple cardstock and adhered it to the card. Finally, I added clear droplets.

Have you been enjoying spring days in your part of the world? I hope you'll get plenty soon! Thanks for visiting today :)

-------------------------------------------------

Hi everyone, Anja here and today I'm back with a birthday card that uses the beautiful Botanical Backdrop Die.

Sunny Studio Stamps: Botanical Backdrop Everyday Greetings Birthday Card by Anja Bytyqi

I started with a white A2 card base and die cut this leafy frame from two shades of purple cardstock. I snipped the lighter frame apart to fill in the empty spaces behind the darker frame.

Next, I created a reversed mask of the die by cutting it from masking paper. I adhered it to a panel of Strathmore Bristol Smooth cardstock and sponged on the Distress Oxide Inks Milled Lavender and a little bit of Wilted Violet. I also added tiny ink splatters with a paint brush.

Sunny Studio Stamps: Botanical Backdrop Everyday Greetings Birthday Card by Anja Bytyqi

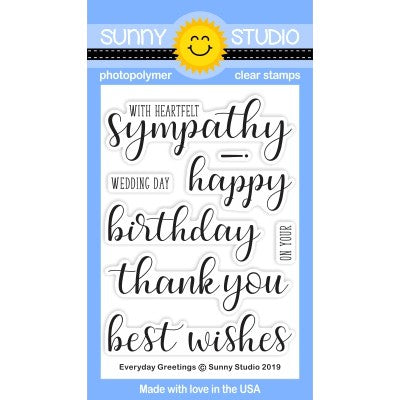
When everything was completely dry, I combined some sentiments from the Everyday Greetings set and stamped them in VersaMark Ink before heat embossing them with Ranger Liquid Platinum embossing powder. I adhered the layered frame to the panel and embellished the card with Sparkling Clear sequins. You can't really see it on the photo, but I also added some Nuvo Pale Periwinkle Jewel Drops.

Thank you so much for stopping by! See you next week!

Sunny Studio Supplies Used:

Hello Word Die
Hello Word Die
Shop at:
Sunny Studio
Botanical Backdrop Die
Shop at:
Sunny Studio
Everyday Greetings Stamps
Shop at:
Sunny Studio

Wednesday, March 6, 2019

Chubby Bunny Cards with Franci and Mona

Hello there and happy Wednesday! Franci here with you today, with a little Spring themed treat box :)

Sunny Studio Stamps: Chubby Bunny Sliding Window Dies Fancy Frames Hello Spring Card by Franci Vignoli

I looove these little cuties from the Chubby Bunny set, they are super adorable and perfect for Easter/Spring time, I can't help smiling every time I look at them! I decide to create a fun project today cause I needed a little treat box/ party favor idea and I'm so happy about how it turned out!

First of all I die cut the Sliding Window die twice out of lilac cardstock and I cut the "scored" sides with my trimmer. I also die cut the little window included in the set out of only one of the 2 pieces and from the side that does not have little tab attached.

Sunny Studio Stamps: Chubby Bunny Sliding Window Dies Fancy Frames Hello Spring Card by Franci Vignoli

I glued my little box together and added a little strip of green patterned paper from the Flirty Flowers paper to create the grass for my bunnies to stand on. I stamped, colored and die cut all the images, added some details with a white gel pen and glued them down to the grass. I think you could also add a little piece of acetate behind the window so your critters have more stability.

Finally I die cut a little banner using the Fancy Frames Rectangle dies out of white cardstock and I stamped a "Hello Spring" sentiment, I glued it down too and added a little clear bag with lots of candies :) It's cute, isn't it?! 

Can't wait to create more and also try to modify this to make also a little shadow box! Hope you like it too and thanks for stopping by today, have a lovely day! 

------------------------------------------------------

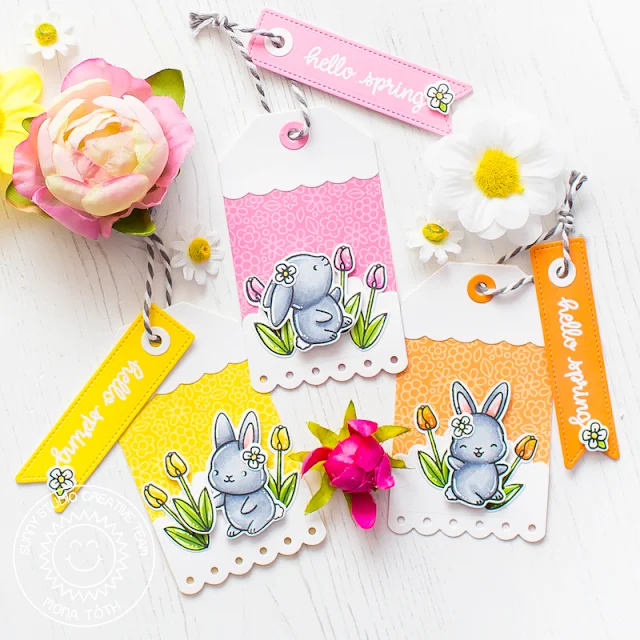
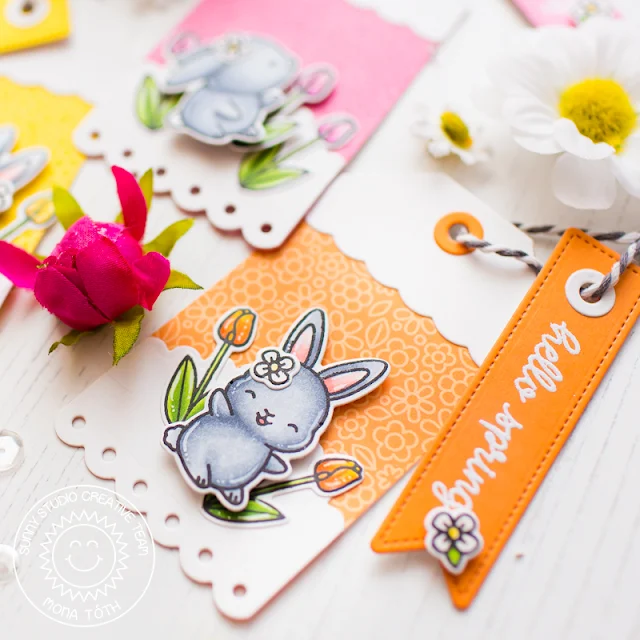
Hi crafty friends! It's Mona here, today I am showing you a pretty, but easy tag tutorial, featuring the Chubby Bunny Stamp Set.

Sunny Studio Stamps: Chubby Bunny Fancy Frames Spring Greetings Build-A-Tag Hello Spring Card by Mona Toth

I started the cardmaking with Stamping and Coloring. I stamped the cute bunny images from the Chubby Bunny Stamp Set and I also stamped tulip images from the Spring Greetings Stamp Set


Sunny Studio Stamps: Chubby Bunny Sliding Window Dies Fancy Frames Spring Greetings Build-A-Tag Hello Spring Card by Mona Toth

I colored the images with Copic markers.

Sunny Studio Stamps: Chubby Bunny Sliding Window Dies Fancy Frames Spring Greetings Build-A-Tag Hello Spring Card by Mona Toth

(Used colors: 0, C0, C1, C3, C5, R20, R22 E0000; Y11, Y15, Y19; YR14, YR07; RV06, RV11, RV34, YG 01, YG03, YG17;)

Sunny Studio Stamps: Chubby Bunny Sliding Window Dies Fancy Frames Spring Greetings Build-A-Tag Hello Spring Card by Mona Toth

When I was done I started the Die-cutting process. I used the Build a Tag #2 Dies, the Fishtail Banner II Dies and the cute banner from the Fancy Frames Rectangle Dies and I made die-cuts. 


Sunny Studio Stamps: Chubby Bunny Sliding Window Dies Fancy Frames Spring Greetings Build-A-Tag Hello Spring Card by Mona Toth

You will need the following pieces for one tag, so if you want to make more like me you can chose more colors.

Sunny Studio Stamps: Chubby Bunny Sliding Window Dies Fancy Frames Spring Greetings Build-A-Tag Hello Spring Card by Mona Toth

There is one more step before you adhere everything together. I wanted to add more dimension to the tags so I run them through my Die-cut machine with the Fishtail Banner II Dies.

Sunny Studio Stamps: Chubby Bunny Sliding Window Dies Fancy Frames Spring Greetings Build-A-Tag Hello Spring Card by Mona Toth

In the end I added my heat embossed sentiment to the banner and put my tag together. Thank you very much for reading through my post, I hope that you have enjoyed it and I have inspired you! If you like my creations let's be friends on Instagram. :)

Sunny Studio Supplies Used:

Fishtail Banner II Dies
Shop at:
Sunny Studio
Fancy Frames- Rectangles
Shop at:
Sunny Studio
Sliding Window Dies
Sliding Window Dies
Shop at:
Sunny Studio
Build-A-Tag #2 Dies
Build-A-Tag #2 Dies
Shop at:
Sunny Studio
Flirty Flowers 6x6 Paper
Shop at:
Sunny Studio
Chubby Bunny Stamps
Chubby Bunny Stamps
Shop at:
Sunny Studio
Chubby Bunny Dies
Chubby Bunny Dies
Shop at:
Sunny Studio
Spring Greetings Stamps
Shop at:
Sunny Studio
Spring Greetings Dies
Shop at:
Sunny Studio