Monday, November 27, 2017

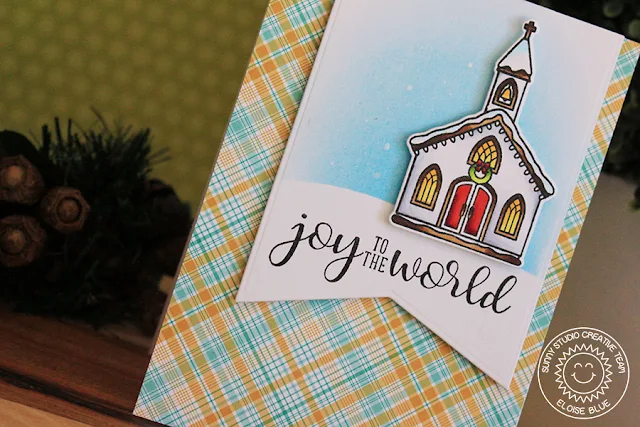
Christmas Chapel Banner Christmas Card with Eloise

Hi everyone, Eloise here and for today's card I'm going super simple using the Christmas Chapel stamp set along with the Fishtail Banners dies to create a Christmas Card.

Sunny Studio Stamps: Christmas Chapel Banner Christmas Card by Eloise Blue

To begin I stamped out the church from Christmas Chapel and coloured it in with Copic Markers. I then used the coordinating dies and cut it out. I then cut down a strip of watercolour cardstock and used the Fishtail Banners to create a banner at the bottom of the panel. Next, I masked off the bottom of the banner and ink blended some Tumbled Glass and Salty Ocean Distress inks over the top for the sky. I then removed the mask and stamped the 'Joy to the World' sentiment from Festive Greetings in black ink.

Sunny Studio Stamps: Christmas Chapel Banner Christmas Card by Eloise Blue

To finish up, I adhered the church to the banner panel with foam tape, and added some white dots using a gel pen in the background to add a little extra to it. I then used some plaid patterned paper from Lawn Fawn and adhered it to a white card base. Then I used foam tape at the back of the banner and popped it up onto the right hand side of the card.

Thanks for stopping by today and I'll catch you next time!

Sunny Studio Supplies Used:


Fishtail Banner Dies
Shop at:
Sunny Studio
Christmas Chapel Stamps
Shop at:
Sunny Studio
Christmas Chapel Dies
Shop at:
Sunny Studio
Festive Greetings Stamps
Shop at:
Sunny Studio

Today is also the final day to for our hurricane relief fundraiser. Last year with your help we were able to raise $1725 to help feed and educate 14 children in Haiti. Thank you for helping transform lives.  

As a thank you for helping us reach our goal this year you can get free shipping on orders over $25 and a free color word die with all orders. :)


Saturday, November 25, 2017

Single Layer Petite Poinsettia Card with Video Tutorial by Yana Smakula

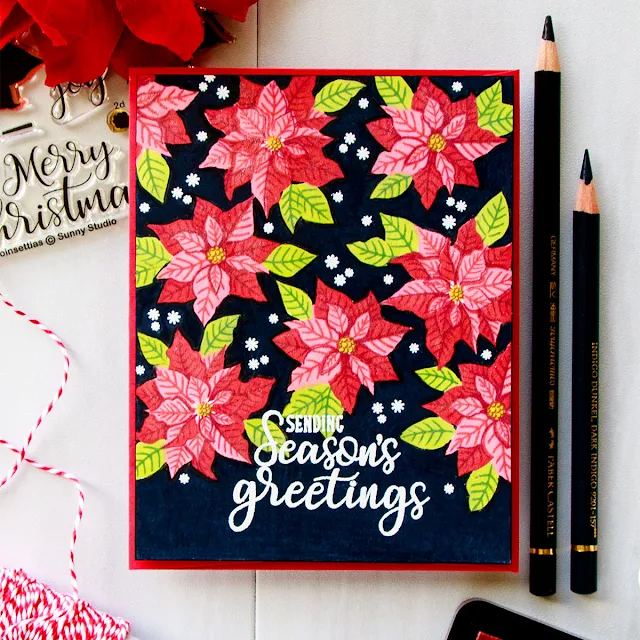
Hello, Sunny Studio fans! This is Yana Smakula and I am very excited to be a guest designer for the Sunny Studio Stamps blog and YouTube channel showing how to stamp a one layer mail friendly Holiday Card featuring a layered poinsettias on deep blue background. 

Single Layer Petite Poinsettia & Festive Greetings Christmas Card with Video Tutorial by Yana Smakula

I have created a video Tutorial that you can watch in on YouTube HERE.


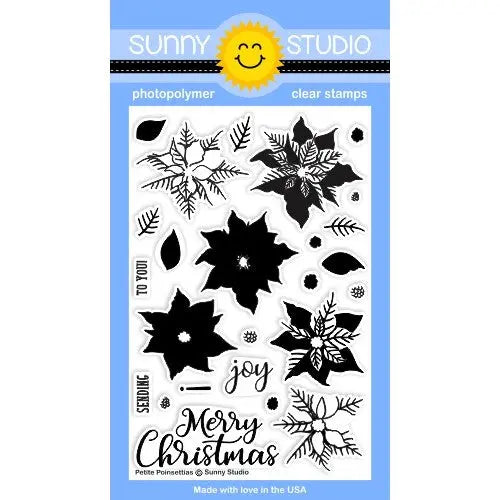
I started working on my project by stamping several poinsettias onto white cardstock panel cut to 4 ¼ x 5 ½”. I used beautiful images from the Petite Poinsettias stamp set and stamped them in 3 shades of red. This stamp set is not only well designed, but also well labeled. Each image is labeled with a number and a letter, there’s also a great layering chart available on the Sunny Studio website that will tell you how you need to position your images for perfect alignment, be sure to print it and store it with your stamp to always have it on hand.

Single Layer Petite Poinsettia & Festive Greetings Christmas Card with Video Tutorial by Yana Smakula

I added leaves next each of my flower (stamped them in 2 shades of green) and stamped flower centers in yellow and brown. Poinsettias come in many different colors so it might be a good idea to stamp these in pink, or light gray to make them appear white, light blue or even green. Don’t limit yourself to just traditional red and green. 

If you look closely you'll notice that my flowers are not perfectly aligned and that's okay. Little imperfections make our project that much more special, don't stress if you can't get perfectly align your images, they will look beautiful no matter what.

Single Layer Petite Poinsettia & Festive Greetings Christmas Card with Video Tutorial by Yana Smakula

After my stamping was done I moved onto coloring the background. The photo of my card shows that the card itself is done on black cardstock. The trick here is simple - I did my stamping on white (using dye ink), dye ink won't show up on black, so in order to get these vibrant colors I had to do stamping on white and use a coloring medium and color the background around the flowers black or deep blue. If you aren't a fan of a dark background like this you can either color it light gray or keep it white. I know not everybody likes black especially for the Holiday cards, so remember there are always options to go with another color.

Single Layer Petite Poinsettia & Festive Greetings Christmas Card with Video Tutorial by Yana Smakula

There are many different coloring mediums that can be used to color the background. You can use markers, like a black Copic markers, but make sure the ink you used to stamp your images will not bleed from coming in contact with the alcohol marker. 

I've been enjoying coloring with colored pencils and if you follow my blog and YouTube channel you've probably seen several coloring videos using pencils. While I usually use my pencils to color the object and do my coloring on a dark background I took a different  approach for this card and colored the background.

Single Layer Petite Poinsettia & Festive Greetings Christmas Card with Video Tutorial by Yana Smakula

I picked 2 pencils - Black and Dark Indigo. These are Polychromos pencils from Faber Castell, you can also use Prismacolor pencils for this kind of coloring. I first outlined images with a black pencil and next colored the white space using a dark blue. 

Finally, I heat embossed “Sending Season's' Greetings” sentiment from the Festive Greetings stamp set from Sunny Studio in white embossing powder onto bottom part of my panel and added a number of white snowflakes from the Christmas Home set in between the flowers to imitate snow. I adhered my stamped and colored panel onto an S2 side folding card base made out of white cards. 

I wanted to thank Sunny Studio and Mendi for inviting me to be a guest designer. It’s been tons of fun! I hope you feel inspired to create and will give this idea a try. I'd love for you to tag me and Sunny Studio on social media if you make something inspired by this tutorial.

Have fun stamping! 

Sunny Studio Supplies:

Christmas Home Stamps
Shop at:
Sunny Studio
Festive Greetings Stamps
Shop at:
Sunny Studio
Petite Poinsettias Stamps
Shop at:
Sunny Studio

Other Supplies:
  • Neenah 110LB Solar White Cardstock
  • Simon Says Stamp Ink in: Rose Apple, Lipstick Red, Merlot, Green Apple, Evergreen, Sunshine, Dark Chocolate. 
  • Faber Castell Polychromos Pencils in Black & Dark Indigo
  • Versamark Watermark Ink Pad
  • Anti Static Powder Tool
  • Hero Arts White Embossing Powder
  • Heat Tool
  • Adhesive

Friday, November 24, 2017

Silver Bells Poinsettias Background Christmas Card with Lexa

Hello crafty friends! Lexa here today with another Christmas card inspiration, for today's card I will be highlighting the Silver Bells Dies from Sunny Studio Stamps. The details are so pretty and it goes well with so many stamp sets.

Sunny Studio Stamps: Silver Bells Poinsettias Background Christmas Card by Lexa Levana

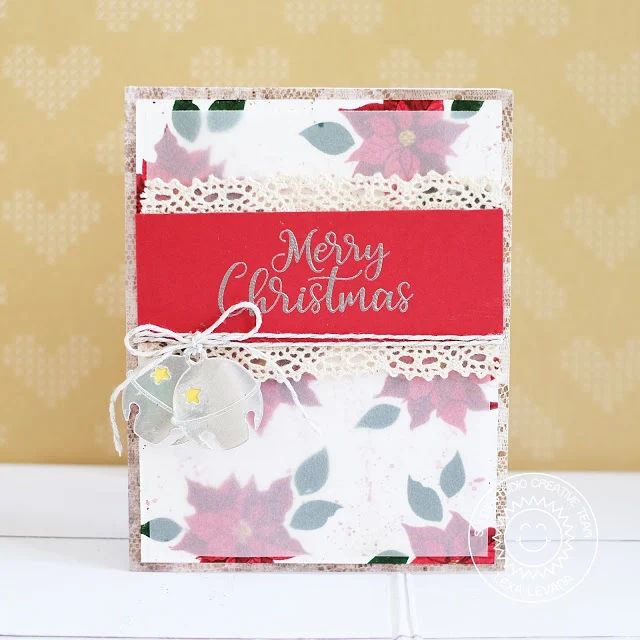
I stamped some pretty poinsettias and leaves from Petite Poinsettias stamp for the background. After finished with the stamping I create some red splatter using the same red dye ink. I layered a slightly smaller size vellum on top to soften the background a little bit. I kind of want to create a rustic look for this card, it looks classic and gorgeous, so I used a lace patterned paper to border my card. 

Sunny Studio Stamps: Silver Bells Poinsettias Background Christmas Card by Lexa Levana

To match the concept, I use real lace behind the red paper stripe with silver embossed sentiment on it. The Silver Bells are cut on a piece of silver foil paper, they both are tied together with silver twines. I also adhere yellow cardstock behind the stars. 

Thank you so much for stopping by today. I hope you like my card as much as I do. Have a wonderful day everybody!

Sunny Studio Supplies Used:

Petite Poinsettias Stamps
Shop at:
Sunny Studio
Silver Bells Die
Silver Bells Die
Shop at:
Sunny Studio

Thursday, November 23, 2017

Frosty Flurries Winter Sky Background Card with Vanessa

Hey everybody! Vanessa here with a winter card using Frosty Flurries and Playful Polar Bears

Sunny Studio Stamps: Frosty Flurries and Playful Polar Bears Winter Sky Background Card by Vanessa Menhorn

I started with a panel of watercolor paper and applied various watercolors to create the winter sky. After it had dried, I stamped and heat-embossed the Frosty Flurries and adhered the panel to my card base. Now I hand-cut a snow hill from white cardstock and adhered it. I die-cut a rectangle from a panel of white cardstock and covered the card with it.

Then I stamped the polar bear image, colored it with Copics, fussy-cut it and adhered it to the card with foam-tape.

Sunny Studio Stamps: Frosty Flurries and Playful Polar Bears Winter Sky Background Card by Vanessa Menhorn

Now I die-cut three snowflakes with the complimentary mini snowflake die and adhered them. I stamped and heat-embossed the sentiment onto a strip of turquoise cardstock, trimmed it and adhered it. Finally, I added matching sequins to the sky.

Well, winter has arrived in my part of the world. What is it like in yours? I'll be glad when it's over, but creating cute winter themed cards with my beloved Sunny Studio goodies makes it bearable for me :) Thanks for stopping by today!

Sunny Studio Supplies Used:

Frosty Flurries Stamps
Shop at:
Sunny Studio
Playful Polar Bears Stamps
Shop at:
Sunny Studio
Playful Polar Bears Dies
Shop at:
Sunny Studio

Wednesday, November 22, 2017

Jolly Gingerbread Christmas Card and Ornament Set with Franci

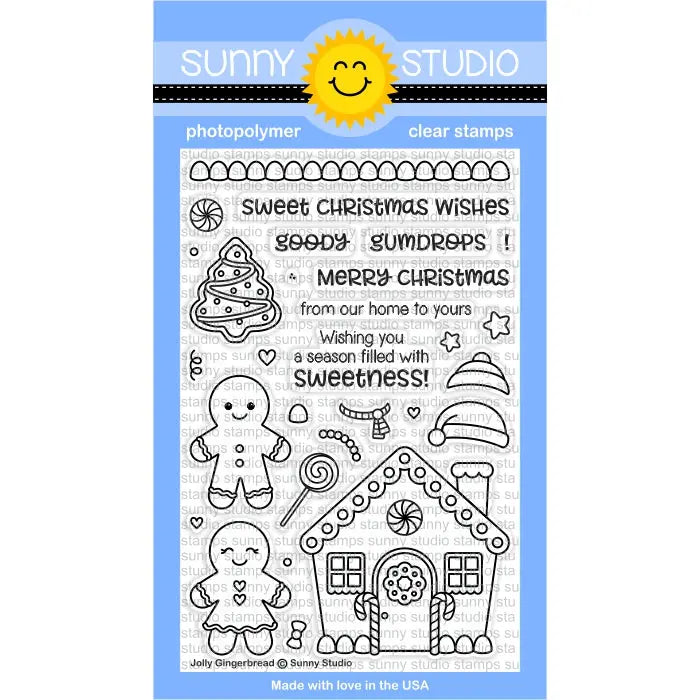
Hi everyone! Franci here with you today with a little Christmas set featuring these cuties from the Jolly Gingerbread stamp set! I'm in love with these!! I created a card and also 2 mini Christmas tree decorations. Here's the card:

Sunny Studio Stamps: Jolly Gingerbread Christmas Card and Ornament Set by Franci Vignoli

For the card I started by die cutting 2 rectangles: one from a gingham pattern paper and one out of some white cardstock. Then I stamped my little gingerbread with Memento black ink, and colored it with Copics. I also stamped the sentiment with the same black ink used before and I glued down this little panel onto the bigger one, in the center.

Then I die cut 2 holly leaves and 3 flowers using the mini dies from the Basic Mini Shapes dies set out of some white cardstock and colored them with Distress inks. The little circle from the flower is the perfect berry to complete the holly decor! I also created a little bow with some gold twine to complete the card.

Sunny Studio Stamps: Jolly Gingerbread Christmas Card and Ornament Set by Franci Vignoli

These decorations are my fave!! First I stamped my images, coloring them with Copics and then die cutting them with their coordinating diesThe I die cut them another time out of some white foam and white cardstock. 

I also took a piece of twine and glued all the layers together with hot glue. Be sure to include the twine between the back layer and the foam so you can hang the little gingerbread to your tree! :) Hope you like it and thank you so so much for stopping by!

Sunny Studio Supplies Used: 

Basic Mini Shape Dies
Shop at:
Sunny Studio
Jolly Gingerbread Stamps
Shop at:
Sunny Studio
Jolly Gingerbread Dies
Shop at:
Sunny Studio