Thursday, November 2, 2017

Playful Polar Bears Winter Themed Birthday Party Card with Vanessa

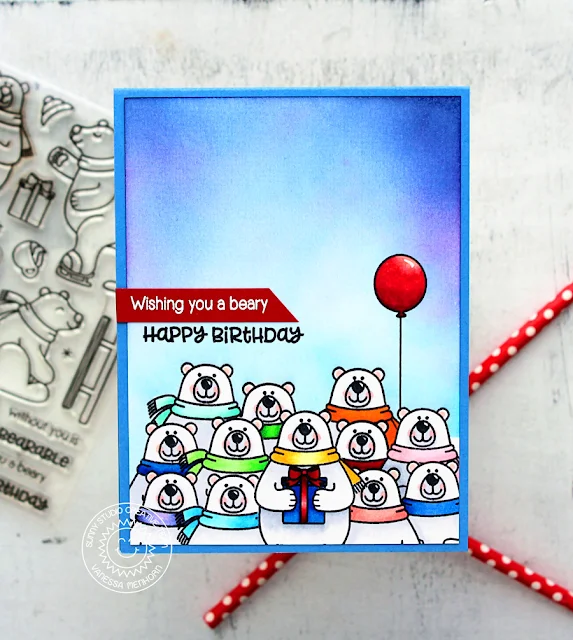
Hi everybody! Vanessa here today with a birthday card full of cute bears from Playful Polar BearsHow about a party with a lot of guests? The more the merrier? Ok!

Sunny Studio Stamps: Playful Polar Bears Winter Themed Birthday Party Card by Vanessa Menhorn

I started with a panel of white cardstock and stamped all the bears, always stamping and masking to create the group. Then I stamped the balloon from Oceans of Joy and masked it, too. Next, I applied various blue and pink inks with an ink blending tool and removed the masks. After I had colored everything with Copics, I stamped the sentiment and adhered the panel to the card.

Sunny Studio Stamps: Playful Polar Bears Winter Themed Birthday Party Card by Vanessa Menhorn

Finally, I stamped and heat-embossed the first part of the sentiment onto a strip of red cardstock, trimmed it and adhered it.

I hope you like my fun party! Thank you for stopping by!

Sunny Studio Supplies Used:

Oceans of Joy Stamps
Shop at:
Sunny Studio
Playful Polar Bears Stamps
Shop at:
Sunny Studio

Wednesday, November 1, 2017

Christmas Chapel Mini Scalloped Shaped Winter Card with Fancesca

Hello there! Franci here with you today with a new festive card! I created a mini scalloped card today with the new Christmas Chapel stamp set and I also added some elements from the Christmas Home stamp set to created this little scene. I think the two sets coordinate so well together. You can really having fun creating multiples village scenes for all your Christmas cards.

Sunny Studio Stamps: Christmas Chapel Mini Scalloped Shaped Winter Card by Fancesca Vignoli

I die cut the scallop from a light grey cardstock and I also die cut a coordinating circle out of white cardstock. I then stamped all of my images with Memento black ink, colored them with Copics, and die cut them with the coordinating Christmas Chapel dies and Christmas Home dies

I sponged some Salty Ocean Distress ink on my card, starting from the top of my circle and blending to the bottom to create the sky. I then adhered down all the elements with a combination of liquid glue and foam adhesive to add dimension and interest. 

Sunny Studio Stamps: Christmas Chapel Mini Scalloped Shaped Winter Card by Fancesca Vignoli

Finally, I glued down my panel to my scalloped card base and added a little red bow at the top. It makes everything even more festive, doesn't it?! 

Hope you like my project and thank you so much for stopping by today! See you next week and be sure to come by tomorrow for more inspiration from the other designers! 

Sunny Studio Supplies Used:

Christmas Chapel Stamps
Shop at:
Sunny Studio
Christmas Chapel Dies
Shop at:
Sunny Studio
Christmas Home Stamps
Shop at:
Sunny Studio
Christmas Home Dies
Christmas Home Dies
Shop at:
Sunny Studio

Tuesday, October 31, 2017

Silver Bells Winter Hues Jingle Bells Christmas Card with Nancy

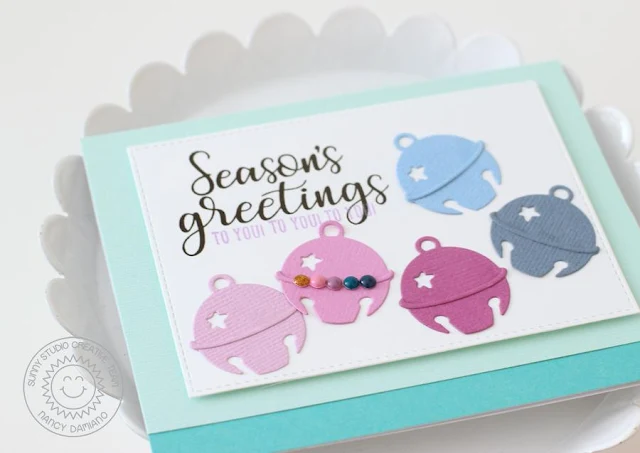
Hey there Sunny fans, Nancy here today with a colorful look at the Silver Bells die set. What better way to create a fun card than with a season's greeting full of jingle! This super quick and easy card was created with winter hues of purple and blue for an interesting alternative to a traditional Christmas palette. 

Sunny Studio Stamps: Silver Bells Winter Hues Jingle Bells Christmas Card by Nancy Damiano

I started this card by die cutting five jingle bells out of cardstock in different hues ranging from light magenta to navy. They were placed across the front of the card in a staggered shape to create movement. One of the bells was embellished with a row of tiny enamel dots.

Sunny Studio Stamps: Silver Bells Winter Hues Jingle Bells Christmas Card by Nancy Damiano

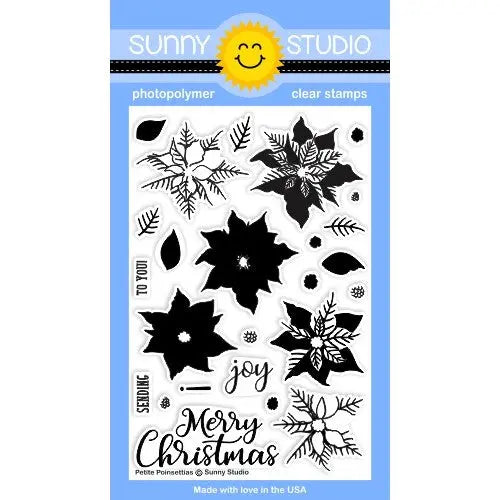
To add some spice to the very clean look of the die cut jingle bells, I wanted a sentiment with a dash of drama. The Festive Greetings stamp set has so many great sentiments that are perfect for a clean and simple card. I thought the card needed one more line of text in a contrasting color, so I used the "to you" from the PetitePoinsettias stamp set. It adds a pop of color and underlines the main sentiment.

Pick up the Silver Bells die set to create your next batch of holiday goodness!

Sunny Studio Supplies Used:

Festive Greetings Stamps
Shop at:
Sunny Studio
Petite Poinsettias Stamps
Shop at:
Sunny Studio
Silver Bells Die
Silver Bells Die
Shop at:
Sunny Studio

Monday, October 30, 2017

Snow Flurries & Frosty Flurries Snowy Background Tags with Eloise

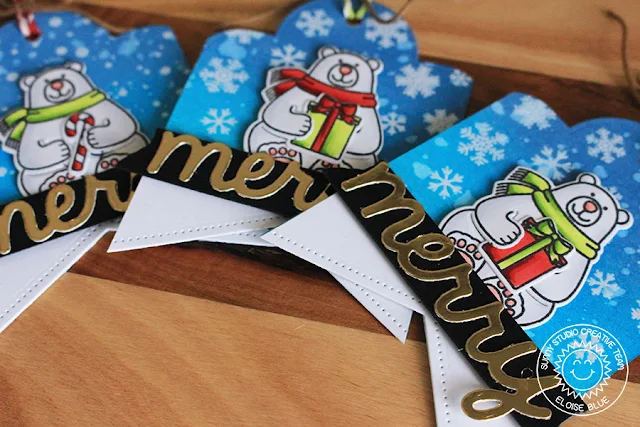
Hi everyone, Eloise here today and I'll be using the Snow Flurries and Frosty Flurries stamp sets to create some simple backgrounds for some tags. As well as the Playful Polar Bears, Tag Topper Crescent Dies, Fishtail Banners Dies and Merry Word Dies

Sunny Studio Stamps: Snow Flurries & Frosty Flurries Polar Bear Snowy Background Tags by Eloise Blue

To begin my tags, I first took some watercolour cardstock, cut them down to 2 3/4" wide and used the Tag Topper Crescent Dies and Fishtail Banners dies to cut the top and bottom of each tag. Once I cut all four tags, I took a hole punch and punched a hole in the top of each tag. I then went ahead and used the Snow Flurries and Frosty Flurries stamp sets to stamp onto each tag. I did two of each design. I then clear heat embossed them. 

Sunny Studio Stamps: Snow Flurries & Frosty Flurries Polar Bear Snowy Background Tags by Eloise Blue

Next up, I used Faded Jeans, Peacock Feathers and Salty Ocean a Distress Oxide Inks to ink blend on each of the tags. Leaving white at the bottom too resemble snow. Now my tag bases were done, I stamped out four Polar Bears sitting with four objects to hold in their hands. I coloured each with Copic Markers using traditional holiday colours. I then used the coordinating dies to cut the Bears and accessories out. I popped them up on foam tape and adhered them to the center on each tag. 

Sunny Studio Stamps: Snow Flurries & Frosty Flurries Polar Bear Snowy Background Tags by Eloise Blue

For my sentiment I used the Merry die and cut four Merry's out of gold foil cardstcok. Then because I felt like they got lost being adhered onto the tag without a backer, I cut strips of black cardstock to adhered behind them and adhered them on with foam tape also. To finish up the tags I threaded through some red and white and brown twine at the top and tied some bows. 

That finished up my tags for today. I hope you enjoyed! Thanks so much for stopping by and I'll see you next time. 

Sunny Studio Products Used: 

Fishtail Banner Dies
Shop at:
Sunny Studio
Merry Word Die
Merry Word Die
Shop at:
Sunny Studio
Tag Topper Dies-Crescent
Shop at:
Sunny Studio
Frosty Flurries Stamps
Shop at:
Sunny Studio
Playful Polar Bears Stamps
Shop at:
Sunny Studio
Snow Flurries Stamps
Shop at:
Sunny Studio

Saturday, October 28, 2017

Guest Designer Spotlight: Shaker Card Tutorial with Juliana Michaels

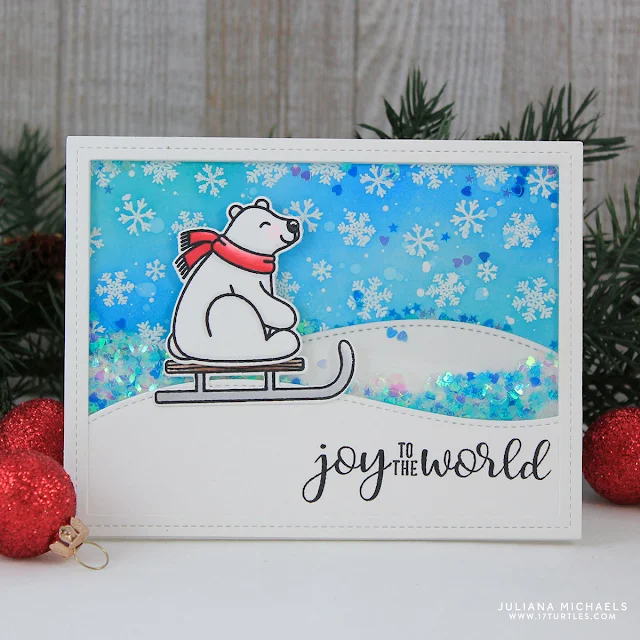
We're so excited to welcome Juliana Michaels back to the blog today as our special guest. She is sharing a tutorial that shows how she created this adorable shaker card, and I'm sure you're all going to love it! 

Sunny Studio Stamps: Playful Polar Bears Shaker Card Tutorial with Juliana Michaels

Happy Saturday and hello Sunny Studio Fans! It's Juliana with you today and I'm so happy to be guesting again here on the Sunny Studio blog. Today I'm sharing a Playful Polar Bear Christmas shaker card I created using some new stamps and dies from the Winter Release.

Sunny Studio Stamps: Playful Polar Bears Shaker Card Tutorial with Juliana Michaels

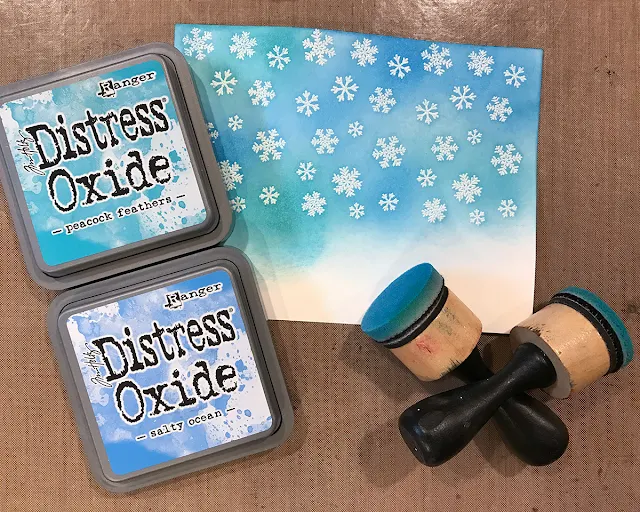
To create the snowy background for this card, begin with the Snow Flurries stamp. With the help of a stamp positioning tool, such as the MISTI, stamp the image with Versamark Embossing Ink 3 times across a piece of 4.25 x 5.5 inch white cardstock.  Slide the cardstock over 1.75 inches each time until the image is stamped across the paper. Sprinkle it with white embossing powder and heat set it using a heat gun.

Sunny Studio Stamps: Playful Polar Bears Shaker Card Tutorial with Juliana Michaels

Next, use an ink blending tool to apply Distress Oxide Ink in Salty Ocean and Peacock Feathers over the stamped and heat embossed snowflakes. This will help the snowflakes show up and pop against the blue background.

Die cut 5 frames from white cardstock and glue them together to create the shaker box frame. Cut a piece of transparency to the same size and glue it on top of the box.

Sunny Studio Stamps: Playful Polar Bears Shaker Card Tutorial with Juliana Michaels

To add a snowy hill for the polar bear to sled on, die cut one from white cardstock and adhere it on the bottom of the stamped snowflakes background.

Sunny Studio Stamps: Playful Polar Bears Shaker Card Tutorial with Juliana Michaels

Die cut another frame from white cardstock. Then die cut another snowy hill, stamp the sentiment on it from the Festive Greetings stamp set and trim it to fit behind the die cut frame. Adhere these together and then adhere them on top of the shaker box.

Next, die cut and trim 5 more snowy hills to match the one you stamped the sentiment on, adhere them together inside the shaker box frame. By adding these inside the shaker box, it will keep the sequins from falling behind the hill in front. I chose to put the sentiment on the outside because with it being placed at the bottom, the sequins would have covered it up and made it difficult to read. You are now ready to fill the shaker box with your favorite sequins and beads. After you do this, adhere the snowflake background to the back side of the shaker box.  

Sunny Studio Stamps: Playful Polar Bears Shaker Card Tutorial with Juliana Michaels

For the final touch stamp, color and die cut the polar bear and sled images from the Playful Polar Bears stamp and coordinating dies. Attach them to the hill on the front of the card and your shaker card is complete!

I hope you enjoyed learning how to create this polar bear Christmas shaker card and are inspired to start your Christmas card crafting using the new Sunny Studio Stamps Winter Release. For more inspiration using the Playful Polar Bears stamp set, head on over to my blog HERE to see another polar bear Christmas card that I created.

HUGS! 
- Juliana

Sunny Studio Supplies Used:


Festive Greetings Stamps
Shop at:
Sunny Studio
Playful Polar Bears Stamps
Shop at:
Sunny Studio
Playful Polar Bears Dies
Shop at:
Sunny Studio
Snow Flurries Stamps
Shop at:
Sunny Studio