Wednesday, April 26, 2017

Magical Mermaid Suspended Shaker Card with Amy

Hello friends! Amy here to share with you a fun suspended shaker card using the lovable Magical Mermaid stamp set.

Sunny Studio Stamps: Magical Mermaid Suspended Shaker Mermaid Card by Amy Yang

I stamped the images, colored them with Copic markers and cut them out using the coordinating Magical Mermaid dies. I then stamped and heat embossed the sentiment "you Mermaid to be awesome" on heat resistant acetate and adhered it to a frame. This served as the window for the shaker card. I distressed the background with Distress inks and added splatters of water on trimmed watercolor cardstock.

Sunny Studio Stamps: Magical Mermaid Suspended Shaker Mermaid Card by Amy Yang

Here comes the fun part. I suspended the jellyfish so that they don't turn upside down when the card is shaken but still move around in a controlled motion. I did this by taping clear thread behind the adorable jellyfish, and loosely sandwiching the thread on the top and the bottom of the foam adhesive (shown below). After adding the fish and some clear sparkly beads, I adhered the shaker window to distressed panel. I'm glad I went with the clear beads because when the card is shaken it reminds me of bubbles and currents in the ocean. I also had fun watching the jellyfish bobbing around.

Sunny Studio Stamps: Magical Mermaid Suspended Shaker Mermaid Card by Amy Yang

To finish, I added the mermaid (she's so sweet, I just love her) and the rest of the images to the front of the card. The idea of the suspended stamped images was inspired by a video Jennifer Mcguire shared on Instagram, to read more about it on her blog click here

I hope you like today's card. Thank you for stopping by!

Sunny Studio Supplies Used:


Tuesday, April 25, 2017

Two Scoops Summery Ice Cream Card with Karin

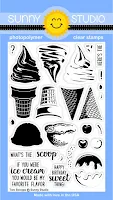
Hi everyone, it's Karin here today. I am here to share a new, very summery card that I've created with the newest release! This is an awesome layering stamp set called Two Scoops

Sunny Studio Stamps: Two Scoops Summery Ice Cream Card by Karin Ã…kesdotter
I started out by making a card base from white cardstock and matting it with pink striped patterned paper. I then stamped my ice cream from three different shades of pink and then the cone from two different light browns and then die cut them with the coordinating Two Scoops dies. It is so fun to see them develop into their 3d look as you stamp each layer! The ink and paper I used are from MFT stamps.

I then inked a panel of white cardstock with Peacock Feathers distress ink and stamped the sentiment in the top right hand corner. I adhered the ice cream cone to the panel with foam adhesive and did the same with the panel to the card base.

Sunny Studio Supplies Used:
  

Monday, April 24, 2017

Oceans of Joy Birthday Fishes Card with Eloise

Hi everyone, Eloise here and today I have a card featuring the new Oceans of Joy stamp set. I love ocean themed stamp sets and this one is so cute. The images are absolutely adorable and there are so many ideas that I have for this stamp set! I'm also pulling in the Stitched Scallop dies and also Magical Mermaids for a few other accents to make my scene.

Sunny Studio Stamps: Oceans Of Joy Birthday Fishies Cards by Eloise Blue

To begin my card today I stamped and coloured all my images from the Oceans of Joy and Magical Mermaids stamp set. I used Copic markers for my colouring today as they're so quick and easy. Once everything was coloured I used all the coordinating dies to cut them all out.

Once all my images were done I could work on my background. I used a few colours of Color Burst powders from Ken Oliver for my background today, I first tapped the powers in my palette and then added some drops of water to be able to use like regular watercolours. I then water coloured my background with the colour. I dried it with a heat tool, added some water splatters and dried it again. I then cut the top of my piece with the Stitched Scallop dies and then cut down the entire panel using a paper trimmer. For my sand piece, I repeated the same step as before and then just stamped the sand bank border with some black ink and trimmed it out on the black line. I then adhered it down onto the bottom of my water coloured panel.

Sunny Studio Stamps: Oceans Of Joy Birthday Fishies Cards by Eloise Blue

I arranged all my images onto my scene with flat and dimensional adhesive. I then lined up my panel onto my white card base and before adhering down my panel I stamped the 'Birthday Fishes' sentiment onto it with more black ink and then adhered down my panel with more foam tape. For a last finishing touch I added some Wink of Stella onto a few of the images and that completed my card.

I hope you enjoyed and are enjoying this new release!

Sunny Studio Supplies Used:
        

Saturday, April 22, 2017

Guest Designer Spotlight: Cards with Francine Vuillème

I'm so excited to welcome Francine Vuillème to the blog today as our special guest. She has some gorgeous cards that you are going to just love! 

Hi stampers! Francine here! So glad to join Sunny Studio Stamps as a guest this month and I’m thrilled to play with the newest summer collection! The sets are awesome!

Today, I have two cards for you showcasing the newest Two Scoops and the A Bird’s Life stamp sets. The idea was to create two cards with a similar design but using different style of stamps. Here is what I came up with.

Sunny Studio Stamps: Guest Designer A Bird's Life Birdie Birthday Card by Francine Vuilleme

For the first card, I used the A Bird’s Life set. I created a cute scene with the branch, the nest and the birds. I drew a hat with a black marker for the flying bird to make him look more festive. I blended Distress ink over a cloud stencil to create the sky. I added enamel dots to add a touch of color. A birthday card with a lot of colors is always fun! 

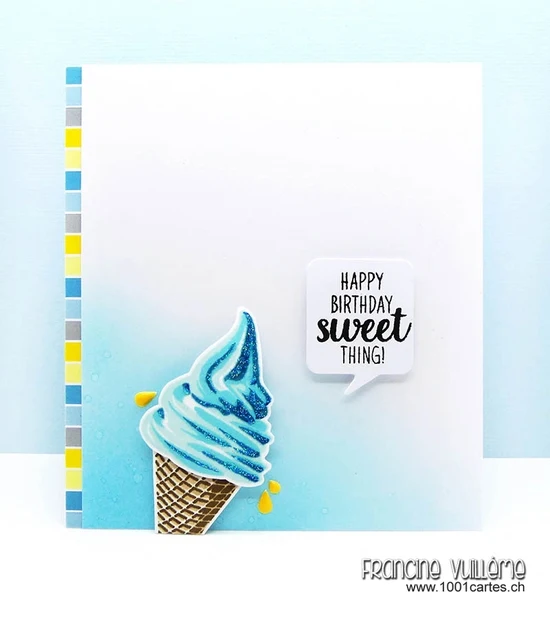
Sunny Studio Stamps: Guest Designer Two Scoops Ice Cream Card by Francine Vuilleme

For the second card, I used the same layout elements. I chose to feature the Two Scoops set. This is a layering stamp set and there are no images to color. The style of both cards is different. This one is more modern. As I did for the first card, I blended the bottom of the card front with Distress ink. This time, I didn’t use a stencil but I splattered some water over the sponged background to add more interest. I also added a colorful strip on the left edge and I stamped the sentiment on a white label (here a speech bubble) that I adhered to the card with foam pads for more dimension. I also used enamel dots (they have a droplet shape here). 

On both cards, I moved the focal image off-center and trimmed any excess that extended over the sides of the cards. As you can see, with the same elements and a similar layout, you can create completely different creations! I hope you like the idea. By the way, that layering stamp set is AWESOME and look so realistic! I love it! The stickles on top of the soft ice cream adds so much sparkle and interest!

Thanks for visiting the blog today and have a great weekend!

Sunny Studio Supplies Used:
      

Friday, April 21, 2017

A Bird's Life No Place Like Home Card with Lexa

Hello everyone! Lexa here with a colorful card featuring the brand new A Bird's Life stamps and coordinating dies. All the fancy bird houses and those little birds...I just can't! Since I couldn't decide which one was my favorite, I decided to use them all.

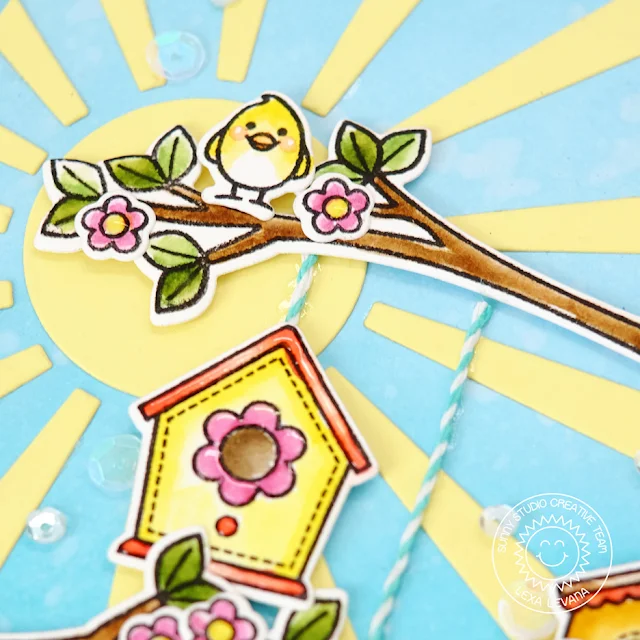
Sunny Studio Stamps: A Bird's Life and Sun Ray Dies No Place Like Home Card by Lexa Levana

I start with 4.25"x6" white cardstock and blend some Tumbled Glass and Peacock Feather Distress Inks, I flicked waters with my finger to create the splatter effect. The card base is slightly taller than I usually use because I want to create a scene with the bird houses hanging to tree's branches. The sunny sky is a perfect weather for the birds to having some fun. I die cut SunRay dies on yellow cardstock and it turns out sooo cute!

Sunny Studio Stamps: A Bird's Life and Sun Ray Dies No Place Like Home Card by Lexa Levana

I stamped all my images with Versafine black ink and watercolor them with Distress Markers. After I finished coloring, I die cut all the images with the coordinating A Bird's Life dies. The thin white outlines are so perfect. I add rosy cheeks for the birds...they are adorable beyond words.

Sunny Studio Stamps: A Bird's Life and Sun Ray Dies No Place Like Home Card by Lexa Levana

​I add some glossy accent and clear sequins to create some dimensions and extra cuteness! ;) Thank you so much for stopping by today, I hope you like it. Have a wonderful day everyone!

Sunny Studio Supplies Used: