Wednesday, April 19, 2017

A Bird's Life Floral Background Card with Amy

Happy Wednesday friends! Amy here sharing a card that features the new stamp set, A Bird's Life and a set from last month's release, Friends & Family. I thought these two paired very nicely together to create a flower background, setting the stage for the birdhouses.

Sunny Studio Stamps: A Bird's Life and Friends & Family Floral Background Card by Amy Yang

To create the front panel, I trimmed smooth white cardstock to 5"x 3.75". Using a Misti Tool, I placed the birdhouses and the sentiment where I wanted them to go and stamped it using black ink. To create a flower background, I stamped a variety of the bold flowers and leaves with pastel dye inks. I stamped them around the birdhouses, spacing them as evenly as I could. I did this using the stamps in the order of largest to smallest. This allows the smaller stamps to fill in the open areas.

Sunny Studio Stamps: A Bird's Life and Friends & Family Floral Background Card by Amy Yang

I wanted this card to have some dimension so I stamped the birdhouses and the cute little birds on the smooth white cardstock and colored them with Copic markers. I also stamped the bows with dye ink and die-cut all of them using the coordinating A Bird's Life dies. Then, I went back to the front panel and drew a line with a green Gelly Pen from the top of the card to the roof of the birdhouses. To finish my card, I added foam adhesives behind all the images and adhered them to the front. Isn't this card tweet? I hope you like it!

Thank you so much for stopping by today, and I hope you have an awesome day! See you next Wednesday.

Sunny Studio Supplies Used:


Tuesday, April 18, 2017

A Bird's Life Grid Design Card with Karin

Hi everyone, it's Karin here. I'm back to share a new card that I've created with Sunny Studio Stamps adorable new summer release! For today's card I used a super sweet set called A Bird's Life.

Sunny Studio Stamps: A Bird's Life Grid Design Birdhouse Card by Karin Akesdotter

I simply die cut a stitched scalloped square and then stamped 4 of the cute bird houses in each of the corners. I stamped the sentiment to the center before I stamped, colored and die cut a bunch of the adorable birdies from the set using the coordinating A Bird's Life dies. When I had them all ready I placed them out where I thought they fit the best and used tape adhesive to tape them to the card - so fun playing with these cuties. 

I then made a card base with a blue panel matted to it before I adhered the scalloped square to the card with foam adhesive.

Sunny Studio Supplies Used: 
  

Monday, April 17, 2017

Pirate Pals Birthday Card with Eloise

Hello everyone! Eloise here and today I have a fun card using the new Pirate Pals stamp set. This is such a great stamp set for boy cards, it's super adorable and so much fun to colour! Today I decided to go ahead and create my own sort of patterned paper with all the stamps and colour them with Copic markers.

Sunny Studio Stamps: Pirate Pals Boy Birthday Card by Eloise Blue

To begin my card I stamped out all my images on a piece of white cardstock. I wanted to feature all three of the pirates, so I began with stamping those 3 first, in a triangle. Then I could fill in with the rest of the images. I again started off with the bigger images I wanted to use, so the barrel, ship, map etc and stamped those around most of the places. Now for any medium sized gaps I used the parrot to fill in and also the telescope. Then for any tiny gaps I pulled in the skull and crossbones and also the anchor. That made my background really full and not to have much white space. You could even go a step further and use the coins and other smaller images in the stamp set and fill in more, but I was satisfied with this look. Once all my images were stamped, I could colour them in.

When I first started the card I thought I wanted to go down the watercolour route, but I wasn't liking how it turned out so I re-stamped and went the Copic route. Now I knew this was going to take a long time to colour with heavy blending Copic colouring, so to make it go faster I decided to only use two markers, and not even blend properly. I just coloured the section with the lighter marker first, then went in on the sides where I think the shadows would be and just drew a line, or traced the outline of the image, to make it appear it has a shadow, and in the end after all the colouring was done, one it looked great for a background, without perfect Copic colouring and two, it took half the time.

Sunny Studio Stamps: Pirate Pals Boy Birthday Card by Eloise Blue

Once the colouring was done, I felt like it didn't pop enough. So I took two very light blue Copic markers and traced roughly around the outside of the images, and that just took the background to a whole other level and made it look even more amazing.

To finish up my card I adhered my coloured piece to a yellow piece of cardstock and then onto a card base. For my sentiment I white heat embossed the sentiment that reads 'Shiver Me Timbers! I Hear It's Your Birthday!' and I did that on some dark blue cardstock. I cut a fishtail banner at one end of the piece and then tied a hemp cord bow around the other end and adhered it to the card with foam tape and that finished up my card for today.

I hope you enjoyed and got inspired! I'm absolutely loving this new release, I hope you are too! Check out the rest of the week for more inspiration using the new release!

Sunny Studio Supplies Used:

Sunday, April 16, 2017

Inspiration Week Winners

Thank you everyone who joined us this week for our Summer Release festivities.  Your love and sweet feedback is so appreciated.  I just wanted to pop in and share the rafflecopter winners for the $25 gift codes:

Monday- Jill Rauenhorst

Tuesday- Lisa A Creations

Wednesday- Stephanie Allen

Thursday- Lisa Bankes-Lahiff

Friday- Sue Sherwood

(winners have been emailed)

I hope you all have a very blessed Easter spent with those you love!

Big Hugs!

Friday, April 14, 2017

Inspiration Week: Introducing A Bird's Life & Heartfelt Wishes

Are you ready?!  Today's the big day, but before you run off to shop make sure to check out this one last post with a couple more new products to showcase and drumroll please... A Video!  You just might be rewarded with a little promo code at the end too (hint-hint).  ;)

Up first we have a stamp set all about birdies called A Bird's Life.  I've been wanting to do some little birds for awhile now and as a graduate in interior design I'm always attracted to cute home themes (too bad my own home is such a mess right now).  ;)

When designing this set it was important to me to create a tree branch that could work facing either direction to expand the set's versatility.  For my card here I started by masking off some clouds on white cardstock using the dies from Rain or Shine and Sunny Sentiments and then inked over the panel using Mermaid dye ink with a jumbo dauber. To make my sentiment stand out I cut a strip of white cardstock, stitched the edge and stamped it in a color to match the birdhouse and birdies.
Sunny Studio Stamps A Bird's Life From Our Nest To Yours Card by Mendi Yoshikawa

For my next card I used some polaroid frames from Doodlebug's Spring Things collection.  To fill the frames I inked up some white cardstock with tumbled glass along the outside edges before adding them behind the die-cuts.  I stamped my sentiment in the center with my favorite VersaFine Ink and then filled the frames with some of the sweet images from the set.  I finished off my card with a large scalloped border along the top and bottom using the new Stitched Scallop dies.

Sunny Studio Stamps A Bird's Life Happy Bird Day Birthday Card by Mendi Yoshikawa

The birdhouses were designed to be used with one of two posts that come with the set or to hang by the strings and "tied" with a bow.  For my next card I used the posts to set my little scene borrowing the tuft of grass from our Easter Wishes set.  When I was done, my card felt a bit unfinished so I framed my scene using THIS die by Gina Marie designs.

Sunny Studio Stamps A Bird's Life Birdhouse Trio Birthday Card by Mendi Yoshikawa

Yesterday I had the pleasure of being a guest over on the Scrapbook & Cards Today blog where I shared this card and some different ways to use masking on your cardmaking.  I hope you will swing by to see my step-by-step photo tutorial over there.  

Sunny Studio Stamps A Bird's Life There's No Place Like Home Birdhouse Card by Mendi Yoshikawa

The second new set I have to share is a small 3x4 sentiment set called Heartfelt Wishes which plays on different ways to use the word "wishes".  This versatile set works all year 'round covering a number of occasions like birthdays, weddings, get well greetings and even the winter holidays. 

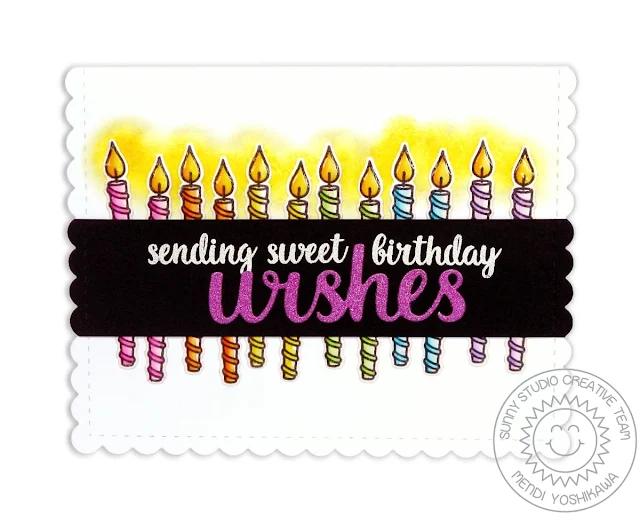
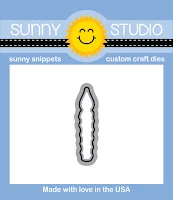
For my card with it here I used the small candle that comes in the set and adhered two together to elongate them so that they could peek from the top and bottom of my sentiment strip.  Before adhering them to my card base I laid them out to get a general idea about placement and then inked up behind them with a little foam dauber and Mustard Seed distress ink.  After I had glued them down with my zig glue pen I went back and added glossy accents to the flames.
Sunny Studio Stamps Heartfelt Wishes Candle Birthday Card by Mendi Yoshikawa

For my other card with the set, I heat embossed the words "wedding wishes" on the diagonal spaced 1/2" apart.  I knew there was no way I was going to be able to keep things straight so I used my clear grid ruler to add some light pencil lines that I went back and erased afterwards. It can be hard to see where you've stamped when using VersaMark on white cardstock so I just worked line by line, heating up the powder before moving on to my next row.  After everything had been erased, I inked up the background with Spun Sugar and Shaded Lilac distress inks and the areas where I had embossed resisted the ink. 

I decided to carry the colors onto my die-cut word so I inked up a scrap of cardstock with the same distress inks before cutting it out.  I finished off my sentiment strip by cutting one end with our fishtail banner dies.  When I was done my card felt like it could still use a bit of glitz and glamour so I added a trail of pink and iridescent sequins with some liquid adhesive.

Sunny Studio Stamps Heartfelt Wishes Wedding Card by Mendi Yoshikawa

Brace yourselves.  You're never going to believe it, but I was finally able to carve out about 10 hours yesterday (LOL!) to put together a 28-minute video for you sharing the full new release along with a tutorial for the new layering stamps.  ;)


I hope you've enjoyed this week of sneak peeks.  I can't wait for you to see what the design team has to share using it all!  
Thank you so much for all your sweet feedback--I have enjoyed reading every single comment and they all mean so much to me!  

Everything is now available for purchase in our online store.  Yay!  In honor of the new release festivities you can receive 10% off your entire purchase using the code SUMMER10 through Monday, April 17th at Midnight PST.

Also just a reminder that all orders automatically come with a complimentary mini leaf die while supplies last.  ;)

Here's a full look at the new Heartfelt Wishes & A Bird's Life Stamps, along with their coordinating dies available for purchase today... 

Sunny Studio Stamps Heartfelt Wishes Sentiment Stamp Set     Sunny Studio Stamps Heartfelt Wishes Word Die     Sunny Studio Stamps Heartfelt Wishes Candle Die

Sunny Studio Stamps A Bird's Life 4x6 Photopolymer Clear Stamp Set      Sunny Studio Stamps A Bird's Life Coordinating Die Set

Would you like to win a $25 gift code to our online store to spend on some of the new sets?  Use the rafflecopter below to enter to win.  We will be giving away a new gift code each day for a total of five chances to win!  Contest closes on April 15th at Midnight PST.  Winners will be announced on Sunday, April 16th.  :)
  a Rafflecopter giveaway

Other Sunny Studio Supplies Used Today: