Tuesday, January 10, 2017

Inspiration Week: Timeless Tulips, Daffodil Dreams & Vintage Jar

Hello there!  Welcome to day 2 of our inspiration week where I share sneak peeks of our newest release for spring and a few fun ideas using them.  There just might be another prize for the day (see below for details).  ;)

Up first is a card using a new set for Spring called Timeless Tulips.  This set comes with 4 different layering tulips, 2 scripty sentiments and a little layering bumblebee.   For my card here I started by sponging on tumbled glass distress ink along the bottom half of my card panel and then stamp the stems from the set, making sure to leave enough space between the stems for my tulips.  When I was done I actually filled in the leaves using our other new set called Daffodil Dreams.  
Sunny Studio Stamps: Timeless Tulips Spring Birthday Card by Mendi Yoshikawa

This leads me to my next card which showcases Daffodil Dreams and our new 3x4 Vintage Jar stamp set.  Both of these sets are layering sets, using multiple layers of ink to create one 3-D image.  The jar has two separate images with the outline and the shiny layer to add dimension.  

For this card I stamped the shiny layer on my card panel and then stamped the online image on a piece of vellum to add a touch of realism and make it look like the stems are really inside the jar.  The jar also comes with an oval image which can be used to give the appearance of water in the jar.  I masked off my jar and sponge on some more ink below the oval line to further the illusion.
Sunny Studio Stamps: Daffodil Dreams Spring Thank You Card by Mendi Yoshikawa


For my next card with Daffodil Dreams I wanted to see if I could stretch the stamps and use them in a completely unexpected way by stamping them in lavender tones.  Of course this a completely fictional flower, but it was still a fun challenge.  

Sunny Studio Stamps: Daffodil Dreams Spring Birthday Card by Mendi Yoshikawa

Up next is a Timeless Tulips shaker card with a Valentine's Day theme.  I stamped the Vintage Jar using Colorbox Seattle Sky ink and then punched a hole in the center and fussy cut the rest out to create my window for the shaker.

I white heat embossed a banner from our Little Angels set on vellum and cut it out with the coordinating dies. I then stamped my "sending love" sentiment in red pigment ink using our Sending My Love Stamps and heat embossed it with clear embossing powder.  When it was cool I used a little Spray Mount to adhere the banner to my card.  It can be messy stuff so be sure to use it in a cardboard box, but it gives a wonderful invisible hold which I love.
Sunny Studio Stamps: Timeless Tulips Sending Love Valentine's Day Card by Mendi Yoshikawa

For my last card I wanted to create a shaker card with the Vintage Jar set sporting a completely different look, pairing it with some of our more playful images from Backyard Bugs, Sweet Shoppe and Summer Picnic.  I stamped the lid using Colorbox Seattle Sky ink and Versafine Onyx Black and then gathered a little gingham fabric which I just happened to have on hand that I adhered to the back with scor-tape.

For the Jar I chose to just use the outline image on it's own, stamping it onto the clear acetate using Stazon Ink.  I then used the coordinating Vintage Jar die to cut my window opening.  
Sunny Studio Stamps: Vintage Jar Card by Mendi Yoshikawa (with strawberries from Sweet Shoppe, Ants from Summer Picnic & bumblebee from Backyard Bugs)


I know layering stamps can sometimes be challenging to figure out exactly how to line up so I've created a special printable PDF for you to have on hand as a guide.  Download or print HERE.

A stamp positioning tool can also be really helpful (especially when stamping multiples). 


Here's a look at the new Daffodil Dreams 4x6, Timeless Tulips 4x6 & Vintage Jar 3x4 stamps and coordinating dies available for purchase on Friday morning...

Sunny Studio Stamps: Introducing Daffodil Dreams Photo-polymer Clear Stamps    Sunny Studio Stamps: Introducing Daffodil Dreams Die Set releasing January 2016    Sunny Studio Stamps: Introducing Timeless Tulips Die Set releasing January 2016

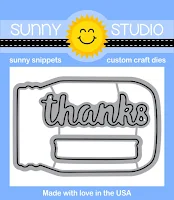
Sunny Studio Stamps: Introducing Timeless Tulips Photo-polymer Clear Stamps    Sunny Studio Stamps: Introducing Vintage Jar 3x4 Photo-polymer Clear Stamps    Sunny Studio Stamps: Introducing Vintage Jar with Thanks Die Set releasing January 2016

I hope you've enjoyed today's sneak peek.  Would you like to win a $25 gift code to our online store to spend on some of the new sets?  Use the rafflecopter below to enter to win.  We will be giving away a new gift code each day for a total of five chances to win!  Contest closes on January 14th at Midnight PST.  Winners will be announced on Sunday, January 15th.  :)

a Rafflecopter giveaway
Make sure to check back tomorrow when I will be sharing another new set that I'm hoping you'll fall in love with as much as I have. ;)

I receive many questions about the ink colors I used for my cards above.  While I mixed a variety of brands from my stash (that many people may not have) I thought I would still share.  Generally if you have a light, a medium and a dark you can make it work.  We happen to carry the Colorbox dye inks in our store so I have linked those.  :)

Yellow Daffodils:
Hero Arts Lemon Yellow

Colorbox Banana by Stephanie Barnard
Papertrey Ink Summer Sunrise

Lavender Tulips:
MFT Stamps Periwinkle
Colorbox Lilac
Simon Say Stamp Hot Mama

Hot Pink Tulips:
MFT Stamps Cotton Candy
Hero Arts Bubble Gum
Simon Says Stamp Doll Pink

Lighter Pink Tulips:
Hero Arts Passion Flower
MFT Stamps Cotton Candy
Hero Arts Bubble Gum

Red Tulips:
Ranger Pink Gumball
Simon Says Stamp Hot Lips (or Hero Arts Pale Tomato)
MFT Stamps Red Hot (or any red in your stash)

Leaves: 
Ranger Electric Lime
MFT Stamps Green Room

Jar on Daffodil Card: 
Simon Says Stamp Sea Glass
Simon Says Stamp Maliblue

Jar on Red Tulip Card:
Colorbox Seattle Sky

Other Sunny Studio Supplies Used Today:


Monday, January 9, 2017

Inspiration Week: Introducing Froggy Friends & Turtley Awesome

Hello there!  Welcome to our inspiration week where I share peeks of all the new products from our Spring release debuting in our online store on Friday the 13th.  Also, make sure to check out our giveaway at the bottom of this post.  :)

Up first I have a card using a new set called Froggy Friends (along with tulips from another set being shared later this week).  This set is primarily an everyday set, but it has a couple fun love themed sentiments including the Valentine's Day sentiment to give extra versatility.  I colored my background with distress inks and then heat embossed the sentiment and some pink hearts stamped with pigment inks.

Oh and before I forget, check out those fun eyelashes on the girl frog!  There are two little stamps included that allow you to turn any of the frogs into girly frogs.  So fun!


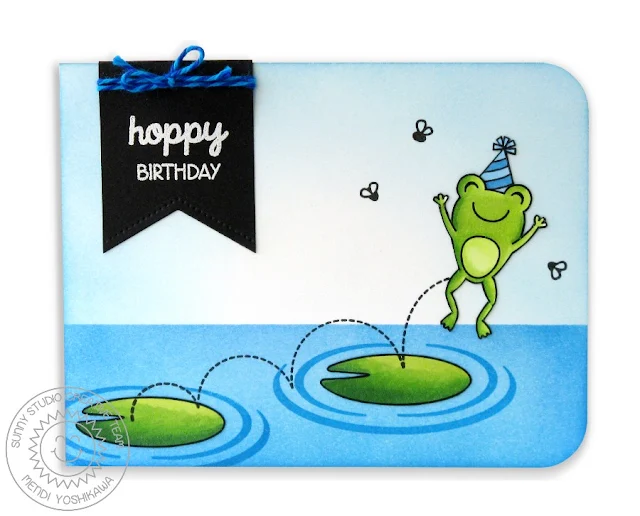
For my next card I wanted to use all the fun companion images from the set to help stage my little scene.  I love the water ripple image that hugs the lily pad to give the appearance the frog just hopped from one pad to another.  I created the waves for my scene using our wavy border dies (which I cut from masking material) and the coordinating wavy images found in our Island Getaway Stamp set.

Up next is a clean and simple card that just makes me smile every time I look at it.  If you're prone to being late with birthday cards, this would be a great card to mass produce because it's fairly simple to make, yet I think it has a big impact.

Here's a peek at the bottom inside the card.  There word "hoppy" is a separate stamp so you can use it to say Hoppy Birthday, You Make Me Hoppy and Hoppy Valentine's Day.  

There's also a little bow tie in the set which I stamped first, masked off and then stamped the frog over the top.  

Up next is a leaping frog using the hopping dashed line.  I think this dashed line will work well with so many other critter stamps.  I'm excited to try it with some other sets.  I completed my scene with a trio of flies from the set.  ;)

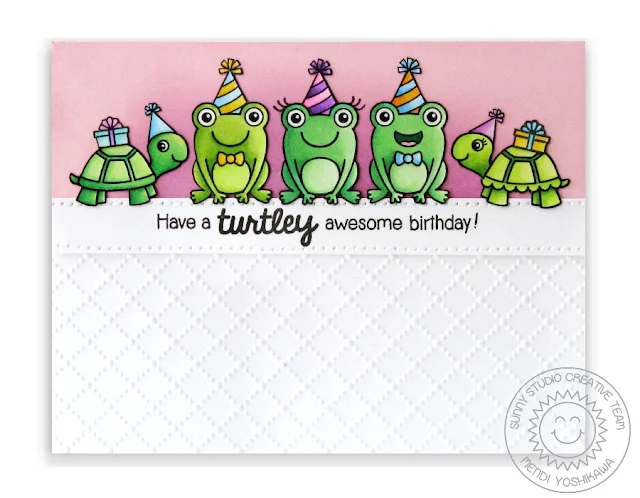
Up next is a birthday card which combines Froggy Friends with another new set for Spring called Turtley Awesome.  It's a sweet mini 2x3 set which comes with both a girl and boy turtle, party hat, gift and three different sentiment options.  

I love how Turtley Awesome is tiny, but it packs a big punch with sentiments that work well for several different occasions.  For this birthday card I cut a circle from masking material and built up my scene in the negative space.  I masked off a tree using our Summer Picnic Stamps and then blended the background with Tumbled Glass and Twisted Citron distress inks.  When I was done, I tied on a simple white grosgrain ribbon and stitched around the circle with my sewing machine.

For this Turtley Awesome card, I chose to repeatedly stamp the turtle images onto white cardstock and then filled the open spaces with hearts from the set stamped in red.  I then quickly colored in the hearts with two tones of Copic Markers for some simple shading.

When I started I knew I wanted to color in a single pair of the turtles so I made sure to center them in the middle of my card.  I finished off my card by heat embossing the sentiment with white embossing powder on red cardstock and tying a red grosgrain bow.

Here's a look at the new Froggy Friends 4x6 & Turtley Awesome 2x3 stamps and coordinating dies available for purchase this Friday (click on images to view them larger)...


Sunny Studio Stamps: Introducing Froggy Friends Photo-polymer Clear Stamps     Sunny Studio Stamps: Introducing Froggy Friends Die Set releasing January 2016

Sunny Studio Stamps: Introducing Turtley Awesome 2x3 Photo-polymer Clear Stamps     Sunny Studio Stamps: Introducing Turtley Awesome Die Set releasing January 2016
I hope you've enjoyed today's sneak peek.  Would you like to win a $25 gift code to our online store to spend on some of the new sets?  Use the rafflecopter below to enter to win.  We will be giving away a new gift code each day for a total of five chances to win!  Contest closes on January 14th at Midnight PST.  Winners will be announced on Sunday, January 15th.  :)

Make sure to check back tomorrow when I will be sharing several new sets that I'm hoping you'll fall in love with as much as I have. ;)

Other Sunny Studio Supplies Used Today:


Saturday, January 7, 2017

Sweet Shoppe Five Ways with Melissa Bickford

Hello there!  I'm popping in with some fun inspiration for you today!  Melissa Bickford has been sharing some super fun cards on her instagram feed over the last month using our Sweet Shoppe set and I couldn't wait to share them with all of you!  Her sweet color choices and bright, clean style make me feel so happy! 

"Sweet As Can Be" Doughnut Card

Sunny Studio Stamps: Sweet Shoppe "Sweet As Can Be" Doughnut Card by Melissa Bickford

"You Bring Me Sweet Joy" Ice Cream Cone Card

Sunny Studio Stamps: Sweet Shoppe "You Bring Me Sweet Joy" Ice Cream Cone Card by Melissa Bickford.

"Hope Your Day is Sweet" Strawberry Card


Sunny Studio Stamps: Sweet Shoppe Strawberry Card by Melissa Bickford.

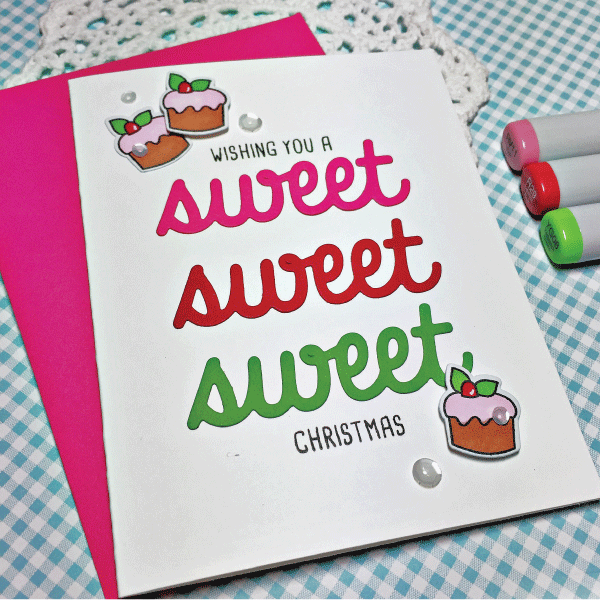
Wishing You a Sweet, Sweet, Sweet Christmas Card

Wishing You a Sweet Christmas Card by Melissa Bickford (using the Sunny Studio Stamps Sweet Word Die)

Candy Background ~ Love how she shows these candies can work for everyday or for the holidays!

Sunny Studio Stamps: Peppermint Candy Card Background by Melissa Bickford.

If you're not following Melissa already on instagram, I hope you will check her out.  Her feed with all her pretty cards is pure eye candy!  ;)


Hope you have a wonderful weekend and stay warm out there!


Sunny Studio Supplies Used:


Friday, January 6, 2017

Backyard Bugs Thanks A Buzzilion Card with Lexa

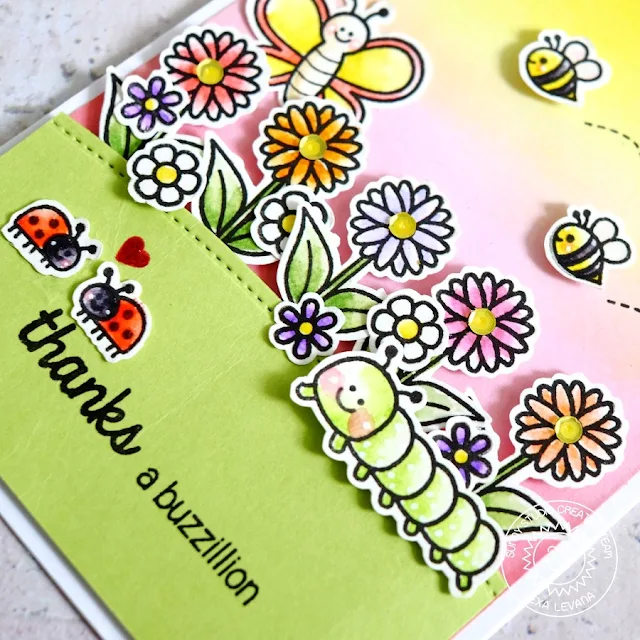
Hello everyone!  Lexa here today with an inspiration for spring. I'm using last year's collection called Backyard Bugs and it's so adorable. To represent spring, I choose to be more colorful for this card. It's a happy card that will make anybody's day!

Sunny Studio Stamps: Backyard Bugs Thanks A Buzzilion Bumblebee, Butterfly, Ladybug & Caterpillar Card by Lexa Levana.

I started with a piece of 4" x 5.25" white cardstock and blended Squeezed Lemonade, Spun Sugar and a little bit of Worn Lipstick Distress Ink on the bottom. I stamped all the images with black Versafine ink and watercolor them with Distress Markers. Then I cut the hill from green cardstock for the flower's ground. The flowers have different colors. They are so pretty that even the bugs are gathered around them. I also added yellow sequins on the center of the flowers which adds more dimensions. Which one is your favorite bugs? Mine are the ladybugs, tiny and super cute.

Sunny Studio Stamps: Backyard Bugs Thanks A Buzzilion Bumblebee, Butterfly, Ladybug & Caterpillar Card by Lexa Levana.

Thank you so much for stopping by today. I hope you all have a wonderful day. 

Sunny Studio Supplies Used:
   

Thursday, January 5, 2017

Backyard Bugs Get Well Card with Vanessa

Hi everybody! Vanessa here with a clean & simple card using Backyard Bugs.

There are so many possibilities to use the small elements from the cute set. I created a pretty flower bouquet with it:

Sunny Studio Stamps: Backyard Bugs "Heard You Caught A Bug" Get Well Card by Vanessa Menhorn.


First, I trimmed a panel of white cardstock slightly smaller than my card base. Then I stamped the flowers, the pot and the ladybugs. The small "berries" are the sprinkles from the set Sweet Shoppe. After I had colored the images with Copics, I masked the top part of the panel and applied light blue ink with an ink blending tool. Finally, I stamped the sentiment and adhered the panel to the card.

Sunny Studio Stamps: Backyard Bugs "Heard You Caught A Bug" Get Well Card by Vanessa Menhorn.

 It's so fun to play with the little images to create a whole new image!

Thanks for stopping by today!


Sunny Studio Supplies Used: