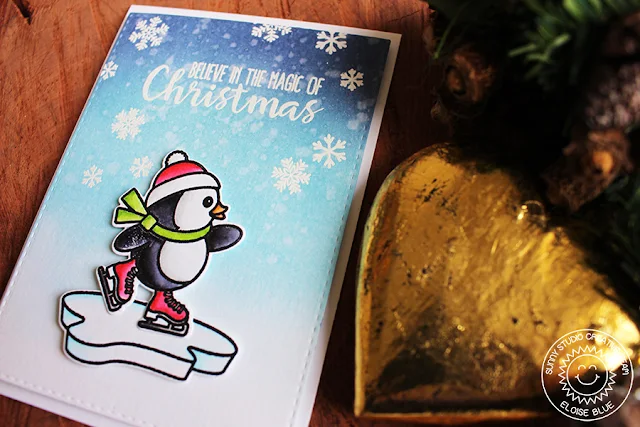
Hello everyone! Eloise here and I'm here to share a card using the Snow Kissed stamp set that was previously released. This is a super fun set with three different penguins doing snow related activities. So cute and unique!
To begin my card I stamped, coloured and die cut out my penguin skating and the ice. I used my Zig Clean Color Real Brush Markers for the colouring today, since they're super quick and easy to use. Once they were done I needed a background. I wanted a resist background, so I grabbed a piece of watercolour cardstock and the snowflake stamps from the Snow Kissed stamp set. I also used the large sentiment from the Holiday Style stamp set and stamped that down too. I used Versamark ink along with white embossing powder. Once they were heat set I pulled a few blue Distress Inks and ink blended the background in an ombre style to white, since I wanted that to sort of be like snow.
Once my panel was blended I popped up my penguin and ice on some foam tape and adhered them down. I then used a piece of fun foam and popped my panel up and adhered it down to my card base. To finish it up I used some Wink of Stella on the penguin to give it some sparkle.
Thanks for stopping by today! I hope you enjoyed. Make sure you come back the rest of the week to be inspired more!
- Eloise
Sunny Studio Products Used:
Monday, November 7, 2016
Saturday, November 5, 2016
Guest Designer Spotlight: Christmas Cards with Juliana Michaels
Hi everyone! It's Juliana Michaels and I'm so happy to be a guest with you here again on the Sunny Studio Stamps blog. Today I'm sharing four cards I created using stamps and dies from the recent Sunny Studio Winter Release.
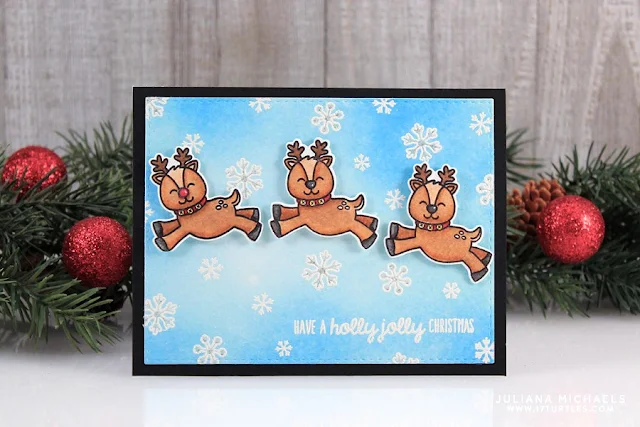
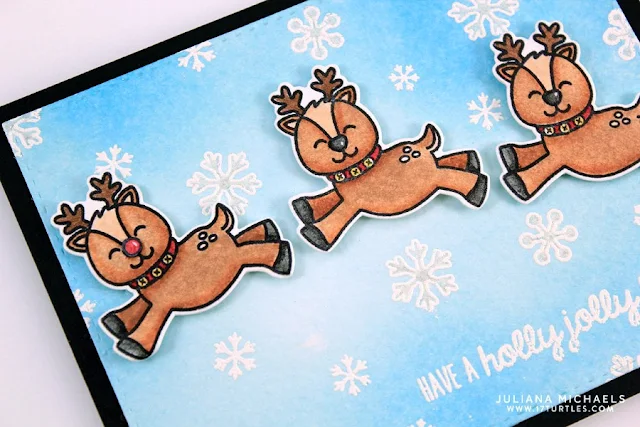
For my first card, I stamped the flying reindeer from the Gleeful Reindeer stamp set onto watercolor paper and die cut them using the coordinating dies. I then colored them with Zig Clean Color Real Brush Markers.
To create the snowy sky background, I stamped the snowflakes and the sentiment onto watercolor paper using Versamark Embossing Ink, sprinkled them with white embossing powder and heat set them with my heat gun. I then used Distress Ink and a foam blending tool to add color. To make the snowflakes a bit sparkly and shiny, I colored them in using a Clear Gelly Roll Stardust Pen.
I used the Gleeful Reindeer stamp set again and those adorable reindeer on my second card. For this card, I randomly stamped the reindeer and presents to create a fun background.
I then colored them with Zig Clean Color Real Brush Markers. The sentiment was then stamped onto red cardstock using Versamark Embossing Ink, sprinkled them with white embossing powder and heat set with my heat gun.
When I first saw this Winter release, I was so excited to see the Mug Hugs stamp set. As a coffee lover, I knew this set was going to be so much fun to create with.
For this card, I stamped the images onto watercolor paper using Versamark Embossing Ink, sprinkled them with white embossing powder and heat set them with my heat gun. I then die cut the shapes using the coordinating die and colored the images in with my Zig Clean Color Real Brush Markers. I then had fun creating a little scene with the mugs, candy cane and cookie.
On my final card, I again used the Mug Hugs set. As you might have noticed, I love to stamp onto watercolor paper using Versamark Embossing Ink and heat emboss the image. This makes coloring with markers so easy, because it helps keep the ink inside the lines.
To create the background on this card, I randomly stamped the stitched heart and the little coffee bean onto a piece of kraft paper. I then layered the die cut pieces and patterned paper and adhered them to the card front. I finished this one off with a bit of jute tied into a bow.
Thanks so much for stopping by today. I really enjoyed this opportunity to share with you here on the Sunny Studio blog. Thanks again Mendi for having me!
Sunny Studio Supplies Used:
Friday, November 4, 2016
Christmas Icons Merry With Friends Card by Lexa
Hello everyone! Lexa here today with more inspirations for your Christmas cards. I can't believe it's November already, Christmas is around the corner. This card is inspired by some pretty wrapping paper.
I started with a piece of 4"x 5.5" watercolor paper, and stamped some images from Christmas Icons with Tattered Rose Distress Ink (or you can use light color ones you have for no-line watercoloring) I colored all the images with my Kuretake Gansai Tambi watercolor palette. This step took a while but it was so much fun at the same time. I choose classic Christmas color tones this time, red, green and gold. While I was doing some coloring, I always tried to keep the color chart in my head so that I keep in track. That's my trick. After finished with all the images, I colored the gap in between with gold watercolor. Believe me, it's so much prettier in real life. I try my best to capture the shine and how sparkly it is.
I die-cut the Merry Word die three times on a white cardstock and one time on the red one. I stacked and adhered all of them together, so it's thick enough to give a dimension to my card. To accompany the word merry, I used Merry Sentiments and gold embossed it on a strip of black cardstock. I'm happy with the result. Last but not least, I tie a white twine and a wooden button for an embellishment.
Thursday, November 3, 2016
Mug Hugs Reindeer Hot Cocoa Card with Vanessa
Hi! Vanessa here with a fun shaker card using Mug Hugs with various other sets! I like to dress up those fun mug images of the set. Here I used Christmas Icons to create a Christmas mug.
I can't help but use plaid patterned paper for Christmas cards! Here I die-cut a circle window from the panel of patterned paper, adhered a piece of clear cardstock behind it and backed it with fun foam. Then I filled the window with sequins and die-cut stars (using the star border die) and adhered the shaker element to the white card base.
I stamped the "Christmas" and adhered the "merry" that I had die-cut from pink cardstock. Now I stamped the mug and the reindeer head, colored it with Copics and die-cut it with the matching die. Finally, I adhered the mug to the top of my shaker window.
Thank you so much for stopping by today! Have a wonderful week!
Vanessa
Wednesday, November 2, 2016
Holiday Style: Creating A Whole New Look with Lindsey
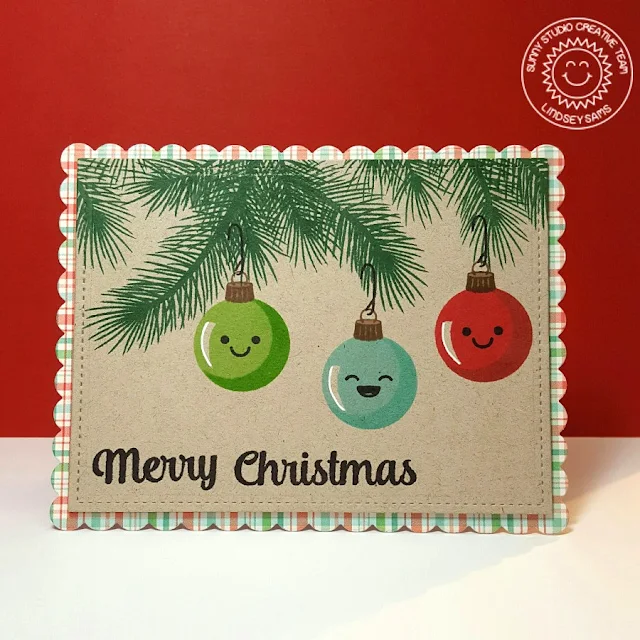
Hi, Lindsey here today sharing a fun card using the new Holiday Style stamp set. I have never really been someone who was drawn to layering stamp sets, but now that I have tried them, I really enjoy working with them. Plus, it gives me an opportunity to use my fun colored dye inks! Let's get started.
To begin this card, I started with a scalloped rectangle cut from some plaid holiday paper. The rectangle is slightly smaller than an A2 size card base. Next, I cut a smaller stitched rectangle from some Kraft cardstock. This is the layer I planned to do my stamping on. I chose to use the pine branch and the ornament. I stamped the pine branch several times across the top of my rectangle, and then decided where I wanted to stamp each ornament. Once I had the ornaments stamped, I added their metal topper and hook. I love how all the layers make the ornament pop off the paper.
Then, I decided to give my ornaments a face using the little faces that came with the Fresh & Fruity stamp set. The faces gave the card a more playful look which I liked. Finally, I stamped my sentiment from the Merry Sentiments stamp set, and put my Kraft panel onto my plaid rectangle using some foam tape.
I hope I've inspired you to give this set a try, even if you aren't normally a layering stamp kind of crafter. It's fun, believe me! Keep checking back to the blog for more inspiration and have a great day!
Sunny Studio Supplies Used:
Subscribe to:
Comments (Atom)


