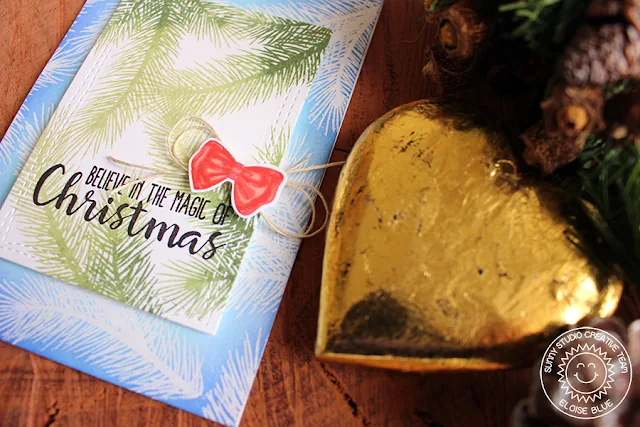
Hi everyone! Eloise here and today I'm here to show you my card using the Holiday Style stamp set. This is probably my personal favourite from the release. I love the big bough image along with the ornament stamps. Did I mention they're layering stamps too?! Absolutely amazing. They are so super fun and easy to layer up to create a fun dimensional ornament. The sentiments are super great too! I love the mix of fonts.

To begin my card today I started off with creating my background. I was originally going to stamp just one layer of the bough image, but instead I decided to stamp it on two pieces and layer it up. To make the bough image line up on the piece that's popped up and the piece on the card base I used my MISTI, just to make it easier on myself. You could try doing this just by hand with acrylic blocks and layering the pieces on top of each other (one full background and one die cut piece) and then stamping on top to get the image stamped in the same spot on both pieces easier, but I have a MISTI and voted doing it this way round this time. So, to do my stamping I first put in my full sized piece of cardstock and then layered my smaller die cut piece over top and then marked on the grid paper inside my MISTI where that die cut piece needed to be in the centre so when I went to line it up next time, it could be in the same position. I hope this makes sense. So now that I knew where my paper had to be placed I could begin stamping.
For the large background piece I stamped down my images with Versamark ink and clear heat embossed them after every time I stamped down one, just so it didn't dry on me. For my smaller die cut piece, I used various green inks to create and ombre effect and because I used my MISTI, my stamp stayed in the same spot and I could ink up one colour at a time and just wipe off a little to make it blend together nicely. This also benefitted me for stamping the stamp in the same spot on both pieces too. Once all my stamping was done I could ink blend the background. I used two Distress Inks - Blueprint Sketch and Tumbled glass and created an ombre background too, fading into the middle where the other piece was going to be layered on top and because I clear heat embossed the boughs to begin with, they resisted the ink and remained white.

Now that the background was blended, I stamped out the sentiment with some black ink on top of the green stamped piece and then added a sheet of fun foam behind it and added it to the middle of my card, lining it up so it looked like it was continuous. For the last bit of my card I wanted to add a pop of colour. I took the layering bow from the set and grabbed three redish inks and stamped them on top of each other. This was so easy to line up and it looks amazing! I grabbed some twine and added a double bow behind the stamped bow and adhered them down to my card. To finish it up I grabbed my Wink of Stella in the clear and added it onto the bow, the word Christmas and a little to the green stamped boughs.
I hope you enjoyed my card today and got inspired. Thanks so much for stopping by today and I hope you'll come back the rest of the week to check out some more projects!
- Eloise
Sunny Studio Products Used:


