Monday, August 15, 2016

Autumn Greetings Slider Card with Eloise

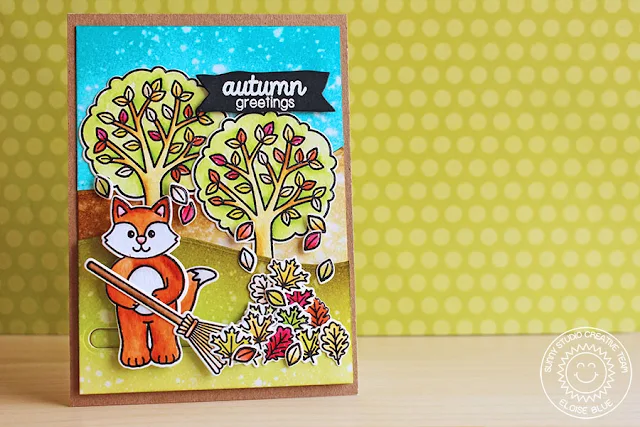
Hello everyone! Eloise here and I'm here to show you my creation for this week. For the recent blog hop I just made a slider card and honestly, I just can't get enough. They're so much fun so I decided to just make a mini slider card today, since I wanted my fox to look like she's sweeping up the leaves. I'm using a mixture of stamp sets on my card today - I'm using the new Woodsy Creatures and Halloween Cuties, along with Harvest Happiness, Summer Picnic and Backyard Bugs. I love mixing in sets together!

Sunny Studio Stamps: Fall Leaves Slider Card by Eloise Blue (using Woodsy Creatures,Harvest Happiness, Halloween Cuties, Summer Picnic & Backyard Bugs)

To begin my card today I stamped out all the images on some watercolour paper and clear heat embossed the images. I used my Zig Clean Colour Real Brush Markers for todays colouring, since they're quick and easy and I knew I had a lot to colour! Once everything was coloured I used the coordinating dies to die cut all my images out.

Now it was time to work on the background. I used several Distress Inks to make this background along with a curved die - but you could just as easily use your scissors to cut the different layers. I made a blue layer, brown layer and green layer to make my scene feel complete. Once that was done I moved onto my slider portion.  As I've done before I used a die to cut this - but since this one is super easy and is straight, you can just use a ruler and a craft knife. Once the slit was die cut out I used 2 circle dies to cut out some circles and used some foam tape piled up in between the two circles and that created my slider part. I did this twice also.


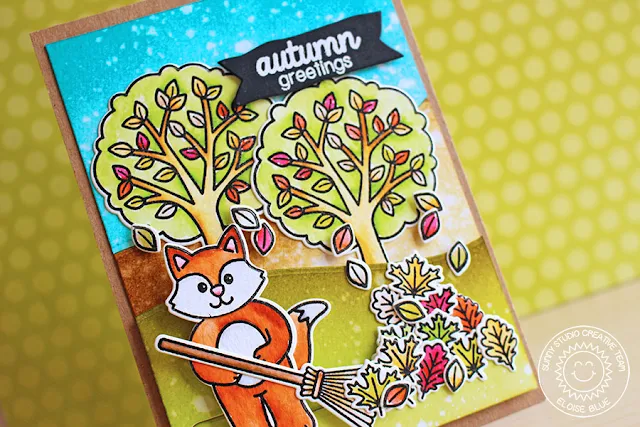
Sunny Studio Stamps: Fall Leaves Slider Card by Eloise Blue (using Woodsy Creatures,Harvest Happiness, Halloween Cuties, Summer Picnic & Backyard Bugs)

Now it was time to arrange my card and pull it all together. I first started with adhering all my leaves together to make a pile of them. I then used liquid adhesive for all the pieces since I knew my fox was going to be popped up because of the slider and I needed it to be able to go over all the images. Once everything was mainly stuck on I needed to adhere some of the extra leaves I had onto the broom - to give that look of sweeping and then I used a few extra smaller leaves that I had and stuck some of those down flat and some popped up as to show them falling from the tree. For a last finishing touch I stamped the sentiment 'autumn greetings' from the Woodsy Creatures set and white heat embossed it onto a black banner I die cut. I popped that up on the right hand side of my card and that finished it up.

I hope you enjoyed my card today and got inspired. Make sure you check back on the blog this week to see the other amazing cards the team will make!

- Eloise

P.S. Just a reminder that today's the last day to take advantage of the 15% OFF SALE to the Sunny Studio Online Store using the code SUNNYBIRTHDAY and to hop to win one of sixteen $20 gift certificates HERE.  :)

Sunny Studio Products Used:


Friday, August 12, 2016

Sunny Studio 1st Birthday Blog Hop with Fall Release & Giveaways!


Hello & welcome!  I'm so happy to have you joining us for our 1st Birthday Blog Hop!  I can't fully express how happy it makes me to have made it to this day and to have you here celebrating the occasion with us!

Up first I have a card using the Costumed Kitty from our new Halloween Cuties set, along with the pumpkins from our Harvest Happiness set which I colored with Copics.  For my circular edge, I inked up my background using salty ocean distress ink and then did some second generation stamping using the same ink color with a little leaf from our new Woodsy Creatures set.  I finished my card by heat embossing my sentiment in white on black cardstock and cutting the edge using our original Fishtail Banner dies.
Sunny Studio Stamps: Halloween Cuties Card by Mendi Yoshikawa

For my next card, I combined the body from our Comfy Creatures set with the tail from our new Woodsy Creatures set and the face from the Raccoon Witch in our new Halloween Cuties set.  I completed the scene for my little flying raccoon by inking up the background using Salty Ocean and Blueprint Sketch distress inks and heat embossing the background with white opaque powder with the stars & moon from the same Halloween Cuties set.  

To complete my card, I inked up a strip of white cardstock with Mustard Seed and Spiced Marmalade distress ink, die-cut one end using our original Fishtail Banner dies and stamped the sentiment in versafine ink.  I love how the small touches of yellow pop against the royal blue and black backgrounds!
Sunny Studio Stamps: Halloween Cuties Raccoon Card by Mendi Yoshikawa
For my last card today I used our new Autumn Splendor set, along with a complimentary 3/4" tall diamond die (see details below).  I grouped 4 of the diamonds together to create one larger diamond to form my argyle pattern.  Click to download a PDF with step-by-step photos and instructions.


Sunny Studio Stamps: Autumn Splendor Fall Leave Argyle Card by Mendi Yoshikawa


What's a party without some presents, right?  In addition to 16 cool prizes we're automatically offering a free mini diamond die (shown above) with every order.


We also have 15% off at our online store with the code "SUNNYBIRTHDAY" through Monday, August 15th at Midnight PST.


Before you go, make sure to check out all the AMAZING projects being shared by some very special guests using our newest sets.  I have admired each one of these ladies for so many years and it warms my heart to have them helping me celebrate this special milestone.  

Not only are you guaranteed to be inspired, but each one of them is also giving away a $20 gift certificate to our online store.  Use the Rafflecopter below to enter a drawing here on our blog as well for a total of 16 chances to win

a Rafflecopter giveaway You're next stop in the hop is the sweet and talented Jennifer McGuire.  :)


Thanks so much for helping us celebrate!  :)


Sunny Studio Supplies Used: 


Thursday, August 11, 2016

Inspiration Week: Introducing Woodsy Creatures Set
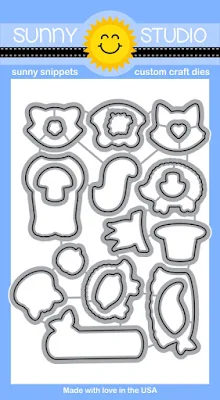
Hello there!  Welcome to Day 3 of our Fall Inspiration week.  Today I'm showcasing a new set called Woodsy Creatures (hitting our online store early tomorrow morning).  ;)

This set is made to mix and match with the previously released Comfy Creatures and Sending My Love sets.  It comes with 5 new woodland critter faces, 3 tails and the addition of a new standing body (in addition to several accessories and sentiments).  The faces from this look awesome with the sitting body from Comfy Creatures so I used that on a number of the cards shared here today.

Up first is a card that immediately came to mind while designing this set.  I feel like I was channeling my inner Laura Bassen on this one.  For my sentiment I used the word "hello" from our Sunny Sentiments set.  
Sunny Studio Stamps: Woodsy Creatures Racoon, Fox & Skunk Card by Mendi Yoshikawa

My second card combines the acorn from the new Autumn Splendor set shared yesterday, along with the hearts from our Stitched Hearts dies, a custom sentiment using our Sweet Script stamps and a pennant strip using our Fishtail Banner dies.


Sunny Studio Stamps: Chipmunk & Acorns Card by Mendi Yoshikawa (using Woodsy Creatures, Autumn Splendor, Stitched Hearts & Fishtail Banners)

For this card I dressed up my critters with the feather headdress and pilgrim hat and put a little pumpkin and pie in their hands to create a Thanksgiving themed card.   I cut my pennant shape along the bottom edge with our Fishtail Banner II dies and then used the mini heart in the set to embellish the scalloped edge.


Sunny Studio Stamps: Woodsy Creatures Thanksgiving Pilgrim & Indian Card by Mendi Yoshikawa
For my skunk card I used the same tail that was used on the squirrel card.  I love that it can work for both creatures depending on the way you color it.  To create my card I started by inking up my scalloped circle with Tumbled Glass distress ink and then flicked on color for my grass using Copic markers.  I then sponged on some Mowed Lawn distress ink along the bottom edge to fill in any missing spots of color.  I loved having the log and mushrooms to embellish with--They add a fun pop of color!
Sunny Studio Stamps: Woodsy Creatures Skunk Card by Mendi Yoshikawa

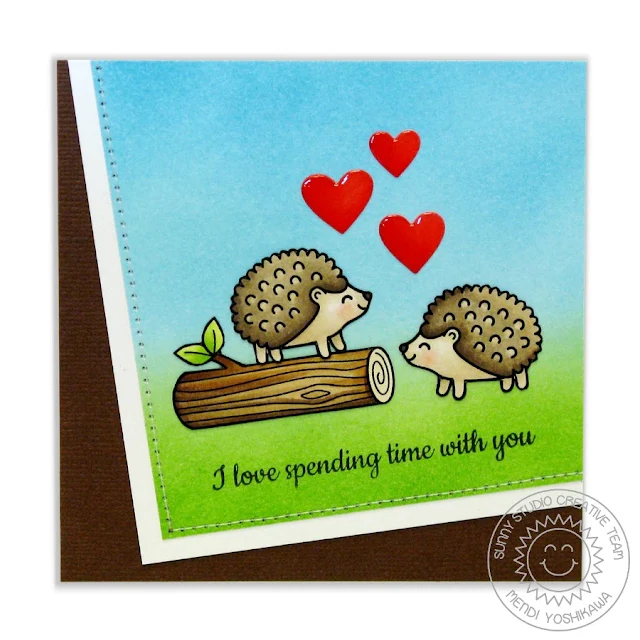
I love designs on the diagonal and this one was so fun and easy to create on a little 4.25" square card.  I embellished with hearts cut using our Stitched Heart dies and topped with glossy accents.  I finished off my card with a sentiment from our Sock Hop set.
Sunny Studio Stamps: Woodsy Creatures Hedgehog Card by Mendi Yoshikawa
For my last card I cut little polaroid frames on my Silhouette Cameo using cutting files by Lori Whitlock and then created little scenes in each.  I wanted it to look like a set of photographs were scattered across my card front.  

I must confess this was the last card I created and I had some random pieces left that I had colored including an extra tree stump, a handful of mushrooms and an unused skunk tail.  I decided to cut the tree stump in half and continue it on the two photos in the background and then just popped the tail in there to look like another critter photo might be sitting down below. I ended up using every last item I had stamped and colored which was a fun little personal challenge.
Sunny Studio Stamps: Woodsy Creatures Hello Foxy Fox Card by Mendi Yoshikawa


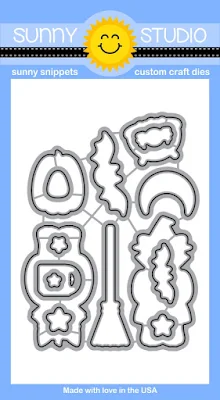
And here's a closer look at the new Woodsy Creature Stamps & coordinating dies...


Sunny Studio Stamps: Introducing New Woodsy Creatures Stamp Set   Sunny Studio Stamps: Introducing New Woodsy Creatures dies

Thank you for all your feedback this week!  My "love language" is words of affirmation so it fills my heart with joy reading your sweet comments.  

Make sure to check back tomorrow for the big celebration when we will have a sale, a special blog hop and lots of prizes!!!  Yay!  Can't wait...

Wednesday, August 10, 2016

Inspiration Week: Introducing Autumn Splendor Fall Leaves Set

Hello there!  Welcome to day 2 of our Fall Release Inspiration week!  Today I'm showcasing our new Autumn Splendor set coming out on Friday!  :)

I've been itching to do a solid stamp set for awhile now and I love the idea of a bold layering set that is perfect for so many different techniques (I promise you'll want to tune in on Friday when there will be loads more ideas for it).  ;)

For my first card I wanted to create a pretty border showing the set in all it's glory.  As an accent next to the sentiment I used one of my favorite images from the entire set: the little acorn!  I love how it looks when it's all layered together!

Sunny Studio Stamps: Autumn Splendor Fall Leaves Thank You Card by Mendi Yoshikawa

For my next card I started by cutting two V's using the Fishtail Banner and Fishtail Banner II dies.  I then layered the images from the set to create a bouquet of sorts for the center of my card.

This set comes with two sets of berry images with shadows on each side of the berry depending on how you plan to use it.  Sadly please ignore the fact that I should have adhered them the opposite way on my own card though--Oops!  ;)

Sunny Studio Stamps: Autumn Splendor Fall Leaves Thank You Card by Mendi Yoshikawa

For my next card I wanted to do something light and airy with a clean & simple design.  I used the alternate interior layering pieces for my two leaf sizes.  For the bottom of my card, I stamped the base using one of the scalloped borders from our Sunny Borders Stamp set and then die-cut it with the coordinating dies.

I then inked up the middle portion on the left side of the card with some Tumbled Glass distress ink to highlight the leaves and make them stand out. I finished my card by adding a jewel to the center for a touch of bling.

Sunny Studio Stamps: Autumn Splendor Fall Leaves Thank You Card by Mendi Yoshikawa

For my last card today I chose to forgo the shadow portion of the images and to heat emboss my stems in gold for a classy look.  It hard to tell in this picture, but I love the way the gold stems look in person!   I finished off my card by die-cutting my panel with our Fishtail Banner II dies and inking up the bottom portion of the card with a a color to match my red leaves.
Sunny Studio Stamps: Autumn Splendor Fall Leaves Falling For You Card by Mendi Yoshikawa

While I ran out of time to make a video, I did snap a couple quick pictures sharing my favorite way for stamping a bunch of leaves at once.  I started by die-cutting each leaf from a piece of scratch paper as a template.  I found that stamping onto the die-cut gave me an extra way to help line up my stem which was especially helpful for the berries (vs. stamping and then die-cutting).  


I then used my template in my MISTI stamp positioner so I could pop in my actual die-cut and position my stamp for quick assembly line style stamping.  You can take this concept one step further and stamp 4 templates all at once with one in each corner.  I had a blast cutting out & stamping a bunch of leaves in different colors for all my cards in one sitting (with plenty of extras for a rainy day).  


Here's a full look at the Autumn Splendor stamps and coordinating dies...


Sunny Studio Stamps: Introducing Autumn Splendor Fall Leaves Stamp Set   Sunny Studio Stamps: Introducing Autumn Splendor Fall Leaves Die Set

And here's a little visual I put together to show all the ways the stamps can be layered since I know they can look a bit strange on the stamp sheet without all the pretty colors. 


For those who are curious about which color combos I used on my leaves today, I actually picked from a variety of ink brands in my stash which I've listed below.  Luckily you really only have to find two colors that look good together so your options are truly endless.  ;)

Red Leaves:

Hero Arts Red Royal Shadow Ink
Ranger Adirondack Cranberry

Orange Leaves & Berries
Stampin' Up Pumpkin Pie
Hero Arts Just Rust Shadow Ink

Yellow Leaves:
Stampin' Up Daffodil Delight
Stampin' Up Crushed Curry

Green Leaves:

Hero Arts Green Hills Shadow Ink
Simon Says Stamp Green Leaf

Red Berries:
Stampin' Up Strawberry Slush
MFT Cherry Crisp

Stems:
Simon Says Stamp Dark Chocolate (for the lighter version)
Stampin' Up Chocolate Chip (for darker version)

Acorns:
VersaFine Vintage Sepia (for bottom portion base)
Close To My Heart Oak Brown (for bottom shadow and top base)
Stampin' Up Chocolate Ship (for top shadow)

I would love to hear your first impressions.  Thanks so much for stopping by.  


Tuesday, August 9, 2016

Inspiration Week: Introducing Halloween Cuties Set

I'm so excited that our little company is turning one this month and we're celebrating with three new Fall stamps & their coordinating dies coming out on Friday.  Today I'm sharing several ideas for a new stamp set called Halloween Cuties!  This set comes with two costumed Critters and includes all sorts of supporting images from jack-o-lanterns, to bats and spiders (I promise they're more cute than creepy).  ;)

Up first is a little scene using a number of images from the set (along with an extra pumpkin from our Harvest Happiness set) which I colored with Copic Markers.
Sunny Studio Stamps: Halloween Cuties Card by Mendi Yoshikawa

For my next card I focused on the bats, moon and stars from the set (and the banner from our Sunny Borders set).  After coloring my images with Copics, I finished my card by adding a bit of bling to the moon & stars using the new Spectrum Noir Clear Sparkle Pens.

Sunny Studio Stamps: Halloween Cuties Batty For You Bat Card by Mendi Yoshikawa

For my last card I used that the same little witch, pairing her with the broomstick and cauldron that come with the set.
Sunny Studio Stamps: Halloween Cuties Witch Card by Mendi Yoshikawa
Curious how I created the bokeh backgrounds for my three cards?  I've put together a little step-by-step picture tutorial for you (click on the image below to view it larger).  

It's a twist on an idea that the amazing Sandy Allnock inspired me with HERE.  She used magnets & a Copic airbrush for her idea and for mine I used die-cut vinyl circles, Distress ink & my favorite jumbo dauber by Tsukineko.  :)


I actually love this technique so much that I also used it on some cards shared earlier HERE and HERE.

Here's a full look at the new Halloween Cutie stamps and coordinating dies.


Sunny Studio Stamps: Introducing Halloween Cuties Stamp Set  Sunny Studio Stamps: Introducing Halloween Cuties Die Set

I'd love to hear what you think.  Make sure to keep checking back throughout the week.  I will be sharing more fun ideas, including more for this set on Friday when we will have 10 special guests helping us celebrate with a birthday blog hop and lots of prizes along the way!