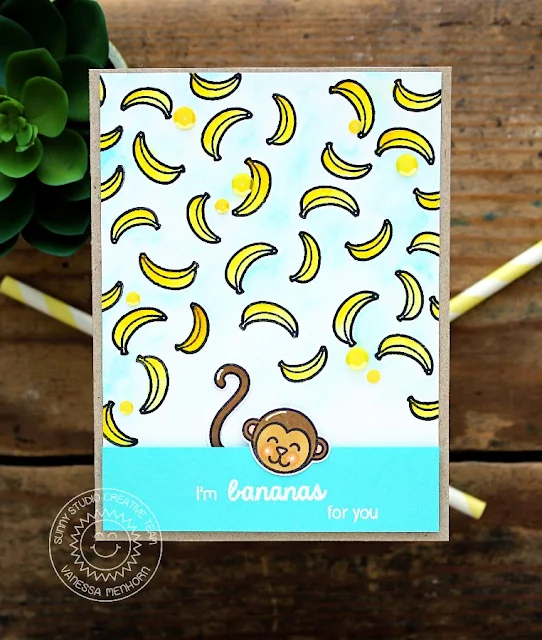
Hey everybody! Vanessa here with a happy banana card :)
The Comfy Creatures set is so cute with its adorable images and fun sentiments. Here is my card for today:
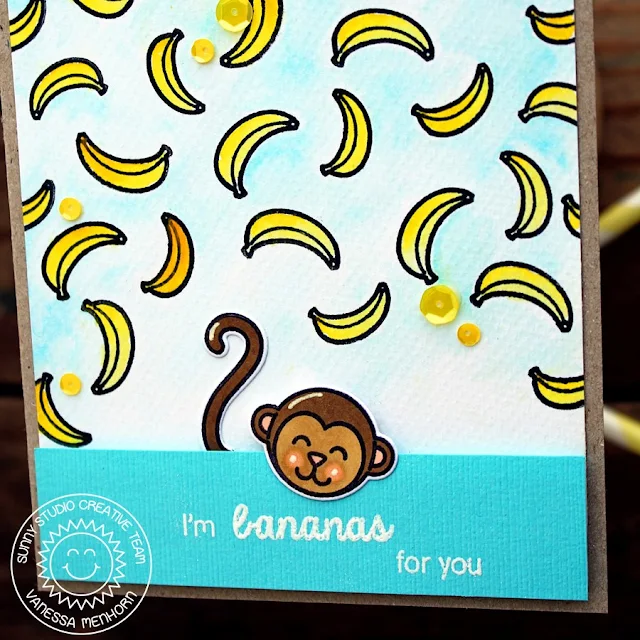
I started with a panel of watercolor paper that I had trimmed slightly smaller than a Kraft card base. I stamped the banana from the Comfy Creatures set and the banana from Summer Picnic repeatedly using archival ink, colored the panel with Peerless Watercolors and adhered it to the card. Now I stamped and heat-embossed the sentiment onto a strip of turquoise cardstock and adhered it with foam tape. I stamped, colored and die-cut the head and the tail of the monkey and adhered them. Finally, I added yellow sequins to the card.
Bananas! It's so fun to create your own background with small stamps. I hope you liked today's inspiration, thank you so much for stopping by! Hope to see you again next week :)
Vanessa
Thursday, May 19, 2016
Wednesday, May 18, 2016
Comfy Creatures Monkeys & Rainbows Birthday Card with Lindsey
Hi, Lindsey here again! Today I'm sharing a cute birthday card featuring the adorable stamp set Comfy Creatures. This set is full of adorable critters that you can mix and match with different bodies and accessories, and there are plenty of sentiments to make different kinds of cards. You get a lot of bang for your buck with this set.
I used the little monkeys with the beach bodies for this card. I started by getting my background ready. I cut some sunburst paper with a stitched rectangle for the top half of my card. For the bottom part of the card, I used the Wavy Border dies to create the water with two different colors of teal cardstock.
I also added a rainbow I made using different colors of cardstock and circle dies. I drew and cut out the clouds myself. Next, I stamped and colored the island and monkeys. I used the coordinating dies to cut the island, monkey tails, and flower on the girl monkey's head. I fussy cut the monkeys. The next step was to put together the scene. I used regular adhesive to attach everything but the monkeys and clouds. I popped them up a bit with foam tape. Lastly, I added some Spectrum Noir clear sparkle pen to the rainbow, clouds, flower, and the clothes on the monkeys.
That's it for me today. Be sure to keep checking back to the blog for more inspiration, and thanks for reading. I hope you'll try your own card using this sweet, fun set!
Supplies Used:
Tuesday, May 17, 2016
Comfy Creatures: Celebrate Birthday Card with Anni
Hey stampers, Anni here! Today I'd like to share a card I made using the set Comfy Creatures. For the stars in the background I used the Star Border Die and the sentiment is from the set Sunny Borders Die.
I stamped and colored the little monkey. I chose colored pencils for the coloring. I really love to use colored pencils but it takes a little bit of time. Coloring with Copics is so much faster. But when I have the time I prefer to use colored pencils.
I paper-pieced the sweater of the monkey. Hey, a monkey in a polka dot sweater - it couldn't get cuter, could it?
For the panel I cut a tag from white paper and a bigger one from patterned paper with stars, added a hole and twine bow.
For the sentiment I die-cut the word Celebrate once from yellow cardstock and a few times from black cardstock and stacked it up. I finished the card with some die cut stars in the background to complete the theme.
Thanks for stopping by and have a sunny week!
Anni
Monday, May 16, 2016
Comfy Creatures Island Retirement Card with Eloise
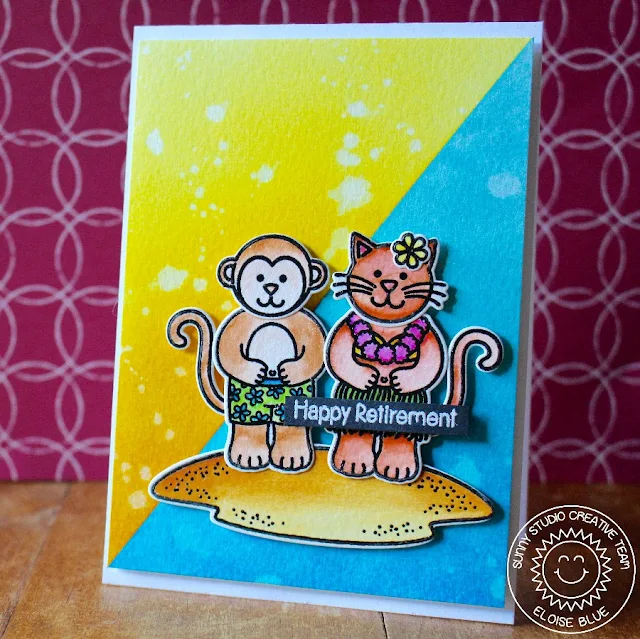
Hi everyone, Eloise here and I’m going to be creating a fun retirement card that would be perfect for someone going to retire on a island somewhere, or I guess someone that’s dreaming about it would work too! I’m going to be using the new Comfy Creatures stamp set as my focal point, but I’m also going to be pulling in the kitty head from the Sending My Love set (a previously released set) and the island from the new Island Getaway stamp set too, since it works perfectly with the two little summery bodies in their bathers from the Comfy Creatures set.
To begin my card I chose the two summery looking bodies, the monkey’s head, flower and the two tails from the Comfy Creatures stamp set. I also took the little island from the Island Getaway set and the cat head from Sending My Love to stamp and colour too. To colour these in, I’m going to be using watercolours. I’ve been completely obsessed with water colouring everything lately! I stamped out my images in black ink and clear embossed over them and then coloured in my images with Zig Clean Colour markers. To cut out all my images I used the coordinating dies from all three sets.
For a little bit of a different background I decided to cut down a piece of watercolour cardstock and then cut it at a diagonal to create two different angled panels. I thought it would be fun and a little bit of a different look. I used some Distress Inks on both pieces using various yellows on the top panel and blues on the bottom panel. I sort of figured it looked like sand and water I guess. I the splattered some water on to give a splotchy look – I love doing this! I adhered the two angled pieces together with some washi tape on the back side to make sure they don’t shift and then I added some fun foam at the back to permanently adhere them together and then adhered it onto my card base. I then took my images and mounted them all on foam adhesive and placed them down into the bottom right corner of my card. To finish off my card I stamped out the ‘Happy Retirement’ sentiment from the Comfy Creatures set and white heat embossed it on a strip of black cardstock. I also adhered this using foam adhesive.
I hope you enjoyed my project today. I just love creating island scenes and I think those little bodies from the Comfy Creatures set is just perfect and I also love how it works so well with other stamp sets and you can mix and match from previously released sets – just makes it that much more versatile!
Make sure you check back tomorrow and the rest of the week to see what the other design team ladies have designed! I’m sure they’re going to be fantastic.
- Eloise
Sunny Studio Products Used:
- Comfy Creatures Stamps
- Comfy Creatures Dies
- Island Getaway Stamps
- Island Getaway Dies
- Sending My Love
- Sending My Love Dies
Saturday, May 14, 2016
Guest Designer Spotlight: Tropical Paradise Card with Chari Moss
I am so thrilled to welcome the talented Chari Moss to the blog today with an incredible card using our Tropical Paradise set! Take it away Chari...
For this card I used masking to create a one layer plumeria heart with leaves. I then colored it with my colored pencils blending with a blender pencil then carefully fussy cut the outside and inside of the heart. I used the same technique to color the flamingos then layered them over top using foam adhesive to pop them up off the card a bit to make them stand out from the flowers better. Since the coloring is focal point of the card I kept it simple with a kraft card base and a simple sentiment banner at the bottom.
Didn't this incredible?! I am so in love with this idea! Thank you Chari for sharing your wonderful idea with us. :)
Subscribe to:
Comments (Atom)


