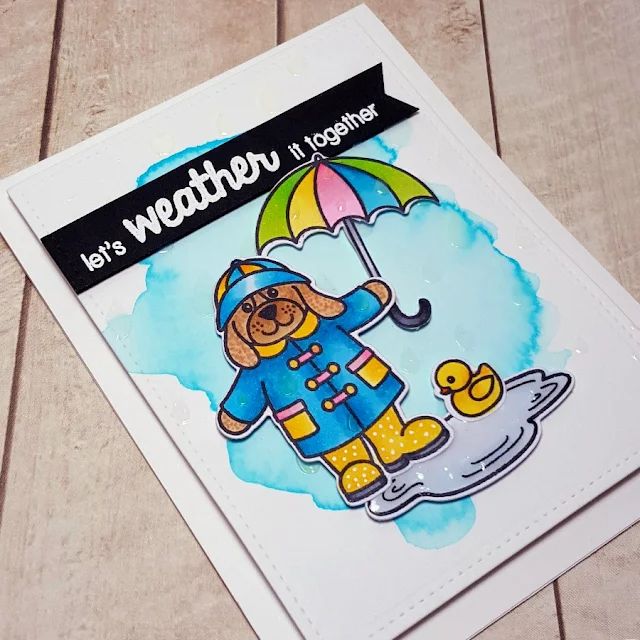
Hello there! It's Heidi here today with another card using the Rain or Shine stamps & coordinating dies.
To go with my rainy theme I created a watercolored panel for my backdrop. I started by applying water to my cardstock and then dropped in color using my Tumbled Glass re-inker (which had been lightly watered down on an acrylic block on the side beforehand).
My images were colored with Copic Markers and afterwards I embellished with a gel pen adding dots to the rain boots and giving the puppy dog some freckles. As a finishing touch I added drips of glossy accents to the umbrella and some drops of glossy accents to the background the reinforce the rainy day theme.
Thanks so much for stopping by. The team will be back again tomorrow with more ideas using this fun set! :)
Tuesday, February 23, 2016
Monday, February 22, 2016
Rain or Shine Let's Weather It Together Card with Melissa
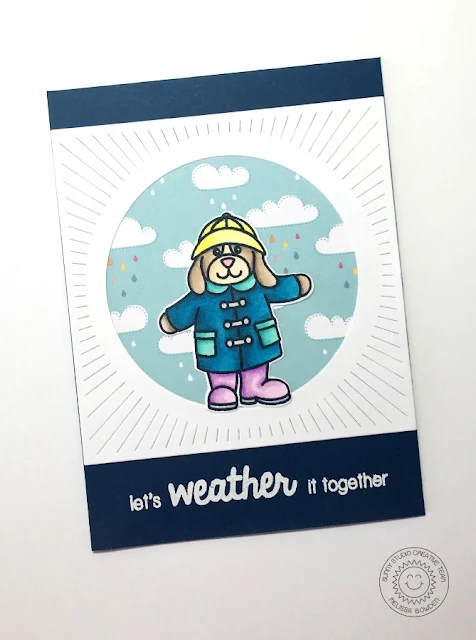
Hello everyone, Melissa here! I am sharing a card with you today featuring the Rain or Shine stamp set and coordinating dies!
To create the card for today I first built the background of the card. I die cut this fun sunburst die out of white paper and put some patterned paper underneath it. The clouds and rain drops fit the scene perfectly. I then stuck those onto a navy card base. I stamped the “lets weather it together” sentiment on the bottom in Versamark ink and heat embossed it with white embossing powder. I then stamped the little dog from the set off to the side on some white paper. I colored him in with Copic markers and used the coordinating die to cut him out. I then stuck him to the card with his feet just resting on the bottom of the circle.
That finishes up the card for today. I hope you liked it! Thanks for stopping by! :)
Saturday, February 20, 2016
Sunny Saturday Share: Customer Cards & Tags for Spring
Happy Saturday! I'm popping in with some great projects spotted on the web in the past week or two from our wonderful customers.
Up first is a super cute set of Easter tags by Ashley @sparklycanadiancraftygirl using our A Good Egg stamps and matching dies. I'm so in love with her bright happy colors and the idea of monochromatic tags! :)
Ashley shared another project using the eggs, easter basket & sentiment from that same A Good Egg stamp set (with some other stamps from her stash) to create this darling Easter card. So cute! :)
For our third project, Anastasiya Sokolova at @stasynic shared this darling card on instagram using our Happy Home stamp set (which is currently sold out, but expected back in stock in early March). Love her cute use of the fence die in the foreground. Such a fun little scene! :)
We'd love to see what you've been creating with our stamps & dies too! As always you share your creations with us on our Facebook page, in our Flickr group or by tagging us with the hashtag #SunnyStudioStamps on instagram.
I hope the rest of your weekend is happy! :)
Friday, February 19, 2016
Guest Designer Spotlight: A Good Egg Easter Cards by Anita Madden
I'm so excited to welcome Anita Madden as a special guest to the blog today! Her darling cards caught my eye over at Instagram and I was delighted when she agreed to create some cards to share with us today! Take it away Anita...
Hello everyone! I’m so excited to be guest designing for Sunny Studio Stamps today. I used the A Good Egg stamp set and the coordinating dies to make the cards I’m sharing today.
I colored everything with copics and cut out all the images with the coordinating dies. I used some white acrylic paint to add polka dots to some of the eggs and I added Glossy Accents to the chick’s beak and feet. I cut my papers with stitched rectangle dies and stamped the sentiment on a flag banner. I added a few enamel dots to finish off my card.
I cut the cardstock panel with a stitched rectangle die and using the masking technique, I stamped the chick and some eggs. I masked the images and sponged on some blue and green inks. I colored the chick and eggs with copics and used Glossy Accents on the chick’s beak and feet. I adhered fun foam behind the cardstock panel and then adhered it to the card base. Again, I added some enamel dots to the card.
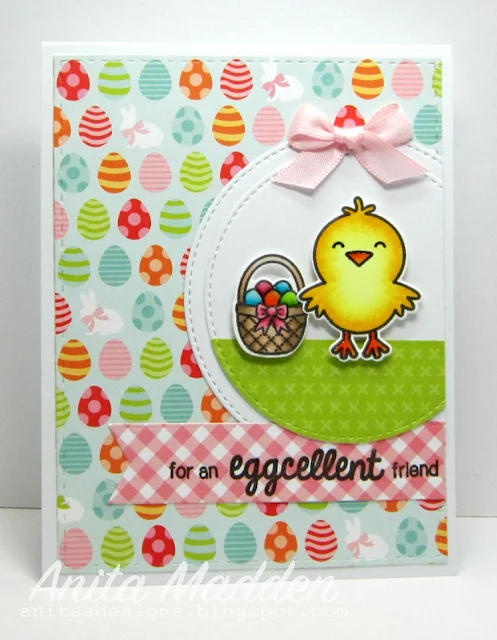
I colored the images with copics and cut them out using the dies. I added Glossy Accents to the chick’s beak and feet, and also to the eggs in the basket. I cut the egg designer paper with a stitched rectangle die and cut two circles with a stitched circle die. I also cut a piece of green dp with the stitched circle die for the “grass”. I stamped the sentiment on a flag baner and added a small bow.
I used a stitched rectangle die to cut a piece of watercolor paper and then applied water and distress inks to create the watercolored background. I colored the images with Copics and used the dies to cut them out. I added Glossy Accents to the chick’s beak and feet, and also to the paint in the can. I added some sequins for a little bit of sparkle.
Didn't Anita do a fabulous job?! I'm in love with every single adorable card! I hope you will stop by her blog and leave her some love! :)
Thursday, February 18, 2016
A Good Egg Happy Easter Card with Elise
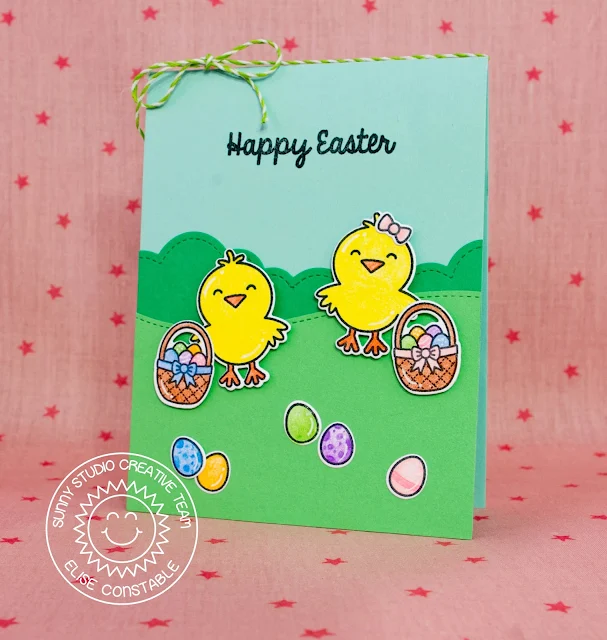
Hello everyone! It's Elise here to share an Easter card with you that features the "A Good Egg" stamp set and die!
I added some extra details to the chicks, Easter basket, and eggs with my white gel pen. That is such a fun and easy way to add some extra detail without much work! I also thought that the girl chick needed a pink bow for her hair! :)
Thanks for stopping by and stop by again tomorrow for some more inspiration! :)
Subscribe to:
Comments (Atom)


