Hi there! It's Marion here with a little project using the newly released Sending My Love stamp set. Talk about a cutsie patoosie stamp set! Lots of different mixing and matching can be done with this one and it also has coordinating dies as well.
Today I have created a simple chocolate wrapper; a perfect little gift to give to someone special on their birthday.
To create the wrapper, I took some red card stock and trimmed it to just under the width of the chocolate box. I wrapped it around the chocolate and drew some pencil marks on the edges, so I knew where to make the fold fines with my scoring board. I made it a fairly snug fit, but still loose enough to slip on and off easily. Before adhering the wrapper ends together, I stamped some love hearts from the Furever Friends stamp set in red ink to create a subtle tone on tone effect.
The bear was coloured with Copic markers. I added some some red Stickles to the love heart to add some sparkle and some Glossy Accents to his nose.
Sunny Studio products used:
Thanks for stopping by today,
Marion
Wednesday, January 6, 2016
Tuesday, January 5, 2016
Sending My Love Simple Puppy Dog Hugs Card by Mendi
Hello there! How was your first day back to a normal schedule? For those who have kids, are you the type who like to have your kids back in school or do you love the break in routine? I'm sort of in the middle. I loved not having to wake up early and pack lunches, but I also love having my kids in school and not sitting home bored while I work. ;)
Today I have a simple little card I created for a friend who had lost a pet using our new Sending My Love stamps... I wanted to keep my design clean so I colored the image with Copic markers and fussy cut it out. To ground the image I added a shadow using the solid oval found in the Sunny Borders stamp set.
For my sentiment I cut out 4 of the "hugs" word dies that come as a bonus with the Furever Friends dies, coloring just the top one with an ombre look with my Copics before stacking and gluing them together with my zig glue pen to create the look of chipboard and add a little dimenson. :)
I hope you have a great day and check back tomorrow to see what the team has up their sleeves using this new set. :)
Monday, January 4, 2016
Sending My Love Critters Sending Birthday Wishes Card by Mendi
Hello there! Happy Monday! Thanks to everyone who made our new release such a success so far! I can't wait to see what you all create with your purchases! :)
This week we are showcasing some more ways to use the new Sending My Love stamps and dies and I couldn't resist taking the opportunity to use the little critter faces all by themselves! :)
To get my faces to line up in a somewhat perfect circle, I used a smaller circle die in my nested set to help push my faces up against and help me with spacing before adhering them to my card with a glue pen.
For my sentiment I mixed the "sending" word from the set with the "Birthday Wishes" sentiment from Birthday Smiles. My background was inked up using Peacock Distress ink and I just love the way it compliments the grey and brown critters. :)
The stamps and dies were a bit late arriving to the team so I will be back tomorrow with one more idea using the Sending My Love set while they try to catch up. Until then, I hope you have a fabulous day! :)
Friday, January 1, 2016
Inspiration Week: Introducing Sunny Borders & Sweet Script
Happy Friday! Today's the big day! Our Spring release is officially available for purchase in our online store and slowly becoming available at select retailers.
Today I am showcasing some of the fun ways to use our new Sunny Borders stamps & dies and the new Sweet Script alphabet stamps. :)
This first card shows one fun way to use the chevron border from the Sunny Borders set. I used my MISTI tool to have the stamp and then moved my card panel up by 1/4" between each color. I paired it with the snail from Backyard Bugs and the little mailbox, letters and part of the sentiment from Sending My Love.
My second card was shared yesterday, but I wanted to share it here as well to showcase the heart border from Sunny Borders which I heat embossed in the background. I alternated clear and white embossing powder for a fun twist, heating them up between each row.
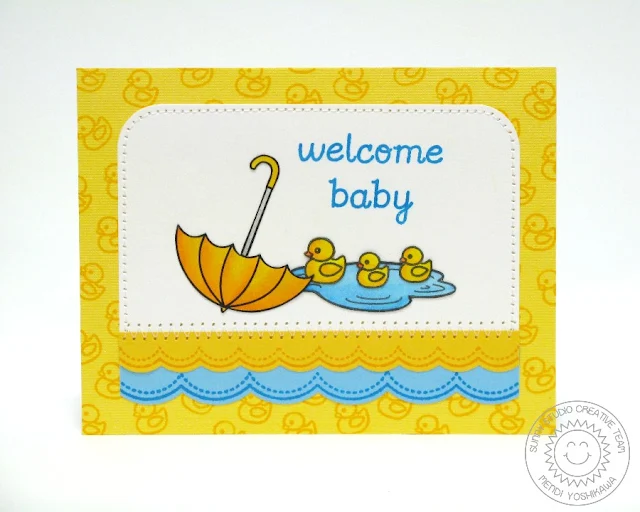
My next card uses both the Sweet Script stamps for my custom sentiment and the Sunny Border stamps and dies. I love how the dies perfectly cut out the matching scallops for the stamps! For the images I used the chick, puddle and umbrella from our Rain or Shine set shared on Monday. :)
I hope you've enjoyed all the inspiration this week. Here's a closer look at the two new sets being featured today...
Don't forget we also have the promo code "SAVE5" for all orders over $49 to help offset your shipping costs. If you are interested in everything you've seen this week we also are offering a bit of a discount on a couple of bundles.
You can shop all the new arrivals HERE or see our full shop HERE. We've also finally had replenishment on our Fishtail Banner dies! :)
Today I am showcasing some of the fun ways to use our new Sunny Borders stamps & dies and the new Sweet Script alphabet stamps. :)
This first card shows one fun way to use the chevron border from the Sunny Borders set. I used my MISTI tool to have the stamp and then moved my card panel up by 1/4" between each color. I paired it with the snail from Backyard Bugs and the little mailbox, letters and part of the sentiment from Sending My Love.
My second card was shared yesterday, but I wanted to share it here as well to showcase the heart border from Sunny Borders which I heat embossed in the background. I alternated clear and white embossing powder for a fun twist, heating them up between each row.
My next card uses both the Sweet Script stamps for my custom sentiment and the Sunny Border stamps and dies. I love how the dies perfectly cut out the matching scallops for the stamps! For the images I used the chick, puddle and umbrella from our Rain or Shine set shared on Monday. :)
For this card I used both the banner and the scalloped stamps and dies from Sunny Borders, paired with the butterfly, flower pot and sentiment from Backyard Bugs.
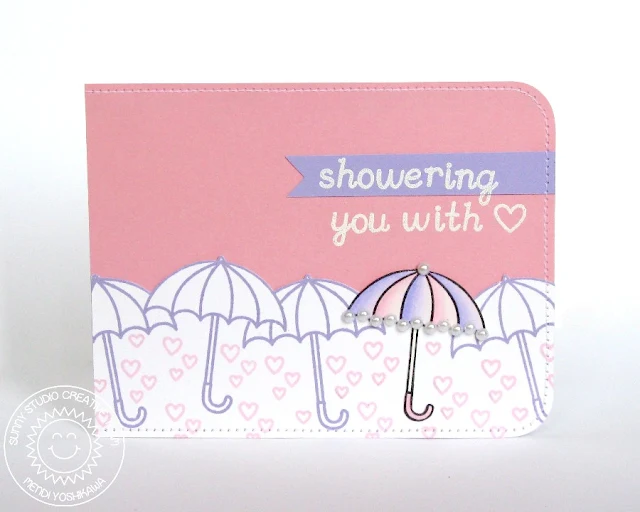
For my last card I used the Sweet Script stamp set to create another custom sentiment for a baby or Bridal shower using the umbrella and hearts from the Rain or Shine set.
I hope you've enjoyed all the inspiration this week. Here's a closer look at the two new sets being featured today...
Don't forget we also have the promo code "SAVE5" for all orders over $49 to help offset your shipping costs. If you are interested in everything you've seen this week we also are offering a bit of a discount on a couple of bundles.
You can shop all the new arrivals HERE or see our full shop HERE. We've also finally had replenishment on our Fishtail Banner dies! :)
Thursday, December 31, 2015
Inspiration Week: Introducing Sending My Love & Stitched Heart Dies
Hello there! Do you have any special plans for New Years? We usually stay in. My family is going skiing for the day and I think I might spend the evening taking down my tree while watching some holiday movies I never got around to watching like Sleepless in Seattle, The Family Stone & When Harry Met Sally. ;)
Today I'm super excited to be sharing one of my favorite sets from the release called Sending My Love! For my first card I created my background using the heart border die from the Sunny Borders stamp set (being featured tomorrow). I then stamped my little scene with the images from the set.
These little critters are pretty easy to line up with the interchangeable heads and hands for single layer cards, but you can also stamp them separately, cut them out with the coordinating dies and pop up the pieces for some added dimension. I think adding a wobbler to the head could be really fun!
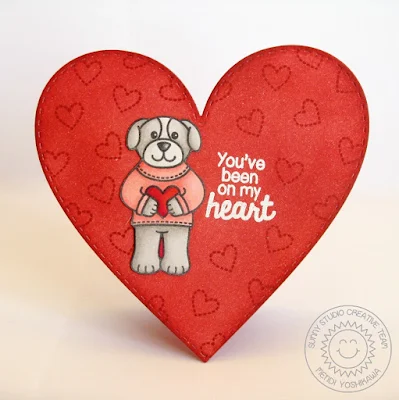
My next card uses the largest heart from the Stitched Heart dies to create a shaped card base. This heart measures 4.5" wide by 4.25" high making it a perfect fit for an A2 sized envelope. You can also use the negative space for a fun window on a larger sized card or home decor project. :)
To create this card base I inked up my white die-cut heart with Fired Brick Distress ink and then stamped my background with a small heart from the stamp set with the same Fired Brick ink. I made sure to zap it with my heat gun to make sure it was really dry and then embossed my sentiment with some white embossing powder.
Stumped on how to get your shaped cards to sit upright? I snipped off the tip of the heart in back to give it a flat surface to rest on. ;)
My next card uses the middle-sized negative heart from the Stitched Heart Dies for my shaker window. I inked up a piece of white cardstock for the inside with Barn Door Distress ink and then once again heat embossed my sentiment in white. I adhered a couple sequins to the inked background so they wouldn't all look like they have fallen to the bottom and then adhered it to the back of my card front panel with a piece of craft foam which I had diecut with that same heart. To make it so that none of the foam could be seen from the front of my card, I used the stitch line on the foam to trim down my heart with my scissors a tiny bit before sandwiching the layers together.
My images were stamped on white cardstock, colored with Copic Markers and fussy cut out. For my mailbox, I trimmed off the grass and stamped the image again onto my card front so I could layer them together so the grass would look seamless. ;)
I wanted to create a card to show how this set isn't limited to just Valentine's Day. In fact I have created for quite a few other occasions as well (some I won't be able to share until next week). For this card I used the puppy and kitty images paired with the cupcake and gift to make a Birthday card. I think they would be super cute colored for Christmas paired with the thank you sentiment to make holiday thank you cards too! :)
My last card was shared yesterday, but I just wanted to include it again with this post to show how the bunny works great for Easter too! :)
Here's a full look at the Sending My Love stamp set, Sending My Love dies and Stitched Heart Dies:
Well, that's all I have for today. Just a reminder that the new release will be available for purchase tomorrow morning by 8:00 EST. I'll also be back tomorrow morning at that same time with one last post featuring our Sunny Borders and Sweet Script stamps. Hope you have a safe & happy New Year's Eve! :)
Subscribe to:
Comments (Atom)


