Wednesday, December 16, 2015
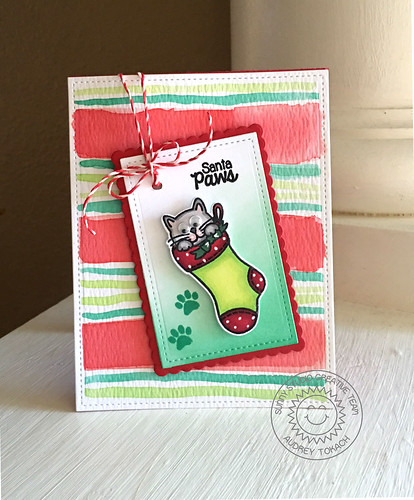
Santa's Helpers: Santa Paws Christmas Card with Audrey
Hello there!! Audrey here! Today I have a card to share with you using the little kitten in a stocking image from the Santa's Helpers stamp set! I had my distress inks out, and I was playing around with making my own watercolor-esque patterned paper. I used a bit of Barn Door, Twisted Citron and Lucky Clover to create my striped background. I intended for this card to look like a Christmas package, wrapped in pretty striped paper, with a cute tag hanging from it.
I stamped, colored and die-cut the stocking image using the coordinating Santa's Helpers dies. I used Lucky Clover ink to add some color to the bottom right of the tag for a little more interest, Then I mounted the image onto the tag with foam tape, punched a hole to thread my twine through and tied a bow. I wrapped the twine around the back of the watercolor piece, taped it down with scotch tape and popped the tag up with foam tape before adhering the panel to a red card base. I felt like something was missing so I added some tiny googly eyes to the kitten. I think his wide eyes add a bit of whimsy and it works well with the playful, whimsical striped background.
That's all for me today! I hope you liked my card.
For the sneak peek of the day we have another look at some of the images from the new Rain or Shine stamp set being released on December 26th. You may use this umbrella together with the puppy dog shared earlier, pair it with some clouds or even use it on it's own for bridal and baby shower cards.
Please be sure to stop back by again tomorrow for even more inspiration from the design team! Thanks for stopping by! :)
Tuesday, December 15, 2015
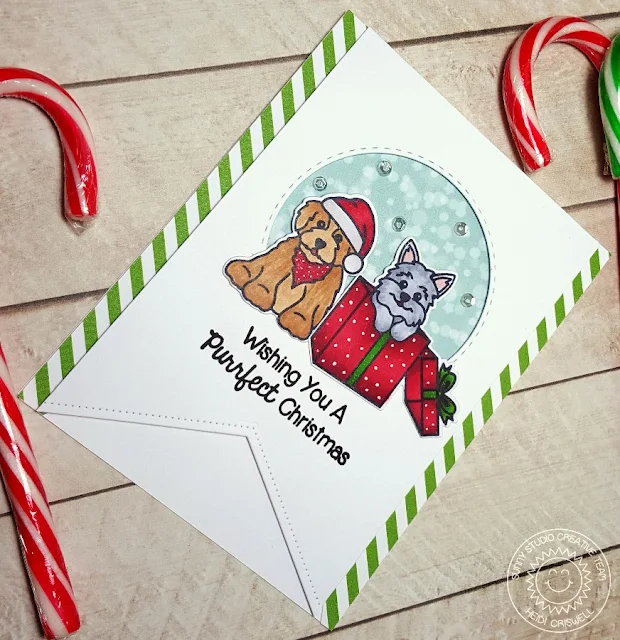
Santa's Helpers Have a Purrfect Christmas Card with Heidi
Hello everybody! Heidi here welcoming you back to the Sunny Studio Stamps blog. I am hoping that all your holiday preparations are going great! Today I am sharing a card using the "Santa's helpers" stamp and its coordinated die set. It's a lovely holiday stamp set that features kittens and puppies.
I stamped, die-cut, colored the images and then added some details with a white gel pen. I used one of the "Fishtail Banner dies" to created a banner for the front panel and I partially die cut a circle on the banner to set the scene. I adhered to the front of the card and images using foam adhesive and then as a finishing touch added some clear sequins.
The "Santa helpers" stamps and dies are available on the Sunny Studio Shop, as well as the "Fishtail Banner" dies. We can't wait to see your creations, using the Santa's helpers stamps!
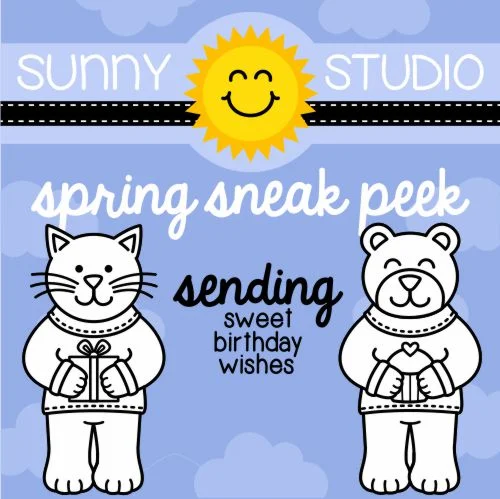
For today's sneak peek we have a second look at the Sending My Love stamp set being released on December 26th. As you can see you have a number of options for different animals and hands holding different objects. By switching out what the critters are holding this set can work for birthdays (or even Christmas) depending on how you color them and what you pair with them.
I hope you have a lovely day!
Monday, December 14, 2015
Santa's Helpers Merry & Bright Puppy Dog Card by Melissa
Hello everyone, Melissa here. Today I have a clean and simple card to
share with you using the Santa’s Helpers stamp set and coordinating dies. This die set not only comes with the dies to cut out the little
critters but it also comes with some bonus word dies, which are amazing! I decided to use some of these for my card today.
To make my card I first laid the merry & bright dies out where I wanted them on a piece of white cardstock, held them in place with some post it tape and ran them through my Big Shot. I also die cut an arch out of the top of the card with a hill border die. I then stuck this piece of card on top of a piece of patterned paper. After that I had to stick the tiny pieces of the die back in place to make the negative space in the middle of some of the letters.
Once that was done I stamped the little dog in the gift box from the stamp set. I colored him in using Copic markers and added little dots to the gift box with a gel pen. To finish off the card I mounted it onto a piece of black card stock.
I hope you enjoyed the card for today! While you're here we also would like to share with you our sneak peek of the day with another look at some of the images from "A Good Egg". This set was designed with scene building in mind. The little bow tie can be stamped on the little chick or left off.
Thanks for stopping by!
Saturday, December 12, 2015
Sunny Saturday Share: Red, Black & White Christmas Cards
Happy Saturday! Can you believe we're only 12 days away from Christmas Eve? That's crazy, right? Well, we have two really cute Christmas cards to share to inspire you in your holiday card making.
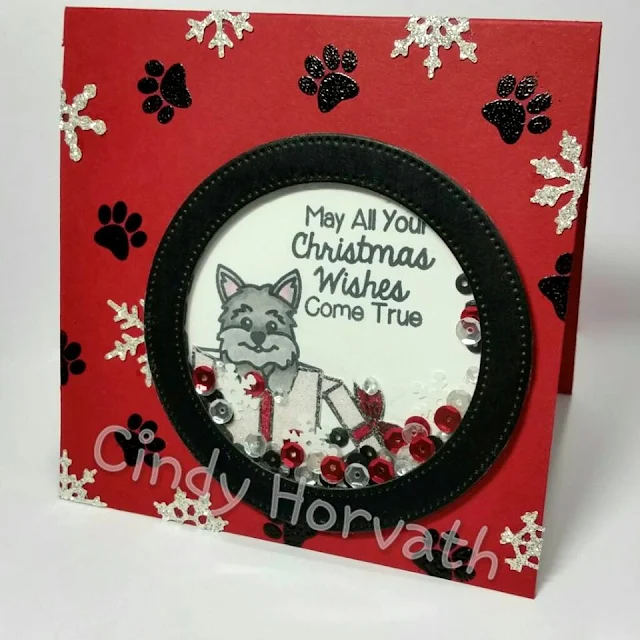
Up first is a darling shaker card using our Santa's Helpers stamp set by Cindy Horvath over at the Mod Squad Challenge blog. I am in love with her red, black and white color scheme and the cute way she heat embossed her background with the alternating paw prints and snowflakes!
Up next we have a super cute card by Nikosinas using our Bundled Up stamp set. Isn't her use of negative space with her snowflake background so much fun?!
I hope you will leave these ladies some much deserved love and as always we would love to see your lovely creations using our stamps and dies. You just might be the next person to be featured here on our Sunny Saturday Share. ;)
Before I leave you today, it's time for another sneak peek at our Spring Release coming out on December 26th. This is a second look at our stamp set called Backyard Bugs with a toadstool house, mushroom, a caterpillar and some fun little ladybugs. I created my first card with this set earlier this week and I am loving all the scene building possibilities! :)
I hope the rest of your weekend is happy!
Friday, December 11, 2015
Snow Kissed Penguin Snowflakes Card with Marion
Hello again. It's Marion here and I appreciate you dropping in on the Sunny Studio blog today. All week the DT have been creating with the Snow Kissed stamp set and today I have some more inspiration for you.
I started by stamping the penguin on the sled and die cutting it with its coordinating die. I die cut two of the images and adhered them together as it is suspended across the window opening on the front of the card, and I wanted it to be more sturdy. The window is a partial die cut of a circle die.
It's a bit easier to see the window opening in this photo. The image was coloured with Copic Markers and these little guys are so much fun to colour!
I stamped some subtle snowflakes from the same set in Versamark ink on the card front, before adhering some of the snowflakes die cuts from white card stock from the coordinating die set.
Sunny Studio Products used:
For the sneak peek of the day, we have a look at a new alphabet set coming soon called "Sweet Script". This fun set is perfect for creating your own custom sentiments ( which is particularly helpful if English isn't your native language) and also for personalizing your projects and scrapbooks. :)
Thanks for visiting today,
Marion
Subscribe to:
Comments (Atom)


