Thursday, May 29, 2025

Everything's Rosy Card with Marine

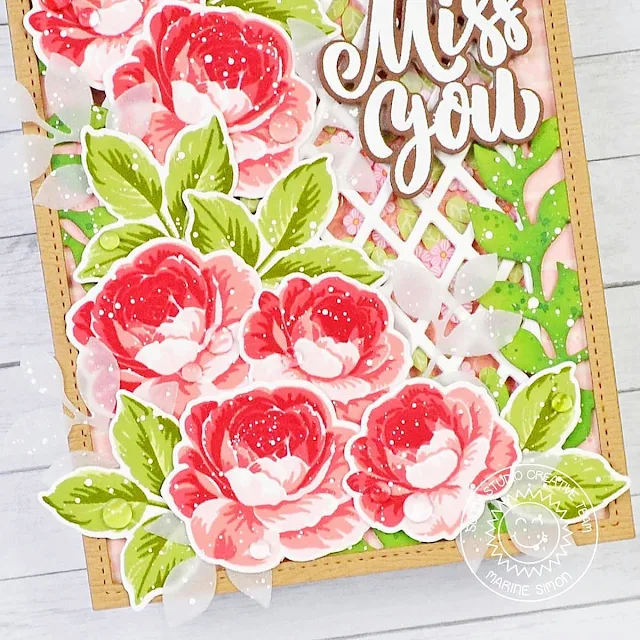
Hello crafty friends, Marine here, I'm very happy to be back with something different than I usually do. I mean, you know that I'm a "the busier the merrier" type of girl with lots and lots of critters. Well, today I'm sharing this floral shaker card showcasing the gorgeous Everything's Rosy stamp set, and I had a blast creating all those beautiful roses and foliage with this layering stamp set!

Sunny Studio Stamps: Everything's Rosy Miss You card by Marine Simon (featuring Big Bold Greetings, Frilly Frame Dies, Stitched Rectangle Dies, Spring Greenery Dies)

And speaking of which, I started off by stamping the roses and leaves, using all the layers, along with Lawn Fawn premium dye inks and Altenew crisp dye inks. For the roses, light to dark I used frosty pink (Alt.) + peachy keen (LF) + guava (LF) + lobster (LF) + raspberry (LF). And for the leaves, light to dark I used frayed leaf (Alt.) + forest glades (Alt.) + moss (Alt.)

I cut all the images using the matching dies, mixed some copic opaque white ink with water and used a slim brush to add splatters to each rose and piece of greenery, and set them aside to dry. I also cut additional pieces of greenery out of vellum using Spring Greenery dies, added white ink splatters to each piece and set them aside as well for later.

Next I cut a 5,5 x 4,25 inches Strathmore bristol smooth panel, and started by covering it with tattered rose oxide ink. I added a brick pattern to my panel using a brick stencil from stash along with saltwater taffy oxide ink, splattered water all over the panel and dried it with a paper towel, mixed some worn lipstick oxide ink with water and added more splatters to the panel, and then did the same with copic opaque white ink.

Sunny Studio Stamps: Everything's Rosy Miss You card by Marine Simon (featuring Big Bold Greetings, Frilly Frame Dies, Stitched Rectangle Dies, Spring Greenery Dies)

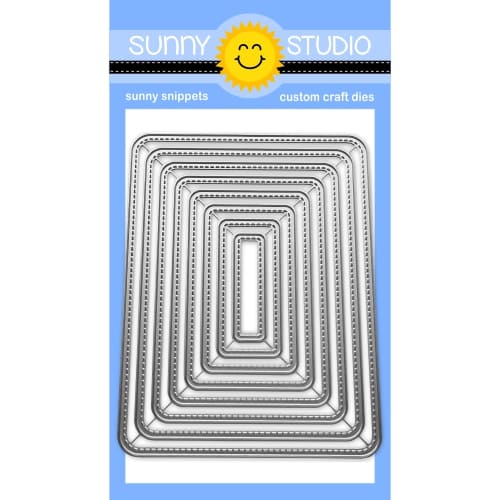
Once my panel was dry, I cut an opening out of it right in the center using the second largest Stitched Rectangle die, kept the frame piece only, and added a piece of acetate at the back of my brick frame using liquid glue. And I wanted my roses to be climbing up on a lattice, so I cut three white panels using the same die I used to create the opening, and cut a lattice design out of each white panel using the Frilly Frame Lattice die set. I layered the three lattice panels on top of each other using liquid glue to create a little bit of dimension, and then attached my lattice panel in the middle of my brick panel, right on the acetate using liquid glue again.

I flipped my brick panel over, added foam strips along the opening, close to the edges, and on the edges of the panel as well. I poured a lot of Pink Blossoms confetti inside the acetate opening, peeled all the foam strips backing papers off, and then closed my shaker panel with a Flirty Flowers pink panel.

Next, back to the front of the brick panel. Along with my climbing roses, I wanted to add some extra foliage, so I cut a Botanical Backdrop panel out of green cardstock, added some rustic wilderness oxide ink to darken some spots, mixed that same ink with water and added splatters to the leaves, did the same with copic opaque white ink, and attached this leafy panel to my brick panel using 1mm foam squares.

Sunny Studio Stamps: Everything's Rosy Miss You card by Marine Simon (featuring Big Bold Greetings, Frilly Frame Dies, Stitched Rectangle Dies, Spring Greenery Dies)

Before attaching the roses and leaves, I wanted to frame my panel with wood, so I used the Tropical Trees die set to cut my frame out of light brown woodgrain cardstock, attached it to my panel using liquid glue, and then finally stuck the roses and leaves using 1mm and 2mm foam squares, and the vellum greenery using liquid glue. For my greeting, I white heat embossed "Miss you" from Big Bold Greetings on dark brown cardstock, cut it using the matching die, and attached it to my panel using foam squares again. I attached my panel to a white card base, and to finish my card I added a scattering of clear droplets from my stash for shine and brightness.

And that's it! I hope that you like this card as much as I enjoyed creating it. It was pretty amazing to see those beautiful roses come to life layer after layer, and it was super easy to line everything up! Thanks so much for stopping by, and see you next week!

Sunny Studio Supplies Used:

Stitched Rectangle Dies
Shop at:
Sunny Studio
Flirty Flowers 6x6 Paper
Shop at:
Sunny Studio
Everything's Rosy Stamps
Shop at:
Sunny Studio
Everything's Rosy Dies
Shop at:
Sunny Studio
Frilly Frames Lattice Dies
Shop at:
Sunny Studio
Spring Greenery Dies
Shop at:
Sunny Studio
Tropical Trees Backdrop
Shop at:
Sunny Studio
Big Bold Greetings Stamps
Shop at:
Sunny Studio
Big Bold Greetings Dies
Shop at:
Sunny Studio
Botanical Backdrop Die
Shop at:
Sunny Studio

Wednesday, May 28, 2025

Baby Elephant Card with Tina

Hello crafters, it’s Tina and today I am making a mini slimline card with the sweet Baby Elephants stamps and die set! I always try to have cards for several occasions in my stash and this set is just perfect for a new baby.

Sunny Studio Stamps: Baby Elephant Card by Tina Henkens (featuring Hello Word Die, Hayley Alphabet Die, Rounded Rectangle Mat Dies)

To start, I cut a white rectangle background panel to the size of a mini slimline using a die from my stash. As an extra layer I also created a white panel with one of the Rounded Rectangle MatsNow it was time to choose one of the adorable elephants, stamp the image on the mat and enjoy some Copic coloring.

Next, I glued both pieces together with liquid glue and pulled a sky stencil for ink blending with Seedless Preserves and Milled Lavender Distress Oxide. I used a small blending brush and was able to avoid stenciling over the image. Of course, you can always cut a mask, but these tiny brushes work very well. I added some purple dots with a Copic marker for extra depth.

Sunny Studio Stamps: Baby Elephant Card by Tina Henkens (featuring Hello Word Die, Hayley Alphabet Die, Rounded Rectangle Mat Dies)

Then it was time to select the letters to spell the word ‘baby’ from a purple paper (Hayley Lowercase Alphabet). I also used the Hello word die cut (Dots & Stripes Pastel). By placing the rounded mat near the bottom of the mini slimline panel, I kept room to add both words above the image.

Next, I created a white card base with another die from my stash and added the cloudy panels with foam tape. As a final embellishment, I cut several sizes of stars (Comic Strip Speech Bubbles), colored them with the same yellow copics as the moon and spread them across the card. This makes the design even more dreamy and sweet.

Thank you for joining me and I look forward seeing the cards you create with this adorable set! Happy crafting!

Sunny Studio Supplies Used:

Hello Word Die
Hello Word Die
Shop at:
Sunny Studio
Dots & Stripes Pastels 6x6 Paper
Shop at:
Sunny Studio
Comic Strip Speech Bubble Dies
Shop at:
Sunny Studio
Baby Elephants Stamps
Shop at:
Sunny Studio
Baby Elephants Dies
Baby Elephants Dies
Shop at:
Sunny Studio
Hayley Lowercase Alphabet Dies
Shop at:
Sunny Studio
Rounded Rectangle Mat Dies
Shop at:
Sunny Studio

Tuesday, May 27, 2025

Grad Cat Card with Amanda

Hey crafty friends! It’s Amanda here sharing a fun little graduation card with you! This card was a lot of fun to make using a masking technique!

Sunny Studio Stamps: Grad Cat Graduation Card by Amanda Fitterer (featuring Spring Scenes, Sprawling Surfaces)

First, I stamped my cat from the Grad Cat Stamps. Using the leftover ink on the stamp, I stamped it again on a piece of Heffy Doodle Memo Tape. I used scissors to fussy cut the mask out and then placed it over the cat.

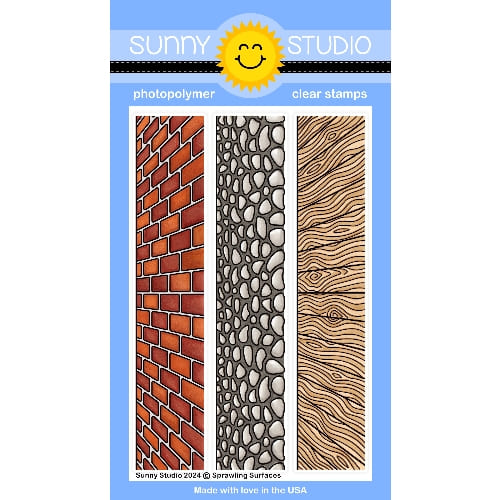
Next, I stamped the Spring Scenes Stamps, which includes the background, bench, and lamppost. Using the same masking technique to mask this image. For the rocky sidewalk, I used the Sprawling Surfaces Stamps.

Before removing my masks, I ink blended Catherine Pooler Hot Tub ink for the sky. Once that was complete, I removed all the masks so that I could color in my scene.

Sunny Studio Stamps: Grad Cat Graduation Card by Amanda Fitterer (featuring Spring Scenes, Sprawling Surfaces)

Here are the Copic markers I ued:
Grass: YG11, YG61, YG63, YG67
Trees: G00, G20, G24, G40, G43, G46, YG11, YG61, YG63, YG67, YG41, YG45
E50, E53, E55, E57
Bench: R35, R37, R39, T2, T6
Road: N2, N3, N5, N7
Cap: C5, C7, C9
Cat: E40, E41, E42, E43, R30, R32
Lamppost: BG72, BG75, BG78

I added a few highlights and dots with a White Gelly Rolly pen. I adhered my card panel to my A2 card base with liquid glue.

Such a simple and sweet grad card that my kitty-loving niece will love! Thanks so much for stopping by the Sunny Studio Stamps Blog today! Come back tomorrow for more inspiration!!

Sunny Studio Supplies Used:

Spring Scenes Stamps
Shop at:
Sunny Studio
Grad Cat Stamps
Grad Cat Stamps
Shop at:
Sunny Studio
Sprawling Surfaces Stamps
Shop at:
Sunny Studio

Monday, May 26, 2025

Paris Afternoon & Wonderful Windows Card Set with Mendi

Hello and welcome! This is Mendi, popping in to share some Parisian-themed spring and  summer cards showcasing our Paris Afternoon Stamps.

Sunny Studio Parisian Cards using Paris Afternoon & Spring Scenes Clear Craft Stamps & Wonderful Windows Metal Cutting Dies

For my first card showcasing the Paris Afternoon Stamps, I heat-embossed the Eiffel Tower from the set using Hero Arts Brass Embossing Powder. To set my scene around the tower, I used the park border from the Spring Scenes Stamps, coloring one of the "hills" to become the Seine River. I added the extra trees, flowers, and butterflies from that same set, as well as the bike, the poodle on the park bench, and the "bonjour" greeting from the Paris Afternoon set. I had initially colored this bicycle a couple of years ago with flowers in the basket that didn't match my scene as well as I might have liked, so I remedied that by layering some other loose flowers over the top. Lastly, I added three die-cut clouds with a pink glow along the bottom from the Tropical Trees Backdrop Dies.

Sunny Studio Park Scene Card using Paris Afternoon & Spring Scenes Clear Craft Stamps & Tropical Trees Backdrop Cutting Dies

For my second Parisian-themed card featuring the Paris Afternoon Stamps, I wanted to build a scene using the latte, croissant, and macarons from the set. I thought it would be fun to create the look of an indoor cafe table with a window overlooking the Eiffel Tower. I started by adding a moody black tone-on-tone striped "wallpaper" using the Sleek Stripes Paper as my backdrop. I wanted something neutral that wouldn't compete with the other images and would make them pop, but sadly, I found it challenging to photograph adequately to capture all the details that are easy to spot in person. I chose to use black cardstock for my window frame and shutters using the Wonderful Window Dies. I did not include the interior window panes from this set to give a maximum view of the Eiffel Tower. I then added some clouds to the view using the Comic Strip Everyday Dies and added the small trees near the base from the Charming City Stamps.

Inside my cafe, I added a round table with a tablecloth by cutting a piece of white cardstock using the stitched hillside die from our Slimline Nature Border Dies. I wanted to stack the macarons onto a plate, but quickly realized we don't have any plates to match this scale. However, I was delighted to discover I could simply stamp extras of the cup and saucer and trim off the cup portion to hide where the cup had been with the croissant and macarons. I completed my card by stamping the "Enjoy life's simple pleasures" sentiment from the City Streets Stamps onto the Brilliant Banner 4 Die, which had been cut from a blue polka-dot print from the Polka-dot Parade Paper pack.

Sunny Studio Latte & Macarons using Paris Afternoon Clear Craft Stamps, Wonderful Windows & Brilliant Banner 4 Cutting Dies

That wraps up my projects for this morning. I hope I've inspired you in your cardmaking and that you spread a little happiness by sending a card to a loved one today. 💛

Don't forget to check out our Spring Scenes StampsSpring Scenes Dies, and Patterned Papers in our online shop, which are currently on sale! 

I also encourage you to check out all the card ideas using these sets on each of their product pages. I always make sure to upload tons of ideas for each set following the product image so there are lots of ideas to scroll through there organized by set.

Supplies Used:

Paris Afternoon Stamps
Shop at:
Sunny Studio
Paris Afternoon Dies
Shop at:
Sunny Studio
City Streets Stamps
City Streets Stamps
Shop at:
Sunny Studio
City Streets Dies
City Streets Dies
Shop at:
Sunny Studio
Spring Scenes Stamps
Shop at:
Sunny Studio
Spring Scenes Dies
Spring Scenes Dies
Shop at:
Sunny Studio
Charming City Stamps
Shop at:
Sunny Studio
Charming City Dies
Charming City Dies
Shop at:
Sunny Studio
Tropical Trees Backdrop
Shop at:
Sunny Studio
Wonderful Windows Dies
Shop at:
Sunny Studio
Brilliant Banner 4 Dies
Shop at:
Sunny Studio
Comic Strip Everyday Dies
Shop at:
Sunny Studio
Polka-dot Parade 6x6 Paper
Shop at:
Sunny Studio
Sleek Stripes Paper
Sleek Stripes Paper
Shop at:
Sunny Studio
Slimline Nature Borders
Shop at:
Sunny Studio
PinkFresh Studio Blending Brushes
Shop at:
Sunny Studio
VersaMark Watermark Ink
Shop at:
Sunny Studio
Memento Tuxedo Black Ink Pad
Shop at:
Sunny Studio
Versafine Onyx Black Ink
Shop at:
Sunny Studio
Tsukineko Jumbo Dauber
Shop at:
Sunny Studio
Brass Embossing Powder
Shop at:
Sunny Studio