Hey friends! Cathy here today sharing a sweet little panda in his stylish home who would love some company!
I had a lot of fun creating this living room for my panda. I started with the wall and floor of the scene. First, I die-cut of piece of paper from the Subtle Grey Tones Paper using the second largest Stitched Rectangle Die. For the floor, I embossed a piece of light gray cardstock using the Woodgrain Embossing Folder and die-cut the piece twice using the ribbon die from the Ribbon & Lace Border Dies. I cut the ribbon pieces into "planks" and adhered 2 rows to the bottom of the die-cut paper piece. I then trimmed the excess from the right and left edges.
Next, I matted the paper piece on black cardstock and matted it again on green cardstock that I die-cut using the largest Stitched Rectangle Die. I adhered these combined pieces to the center of an A2 card front.
For the window, I die-cut the smaller window from the Wonderful Windows Dies from black cardstock. I traced around the outside of the die-cut window with a pencil on white cardstock, cut it out with scissors and inked a light blue sky with Tumbled Glass Distress ink. I die-cut the Autumn Tree Die from white cardstock, colored the branches with Copics and adhered portions of the branches to the right side of the sky piece. I trimmed off the excess along the right edge. I then die-cut leaves and flowers from the Wonderful Windows Dies from white cardstock, colored the flowers with Copics and inked the leaves with Twisted Citron Distress ink. After adhering them to the branches, I adhered the black window frame to the sky piece and adhered the window 2" from the bottom of the card and 1" from the right side.
Next, I stamped the panda from the Panda Party Stamps and the pillows/sofa from the Cozy Christmas Stamps on Neenah Classic Crest 80lb solar white cardstock, colored them with Copics and fussy cut them out. I decided the little panda needed a houseplant so I die-cut a small tag topper from the Stitched Arch Dies from white cardstock and colored it with Copics to resemble a basket planter. For a tall plant, I inked white cardstock with Rustic Wilderness Distress ink and die-cut a small fern leaf from the Spring Greenery Dies.
To finish, I stamped the "Miss You" sentiment from the Big Bold Greetings Stamps in Versamark ink on black cardstock, heat embossed it with white embossing powder and die-cut it using the coordinating dies. To add a little more color, I die-cut the coordinating "Miss You" die from light blue cardstock and layered the sentiment slightly overlapping it.
I hope you enjoyed and thanks for stopping by! For more inspiration, please visit my blog www.inkredibleadventures.com and you can also find me on Instagram as @cathy.chapdelaine.
--------------------------------------------------
Hi friends! It’s Bobbi here with a BIG and BOLD greeting card! I am
using the Big Bold
Greeting stamps and coordinating
dies for this vibrant birthday card. This is such a quick
and easy card to make and is age-appropriate for anyone. I am using a fun paper
from the Spring
Fever paper pack that just makes
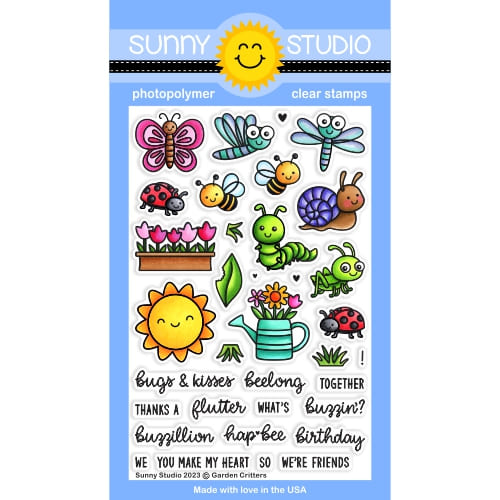
the card happy and that cute sun is from the Garden
Critters stamp set and coordinating
dies.
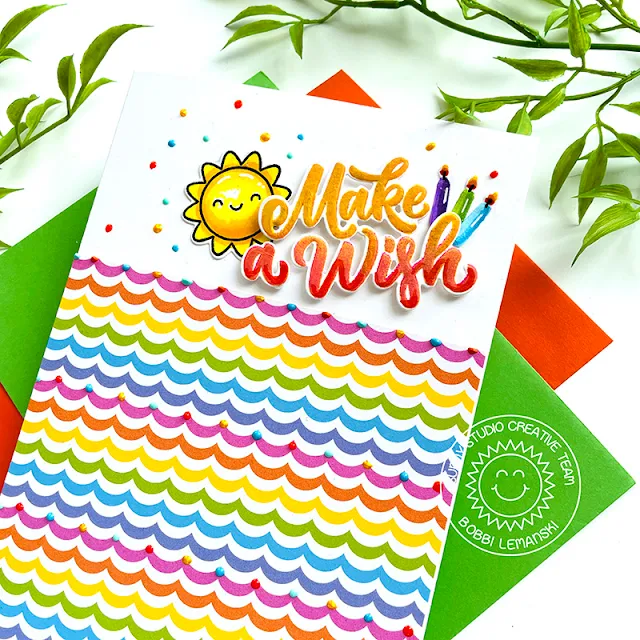
I stamped the “Make a Wish” phrase using three ink colors, stamping one color at a time. I used a Memento ink in yellow, orange and pink. I cut out the phrase using the matching die. I also cut three candles from the same set and colored them using Copic Sketch markers in B05, B02, V09, V04, YG17 and YG03. The flames were done in R17, YR07, and YR19. I drew the wick with a fine-tip black marker. I also stamped the sun from the Garden Critters stamp set and cut it out using its coordinating die. I colored the sun using Copics in Y08, Y15, Y19 and Y38. I added white highlights to the sun and the candles using my Gelly Roll pen.
To make the background for this 5″ X 7″ card, I cut a 5″ wide X 4-1/2″ tall piece of patterned paper and attached it to the front of the card base. Next, I added dots of Pearl Pen in coordinating colors to the scallop joints at the top on each of the pink strands. These dots of color give the paper dimension and interest in a quick and easy way. Note: Pearl Pen is similar to Nuvo Drops. Either will work for this application.
I attached the sentiment, the candles and the sun to the white space at the top of the card, offsetting the design to the right. I used foam tabs under the sentiment to make it stand out above everything else for emphasis. I also added accent dots around the collage for more festive fun. You can see from the photo above how much dimension this card has. It’s so cute and so easy to do! This card is ready to send.
Thanks for stopping by today. If you want to see more ideas and inspiration from me, subscribe to my blog, BobbiHartDesign.com. I’ll send you updates on new posts! You can also find me on Instagram as @BobbiHartDesign and on Facebook as BobbiHartDesign.
Sunny Studio Supplies Used:
 Stitched Rectangle Dies Shop at: Sunny Studio |
 Subtle Grey Tones Paper Shop at: Sunny Studio |
 Woodgrain Embossing Shop at: Sunny Studio |
 Stitched Arch Dies Shop at: Sunny Studio | |
 Spring Greenery Dies Shop at: Sunny Studio |
 Cozy Christmas Stamps Shop at: Sunny Studio |
 Cozy Christmas Dies Shop at: Sunny Studio |
 Big Bold Greetings Stamps Shop at: Sunny Studio | |
 Big Bold Greetings Dies Shop at: Sunny Studio |
 Garden Critters Stamps Shop at: Sunny Studio |
 Garden Critters Dies Shop at: Sunny Studio |
 Panda Party Stamps Shop at: Sunny Studio | |
 Panda Party Dies Shop at: Sunny Studio |
 Ribbon & Lace Dies Shop at: Sunny Studio |
 Wonderful Windows Dies Shop at: Sunny Studio |
 Spring Fever Paper Shop at: Sunny Studio | |


