Wednesday, August 17, 2016
First Birthday Blog Hop Winners!!!
Thank you to everyone who helped us celebrate our first birthday! It was truly humbling and heartwarming to see your outpouring of love and support for our little company!
Without further ado, here are the winners of the $20 gift codes to our online store...
Sunny Studio blog Winner: Carol Henderson
Jennifer McGuire's Winner: Bonnie Thrasher
Chari Moss' Winner: Linda Whitaker
Juliana Michaels' Winner: Lindsey Rickett
Eloise Blue's WInner: Julie Wexler
Debbie Olson's Winner: Larissa Heskett
Anni Lerche's Winner: Lisa Lahiff
Stephanie Klauck's Winner: Rose Mary Smalley
Laura Bassen's Winner: Iris Esther López
Vanessa Menhorn's Winner: Maggie Baxter
Francine Vuillème's Winner: Nandini Karmarkar
Nichol Spohr's Winner: Cynthia Baldwin
Lexa Levana's Winner: Christina Thomsen
Suzy Plantmura's Winner: Abby
Nina-Marie Trapani's Winner: Lisa Herrera-Garcia
Lindsey Sams' Winner: Kathleen (kittykat3308)
I have emailed many of you already with your gift codes, but for some of you I couldn't locate your email address so please email me at info@sunnystudiostamps.com to claim your prize.
I hope you will join us for a special challenge the week of September 5th and link up your projects using our Fishtail Banner dies. I can't wait to see what you create (there just might be another prize in store). :)
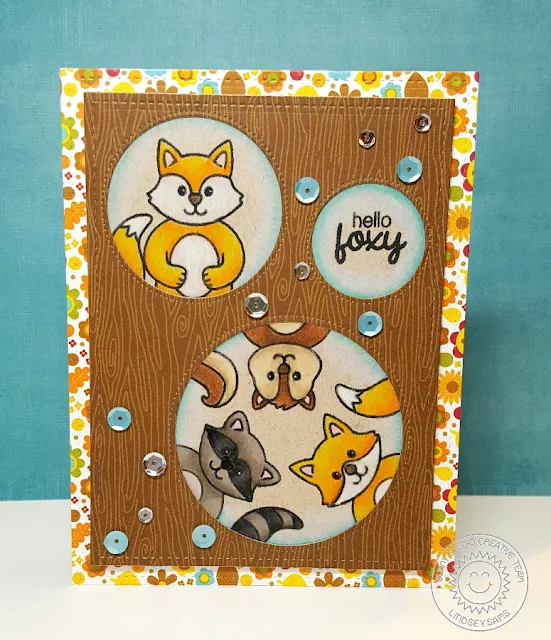
Woodsy Creatures Card With Circular Windows by Lindsey
Hi Lindsey here! Today I have another card featuring the fun and adorable Woodsy Creatures stamp set. I just can't get enough of these sweet little critters. They are so fun to work with, so let's get started!
To begin, I cut an A2 sized rectangle from some fall patterned paper. Next I cut two smaller rectangles, one from Kraft and one from some woodgrain paper. I thought these would go nicely with the woodland theme. Then, I cut three different sized circles into the woodgrain rectangle. These will act as windows for the critters and the sentiment. In order to know where to stamp, I traced the inside of each circle with a pencil onto the Kraft rectangle.
Next, I picked my critters and sentiment and stamped them in the circles I traced on the Kraft. Once all my images were stamped, I colored all the images and around the edge of the circles using Prisma colored pencils. I haven't had a lot of experience using these pencils, and I still need some practice, but I thought the critters turned out pretty cute. Finally, I added a some sequins for a little sparkle and popped up the woodgrain panel on the card base.
Next, I picked my critters and sentiment and stamped them in the circles I traced on the Kraft. Once all my images were stamped, I colored all the images and around the edge of the circles using Prisma colored pencils. I haven't had a lot of experience using these pencils, and I still need some practice, but I thought the critters turned out pretty cute. Finally, I added a some sequins for a little sparkle and popped up the woodgrain panel on the card base.
Tuesday, August 16, 2016
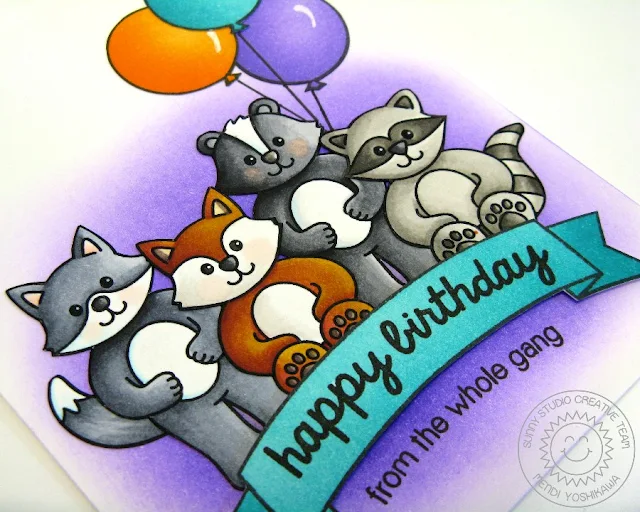
A Sneak Peek of some Fall Cards Created for Simon Says Stamp
I'm on the Simon Says Stamp blog today with a couple more cards using our newest stamps. I hope you will swing by to see the full reveal. ;)
I used the following sets to create my projects:
Also make sure to keep scrolling down to see Anni's wonderful card today. :)
I used the following sets to create my projects:
Also make sure to keep scrolling down to see Anni's wonderful card today. :)
Hello Pumpkin! Fall Card by Anni
Hey stampers, Anni here!
Have you been having a perfect summer? Well, autumn is ahead and I have a card with pumpkins for you today! I went through my stamps and got all the pumpkins I could find. These are the sets I used: Harvest Happiness, Halloween Cuties and Woodsy Creatures.
I stamped the pumpkins, colored them with colored pencils and fussy cut them (there also coordinating dies available). For a little extra I added some highlights with a white gel pen.
To give them a place to sit I colored a ground with watercolors - very quick - it doesn't have to be perfect. I stamped the sentiment and die cut a rectangle from that piece of paper.
I chose some matching paper that went well with my pumpkins and assembled the card.
It seems I couldn't finish a card without sequins so I added some to the card as a finishing touch.
Thanks for stopping by and have a sunny week!
Anni
Monday, August 15, 2016
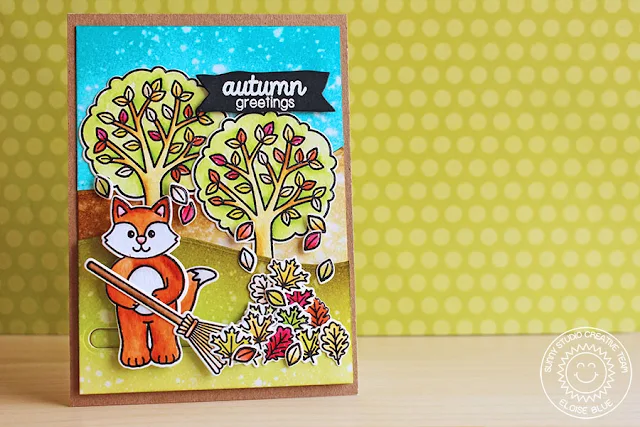
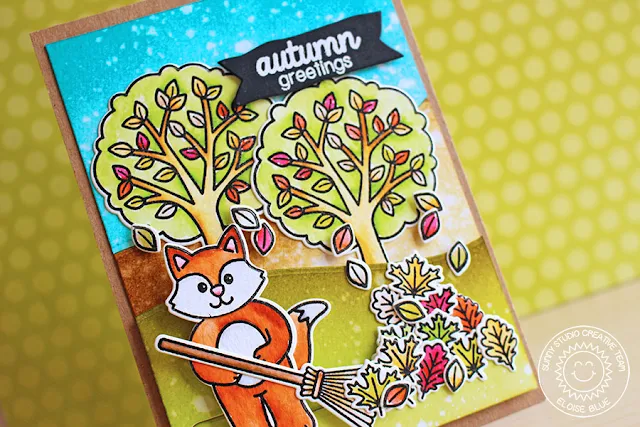
Autumn Greetings Slider Card with Eloise
Hello everyone! Eloise here and I'm here to show you my creation for this week. For the recent blog hop I just made a slider card and honestly, I just can't get enough. They're so much fun so I decided to just make a mini slider card today, since I wanted my fox to look like she's sweeping up the leaves. I'm using a mixture of stamp sets on my card today - I'm using the new Woodsy Creatures and Halloween Cuties, along with Harvest Happiness, Summer Picnic and Backyard Bugs. I love mixing in sets together!
To begin my card today I stamped out all the images on some watercolour paper and clear heat embossed the images. I used my Zig Clean Colour Real Brush Markers for todays colouring, since they're quick and easy and I knew I had a lot to colour! Once everything was coloured I used the coordinating dies to die cut all my images out.
Now it was time to work on the background. I used several Distress Inks to make this background along with a curved die - but you could just as easily use your scissors to cut the different layers. I made a blue layer, brown layer and green layer to make my scene feel complete. Once that was done I moved onto my slider portion. As I've done before I used a die to cut this - but since this one is super easy and is straight, you can just use a ruler and a craft knife. Once the slit was die cut out I used 2 circle dies to cut out some circles and used some foam tape piled up in between the two circles and that created my slider part. I did this twice also.
Now it was time to arrange my card and pull it all together. I first started with adhering all my leaves together to make a pile of them. I then used liquid adhesive for all the pieces since I knew my fox was going to be popped up because of the slider and I needed it to be able to go over all the images. Once everything was mainly stuck on I needed to adhere some of the extra leaves I had onto the broom - to give that look of sweeping and then I used a few extra smaller leaves that I had and stuck some of those down flat and some popped up as to show them falling from the tree. For a last finishing touch I stamped the sentiment 'autumn greetings' from the Woodsy Creatures set and white heat embossed it onto a black banner I die cut. I popped that up on the right hand side of my card and that finished it up.
I hope you enjoyed my card today and got inspired. Make sure you check back on the blog this week to see the other amazing cards the team will make!
- Eloise
P.S. Just a reminder that today's the last day to take advantage of the 15% OFF SALE to the Sunny Studio Online Store using the code SUNNYBIRTHDAY and to hop to win one of sixteen $20 gift certificates HERE. :)
Sunny Studio Products Used:
Subscribe to:
Comments (Atom)


