Friday, July 9, 2021

Poppy Fields Cards with Kay and Candice

Hi there! Kay here today with a card to share with you using the beautiful new Poppy Fields stamp setPoppy Fields coordinating dies and the Inside Birthday Greetings stamp set. And yes, I do know that poppies are red, but I decided to make a bouquet of poppies in a lovely mix of pink, purple and orange! That's what's so fun about stamping!

Sunny Studio Stamps: Poppy Fields Inside Greetings Birthday Card by Kay Miller

I first created a background for my card using distress inks in Blueprint Sketch, Wilted Violet and Broken China. I blended these onto Bristol Board cardstock and then speckled with water and blotted.

I then stamped all of the flowers, leaves and stems with the Poppy Fields Stamp set in the following Pinkfresh Studio inks:

Pinks: Ballet Slipper, Sparkling Rose, Bubble Gum, Raspberry Bliss
Oranges: Peach Fizz, Apricot, Clementine, Persimmon
Purples: Soft Lilac, Candy Violet, Lavender, Regal Kiss
Greens: Fresh peas, Olive

Sunny Studio Stamps: Poppy Fields Inside Greetings Birthday Card by Kay Miller

I cut all of the images out with the Poppy Fields coordinating dies. I then adhered the stems with liquid glue first and then added all of the flowers and leaves with glue dots.

Lastly I stamped the sentiment from the Inside Birthday Greetings stamp set on black cardstock and heat embossed it. I cut it out and added it to the bottom of the bouquet with foam tape.

I hope you have enjoyed my card today! Thanks so much for stopping by and enjoy your weekend!

----------------------------------------------------

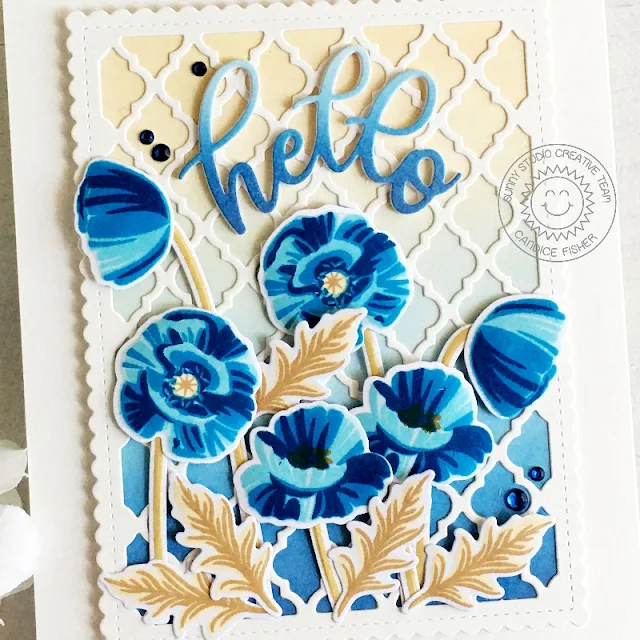
Hello! It's Candice with you this fabulous Friday sharing an elegant card using the Poppy Fields stamp set! I didn't know there were blue poppies but found out there are some called Himalayan Blue poppies and used the color for my inspiration today!

Sunny Studio Stamps: Poppy Fields Frilly Frame Dies Slimline Dies Everyday Card by Candice Fisher

I used these Sunny Studio products for my design:

I began my card with a 6 1/2 x 5 card base. For my background, I first die cut the scalloped inlay from thick white cardstock and trimmed a piece of Bristol Smooth cardstock to fit behind it. I inked this piece with faded jeans, salty ocean, tumbled glass, and tea dye and glued the inlay over it. I used foam tape to adhere to the center of my card front.

Sunny Studio Stamps: Poppy Fields Frilly Frame Dies Slimline Dies Everyday Card by Candice Fisher

Next I stamped the poppies, leaves, and stems using these colors of Altenew inks: blues-sea glass, ocean waves, tidal blue, and starlight browns-vanilla cream, hazelnut, and almond butter. I then die cut them out using the coordinating dies and arranged along the bottom of the frame gluing the bottoms and using foam tape to raise the flowers. I finished with a layered 'hello' inking the top one with faded jeans, salty ocean, and tumbled glass and sprinkled a few blue jewels around!

Thank you so much for visiting with me today!

Sunny Studio Supplies Used:

Poppy Fields Stamps
Poppy Fields Stamps
Shop at:
Sunny Studio
Poppy Fields Dies
Poppy Fields Dies
Shop at:
Sunny Studio
Frilly Frames Stripes Die
Shop at:
Sunny Studio
Frilly Frames Quatrefoil
Shop at:
Sunny Studio
Slimline Scalloped Frame
Shop at:
Sunny Studio
Inside Greetings Birthday
Shop at:
Sunny Studio

Thursday, July 8, 2021

Outback Critters Cards with Anja and Vanessa

Hello everyone, Anja here with you today. Instead of creating an Australia themed card with the Outback Critters Stamps, I thought it would be fun to use the sweet kangaroo image for a birthday. I combined it with the balloon bouquet from the Floating By set.

Sunny Studio Stamps: Outback Critters Floating By Frilly Frame Dies Birthday Card by Anja Bytyqi

I started off with a lemon yellow A2 card base and cut the Frilly Frames Retro Petals Dies from white heavyweight cardstock. I left all the petal pieces inside of the die-cut and adhered the whole panel to a piece of fun foam. The white-on-white pattern in the background creates a bit of interest without appearing too busy.

Next, I stamped the images in Memento Tuxedo Black Ink and colored them with Copic Markers. I used the coordinating die to cut out the mama kangaroo with her cute baby. For the balloons and strings, I did partial die cutting as well as a little fussy cutting with scissors. I adhered the balloons behind the kangaroo image which I popped up with foam tape.

Sunny Studio Stamps: Outback Critters Floating By Frilly Frame Dies Birthday Card by Anja Bytyqi

I cut the word 'happy' included in the Blooming Frame Die set three times from light aqua cardstock. Then I stacked the die-cuts on top of each other to make them more dimensional and sturdy. The word 'birthday' from the Prancing Pegasus stamp set was stamped in VersaMark Ink onto a small purple cardstock strip and I heat embossed it with white embossing powder. Finally, I adhered the sentiment and added two enamel hearts as embellishments.

Thank you so much for stopping by! Wishing you a happy day!

-----------------------------------------------

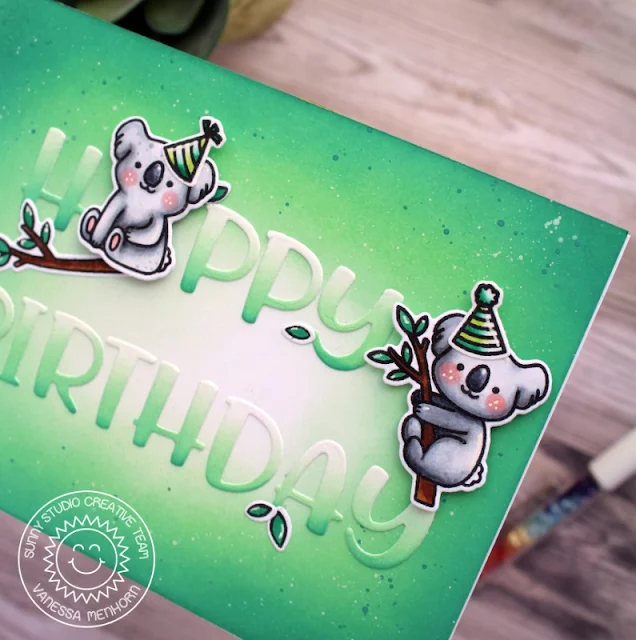
Hello to you! Vanessa here with a fun birthday card using the Outback Critters set. I decided to concentrate on the cute koalas:

Sunny Studio Stamps: Outback Critters Chloe Alphabet Dies Birthday Card by Vanessa Menhorn

I first inked the front of a white card base with Cracked Pistachio and Pine Needles Distress Oxide Inks and added ink droplets. Now I inked another panel with the same colors and die-cut the letters from it. After I had spelled the Happy Birthday on the card, I stamped the images onto white cardstock.

Here comes a list of the products used today:
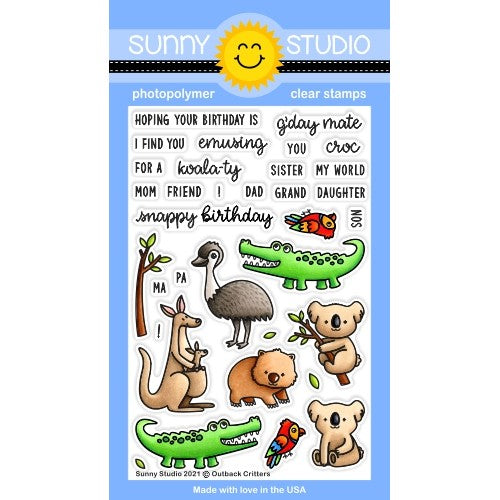
Outback Critters stamps + dies (koalas, leaves, branch)
Purrfect Birthday stamps + dies (party hats)
Chloe Alphabet Dies

Sunny Studio Stamps: Outback Critters Chloe Alphabet Dies Birthday Card by Vanessa Menhorn

Then I colored the elements with Copic markers, die-cut the pieces with the matching dies and adhered everything to the card, raising some parts with foam tape.

Have a fun day everybody and thanks for stopping by!

Sunny Studio Supplies Used:

Outback Critters Stamps
Shop at:
Sunny Studio
Outback Critters Dies
Shop at:
Sunny Studio
Chloe Alphabet Dies
Chloe Alphabet Dies
Shop at:
Sunny Studio
Purrfect Birthday Stamps
Shop at:
Sunny Studio
Purrfect Birthday Dies
Shop at:
Sunny Studio
Frilly Frames Retro Petals Dies
Shop at:
Sunny Studio
Floating By Stamps
Floating By Stamps
Shop at:
Sunny Studio
Floating By Dies
Floating By Dies
Shop at:
Sunny Studio
Prancing Pegasus Stamps
Shop at:
Sunny Studio
Blooming Frame Die
Blooming Frame Die
Shop at:
Sunny Studio

Wednesday, July 7, 2021

Chloe Alphabet Focused Cards and Video Tutorial with Julia and Franci

Hey crafty friends! It’s Julia here with a fun birthday card!

Sunny Studio Stamps: Chloe Alphabet Dies Alpaca Holiday Floating By Birthday Card by Julia Englich


First, I stamped my images from Alpaca Holiday & Floating By onto Bristol Smooth cardstock and then I used my Zig Clean Color Real Brush Markers to color them in!

I cut the second larges Fancy Frames Circle die 4 times out of white cardstock and layered the die cuts for more dimension. Then, I die cut the third largest of the Stitched Circle Large dies twice, once for my background and a second time for the grassy hill. I ink blended the circle die cuts using Distress Oxide inks. To create my hill, I die cut one of the stitched circles using the Slimline Nature Borders dies. I also die cut the letter HAPPY using the Chloe Alphabet dies and I ink blended those as well.

Sunny Studio Stamps: Chloe Alphabet Dies Alpaca Holiday Floating By Birthday Card by Julia Englich

For the background of my card, I used the Quilted Hearts Embossing Folder and adhered it to an A2 sized card base. Then, I added my ink blended circle, grassy hill and the scalloped frame on top. Finally, it was time to add my cute images to the scene! Below the little scene I adhered the letters for the first part of my sentiment. For the second part, I used a sentiment from the Candy Shoppe stamp set and I heat embossed it in white.

As a finishing touch, I added white gel pen details to the balloons! If you would like to see how this card came together, you can watch the video below - or on my YouTube channel, Craft Room Adventures!


Inks used: Tumbled Glass, Salty Ocean, Cracked Pistachio, Evergreen Bough
Zig Markers used:
999; 21; 32; 50; 33; 73, 64.

Thank you so much for spending time with me today! Have an awesome week!

----------------------------------------------

Hi there and happy Wednesday! It's Franci here with you today, with a fun card showcasing the Chloe Alphabet Dies set. Alphabet dies are so cool, I loved using them to add a little something to my sentiment here!

Sunny Studio Stamps: Chloe Alphabet Dies Harvest Mice Seasonal Trees Card by Franci Vignoli

First of all I die cut my white panel using the Stitched Rectangles dies and the partial die cutting technique and inked the center with Distress Ink. Then I created a coordinated card base out of light grey cardstock.

Then I stamped, colored with Copics and die cut all the images from these different sets: Harvest Mice set + coordinated dies and Seasonal Trees set + coordinated dies. I glued everything down into this cute scene and added some details with a white gel pen.

Sunny Studio Stamps: Chloe Alphabet Dies Harvest Mice Seasonal Trees Card by Franci Vignoli

I die cut all the "apple" letters out of red cardstock, using the Chloe Alphabet set and added them as well, after stamping the other part of my sentiment from the Fruit Cocktail set. 

Finally I mounted my decorated panel onto my card base with more foam adhesive and added a coat of glossy accents onto my die cut word - the effect in real life is soo cool!

Hope you like this card as much as I do and thanks a lot for stopping by today!

Sunny Studio Supplies Used:

Candy Shoppe Stamps
Candy Shoppe Stamps
Shop at:
Sunny Studio
Chloe Alphabet Dies
Chloe Alphabet Dies
Shop at:
Sunny Studio
Stitched Rectangle Dies
Shop at:
Sunny Studio
Fancy Frames-Circle Dies
Shop at:
Sunny Studio
Fruit Cocktail Stamps
Shop at:
Sunny Studio
Alpaca Holiday Stamps
Shop at:
Sunny Studio
Alpaca Holiday Dies
Alpaca Holiday Dies
Shop at:
Sunny Studio
Quilted Hearts Embossing
Shop at:
Sunny Studio
Seasonal Trees Stamps
Shop at:
Sunny Studio
Seaonal Trees Dies
Seaonal Trees Dies
Shop at:
Sunny Studio
Floating By Stamps
Floating By Stamps
Shop at:
Sunny Studio
Floating By Dies
Floating By Dies
Shop at:
Sunny Studio
Slimline Nature Borders
Shop at:
Sunny Studio
Harvest Mice Stamps
Harvest Mice Stamps
Shop at:
Sunny Studio
Harvest Mice Dies
Harvest Mice Dies
Shop at:
Sunny Studio
Stitched Circle Large Dies
Shop at:
Sunny Studio

Tuesday, July 6, 2021

Tiki Time Cards with Kavya and Isha

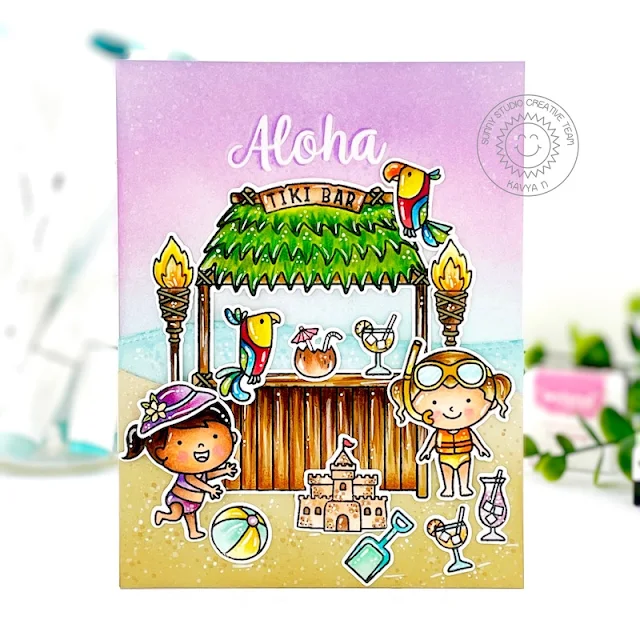
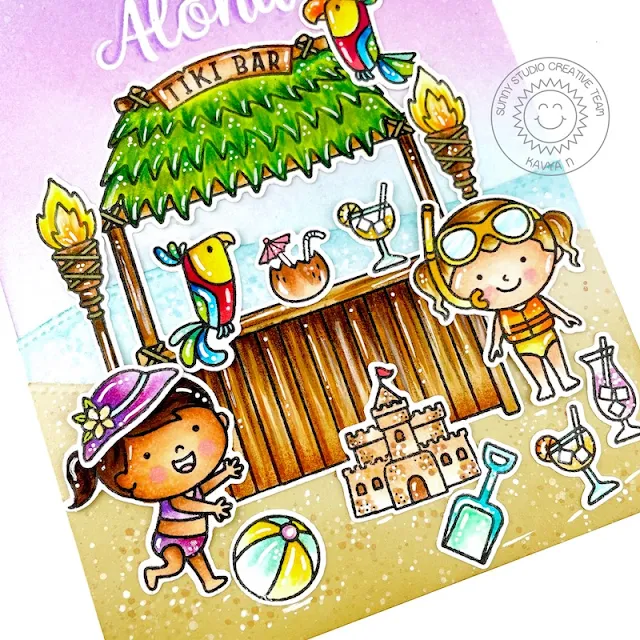
Hi folks, Kavya here. I am back on the blog with another fun card that combines a bunch of newer products with older ones. Here is a fun beach scene complete with a Tiki bar. I have been making a bunch of beach themed cards lately and it’s incredibly hot in the PNW so all these beach cards are making me jealous right now! 

Sunny Studio Stamps: Tiki Time Beach Buddies Slimline Dies Beach Babies Beach Themed Card by Kavya

I first started off by stamping and coloring a bunch of images from Tiki TimeBeach Buddies and Beach Babies stamp sets. I wanted the focus to be on the stamped images so decided to soft colors for the background. I ink blended a A2 sized cardstock using pastel purple, pink and blue dye ink.

Sunny Studio Stamps: Tiki Time Beach Buddies Slimline Dies Beach Babies Beach Themed Card by Kavya

I then used the Slimline Nature Border Dies to die cut the water and sand. Finally, I heat embossed a sentiment from Tiki Time to finish it off :) 

That’s it folks! I hope you liked this fun card… Be sure to check the blog tomorrow for more inspiration! Happy Crafting.

----------------------------------------------

Hello everyone. Isha here featuring the Tiki Time stamp and dies today with this summer theme card. Our summer break started this week but it's quite different because of Covid, so I decided to send this card to a dear friend to cheer her up :)

Sunny Studio Stamps: Tiki Time Beach Buddies Slimline Dies Beach Babies Seasonal Trees Beach Themed Card by Isha Gupta

I started by creating the background first by die-cutting two hill pieces using Slimline Nature Borders dies. Now I used distress inks to add color to the pieces. For the sky I used squeezed lemonade and picked raspberry, for water, I used salty ocean and peacock feathers, for the sand, I used scattered straw and vintage photo. Flick some water and dab using a kitchen towel.

Stamp the images from Tiki Time stamp, color with Copic markers and die-cut using the coordinating diesThe palm tree and the coconut is from the Seasonal Trees stamp, color and die-cut using the coordinating dies.

Sunny Studio Stamps: Tiki Time Beach Buddies Slimline Dies Beach Babies Seasonal Trees Beach Themed Card by Isha Gupta

Adhere the background onto a white card base. Assemble the scene by adhering some images using 3d foam for added interest. Stamp the sentiment from the Beach Buddies stamp set.

Thank you for dropping by! Have a nice day.

Sunny Studio Supplies Used: 

Beach Buddies Stamps
Shop at:
Sunny Studio
Beach Buddies Dies
Beach Buddies Dies
Shop at:
Sunny Studio
Tiki Time Stamps
Tiki Time Stamps
Shop at:
Sunny Studio
Tiki Time Dies
Tiki Time Dies
Shop at:
Sunny Studio
Beach Babies Stamps
Beach Babies Stamps
Shop at:
Sunny Studio
Beach Babies Dies
Beach Babies Dies
Shop at:
Sunny Studio
Seasonal Trees Stamps
Shop at:
Sunny Studio
Seaonal Trees Dies
Seaonal Trees Dies
Shop at:
Sunny Studio
Slimline Nature Borders
Shop at:
Sunny Studio