Tuesday, July 2, 2019

Catch A Wave Cards with Julianna and Angelica

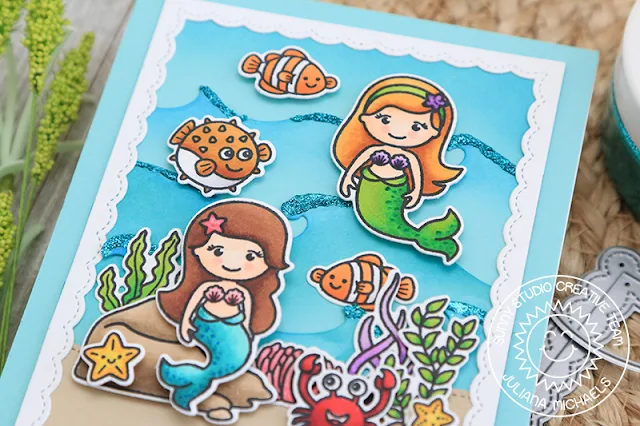
Hello friends! It's Juliana here today to share a mermazing card with you today that featuring the Catch A Waves Dies combined with the Magical Mermaids and Best Fishes Stamp Sets.

Sunny Studio Stamps: Magical Mermaids, Best Fishes, Catch A Wave Dies & Fancy Frames Summer Themed Card by Juliana Michaels

I began by stamping and coloring images from the Magical Mermaids Stamp Set and Best Fishes Stamp Sets. I colored them with Copic markers and added some details using Sakura Glaze Pens. I then die cut them using the Magical Mermaid Dies and Best Fishes Dies.

Sunny Studio Stamps: Magical Mermaids, Best Fishes, Catch A Wave Dies & Fancy Frames Summer Themed Card by Juliana Michaels

For the sea floor, I used the Woodland Border Dies and cut it from a piece of sand colored cardstock.

Sunny Studio Stamps: Magical Mermaids, Best Fishes, Catch A Wave Dies & Fancy Frames Summer Themed Card by Juliana Michaels

I then went about creating the underwater part of the background using the Catch A Waves Dies. I used each of the dies to cut a piece of blue cardstock. I then inked the edges with Distress Oxide in Salty Ocean.

Sunny Studio Stamps: Magical Mermaids, Best Fishes, Catch A Wave Dies & Fancy Frames Summer Themed Card by Juliana Michaels

For a touch of shimmer, I added Therm O Web Glitz Glitter Gel in Turquoise Sea to the edges of the waves. This gel makes adding glitter to a project so easy and without all the mess of loose glitter! Once the gel was dry, I trimmed the pieces to fit behind the inside of the Fancy Frames Rectangle Die cut from white cardstock. Once the background was completed, I began creating my underwater scene with all of my stamped images. I then adhered this entire piece onto a blue piece of cardstock before adding it to my card base.

Sunny Studio Stamps: Magical Mermaids, Best Fishes, Catch A Wave Dies & Fancy Frames Summer Themed Card by Juliana Michaels

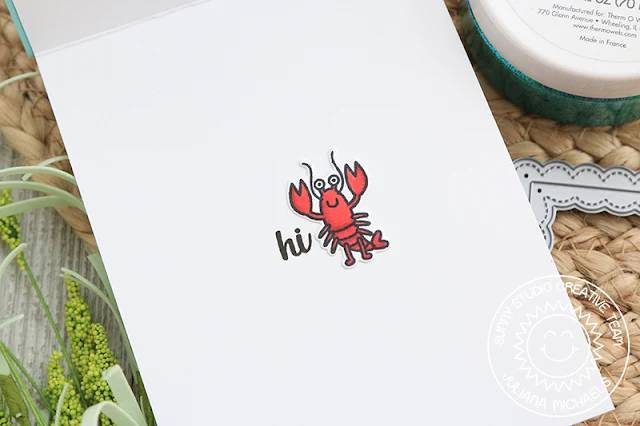
As an added bit of fun, I wanted the sentiment to continue to the inside of the card. I stamped part of it on the front and the rest on the inside, along with the cute little lobster from the Best Fishes Stamp Set.

I hope you enjoyed this bit of inspiration using the Catch A Wave Dies combined with a touch of shimmer and shine! Thanks so much for stopping by today!

--------------------------------------------------

Hi Friends, Angelica here sharing a card showcasing Catch A Wave dies. I used the three dies to make my white background.

s, Best Fishes & Fancy Frames Summer Themed Shaker Card by Angelica Conrad

I die-cut one panel of white card stock with the dies. I put the die cut pieces back together on top of another panel covered with Stick-It Adhesive. I trimmed the panel down, then die-cut a circle for a shaker window. I closed the window with acetate, and wrapped thin foam strips around the window. I filled it the window with clear jewels and confetti, then closed it with an alcohol ink background. I added foam adhesive to the back the panel, and adhered it to a card base.

s, Best Fishes & Fancy Frames Summer Themed Shaker Card by Angelica Conrad

I stamped and Copic-colored images from the Best Fishes stamp set, and used the coordinating dies to cut them out. I adhered a die-cut Fancy Frames Circle over the window, then attached the colored images and heat-embossed sentiment with foam squares.

s, Best Fishes & Fancy Frames Summer Themed Shaker Card by Angelica Conrad

I hope I have helped with ideas on using the Catch a Wave Dies. Thanks for stopping by!

Sunny Studio Supplies Used:

Magical Mermaid Dies
Shop at:
Sunny Studio
Magical Mermaid Stamps
Shop at:
Sunny Studio
Fancy Frames-Circle Dies
Shop at:
Sunny Studio
Fancy Frames- Rectangles
Shop at:
Sunny Studio
Woodland Borders Dies
Shop at:
Sunny Studio
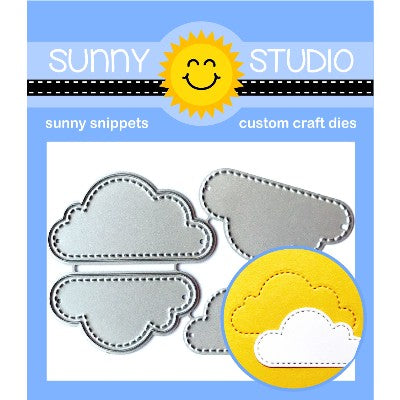
Catch A Wave Dies
Catch A Wave Dies
Shop at:
Sunny Studio
Best Fishes Stamps
Best Fishes Stamps
Shop at:
Sunny Studio
Best Fishes Dies
Best Fishes Dies
Shop at:
Sunny Studio

Monday, July 1, 2019

Frilly Frames Cards with Eloise and Leanne

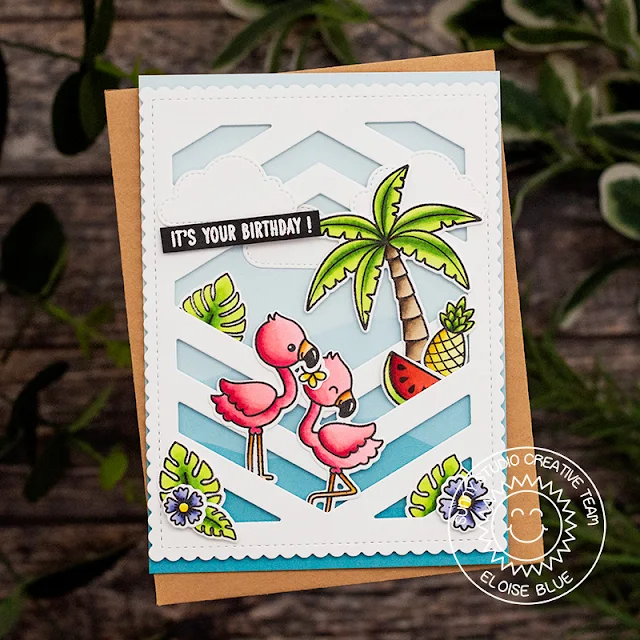
Hello friends, Eloise here and today I’ll be using the Frilly Frames Die Set along with a couple of stamp sets to create a summery Birthday Card.

Sunny Studio Stamps: Fabulous Flamingos,  Fluffy Clouds & Frilly Frames Chevron & Seasonal Trees Summer Themed Card by Eloise Blue

I started off with stamping out my images from Fabulous Flamingos and Seasonal Trees and coloured them in with Copic Markers. Once they were coloured, I cut them out. While I was die-cutting I also cut the Fluffy Clouds Dies out of white, too.

(Copic Markers Used: RV121, RV23, RV25, RV29 / BV01, BV02, BV04, BV08 / YG01, YG23, YG17, YG67 / E42, E43, E44, E47 / YR00, YR02, YR12, YR18 / Y11, Y13, Y15, YR23 / R14, R24, R27, R89)

Sunny Studio Stamps: Fabulous Flamingos,  Fluffy Clouds & Frilly Frames Chevron & Seasonal Trees Summer Themed Card by Eloise Blue

I then used the Frilly Frames Chevron Dies and cut out the centre piece. I then ran half of the die through my die cutting machine, removed the die, rotated it 180 degrees and ran through the opposite side. This made a diamond shape get cut from the centre and just changed up the design of the die a little. I used an exacto knife to cut out the centre since it didn’t cut all the way, but it worked well. I then used the Frilly Frames Stripes Dies and ran through the piece again with the scallop edge die.

Sunny Studio Stamps: Fabulous Flamingos,  Fluffy Clouds & Frilly Frames Chevron & Seasonal Trees Summer Themed Card by Eloise Blue

I adhered my frame onto a piece of wavy patterned paper from Summer Splash and then adhered my scene and clouds into place. Lastly for my sentiment I white heat embossed the ‘It’s Your Birthday!’ from Fabulous Flamingos onto a black strip and adhered it at an angle in the top left-hand corner.

Thanks for stopping by today, make sure you stop my next week for sneaks at the brand-new release coming soon. See you next time.

---------------------------------------------------

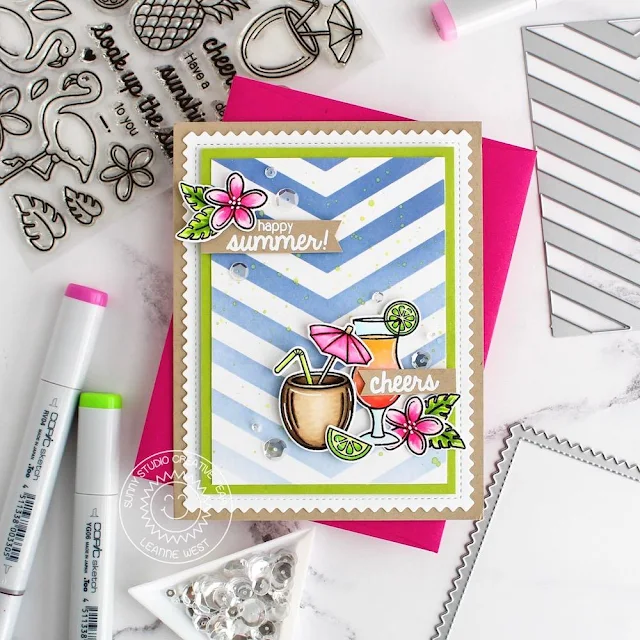
Hi everyone and happy July! Leanne here and today, I have a summertime themed card to share today that showcases the Filly Frames Chevron dies used two ways to give some decorative details to the design.   

Sunny Studio Stamps: Tropical Paradise Summer Drink Card by Leanne West featuring Frilly Frames Chevron Dies

I started with an A2 size kraft card base. I used the outer die from Frilly Frames Chevron to cut out the zig zag edged layer. It’s just slightly smaller than A2 size an fits perfectly within the card front dimensions. I then trimmed a piece of green card stock a bit smaller and layered over the white.  

Sunny Studio Stamps: Tropical Paradise Summer Drink Card by Leanne West featuring Frilly Frames Chevron Dies

I then used the chevron die to make a stencil out of copy paper. I used Faded Jeans Distress Oxide Ink to stencil the chevron pattern onto some Bristol Smooth card stock. I lightly splattered with watered down Twisted Citron Distress Ink and then trimmed the panel to the right size to layer over top the green panel.  

Sunny Studio Stamps: Tropical Paradise Summer Drink Card by Leanne West featuring Frilly Frames Chevron Dies

I stamped and Copic colored several images from Tropical Paradise. These fun images just remind me of the lazy days of summer when you can just kick back and enjoy a refreshing drink. I white heat embossed two separate sentiments onto some kraft card stock and trimmed into thin strips. Happy summer is from Island Getaway and Cheers is from Tropical Paradise. I then adhered the colored images and sentiments strips in two spots to create an asymmetrical design. To finish it off I added a few sequins.  

Sunny Studio Supplies Used:

Island Getaway Stamps
Shop at:
Sunny Studio
Tropical Paradise Dies
Shop at:
Sunny Studio
Tropical Paradise Stamps
Shop at:
Sunny Studio
Frilly Frames Chevron Die
Shop at:
Sunny Studio
Frilly Frames Stripes Die
Shop at:
Sunny Studio
Fluffy Clouds Dies
Fluffy Clouds Dies
Shop at:
Sunny Studio
Fabulous Flamingos Stamps
Shop at:
Sunny Studio
Fabulous Flamingos Dies
Shop at:
Sunny Studio
Seasonal Trees Stamps
Shop at:
Sunny Studio
Seaonal Trees Dies
Seaonal Trees Dies
Shop at:
Sunny Studio
Summer Splash 6x6 Paper
Shop at:
Sunny Studio

Saturday, June 29, 2019

Guest Designer Spotlight: Cards with Keeway Tsao

Hi crafty friends! It’s Keeway Tsao from Kiwi Koncepts and I’m excited to be back guest blogging to share with you some fun oceanic cards with the Best Fishes set from the Summer 2019 release!

Sunny Studio Stamps: Best Fishes Frilly Frames Dies Ocean Themed Cards by Keeway Tsao

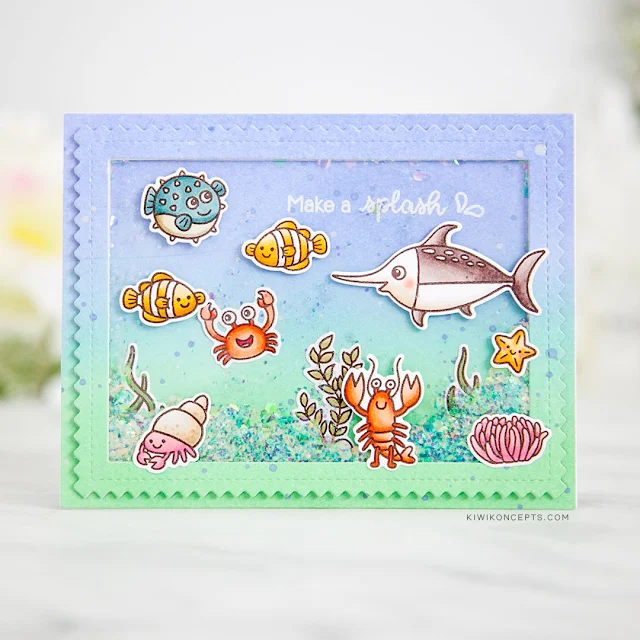
My first card is an underwater shaker card with many of the cute fishes from the Best Fishes set. I stamped all the images in the set in a dark brown hybrid ink and colored them with Copic markers. Then, I used the matching dies to die cut the images out.

Sunny Studio Stamps: Best Fishes Frilly Frames Dies Ocean Themed Cards by Keeway Tsao

I created an ink blended background with Cracked Pistachio and Shaded Lilac distress oxide inks. With this ink blended A2 panel, I die cut the frame from Frilly Frames Chevron Die and again with a basic rectangle that is just slightly smaller. This creates our frame for the shaker.

Sunny Studio Stamps: Best Fishes Frilly Frames Dies Ocean Themed Cards by Keeway Tsao

I heat embossed the sentiment in white in the top right corner on the center piece. I also added a few images that will be inside of the shaker, leaving a few for later to be outside. I added lots of sequins and sealed it off with a foam taped border, acetate layer, and then the frame we just die cut out.

Lastly, I added all the remaining fishes to the card on top of the frame and acetate. This gives the scene some extra dimension. Look at how the shaker shines!

Sunny Studio Stamps: Best Fishes Catch A Wave Dies Ocean Themed Cards by Keeway Tsao

For my next card, I also used the Best Fishes set this time using the sharks. I had to separate them so they don’t eat the little fishes!

Sunny Studio Stamps: Best Fishes Catch A Wave Dies Ocean Themed Cards by Keeway Tsao

This card has a more graphic layout and uses the Catch A Wave Dies to create several layers that I ink blend on. I used this die several times on a piece of A2 white card stock and for each layer I picked one distress oxide ink to blend it in full.

In the top dark blue layer, I heat embossed my sentiment in white. Then I inlaid all the pieces back together when I adhered it onto a A2 base.

Sunny Studio Stamps: Best Fishes Catch A Wave Dies Ocean Themed Cards by Keeway Tsao

I splattered on some water to distress the ink for some texture. Finally, I added my sharks and some ocean plants to the card with foam tape.

Sunny Studio Stamps: Best Fishes Catch A Wave Dies Frilly Frames Dies Ocean Themed Cards by Keeway Tsao

Thanks for stopping by and hope you have a beautiful weekend!

Sunny Studio Supplies Used:

Frilly Frames Chevron Die
Shop at:
Sunny Studio
Catch A Wave Dies
Catch A Wave Dies
Shop at:
Sunny Studio
Best Fishes Stamps
Best Fishes Stamps
Shop at:
Sunny Studio
Best Fishes Dies
Best Fishes Dies
Shop at:
Sunny Studio

Friday, June 28, 2019

Hawaiian Hibiscus Cards with Rachel and Lexa

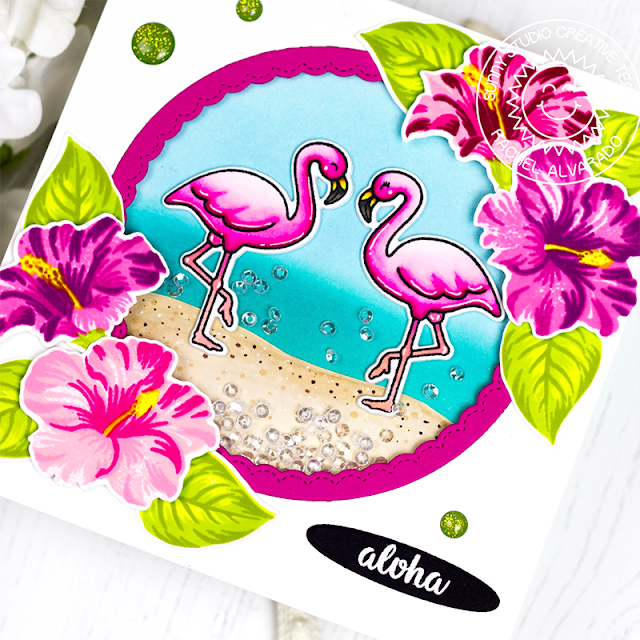
Hello, everyone! It's Rachel here and I have a fun tropical shaker square card to share with you today featuring the new Hawaiian Hibiscus layering stamps. I just love all of the gorgeous detail that you get from this set! I combined this set with some flamingos from the Tropical Paradise Stamp Set.

Sunny Studio Stamps: Hawaiian Hibiscus Fancy Frames Tropical Paradise Summer Themed Card by Rachel Alvarado

To create my flowers, I simply used 4 different colors to stamp each one.
  • Light Pink: MFT Tickled Pink, Cotton Candy, Ripe Raspberry, and Razzle Berry
  • Dark Pink: MFT Cotton Candy, Ripe Raspberry, Razzle Berry, and Hero Arts Raspberry Jam
  • Purple: Altenew Rose Quartz, Puffy Heart, Purple Wine, and Cosmic Berry
  • Greens: Altenew Parrot, Bamboo, and Olive
Sunny Studio Stamps: Hawaiian Hibiscus Fancy Frames Tropical Paradise Summer Themed Card by Rachel Alvarado

For my flamingos, I stamped them with Memento Tuexedo Black Ink onto a sheet of Neenah Solar White 110lb Card Stock and colored with Copic Markers. I like to use a lot of different shades to blend my coloring but only a few of the ones listed would be sufficient. (Pinks: RV0000, RV00, RV02, RV04, RV06, and RV09. Legs: R12, RV55. Yellow beak: Y13, Y17, and E35. Black part of beak: W5, W7.) I then used the coordinating Tropical Paradise Dies to cut them out.

Sunny Studio Stamps: Hawaiian Hibiscus Fancy Frames Tropical Paradise Summer Themed Card by Rachel Alvarado

Next, I assembled the base of my card with these components. I quickly blended some Tumbled Glass and Peacock Feathers on a piece of scrap paper for the background of my card. I then colored some sand using some Copic Markers (E41, E42). I used the Fancy Frames Circle Dies to die cut a beautiful scalloped circle frame from pink card stock. I trimmed my card base to 5"x5" prior to die cutting a circular hole/window in the center.

Sunny Studio Stamps: Hawaiian Hibiscus Fancy Frames Tropical Paradise Summer Themed Card by Rachel Alvarado

I added all of my Hibiscus flowers with some 3D Foam Adhesive Squares for some added dimension and the leaves with liquid adhesive. Lastly, I heat embossed my sentiment with Fine Detail White Embossing Powder onto a strip of black card stock and then diecut it with the small oval die from the Sunny Border Dies and filled my card with some Studio Katia Majestic Mini Sequins.

I hope you enjoyed my card! Thanks so much for dropping by today and have a wonderful weekend!

-------------------------------------------------------

Hi everyone! Lexa here today to share a see through card using Hawaiian Hibiscus Stamp and the coordinating dies. It's inspired from Jennifer McGuire's cards. The hibiscus flowers from Sunny Studio is sure the prettiest layered stamp, they have couple of other flowers too. Make sure to check them out.

Sunny Studio Stamps: Hawaiian Hibiscus Everyday Greetings Floral Best Wishes Card by Lexa Levana

First, I cut a 4.25"x5.5" paper in half. Blend Wild Honey and Worn Lipstick Distress Inks on one part. Then use the other one for a guide rectangle to arrange the hibiscus. Stamp the flowers in two colors, pink and orange with some dye inks. Then use the coordinating dies to cut every pieces. Arrange them on the piece of paper I mentioned above, use a washi tapes to keep them in their places and trim the excess on three sides. Make sure to leave them hanging on one side. After the trimmings, use strong adhesive glue on overlapping pieces. You'll have a see through panel ready. 

Sunny Studio Stamps: Hawaiian Hibiscus Everyday Greetings Floral Best Wishes Card by Lexa Levana

Adhere the hanging part on the blended panel. It's simple and easy, but turns out so beautiful. I use Everyday Greetings Stamps and copper embossed it on pink paper piece. Adhere it with foam tapes so it will pop out. Last touch is add pretty yellow jewels here and there. I love the bright colors and how pretty the hibiscus are.

Thank you so much for stopping by today, don't forget to leave me some love on the comments below. I hope you like today's card as much as I do. Have a wonderful day!

Sunny Studio Supplies Used:

Sunny Borders Dies
Sunny Borders Dies
Shop at:
Sunny Studio
Tropical Paradise Dies
Shop at:
Sunny Studio
Tropical Paradise Stamps
Shop at:
Sunny Studio
Fancy Frames-Circle Dies
Shop at:
Sunny Studio
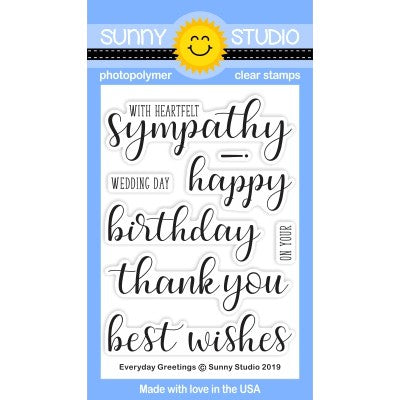
Everyday Greetings Stamps
Shop at:
Sunny Studio
Hawaiian Hibiscus Stamps
Shop at:
Sunny Studio
Hawaiian Hibiscus  Dies
Hawaiian Hibiscus Dies
Shop at:
Sunny Studio