Friday, September 24, 2021

Crisp Autumn Cards with Audrey and Vanessa

Hello friends! Audrey here with an autumn card to share with you!  

Sunny Studio Stamps: Crisp Autumn Fall Themed Card by Audrey Tokach

To create my card, I started off with a piece of ivory cardstock cut to 4" x 5.25". I masked off the top portion of the panel and ink blended on some Evergreen Bough Distress Oxide. Then, I reversed the mask and ink  blended on some Peeled Paint Distress Oxide ink. To give a  more rustic feel to the panel, I blended Walnut Stain Distress Oxide around the edges, and splattered some all over the panel. I stamped and die cut images from the Crisp Autumn layering stamp set. I used dye inks in shades of orange, green, red, gold and teal then die cut them with the coordinating Crisp Autumn Dies. I arranged the images, and adhered some flat with glue pen, while others were popped up with foam tape. 

Sunny Studio Stamps: Crisp Autumn Fall Themed Card by Audrey Tokach

Then, I stamped the sentiment from the set, which I also die cut and popped up. I adhered the panel to an A2 card base, and added a strip of Dots & Stripes Jewel Tones patterned paper to the left edge. To finish off my card, I added some bronze sequins.

------------------------------------------------

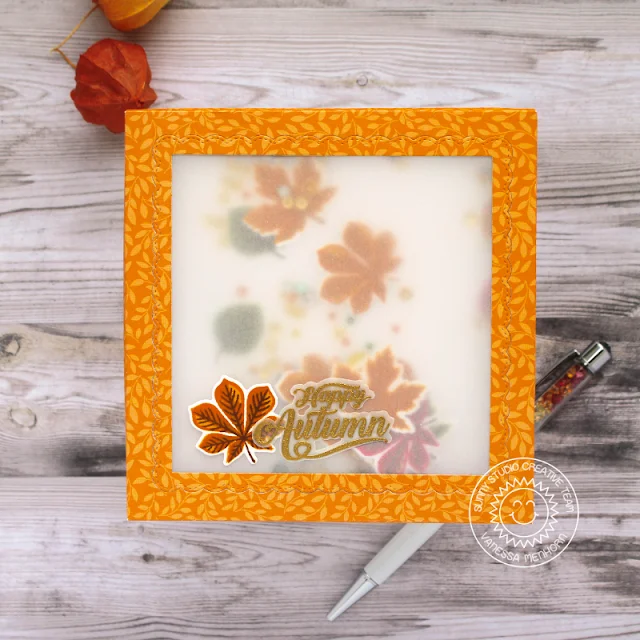
Hello to you! Vanessa here with a vellum shaker card using Crisp Autumn.

Sunny Studio Stamps: Crisp Autumn Fancy Frame Dies Autumn Themed Card by Vanessa Menhorn

I first stamped various leaves onto white cardstock and die-cut them with the matching dies. Now I created a shaker window from Sweater Weather patterned paper, die-cutting the window with the Fancy Frames Square Dies and backing it with vellum. I filled the window with the leaves and sequins and adhered it to the white card base. 

Sunny Studio Stamps: Crisp Autumn Fancy Frame Dies Autumn Themed Card by Vanessa Menhorn

Now I stamped and heat-embossed the sentiment onto vellum, using gold embossing powder. After I had die-cut it with the matching die, I adhered the element together with a leaf.

Have a wonderful day and thanks for stopping by!

Sunny Studio Supplies Used:

Crisp Autumn Stamps
Crisp Autumn Stamps
Shop at:
Sunny Studio
Crisp Autumn Dies
Crisp Autumn Dies
Shop at:
Sunny Studio
Fancy Frames-Square Dies
Shop at:
Sunny Studio
Dots & Stripes Jewel Tones 6x6 Paper
Shop at:
Sunny Studio
Sweater Weather Paper
Shop at:
Sunny Studio

Thursday, September 23, 2021

Fall Friends Cards with Anja and Marine

Hello everyone, Anja here and with today's card I'm highlighting the adorable Fall Friends Stamps which are perfect to build scenes by using all the fun accessories.

Sunny Studio Stamps: Fall Friends Slimline Dies Picket Fence Border Dies Fall Themed Card by Anja Bytyqi

I started off with an A2 card base made from Kraft cardstock. For the sunset background, I did some ink blending on smooth Bristol cardstock with Distress Oxide Inks (Fossilized Amber, Spiced Marmalade, Abandoned Coral and Candied Apple). I added gold paint splatters with a small brush.

Next, I cut two grass pieces using the borders included in the Slimline Nature Borders Dies and Picket Fence Border Dies set. The Distress Oxide colors I used for them are Bundled Sage and Rustic Wilderness. And again, I added ink splatters for a little bit of interest. When everything was completely dry, I ran all ink blended pieces through my die cutting machine with the stitched rectangle die from the Frilly Frames Retro Petals Dies set. Then I layered them on top of each other.

Sunny Studio Stamps: Fall Friends Slimline Dies Picket Fence Border Dies Fall Themed Card by Anja Bytyqi

I stamped the images in Memento Tuxedo Black Ink and colored them with Copic Markers. I used the coordinating dies to cut everything out. The sentiment was stamped in VersaMark Ink onto a red cardstock strip and I heat embossed it with white embossing powder. Finally, I assembled my card and adhered all the elements with liquid glue.

Thank you so much for stopping by! Have an awesome day!

--------------------------------------------

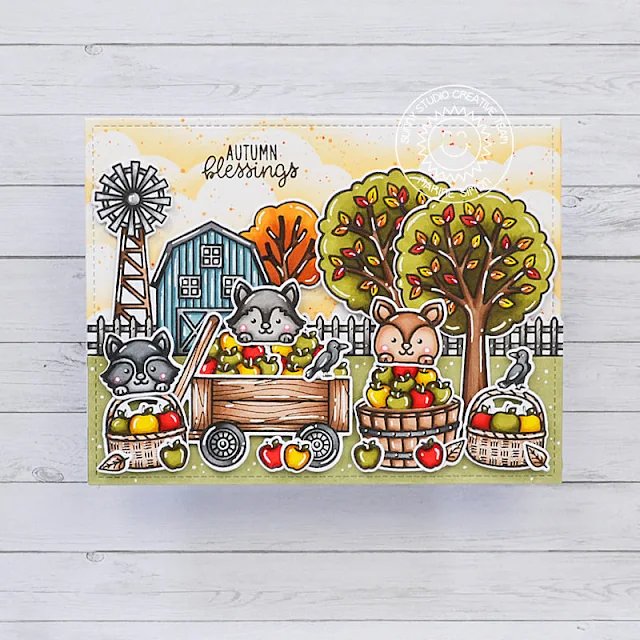
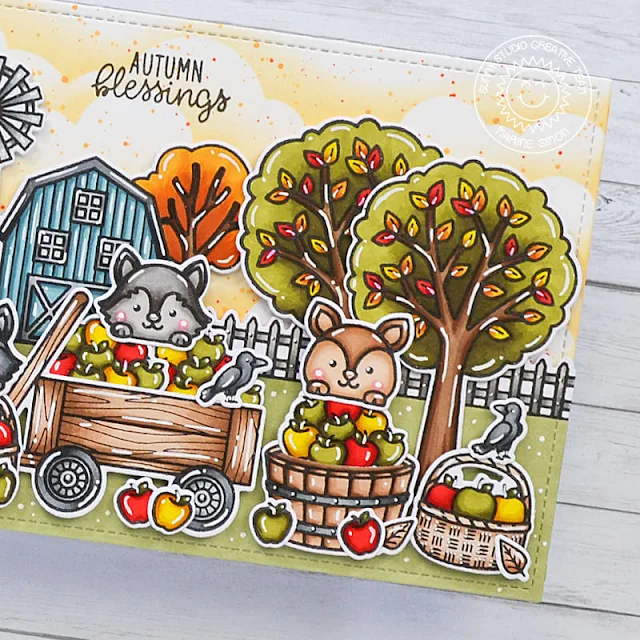
Hello crafty friends, Marine here, I'm happy to be back on the blog with this lovely apple picking autumnal card featuring some cute critters from Fall Friends, as well as a few images from other sets: the tree image is from Seasonal Trees, the farm and the crows are from Farm Fresh, and my sentiment and apple basket are from Happy Harvest.

Sunny Studio Stamps: Fall Friends Farm Fresh Happy Harvest Fall Themed Card by Marine Simon

I did the same routine as usual: I stamped all the images using an alcohol marker friendly black ink, cut them all using the coordinating dies and then colored everything using my alcohol markers. And I went for traditional autumnal colors: khaki green, yellow, orange and red, with a touch of faded blue for the barn.

Sunny Studio Stamps: Fall Friends Farm Fresh Happy Harvest Fall Themed Card by Marine Simon

Next I cut a 5,5 x 4,25" bristol panel and created a simple sky using a cloud stencil along with dried marigold and ripe persimmon distress inks, and once the panel was dry, I attached all the elements on this cloudy panel, starting with the farm border using foam tape, and then the rest of the images using foam squares and liquid glue.

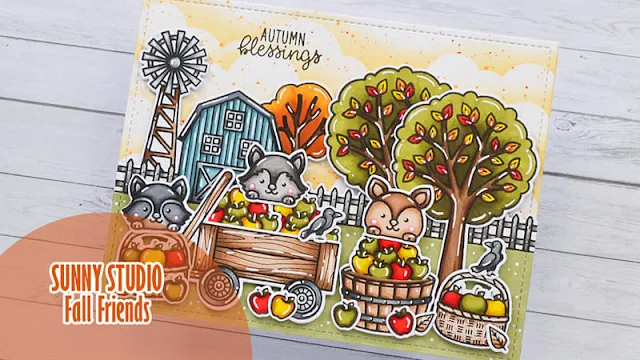
Sunny Studio Stamps: Fall Friends Farm Fresh Happy Harvest Fall Themed Card by Marine Simon

I added highlights on the images using a white gel pen, and stamped my sentiment 'Autumn Blessings' from Happy Harvest at the top left corner using black versafine ink. And finally I stuck my apple picking panel on a card base, and added white dots to each critter's cheeks.

Sunny Studio Stamps: Fall Friends Farm Fresh Happy Harvest Fall Themed Card by Marine Simon

And that's it! I hope you like this super sweet apple picking scene, I leave you with the video (click the image above), and wish you all an amazing day. See you next time!

Sunny Studio Supplies Used:

Picket Fence Border Dies
Shop at:
Sunny Studio
Fall Friends Stamps
Fall Friends Stamps
Shop at:
Sunny Studio
Fall Friends Dies
Fall Friends Dies
Shop at:
Sunny Studio
Happy Harvest Dies
Happy Harvest Dies
Shop at:
Sunny Studio
Happy Thoughts Stamps
Shop at:
Sunny Studio
Seasonal Trees Stamps
Shop at:
Sunny Studio
Seaonal Trees Dies
Seaonal Trees Dies
Shop at:
Sunny Studio
Frilly Frames Retro Petals Dies
Shop at:
Sunny Studio
Slimline Nature Borders
Shop at:
Sunny Studio
Farm Fresh Stamps
Farm Fresh Stamps
Shop at:
Sunny Studio
Farm Fresh Dies
Farm Fresh Dies
Shop at:
Sunny Studio

Wednesday, September 22, 2021

Words of Gratitude Cards with Julia and Franci

Hello everyone! It’s Julia here and today I want to share this wintery thank you card with you!

Sunny Studio Stamps: Words Of Gratitude Slimline Dies Bear Hugs Thank You Word Dies Thank You Card by Julia Englich

First, I ink blended a piece of Bristol Smooth cardstock with Milled Lavender, Victorian Velvet, Seedless Preserves, and Black Soot. I added white splatters for a snowy look. I also used a mountain border die from my stash to create a background for my cute polar bears from Bear Hugs.

I used the Slimline Nature Borders to add two snowy hills. I added a little bit of Salvaged Patina to the edge of the snowbanks as well as some shimmer spray for lots of shine.

Sunny Studio Stamps: Words Of Gratitude Slimline Dies Bear Hugs Thank You Word Dies Thank You Card by Julia Englich


I adhered all the die cuts to an A2-sized card base and added the image with foam squares. For my sentiment, I die cut the
Thank You Words die three times out of white card stock and layered all of them for dimension. For the second part of the sentiment, I heat embossed the greeting from Words of Gratitude onto a strip of black cardstock and attached both to the background.

I really hope you like it!! Until next time - have an amazing week!

---------------------------------------------------

Hi there and happy Wednesday! It's Franci here with you today, with a mice card showcasing the new Words of Gratitude set. Aww I love this card so much, it makes me smile!

Sunny Studio Stamps: Words Of Gratitude Stitched Oval Dies Harvest Mice Thank You Card by Franci Vignoli

First of all I die cut a Stitched Oval 2 out of white cardstock and a Scalloped Oval Mat One out of this pretty patterned paper from the Sweater Weather 6x6 set. I created a matching card base with the partial die cutting technique and I glued everything together with liquid glue. 

Sunny Studio Stamps: Words Of Gratitude Stitched Oval Dies Harvest Mice Thank You Card by Franci Vignoli

I stamped, colored with Copics and 
die cut all the images from the Harvest Mice set, glued them down into this cute little scene with foam adhesive and stamped my sentiment at the bottom. In this new set you can find so many lovely ways to say thank you on your cards and there's also a new die set that coordinates: Thank You Words die. Finally I added a little pink heart and some Nuvo Drops embellishments here and there. 

Thanks a lot for stopping by and happy crafting!

Sunny Studio Supplies Used:

Bear Hugs Stamps
Bear Hugs Stamps
Shop at:
Sunny Studio
Bear Hugs Dies
Bear Hugs Dies
Shop at:
Sunny Studio
Words of Gratitude Stamps
Shop at:
Sunny Studio
Thank You Words Die
Thank You Words Die
Shop at:
Sunny Studio
Slimline Nature Borders
Shop at:
Sunny Studio
Harvest Mice Stamps
Harvest Mice Stamps
Shop at:
Sunny Studio
Harvest Mice Dies
Harvest Mice Dies
Shop at:
Sunny Studio
Scalloped Oval Mat 1 Dies
Shop at:
Sunny Studio
Stitched Oval 2 Dies
Shop at:
Sunny Studio
Sweater Weather Paper
Shop at:
Sunny Studio

Tuesday, September 21, 2021

Forest Tree Stencil Focused Cards with Kavya and Isha

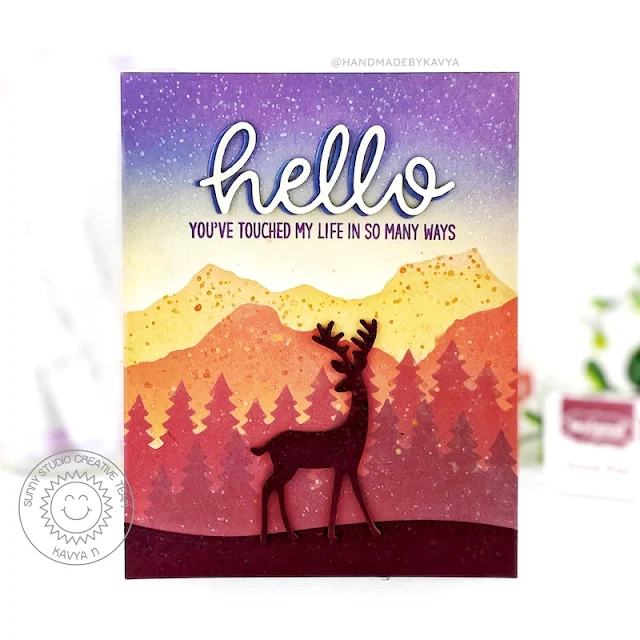
Hi folks, Kavya here. I am back on the blog with another fun card using the new Forest Trees stencil! This one might be the quickest yet longest I made so far. Quickest because it took me less than an hour to put together but longest because it took me over 2 nights to figure out the right color combo. Being a perfectionist is definitely not the best trait for a cardmaker!

Sunny Studio Stamps: Forest Tree Stencils Rustic Winter Dies Hello Word Die Thank You Card by Kavya

I first started off creating a diy ‘mountain stencil’ by tearing a piece of cardstock by hand. I then used the following distress oxide inks to stencil the two mountain stencils and two Forest Tree stencils and added some paint splatters too! I tried using distress inks and other dye inks but it was just easier to blend with oxides! 

  • Sky: Dusty Concord and Stormy Sky at the top and Dried Marmalade at the bottom
  • Mountains: Dried Marmalade, Crackling Campfire
  • Forest: Fired Brick and Aged Mahogany 
Sunny Studio Stamps: Forest Tree Stencils Rustic Winter Dies Hello Word Die Thank You Card by Kavya

Later, I added a deer and some land using 
Rustic Winter dies and Slimline Nature Border Dies using a deep maroon cardstock. Finally, I added a sentiment from Words of Gratitude stamp set and Hello Word die to finish off my card! 

That’s it! I hope you liked this fun card! I sure enjoyed making it :) Happy Crafting!

----------------------------------------------

Hello everyone! Isha with you, sharing some fun and bright New Year cards. Today the focus is on the GORGEOUS Forest Trees stencils. This is a set of three stencils, which makes it easy to create beautiful backgrounds.

Sunny Studio Stamps: Forest Tree Stencils Season's Greetings Lacy Snowflake Dies Winter Holiday Cards by Isha Cupta

Card 1: I started by sponging distress inks in cracked pistachio, peacock feathers, lucky clover, pine needles onto a white cardstock using the Forest trees stencils. I used all the three layers and repeated the process to fill the whole background. 

I then flicked some pine needle, gold and white inks. Frame this piece using the Fancy Frames Rectangle.

Sunny Studio Stamps: Forest Tree Stencils Season's Greetings Lacy Snowflake Dies Winter Holiday Cards by Isha Cupta

Stamp the sentiment from the Seasons Greetings stamp set using versamark ink and emboss using WOW! metallic gold rich embossing powder. Die-cut using the coordinating dies. Die-cut one more piece using red cardstock and adhere this slightly offset behind the sentiment. Adhere this panel to a red card base. Add gold floss behind the sentiment and finish by using some Emerald Jewels.

Sunny Studio Stamps: Forest Tree Stencils Season's Greetings Lacy Snowflake Dies Winter Holiday Cards by Isha Cupta

Card 2: I sponged the background using distress inks in tattered rose, candied apple, abandoned coral, fired brick and aged mahogany as the above piece. The only difference is that I flipped the stencils to create the next layers. This gives a beautiful angled forest look. Flick, gold and white paint. Adhere this piece to the inner frame of the Fancy Frames die. Adhere this to a white card base. Die-cut the snowflakes using the Lacy Snowflakes die. Add some gold paint. Adhere to the card. Stamp the sentiment from the Inside Greetings - Holidays stamp set.

These cards were quick to make and are perfect for mailing. Thanks for dropping by!

Sunny Studio Supplies Used:

Stitched Rectangle Dies
Shop at:
Sunny Studio
Words of Gratitude Stamps
Shop at:
Sunny Studio
Lacy Snowflakes Die
Lacy Snowflakes Die
Shop at:
Sunny Studio
Hello Word Die
Hello Word Die
Shop at:
Sunny Studio
Rustic Winter Dies
Rustic Winter Dies
Shop at:
Sunny Studio
Season's Greetings Stamps
Shop at:
Sunny Studio
Season's Greetings Dies
Shop at:
Sunny Studio
Slimline Nature Borders
Shop at:
Sunny Studio
Inside Greetings-Christmas
Shop at:
Sunny Studio
Forest Trees Stencils
Shop at:
Sunny Studio