Thursday, September 9, 2021

Icing Border Die Focused Cards with Anja and Marine

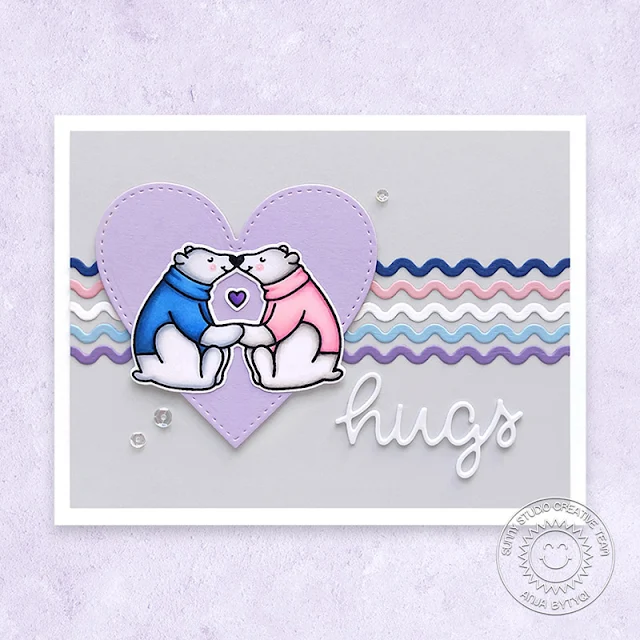
Hello everyone, Anja here and today I have a love and winter themed card for you showing you how you can use the Icicle Border Dies as accents on your project. I die cut the ric-rac border from five colors of cardstock to create a repeating design element in the background.

Sunny Studio Stamps: Icing Border Dies Bear Hugs Stitched Hearts Everyday Card by Anja Bytyqi

I started off with a white A2 card base and trimmed down a light grey cardstock panel to be 3/16 inch smaller on each side. Next, I adhered the ric-rac borders with liquid glue and cut off the excess. I also die cut one of the Stitched Hearts from lavender cardstock. For a bit of dimension, I popped it off with foam tape.

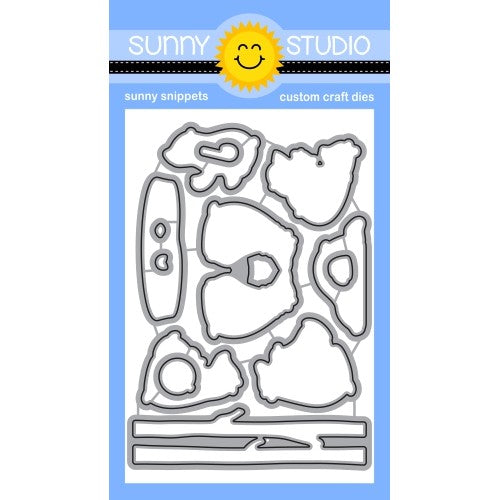
I love the versatile Bear Hugs Stamps and picked the adorable polar bear couple as well as a little heart. I stamped the images in Memento Tuxedo Black Ink and colored them with Copic Markers. I used the coordinating die to cut out the bears. The heart was fussy cut with scissors. I adhered the images in the middle of the heart die-cut.

Sunny Studio Stamps: Icing Border Dies Bear Hugs Stitched Hearts Everyday Card by Anja Bytyqi

The scripty word 'hugs' is included in the Scalloped Oval Mats 3 Dies set and I cut it three times from white cardstock. I stacked the die cuts on top of each other and adhered it to the card. Finally, I added three clear sequins.

Thank you so much for stopping by!

--------------------------------------------

Hey friends, Marine here, I'm so happy to be back on the blog with this shaker card showcasing some brand new products: the Icing Borders die set, the Thank You Words die set, as well as some autumnal pattern papers from the gorgeous Sweater Weather 6x6 paper pack.

Sunny Studio Stamps: Icing Border Dies Cupcake Shaped Dies Thank You Word Dies Everyday Card by Marine Simon

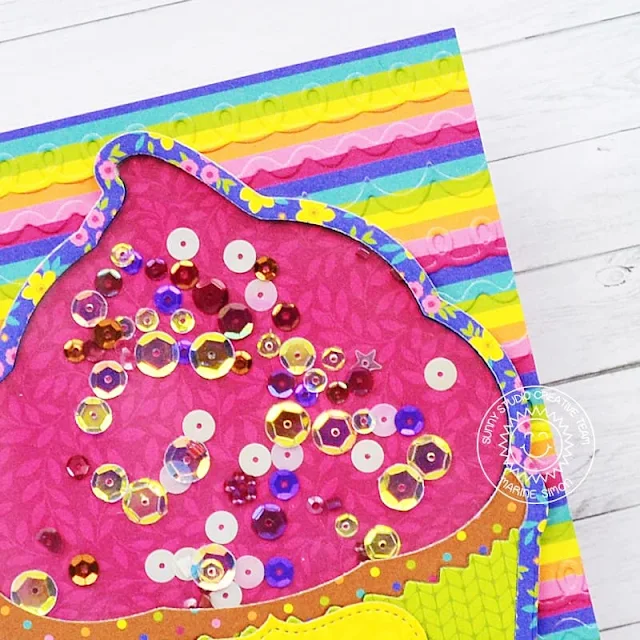
I picked up a floral pattern paper to be the frame of my cupcake, and cut a plain cupcake using the biggest die from the Cupcake Shaped die set. Next I used the second cupcake die to cut my frame: I placed and taped it in the center of the plain cupcake, and sent it to my die cutting machine to get my floral frame.

Next I cut additional elements: three cupcake pieces out of pattern papers: a dark pink icing piece, a brown piece to make the cake and a green piece to make the cupcake liner, as well as a plain cupcake out of acetate to create the window of my shaker, and another one out of navy blue cardstock to be the base of the cupcake.

I temporarily taped the floral frame on top of the navy blue base and I attached the dark pink icing part on the cupcake base by tucking it right up against the frame.

Next I attached the floral frame to the plain acetate cupcake to create the window, and on the front of this window, I attached the two remaining pieces of cupcake: the cake piece and the cupcake liner.

Sunny Studio Stamps: Icing Border Dies Cupcake Shaped Dies Thank You Word Dies Everyday Card by Marine Simon

At the back of the window panel, I applied thin strips of foam tape on the edges. And all along those foam strips I applied powder, this way the sequins won't stick to the foam.

Next I poured a sequin mix on the cupcake base, right on the dark pink icing section, and then stuck my window panel on top of the cupcake base to close the shaker.

I created a custom background using the Icing Border dies. I used those dies and a striped pattern paper from the Sweater Weather 6x6 paper pack to cut lots of icing shapes. I cut a panel out of the same striped pattern paper, and I glued each icing shape on top of the panel in a way that the panel and borders would be coordinated.

I filled the entire panel with icing borders, trimmed off the edges and stuck the panel to a pink card base, and then I attached my giant shaker cupcake on my custom background using liquid glue.

Next I cut two banners: one out of a yellow pattern paper using a die from the Sliding Window die set and one out of a blue pattern paper using a die from the Stitched Rectangles die set. I attached those banners on top of each other on the bottom section of the cupcake, and finally I cut the word 'Thanks' out of gold mirror cardstock and stuck it on top of the banners.

And that's it. this is the final result. I hope this shaker cupcake will inspire you to make your own version, maybe a holiday cupcake with some pretty Christmas themed papers or a birthday cupcake with rainbow papers? Depending on the papers you use, the possibilities are endless. I leave you with the video right below, and wish you an amazing day. See you next time!

Sunny Studio Stamps: Icing Border Dies Cupcake Shaped Dies Thank You Word Dies Everyday Card by Marine Simon

Sunny Studio Supplies Used:

Stitched Heart Dies
Stitched Heart Dies
Shop at:
Sunny Studio
Cupcake Shape Dies
Cupcake Shape Dies
Shop at:
Sunny Studio
Stitched Rectangle Dies
Shop at:
Sunny Studio
Bear Hugs Stamps
Bear Hugs Stamps
Shop at:
Sunny Studio
Bear Hugs Dies
Bear Hugs Dies
Shop at:
Sunny Studio
Thank You Words Die
Thank You Words Die
Shop at:
Sunny Studio
Icing Border DIes
Icing Border DIes
Shop at:
Sunny Studio
Sliding Window Dies
Sliding Window Dies
Shop at:
Sunny Studio
Scalloped Oval Mat 3 Dies
Shop at:
Sunny Studio
Sweater Weather Paper
Shop at:
Sunny Studio

Wednesday, September 8, 2021

Crisp Autumn Cards with Julia and Franci

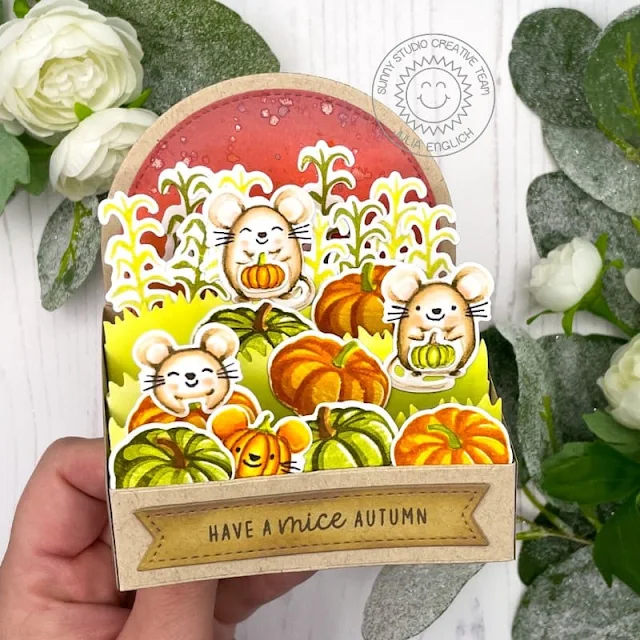
Hello crafty friends! It's Julia here and I am so excited to share this fun autumn box card with you!

Sunny Studio Stamps: Crisp Autumn Harvest Mice Autumn Themed Card by Julia Englich

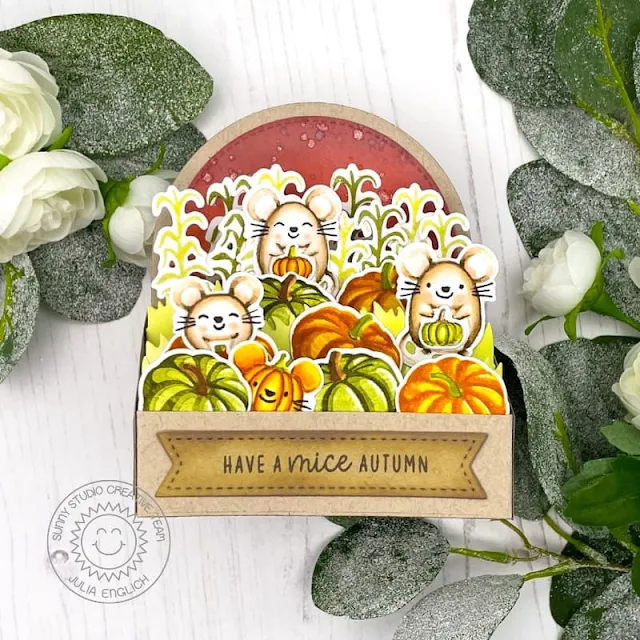
First, I stamped the pumpkins from the Crisp Autumn layering stamp set with Distress Inks and the sweet mice from Harvest Mice with no-line coloring ink onto Strathmore Bristol Smooth cardstock. I wanted to match the look of the pumpkins, so I thought I would give no-line coloring a go! I had so much fun trying this new (to me) coloring technique!

Distress Inks used: green pumpkin: Shabby Shutters, Peeled Paint, Forest Moss,; stem: Tea Dye, Gathered Twigs; orange pumpkin: Dried Marigold layered with Mustard Seed, Wild Honey, Rusty Hinge; stem: Shabby Shutters, Peeled Paint.

Zig Markers used: 999; 222; 53, 46, 43; 52, 61, 60; 76, 64, 65.


Sunny Studio Stamps: Crisp Autumn Harvest Mice Autumn Themed Card by Julia Englich

I ink blended the background and grass borders with Distress Oxides and I also added a little bit of shading to the panels on the outside of the box. I assembled the box and then it was time to add in all the adorable little mice and pumpkins!


I had lots of fun creating this fun autumn scene and I really hope

------------------------------------------

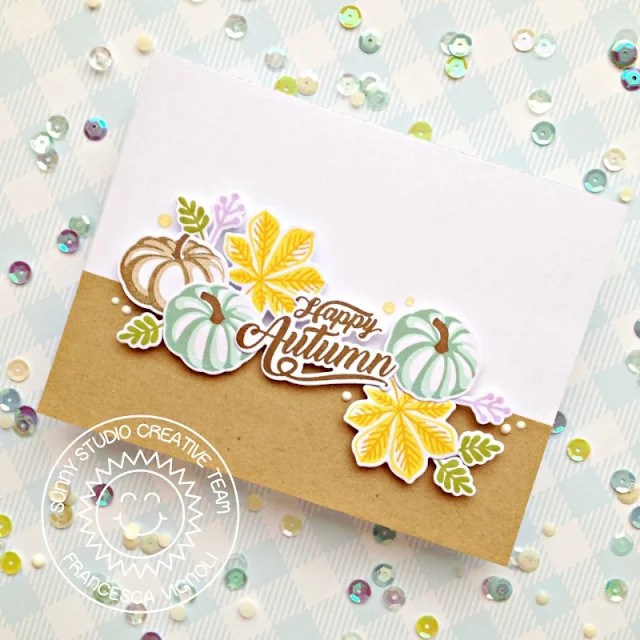
Hello! It's Franci here with you today, with a Fall themed card to celebrate the upcoming season. This new autumn themed set is so cool! It features layering pumpkins and leaves and look at that beautiful sentiment! 


Sunny Studio Stamps: Crisp Autumn Autumn Themed Card by Franci Vignoli


First of all I created a white card base and covered the front with a stripe of kraft cardstock. Then I stamped all my images from the 
Crisp Autumn set using a combo of Memento Drop inks and Lawn Fawn inks. I die cut them out using their coordinated dies and glued them down into this fall scene with foam adhesive.


Sunny Studio Stamps: Crisp Autumn Autumn Themed Card by Franci Vignoli


I added some white embellishments here and there with my Tonic Nuvo Drops and this card is ready to wish "Happy Autumn" to one of my friends! 

Thanks a lot for stopping by today and have a lovely day! 

Sunny Studio Supplies Used:

Crisp Autumn Stamps
Crisp Autumn Stamps
Shop at:
Sunny Studio
Crisp Autumn Dies
Crisp Autumn Dies
Shop at:
Sunny Studio
Harvest Mice Stamps
Harvest Mice Stamps
Shop at:
Sunny Studio
Harvest Mice Dies
Harvest Mice Dies
Shop at:
Sunny Studio

Tuesday, September 7, 2021

Fall Friends Cards with Kavya and Isha

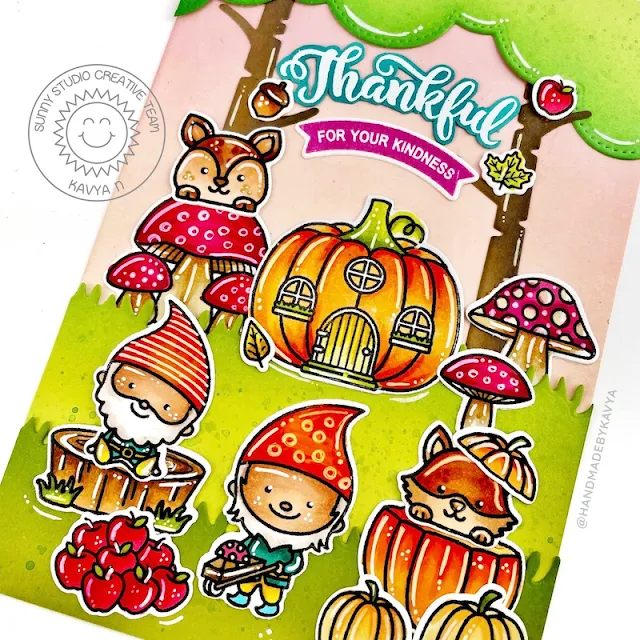
Hi folks, Kavya here. I am back on the blog with another fun card using the new release! I love how versatile this release is (just like everything in the past!). I always try to find ways to combine stamp sets with previously released products because you got to use your stash right? Today’s card uses the new Fall Friends stamp set with the previously releases Home Sweet Gnome stamp set! 

Sunny Studio Stamps: Fall Friends Home Sweet Gnome Slimline Dies Fall Themed Card by Kavya

I first started off by die cutting grass and tree cover using dies using Slimline Nature Border die set and colored cardstock. I then ink blended the edges and splattered matching paint to make it more realistic! I ink blended an A2 cardstock using Tattered Rose and Spun Sugar distress oxide ink. I then assembled the background together… I ended up placing the grass die cuts a bit lower so my card ended up longer than 5.5” but I love the extra space :) 

Sunny Studio Stamps: Fall Friends Home Sweet Gnome Slimline Dies Fall Themed Card by Kavya

I then stamped and colored multiple images from Fall Friends and Home Sweet Gnome using alcohol markers. As always, I added some highlights using a white gel pen. Finally, I embossed and stamped sentiments from Bountiful Autumn to finish off my card :) 

I hope you liked this fun card! Check back tomorrow for more fun inspiration! Happy crafting!

----------------------------------------

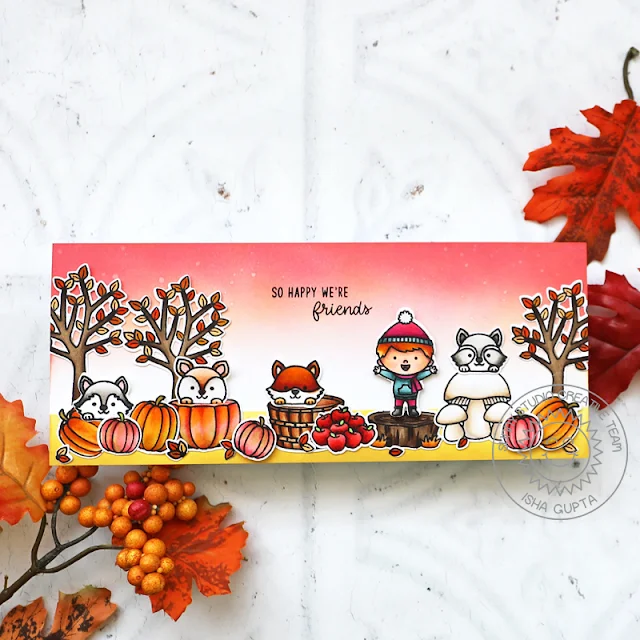
Hello everyone, Isha here with you! Hope you are enjoying creations using the new release on the blog. Today, I am featuring the Fall Friends stamps and dies. There are so many images in this set. I created a slimline scene and used a few of the older release products. It all goes well with each other.

Sunny Studio Stamps: Fall Friends Seasonal Trees Fall Kiddos Fall Themed Card by Isha Gupta

To start, I created the background using various distress inks. I then stamped the images, colored them using Copic markers and then die-cut using the coordinating dies.

Fall Friends stamp and dies - critters, pumpkins, apples, tree trunk, basket 
Seasonal Trees stamp and dies - autumn trees
Fall Kiddos stamp and dies - girl

Sunny Studio Stamps: Fall Friends Seasonal Trees Fall Kiddos Fall Themed Card by Isha Gupta

Once the images were ready, I adhered the background to a white card base. I then adhered all the images. Now there is something special about the big pumpkin and the basket dies. They cut a slit in the center to create an opening to tuck in things. It is awesome.

I love autumn for its colors. Which is your favourite season? Thanks for dropping by! Have a nice day.

Sunny Studio Supplies Used:

Fall Friends Stamps
Fall Friends Stamps
Shop at:
Sunny Studio
Fall Friends Dies
Fall Friends Dies
Shop at:
Sunny Studio
Fall Kiddos Stamps
Fall Kiddos Stamps
Shop at:
Sunny Studio
Fall Kiddos Dies
Fall Kiddos Dies
Shop at:
Sunny Studio
Home Sweet Gnome Stamps
Shop at:
Sunny Studio
Home Sweet Gnome Dies
Shop at:
Sunny Studio
Seasonal Trees Stamps
Shop at:
Sunny Studio
Seaonal Trees Dies
Seaonal Trees Dies
Shop at:
Sunny Studio
Slimline Nature Borders
Shop at:
Sunny Studio
Bountiful Autumn Stamps
Shop at:
Sunny Studio

Monday, September 6, 2021

Words of Gratitude Cards with Mayra and Ashley

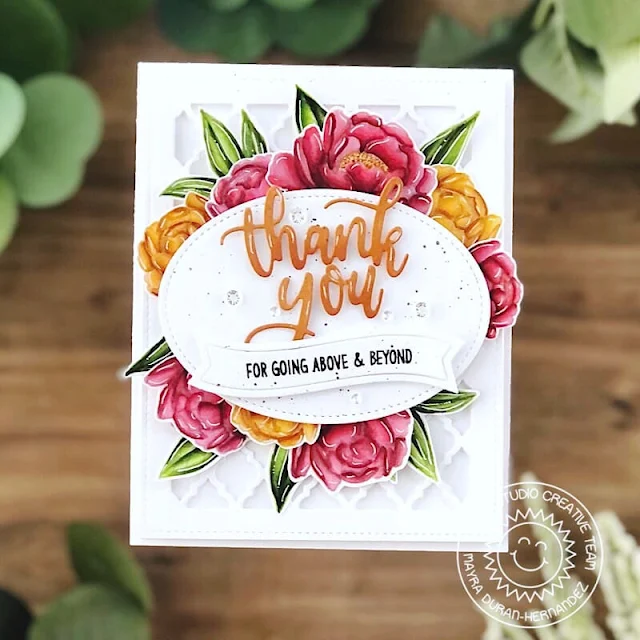
Hello everyone. Happy Monday. Mayra is here with you today. I am sharing this card using the lovely new Words of Gratitude stamp set. 

Sunny Studio Stamps: Peony Floral Thank You Card by Mayra Duran-Hernandez (using Words of Gratitude, Pink Peonies, Stitched Oval 2, Frilly Frames Quatrefoil & Slimline Scalloped Frame Dies)

I began by coloring the beautiful peonies from the Pink Peonies set. The images are in a light color to give the no-line coloring look. I used R81, R83, R59, R56, R39, and R35 for the burgundy-colored peonies, YR30, YR21, YR23, YR24, and E99 for the rusty yellow-colored peonies. For the green, I used G40, YG03, YG17, YG67, YG63, G94, and G99.

Sunny Studio Stamps: Peony Floral Thank You Card by Mayra Duran-Hernandez (using Words of Gratitude, Pink Peonies, Stitched Oval 2, Frilly Frames Quatrefoil & Slimline Scalloped Frame Dies)

Next, I used the large rectangle from the Frilly Frames Quatrefoil die set along with the intricate die-cut panel to die cut the base of the card from white cardstock. Then, I die-cut an oval using the Stitched Oval Dies 2 set. I then die-cut the thank-you phrase using the thank-you from the Slimline Scalloped Frame dies set. I stamped the sentiment from the Words of Gratitude set onto a small banner. 

I hope you enjoy the card I created to share with you today. Thank you so much for taking the time to stop by. I pray you each have a wonderful and blessed day. 

------------------------------------------------

Hello friends! It's Ashley today with a simple and elegant card featuring the Words of Gratitude set. I am so happy that Sunny Studio has a whole set just for thank you cards now! I make them all the time and it's so nice to have so many options for wording, especially when combined with the new Thank You Words dies!

Sunny Studio Stamps: Words of Gratitude Card by Ashley Ebben (using Winter Greenery Dies, Thank You Word Dies, Sweater Weather Paper & Rainbow Pearls)

I mentioned last week how much I love the new leaf patterned paper in the Sweater Weather paper pack, so I used that paper as my inspiration for my card this week. I started by cutting a piece of white cardstock with the largest Stitched Rectangle die. I used two of the leaves from the new Winter Greenery die set several times on white cardstock until I had a small pile of them. I then glued the leaves randomly around my white stitched rectangle, trimming off any over hang when I was done. I love the dimensional tone on tone look of all the white! 

Sunny Studio Stamps: Words of Gratitude Card by Ashley Ebben (using Winter Greenery Dies, Thank You Word Dies, Sweater Weather Paper & Rainbow Pearls)

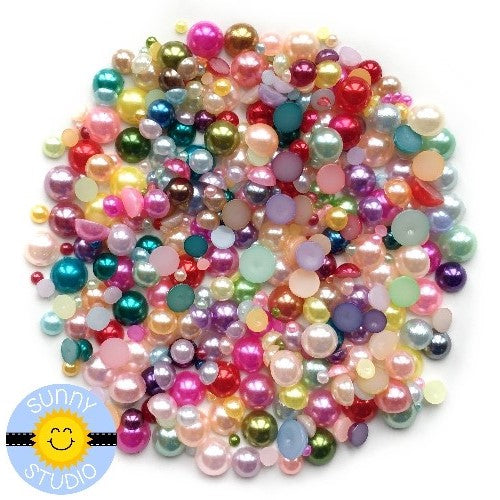
I added my white leafy background to the magenta piece of leaves paper from Sweater Weather. I cut the "thank you" word die from the same patterned paper, then twice more from a pretty burgundy cardstock in my stash. I glued all the die cuts together for a dimensional sentiment. I stamped the rest of the sentiment from Words of Gratitude onto more burgundy cardstock in VersaMark ink and embossed with white. I added the strips to the card first, then the dimensional words so they really popped above the rest of the sentiment. To finish, I added a few magenta and burgundy pearls from the Rainbow Pearls embellishment pack.

Thank you so much for stopping by! Have a wonderful day!

Sunny Studio Supplies Used:

Stitched Rectangle Dies
Shop at:
Sunny Studio
Words of Gratitude Stamps
Shop at:
Sunny Studio
Thank You Words Die
Thank You Words Die
Shop at:
Sunny Studio
Pink Peonies Stamps
Pink Peonies Stamps
Shop at:
Sunny Studio


Frilly Frames Quatrefoil
Shop at:
Sunny Studio
Slimline Scalloped Frame
Shop at:
Sunny Studio
Stitched Oval 2 Dies
Shop at:
Sunny Studio
Winter Greenery DIes
Shop at:
Sunny Studio

Pink Peonies Dies
Pink Peonies Dies
Shop at:
Sunny Studio
Sweater Weather Paper
Shop at:
Sunny Studio
Rainbow Pearls
Rainbow Pearls
Shop at:
Sunny Studio
VersaMark Watermark Ink
Shop at:
Sunny Studio