Tuesday, April 26, 2022

Fintastic Friends Cards with Kavya and Mendi

Hey folks! Kavya here! I am super excited to start playing with the new Summer release :) There are so many awesome products and I cannot stop finding inspiration all around me. Today’s card is based on one of my favorite themes - Oceans and it’s gorgeous floral and fauna. There is so much opportunity for color here and there is no right or wrong. 

Sunny Studio Stamps: Fintastic Friends Card by Kavya (featuring Magical Mermaids, Ocean View)

I first started off by creating my background using a pale blue colored cardstock. I ink blended using Blueprint, Mermaid Lagoon and Peacock Feathers distress oxide ink. I also added some sun rays entering the water from a side using a generic sun ray stencil. Then, I splattered some water and white paint to give the look of bubbles! 

Sunny Studio Stamps: Fintastic Friends Card by Kavya (featuring Magical Mermaids, Ocean View)

Later, I colored a bunch of images from the new Fintastic Friends and Ocean View stamp sets. From the older releases, I used the Magical Mermaid stamp (It’s retiring soon so grab it before it’s gone!). Adhered them to the background using foam and added a sentiment to finish off my card :) 

That’s it folks! I hope you liked this project :) Check back tomorrow for more inspiration! Happy Crafting!

-------------------------------------------

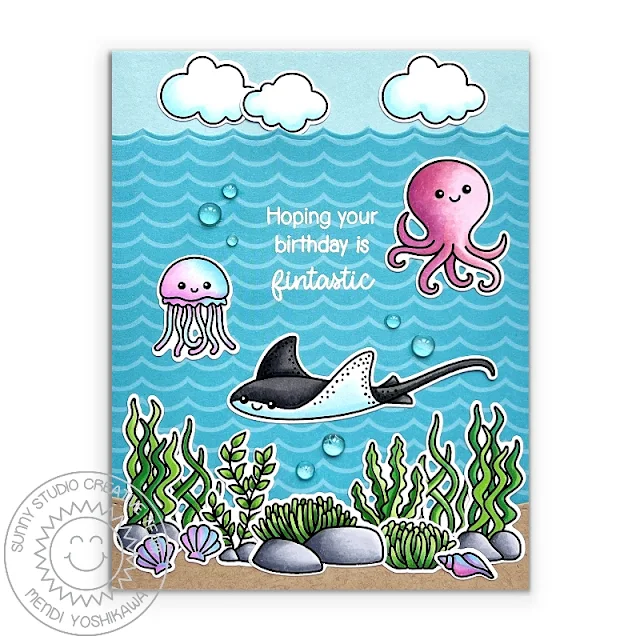
Hello there!  It's Mendi here today, filling in for Isha, with a card showcasing the Fintastic Friends Stamps. I started my card by using a piece of patterned paper with waves from our Summer Splash Paper pack, trimming the top with our retired Sunny Border Dies. A similar look can be achieved by simply cutting along the top of the wave print with your scissors.

To set my scene I mixed in plants from both our Best Fishes Stamps and our new Fintastic Friends set with some of seashells and clouds from our new Ocean View Stamps. I tried to narrow my Copic marker choices to a limited color palette to have my seashells, jellyfish and octopus all compliment each other with a bit of a pearlescent look by blending pinks, lavenders and pale aqua blues.

Sunny Studio Punny Birthday Card (using Fintastic Friends, Ocean View & Best Fishes Stamps, Summer Splash Paper, Slimline Nature Border Dies)

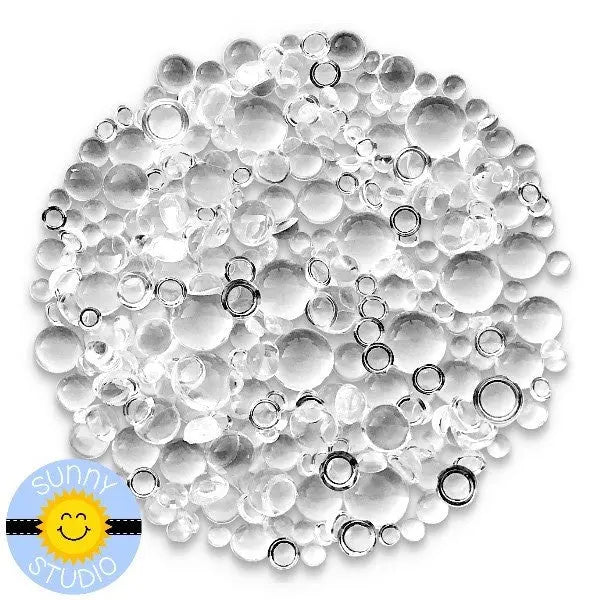
For my punny greeting, I stamped my sentiment from the Fintastic Friends Stamps using VersaMark ink and heat embossed it with Hero Arts White Detail Embossing Powder. Lastly, I added some bubbles using our Clear Drops Mix, which I adhered to my card using Ranger Multi Matte Medium, to add a little shine and dimension to my otherwise flat card.

Sunny Studio Punny Birthday Card (using Fintastic Friends, Ocean View & Best Fishes Stamps, Summer Splash Paper, Slimline Nature Border Dies)

That wraps up our shares for the day. Thanks so much for joining us! I hope we've inspired you in your Summer cardmaking endeavors.

Supplies Used:

Best Fishes Stamps
Best Fishes Stamps
Shop at:
Sunny Studio
Best Fishes Dies
Best Fishes Dies
Shop at:
Sunny Studio
Summer Splash 6x6 Paper
Shop at:
Sunny Studio
Fintastic Friends Stamps
Shop at:
Sunny Studio

Ocean View Stamps
Ocean View Stamps
Shop at:
Sunny Studio
Ocean View Dies
Ocean View Dies
Shop at:
Sunny Studio
Hero Arts White Detail
Shop at:
Sunny Studio
Clear Drops Mix
Clear Drops Mix
Shop at:
Sunny Studio
Fintastic Friends Dies
Shop at:
Sunny Studio
VersaMark Watermark Ink
Shop at:
Sunny Studio
Multi Medium Matte
Multi Medium Matte
Shop at:
Sunny Studio
Magical Mermaid Dies
Shop at:
Sunny Studio
Magical Mermaid Stamps
Shop at:
Sunny Studio

Monday, April 25, 2022

Baby Elephants Cards with Catherine and Bobbi

Hi Friends! It’s Catherine here sharing a slimline shaker card featuring the adorable Baby Elephants

Sunny Studio Stamps: Baby Elephants Baby Themed Shaker Card by Catherine Cohen (featuring Stitched Circle Dies, Slimline Dies)

For the base, I trimmed a piece of white cardstock to 3.2”H x 8.2”W. I then die cut another piece of white cardstock using the rectangle in the Slimline Scalloped Frame set.  I then die cut three circles on the rectangle using the third smallest circle in the Stitched Circles- Large set to make the shaker front.

I made a slimline cloudy stencil by die cutting stencil paper with the cloud die from Slimline Nature Borders. I placed the rectangle on top of the base and I lightly ink blended a cloudy sky background with Tumbled Glass Distress Oxide.  I added a cloudy border at the bottom using the cloud from the Slimline Nature Border set.

Sunny Studio Stamps: Baby Elephants Baby Themed Shaker Card by Catherine Cohen (featuring Stitched Circle Dies, Slimline Dies)

I cut a piece of acetate the same size as the rectangle piece die cut with the three circles. I then glued the acetate onto the back of the rectangle piece. I added foam tape around all the edges of the rectangle piece making sure not to tape over the circles. I added Pastel Star Confetti onto the base and carefully attached the rectangle making sure that the clouds were lined up.

I wanted the Baby Elephants to have a soft appearance so I used light brown ink to stamp the images and sentiment. I die cut the stamped images with the coordinating dies and colored with Coptic Markers. I borrowed the balloon strings from Heart Bouquet and tied the balloons with a bow from Little Birdie. I added a flower on one of the elephants from Fabulous Flamingos, a crown on the other, and finished off the card by adding little stars.

------------------------------------------

Hello friends! It's Bobbi Lemanski here thrilled to be sharing my first card as a Sunny Studio Stamps Design Team member! I am using the new Baby Elephants Stamps  and coordinating dies. I fell in love with the sweet baby elephant sleeping on the clouds, hanging from the moon, so I decided this cutie needed to be suspended in the sky on my card, too. The swinging motion makes this interactive card just a little more fun and lively to give the new parents!

Sunny Studio Stamps: Baby Elephants Baby Themed Card by Bobbi Lemanski

How to Make this Card:

Feature Image: To create the sweet feature image, I stamped and die cut the elephant image and backed it with two more plain white die cuts. Adding additional backing to the die cut image helps by (1) by adding weight to the hanging piece, (2) concealing any color bleeding from my Copic Markers, and (3) concealing between the layers, the invisible fish line used to suspend the image. I used two lines to suspend the image. I colored the image using Copics: C3, C1, R22, R0, YG00, YG000, B45, B41, and B21. I used my glitter pen to add some shimmery dots to the moon, too. I stamped the "welcome baby" phrase from the Baby Elephant stamp set right below the opening. I attached two invisible strings between the top layer and the back layers using double sided tape. It's ready to suspend.


Sunny Studio Stamps: Baby Elephants Baby Themed Card by Bobbi Lemanski


To house the feature image, I created a stand up card with a circular window opening in the front. I cut four pieces from Neenah 80lb cardstock as follows:


Two pieces measuring 5″ wide X 8-1/2″ tall. Both were scored 1/2″ down from top edge and 1″ up from bottom edge.


One piece measuring 5″ X 7″ in size. This will be the backing support for the front panel. It helps support the narrow sides around the window opening.


One piece 5″ wide X 2″ tall. This will be used as the hinge, connecting the front and back panels at the bottom and providing additional support.


Back Panel:  I cut a 5″ wide X 6″ tall piece of gray and white star pattern paper from the Subtle Grey Tones 6″ X 6″ paper pad and attached it to the back panel, positioning along the 1″ score line at the bottom. Only the bottom will show, not the top, so cover the bottom!


Front Panel: For the front panel, I layered the remaining two panels, positioning the smaller A7 piece between the scored lines of the larger piece, and die cut a 4″ circle in the middle. Since I'm coloring on the front, I wanted a backing to (1) conceal the color bleed from the front and (2) to provide extra support around the opening. I stamped clouds, star balloons and tiny stars in the sky on the larger panel and colored them using Copic Markers: B000, B00, R22, R20, B45, B41, B21, and YG00. I also used my glitter pen to add a few smaller glittery stars on the front.


Sunny Studio Stamps: Baby Elephants Baby Themed Card by Bobbi Lemanski


Card Assembly: 
To assemble the card, I used double sided tape to connect the top 1/2″ scored areas that were folded inward, tucking the invisible line that suspends the baby elephant image in between the folded sections. I also used strong double-sided tape to attach the hinge piece on top of both of the bottom 1″ sections to make the folding bottom side. The hinge on top provides a nice, clean finish that shows, too.


Sunny Studio Stamps: Baby Elephants Baby Themed Card by Bobbi Lemanski


Back Pocket:
 This card still needs a spot to add a personal message, a signature and/or a gift card. To create a place for this, I made a quick little card that tucks inside a half circle pocket (made from more pattern paper) on the back of the card. I used the same 4″ circle die to cut the pocket. I simply cut the circle in half, drew faux black stitching lines around the pocket edge perimeter, and attached it to the back panel using glue around the perimeter.


Sunny Studio Stamps: Baby Elephants Baby Themed Card by Bobbi Lemanski


Notecard:
 For the little notecard, I cut a piece of white cardstock 6″ wide X 3″ tall and scored down the middle to make a 3″ square card. I stamped another image from the Baby Elephants stamp set on the front panel and added more faux stitching around the edges to match the pocket. This notecard tucks snugly in the pocket, much like a baby in a blanket!


Sunny Studio Stamps: Baby Elephants Baby Themed Card by Bobbi Lemanski


This card folds flat for mailing. It fits neatly inside a 5″ X 7″ (A7) envelope. I think parents will love the rocking motion of the baby elephant. I hope you give this card idea a try!


Thanks for stopping by today. If you want to see more ideas and inspiration from me, subscribe to my blog, BobbiHartDesign.com. I'll send you updates on new posts! You can also find me on Instagram as @BobbiHartDesign and on Facebook as BobbiHartDesign.

Sunny Studio Supplies Used:

Fabulous Flamingos Stamps
Shop at:
Sunny Studio
Fabulous Flamingos Dies
Shop at:
Sunny Studio
Subtle Grey Tones Paper
Shop at:
Sunny Studio
Slimline Nature Borders
Shop at:
Sunny Studio
Slimline Scalloped Frame
Shop at:
Sunny Studio
Stitched Circle Large Dies
Shop at:
Sunny Studio
Heart Bouquet Stamps
Shop at:
Sunny Studio
Heart Bouquet Dies
Heart Bouquet Dies
Shop at:
Sunny Studio
Little Birdie Stamps
Shop at:
Sunny Studio
Little Birdie Dies
Little Birdie Dies
Shop at:
Sunny Studio
Baby Elephants Stamps
Shop at:
Sunny Studio
Baby Elephants Dies
Baby Elephants Dies
Shop at:
Sunny Studio

Sunday, April 24, 2022

Summer 2022 Sneak Peek Winners + New Design Team Members

Hello there!  Thank you so much for joining me this week to help us celebrate our newest Summer Release!  I'm super exited to announce the following winners:

Monday
Caren Bartholomew

Tuesday
Lauryne Cunningham

Wednesday
Rosalie Beaube

Thursday
A Ito

Friday
Nikki Cochran

I have emailed each of you so if you didn't receive my email, please check your spam folder.


I am also thrilled to have the these four talented ladies joining our Sunny Studio team of designers who will begin sharing their own Summer cards starting on Monday. Yay!  I've received a little sneak peek and they are really going to inspire you!

Alma Störk

Bobbi Lemanski


With new faces it sadly means we have to say goodbye to several designers who we have come to love and adore over the years. Thank you Anja, Franci, Mayra and Ashley for all your inspiring cards and friendship. You mean the world to me and I will miss you greatly. 

Friday, April 22, 2022

Sneak Peek: Country Carnival Stamps + Summer Release in Review Video

Hello and welcome to our final Sneak Peek!  All this week I have been showcasing cards using our newest Summer collection which is now available for purchase!  Yay!

I've created a video showcasing not only today's sneak peeks, but all the new products from our Summer 2022 release and a closer look at the 40+ cards I made with them (which you can view below or at our YouTube channel HERE).


Today I'm also sharing one last set of ideas using our new Country Carnival Stamps. Before you run off to shop, I hope you will also join me for a closer look at this fun set and all the cards I made using them.

Card No. 1: For my first card I paired our darling new Country Carnival Stamps with the train from our Holiday Express Stamps and the teddy bears to match from our Beach Buddies StampsTo get everything to fit that I wanted to add to my scene, I went with a larger "canvas", creating a 5.5" square card base. I colored all my images in bright, happy primary colors with small touches of orange and green using Copic Markers. 

To separate my larger bears in the foreground from the smaller bears in the background, I inked up and trimmed two sloping hillsides using our Slimline Nature Border Dies which were inked up using Twisted Citron and Mowed Lawn Distress inks. For my sentiment I combined the words "Wishing You a" from our Bear Hugs Stamps, "Thrilling" from the Country Carnival Stamps, and "Birthday!" from our Kiddie Pool Stamps. Lastly to continue with my birthday theme and add some additional rainbow colors to my card I added two striped party hats to the bears on my train using our Froggy Friends StampsSunny Studio Theme Park Summer Fair with Train Birthday Card (using Country Carnival, Holiday Express & Beach Buddies Stamps, Slimline Nature Border Dies)

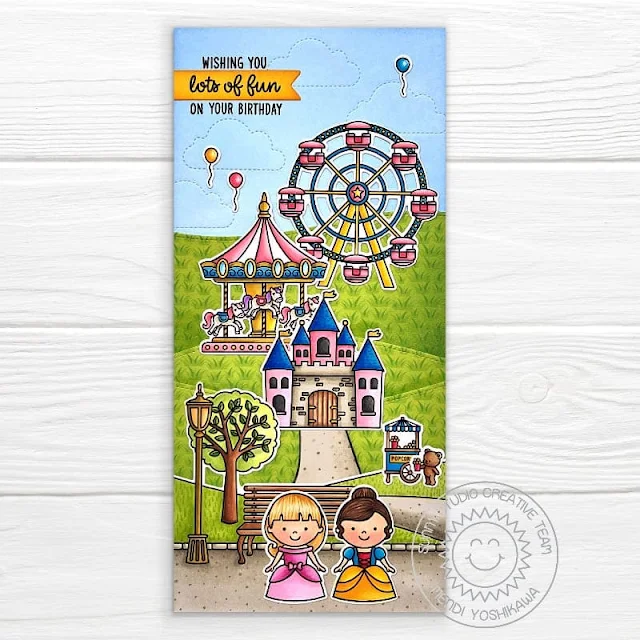
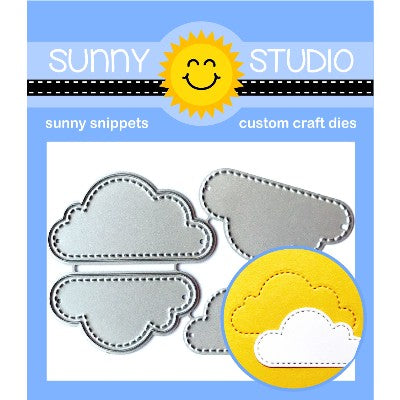
Card No. 2: Next up is an Amusement Theme Park Card combining the new Country Carnival Stamps with the princesses and castle from our Enchanted Stamps. I once again wanted to work with a larger canvas to fit all the adorable elements, so I went with a 4" wide x 8.5" high slimline card base. To add subtle clouds to my background, I added to the two stitched clouds that come with our Fluffy Cloud Dies. I then layered in a number of grassy hillsides cutting the grass patterned paper from our Spring Fling Paper pack using our Slimline Nature Border Dies

To create the walkway to my castle, I colored some scratch paper using Copic Markers and then traced the edge with a sharpie (using some copy paper below to protect my desk). This gave the path the look of a stamped image so that it would blend perfectly to match the stamped path in the Spring Scenes park border in the foreground. I then added two my Sleeping Beauty and Snow White characters to stand in front of the park bench. Lastly I stamped my greeting using a birthday sentiment from the Country Carnival set using Versafine Onyx Black Ink, stamping the words "lots of fun" onto a small pennant strip to add interest and a touch of color to the top portion of my card.

Sunny Studio Disney Inspired Theme Park Girls Princess Birthday Card (using Country Carnival, Enchanted & Spring Scenes Stamps, Spring Fling Paper, Fluffy Cloud & Slimline Nature Border Dies)

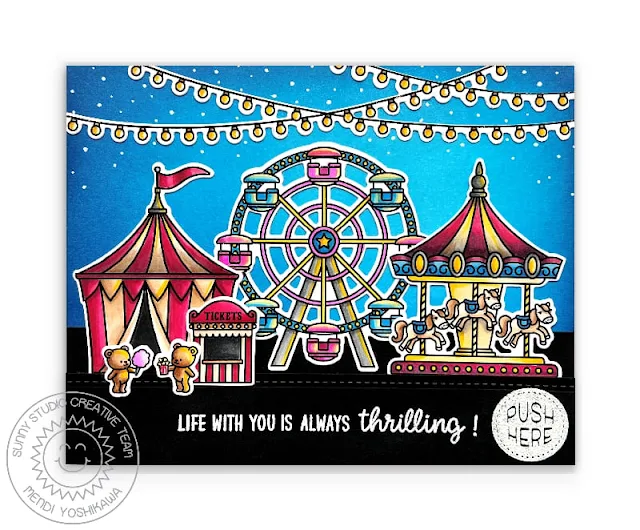
Card No. 3: For my next Country Carnival project to share, I have a fun interactive light-up card using Chibitronics White Lights. To start I inked my background blending Mermaid Lagoon, Salty Ocean, Prize Ribbon and Chipped Sapphire for my night's sky. I then added a string of lights using a border from our Scenic Route Stamps, adding stars to my sky using a white Sharpie Paint Pen. For my Country Carnival images I tried to color them with more dramatic shadows and yellow glowing highlights to sell the bright lights. I also made sure to keep my background lighter and brighter where my ferris wheel and carousel would be positioned to lend to the glowing effect. To build up the area around my battery, I added two layers of foam tape along the bottom inch of my card, adding stitching to my second strip of black cardstock with our Slimline Basic Border Dies.
Sunny Studio Interactive Light Up Amusement Park Card (using Country Carnival, Scenic Route Stamps & Slimline Basic Border Die)

Lighted View: For my "Push Here" button, I stamped and heat embossed an image from Lawn Fawn's Push Here Stamps. These super cool Chibitronics Lights retail for about $1 per LED light bulb so unfortunately I wasn't able to light up my entire string of lights as much as I would have liked to so I limited myself to three bulbs for the hanging lights and added two more to my scene, with one in the center of my ferris wheel and another just above the center horse on my carousel. To see how you can create a light-up card of your own, I found this to be a super helpful video tutorial HERE. The only other supplies I needed to purchase to was Copper Tape and batteries and I now have plenty of them on hand for lots of future cards.

Sunny Studio Interactive Light Up Amusement Park Card (using Country Carnival, Scenic Route Stamps & Slimline Basic Border Die)

Card No. 4: As I was looking at our Beach Buddies Critters, I realized their ears might be able to be colored like mouse ears. Unfortunately they didn't quite look like mouse ears when I did it though so I exaggerated them by tracing around a small circle template with my Copic Multi-liner pen and coloring them a solid black to hide the original stamped lines. I also used that same pen to trace around the edge of a larger circle to form the bottom brim of the hat and then fussy cut them out by hand since my altered ears wouldn't have cut properly with the dies.

For my background, I die-cut a scalloped panel using our Frilly Frames Polka-Dot Dies layered over a yellow patterned paper from our Polka-dot Parade Paper pack. I inked my sky and grass using Tumbled Glass and Twisted Citron Distress Inks and stamped the tufts of grass from our Farm Fresh Stamps. For the rest of my scene, I put my critters in the wagon from our Fall Friends Stamps and added a bouquet of balloons from our Floating By Stamps. To complete my theme park scene I used the carousel from our new Country Carnival Stamps and the two trees from our Spring Scenes Stamps
Sunny Studio Life With You Is Fun Critters with Mouse Ears in Wagon with Carousel Card (using Country Carnival, Fall Friends, Beach Buddies, Spring Scenes Stamps, Polka-dot Parade Paper & Frilly Frames Polka-dot Dies)

Card No. 5: For my next Country Carnival card I went with a clean and simple design with a bit of an artsy flair. I started by inking up an A2 sized cardstock panel using finger dauber using Kitsch Flamingo, Saltwater Taffy, Squeezed Lemonade, Twisted Citron, Salvaged Patina, Mermaid Lagoon and Shaded Lilac distress inks. I thought it sort of looks like the colorful fair lights at night when you sort of squint your eyes with the bokeh effect. I then die-cut it down with the stitched edge using our Frilly Frames Retro Petals Dies, mounting it onto a 4-1/4" x 5-1/2" black cardstock panel before adhering them to the front of my A2 sized card. 

For my sentiment, I heat embossed my congrats greeting from the Country Carnival set onto a stitched pennant from our Stitched Rectangle Dies. Lastly I adhered the stamped ferris wheel to my card front with foam tape to make it pop up and take center stage against the colorful background. I elected to not color the image since I thought my rainbow bokeh background had enough going on already. Plus I really liked the pop art feel of leaving it a plain black & white line drawing with the colors peeking through the spokes with the openings created by the die.

Card No. 6: My last Country Carnival card of the day is a Dumbo inspired scene, pairing the two clouds and elephant from our Baby Elephants Stamps with the circus tent from our Country Carnival Stamps. To help my dumbo fly, I fashioned a feather for him to carry by just sketching one out on scratch paper and fussy cutting it out. I love that one doesn't have to be must of an artist to make something like this. For both the clouds in my background and the brush along the bottom of my card I turned to the same cloud border from our Slimline Nature Border Dies. To complete my card I heated embossed the greeting "Just a note to lift you up" from our Balloon Rides Stamps, using Versamark Ink with Hero Arts White Detail Embossing Powder.
Sunny Studio Dumbo Inspired Elephant Flying Over Circus Tents Card (using Country Carnival, Baby Elephants & Balloon Rides Stamps & Slimline Nature Border Dies)

With each new collection we always have a new free mini die we include automatically with orders placed in our online store. For this release we have a fun little dragonfly die!

Sunny Studio Blog: Spring 2022 Free Mini Dragonfly Die Automatically Comes with all Sunny Studio Store Purchases

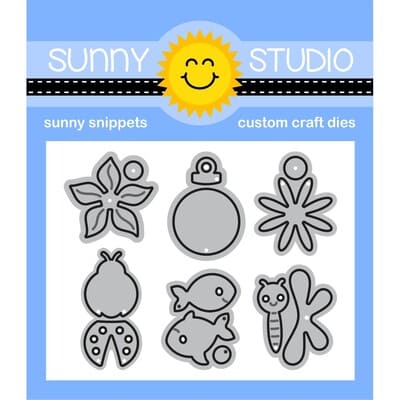
Card No. 7: I couldn't resist creating a card with this release's free mini dragonfly die that comes with each Sunny Studio website purchase. I combined it with several of our past Basic Mini Shape 2 Dies (for tiny hearts and butterfly) and Basic Mini Shape 4 Dies (for the ladybug). 

To start my card I used a rainbow grid patterned paper from our Spring Sunburst Paper pack for my background. I then layered it with a strip of lilac cardstock along the bottom which had been die-cut along the edge using the stitched border from our Slimline Basic Border Dies and a white scalloped border from our Eyelet Lace Border Dies. To frame each of my garden critters, I used 4 of the stitched cutouts from our new Wonky Windows Dies to form a 2 x 2 grid on my card front, cutting them from both aqua blue cardstock for the sky and again from green for my grass. I then cut the green versions a second time using the grassy border from our Picket Fence Dies. I also cut a number of small white fluffy clouds using our Comic Strip Everyday Dies to scatter between the four mini scenes and a speech bubble for my sentiment using the Comic Strip Speech Bubble Dies. My "happy mother's day" sentiment was actually pieced together using words from three separate stamp sets including our Happy Thoughts StampsBeach Buddies Stamps and Kiddie Pool Stamps.
Sunny Studio Grid Style Spring Dragonfly, Ladybug & Butterfly Mother's Day Card (using Wonky Window, Picket Fence, Eyelet Lace Border, Slimline Basic Border Dies & Spring Sunburst Paper)

When shopping we have a couple different ongoing promotions you can choose from to be entered at checkout depending on which offer is better for you (one discount code per order).

Sunny Studio Stamps: Save $5 on orders of $49 or more using Promo code SAVE5 at checkout OR use promo code FREESHIP on orders of $25 or more to receive free US shipping. Limit One Discount code per order.

That wraps up today's sneak peeks. I'm so happy you spent the week with me! I read all your comments and they mean so much!  I'd love to give one last $50 gift code to one lucky winner today using the rafflecopter below. 

Our five daily contests this week run through tomorrow, April 23rd at Midnight PST with winners announced here on Sunday, April 24th. :)

a Rafflecopter giveaway Here's a closer look at the our new Country Carnival Stamps & Dies used today:

Sunny Studio Blog: Summer Country Carnival 4x6 County Fair Theme Park Clear Photopolymer Stamps 

Other Supplies Used:

Froggy Friends Dies
Froggy Friends Dies
Shop at:
Sunny Studio
Froggy Friends Stamps
Shop at:
Sunny Studio
Beach Buddies Stamps
Shop at:
Sunny Studio
Beach Buddies Dies
Beach Buddies Dies
Shop at:
Sunny Studio

Fall Friends Stamps
Fall Friends Stamps
Shop at:
Sunny Studio
Fall Friends Dies
Fall Friends Dies
Shop at:
Sunny Studio
Holiday Express Stamps
Shop at:
Sunny Studio
Holiday Express Dies
Shop at:
Sunny Studio
Tsukineko Jumbo Dauber
Shop at:
Sunny Studio
Versafine Onyx Black Ink
Shop at:
Sunny Studio
Polka-dot Parade 6x6 Paper
Shop at:
Sunny Studio
Frilly Frames Polka-Dot
Shop at:
Sunny Studio
Fluffy Clouds Dies
Fluffy Clouds Dies
Shop at:
Sunny Studio
Scenic Route Stamps
Scenic Route Stamps
Shop at:
Sunny Studio
Scenic Route Dies
Scenic Route Dies
Shop at:
Sunny Studio
Enchanted Stamps
Enchanted Stamps
Shop at:
Sunny Studio
Enchanted Dies
Enchanted Dies
Shop at:
Sunny Studio
Floating By Stamps
Floating By Stamps
Shop at:
Sunny Studio
Floating By Dies
Floating By Dies
Shop at:
Sunny Studio
Spring Scenes Stamps
Shop at:
Sunny Studio
Spring Scenes Dies
Spring Scenes Dies
Shop at:
Sunny Studio
Spring Fling Paper
Spring Fling Paper
Shop at:
Sunny Studio
Slimline Basic Borders
Shop at:
Sunny Studio
Slimline Nature Borders
Shop at:
Sunny Studio
Farm Fresh Stamps
Farm Fresh Stamps
Shop at:
Sunny Studio
Balloon Rides Stamps
Shop at:
Sunny Studio
Baby Elephants Stamps
Shop at:
Sunny Studio
Baby Elephants Dies
Baby Elephants Dies
Shop at:
Sunny Studio
Kiddie Pool Stamps
Kiddie Pool Stamps
Shop at:
Sunny Studio
Hero Arts White Detail
Shop at:
Sunny Studio
VersaMark Watermark Ink
Shop at:
Sunny Studio
Domed Ink Blending Foam
Domed Ink Blending FoamShop at:
Sunny Studio
Picket Fence Border Dies
Shop at:
Sunny Studio
Bear Hugs Stamps
Bear Hugs Stamps
Shop at:
Sunny Studio
Comic Strip Everyday Dies
Shop at:
Sunny Studio
Happy Thoughts Stamps
Shop at:
Sunny Studio
Spring Sunburst 6x6 Paper
Shop at:
Sunny Studio
Comic Strip Speech Bubble Dies
Shop at:
Sunny Studio
Eyelet Lace Borders
Eyelet Lace Borders
Shop at:
Sunny Studio
Wonky Windows Die
Wonky Windows Die
Shop at:
Sunny Studio
Stitched Rectangle Dies
Shop at:
Sunny Studio
Mini Basic Shape Dies 2
Shop at:
Sunny Studio
Frilly Frames Retro Petals Dies
Shop at:
Sunny Studio
Basic Mini Shape Dies 4
Shop at:
Sunny Studio