Tuesday, October 19, 2021

Chloe Number Die Focused Cards with Kavya and Isha

Hi folks, Kavya here. I am back on the blog with another fun card! I haven’t made a rainbow card in a while so decided to create a Sweet 16 themed card using some of my favorite previously released products and the new Chloe Numbers die set. I tend to use the Chloe Alpha set a lot so this new die set is a perfect addition for me! 

Sunny Studio Stamps: Chloe Number Dies Candy Shoppe Meow & Furever Birthday Card by Kavya

I first started off by ink blending the background of a mini slimline sized cardstock using colors of the rainbow. For my card, I used Wilted Violet, Picked Raspberry, Spiced Marmalade, Mustard Seed, Twisted Citron and Peacock Feathers distress oxide inks. For the bottom portion, I used Antique Linen. 

Sunny Studio Stamps: Chloe Number Dies Candy Shoppe Meow & Furever Birthday Card by Kavya

Then, I stamped and colored images from Candy Shoppe and Meow & Furever. I tried to maintain the same rainbow theme while coloring the candy too! Finally, I used a sentiment from Candy Shoppe and Chloe Numbers to finish off the card!  

That’s it! Isn’t this super cute? Can’t wait to find a 16 year old to gift this card too! Happy Crafting!

------------------------------------------

Hello everyone! Isha here with a fun personalized 25th birthday card featuring the new Chloe Numbers dies.

Sunny Studio Stamps: Chloe Number Dies Candy Shoppe Bear Hugs Bold Balloons Birthday Card by Isha Gupta

To start, I cut a piece of pattern paper from the new All is Bright paper pad. Adhere to a white card base. I then die-cut a white circle using the Stitched Circle Small die. Sponge salvaged patina distress oxide ink to the edges.

Stamp and white heat emboss the balloon outline using the heart shape balloon from the Bold Balloons stamp set from the pink pattern paper, sponge the edges using picked raspberry distress ink. Die-cut using the coordinating die. Tie a white floss and adhere to the card. 

Sunny Studio Stamps: Chloe Number Dies Candy Shoppe Bear Hugs Bold Balloons Birthday Card by Isha Gupta

Die-cut the numbers from the Chloe Numbers using red glitter cardstock, adhere to the balloon. Stamp the images from the Bear Hugs stamp, color using copic markers and die-cut using the coordinating dies. Stamp the birthday wishes greetings from the Candy Shoppe stamp set, back with red pattern paper and adhere to the card.

Die-cut the word "CONGRATS" from the Slimline Scalloped Frame die using pink pattern paper. To finish, stamp a few red hearts.

Sunny Studio Supplies Used: 

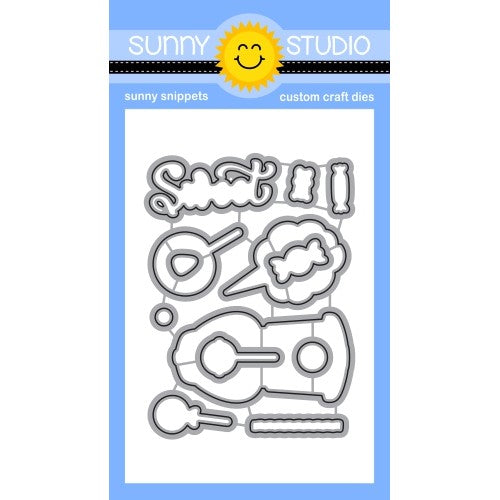
Candy Shoppe Stamps
Candy Shoppe Stamps
Shop at:
Sunny Studio
Candy Shoppe Dies
Candy Shoppe Dies
Shop at:
Sunny Studio
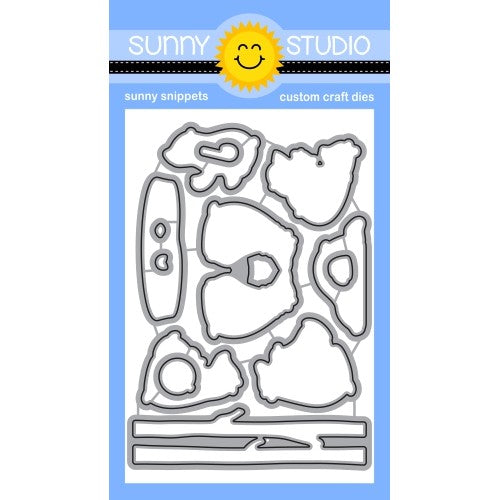
Bear Hugs Stamps
Bear Hugs Stamps
Shop at:
Sunny Studio
Bear Hugs Dies
Bear Hugs Dies
Shop at:
Sunny Studio
Chloe Number Dies
Chloe Number Dies
Shop at:
Sunny Studio
Slimline Scalloped Frame
Shop at:
Sunny Studio
Balloon Rides Stamps
Shop at:
Sunny Studio
Meow & Furever Stamps
Shop at:
Sunny Studio
Meow & Furever Dies
Meow & Furever Dies
Shop at:
Sunny Studio
Stitched Circle Small Dies
Shop at:
Sunny Studio
All Is Bright Paper
All Is Bright Paper
Shop at:
Sunny Studio

Monday, October 18, 2021

Pristine Poinsettia & Winter Greenery Cards with Mayra and Ashley

Hello everyone, Mayra here. Happy Monday. I am sharing this card with you today using the beautiful Pristine Poinsettia die and the Winter Greenery die set. 

Sunny Studio Stamps: Pristine Poinsettia Winter Greenery Season's Greetings Winter Holiday Card by Mayra Duran-Hernandez

I began by die-cutting the layers needed to create the poinsettias and the different types of greenery from the Winter Greenery die set. I then added a bit of color to each of the die-cut layers using Chili Pepper and Lobster-colored inks from Lawn Fawn.  

Sunny Studio Stamps: Pristine Poinsettia Winter Greenery Season's Greetings Winter Holiday Card by Mayra Duran-Hernandez

I then used the Stitched Rectangles die set to die-cut the base panels for the card. Next, I stamped the sentiment using the Season's Greetings stamp set. 

Thank you very much for taking the time to stop by. I hope you each have a wonderful and blessed day. 

---------------------------------------------

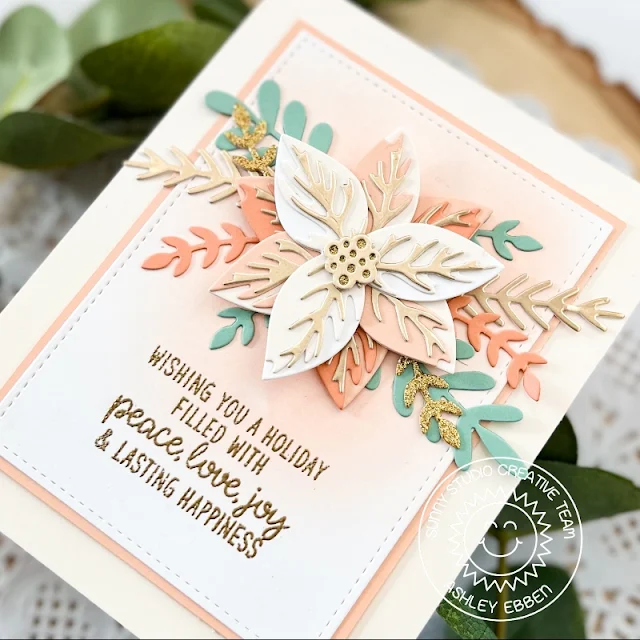
Hello friends! It's Ashley with a holiday card today featuring some gorgeous die cuts! Mendi really knocked it out of the park with the 3D Pristine Poinsettia and Winter Greenery sets! They go together beautifully and make such an impact on an otherwise simple card.

Sunny Studio Stamps: Pristine Poinsettia Winter Greenery Inside Greetings Winter Holiday Card by Ashley Ebben

I started by assembling my flower using the Pristine Poinsettia dies. I created three petal pieces using various shades of white, cream, apricot and coral cardstocks, along with gold veining for each one. I stacked the petals together with some liquid glue to create the prettiest poinsettia flower! I also added a bit of sparkle to the center by using glitter gold and metallic gold cardstocks for those pieces. 

For my poinsettia's background, I blended a bit of Tattered Rose Distress Oxide ink onto the center of a piece of white cardstock. I used the medium sized Stitched Rectangle die to cut it out, then added a thin border of apricot cardstock. I added the whole thing to a cream card base, then glued my flower onto the upper center.

Sunny Studio Stamps: Pristine Poinsettia Winter Greenery Inside Greetings Winter Holiday Card by Ashley Ebben

To add more interest around the flower, I cut various sprigs from the Winter Greenery set in different colors of cardstock. I used gold glitter and metallic gold along with some sage green and coral for lots of texture. I tucked each piece in around the poinsettia until I was happy with the final look. To finish, I grabbed my favorite holiday sentiment set from last year, Inside Greetings - Holiday, and stamped one in VersaMark ink under the flower. I embossed with gold to give it a pretty shine and to match the gold veining and leaves of the floral.

Thank you so much for stopping by! Have a wonderful day!

Sunny Studio Supplies Used:

Stitched Rectangle Dies
Shop at:
Sunny Studio
Season's Greetings Stamps
Shop at:
Sunny Studio
Inside Greetings-Holidays
Shop at:
Sunny Studio
Pristine Poinsettia Dies
Shop at:
Sunny Studio
Winter Greenery DIes
Shop at:
Sunny Studio

Saturday, October 16, 2021

Guest Designer Spotlight: Cards with Rachel Alvarado

Hello friends! Rachel here and I'm so happy to be guest designing today for Sunny Studio Stamps! I created two winter-themed cards to share with you today using some fabulous items from the latest release. 

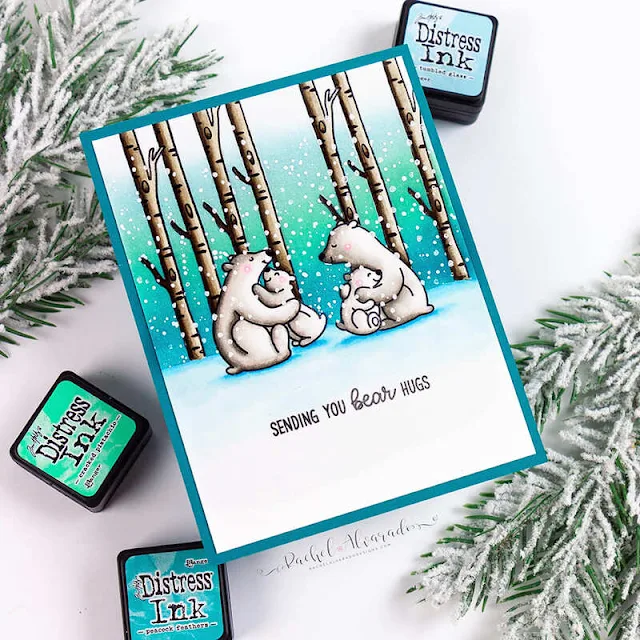
Sunny Studio Stamps: Bear Hugs Winter Themed Friendship Card by Rachel Alvarado

My first card is a one-layer card featuring the adorable Bear Hugs Stamp Set. To start my card, I first trimmed a piece of Neenah Classic Crest Solar White 110lb Card Stock to 4.25" x 5.5". I then stamped my bear images onto the center portion of the card stock. Next, I stamped them again onto a piece of Gina K. Designs Masking Magic Sheets, fussy cut them out, and placed the masking pieces over my bears. I then added more masking paper (that I had cut in the form of a snow drift) and masked off the ground area. Next, I stamped my tree images so that when finished, they would appear to be in the background of my card.

Sunny Studio Stamps: Bear Hugs Winter Themed Friendship Card by Rachel Alvarado

I then stamped all of my tree images onto masking paper and followed the same steps as above to mask my trees. Once finished, I then ink blended my background with a mix of Peacock Feathers, Cracked Pistachio, and Tumbled Glass Distress Inks. With my masking paper still attached, I then splattered this area with some diluted opaque white paint to resemble snow. Next, I removed my masking pieces and colored my images with Copic Markers. Lastly, I stamped my sentiment with some Memento Tuxedo Black Ink and used a white gel pen to add some "snow" on top of my colored images. Copic Colors Used: Bears 0, W00, W1, W3; Trees: E41, E43, E44; Cheeks: RV00, R83.

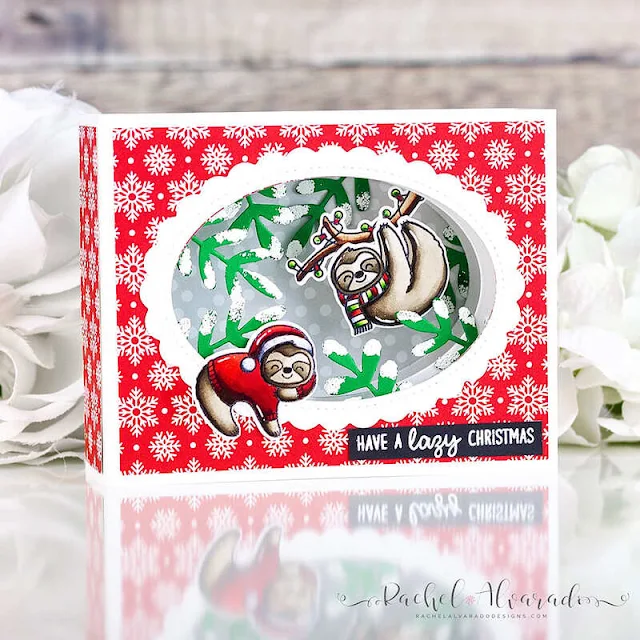
Sunny Studio Stamps: Lazy Christmas Stitched Oval Dies Scalloped Oval Mat Dies Winter Greenery Christmas Card by Rachel Alvarado

For my second project, I made a Mini Slimline Shadow Box Card that measures at 5" x 4" when opened and propped up. I layered the box portion with some red patterned paper from the new All is Bright 6x6 Paper Pad. I also lined the inside background of the card with a piece of grey and white patterned paper from the Holiday Cheer 6x6 Paper Pad. I cut an oval from the front of my card using the Stitched Oval Dies and added a stitched scalloped frame using the new Scalloped Oval Mat 1 Dies.

Sunny Studio Stamps: Lazy Christmas Stitched Oval Dies Scalloped Oval Mat Dies Winter Greenery Christmas Card by Rachel Alvarado

I stamped my images from the Lazy Christmas Stamp Set onto another piece of Neenah Solar White 110lb Card Stock, colored them with Copic Markers, and used the coordinating Lazy Christmas Dies to cut them out. Next, I added some green foliage that I had cut from green card stock using the new Winter Greenery Dies. I added some "snow" to the edges of these pieces by heat embossing some WOW! White Puff Embossing Powder.

Sunny Studio Stamps: Lazy Christmas Stitched Oval Dies Scalloped Oval Mat Dies Winter Greenery Christmas Card by Rachel Alvarado

When folded flat, this card fits perfectly into a 4.25" x 6.75" envelope (or larger) that I had made from scratch. This makes it perfect for mailing and so much fun to give during the holidays! Thanks so much for stopping by! If you liked these cards and want some more crafty inspiration, please feel free to check out my INSTAGRAM feed!

Sunny Studio Supplies Used:

Bear Hugs Stamps
Bear Hugs Stamps
Shop at:
Sunny Studio
Bear Hugs Dies
Bear Hugs Dies
Shop at:
Sunny Studio
Lazy Christmas Stamps
Shop at:
Sunny Studio
Lazy Christmas Dies
Lazy Christmas Dies
Shop at:
Sunny Studio
Holiday Cheer 6x6 Paper
Shop at:
Sunny Studio
Stitched Oval Dies
Stitched Oval Dies
Shop at:
Sunny Studio
Scalloped Oval Mat 1 Dies
Shop at:
Sunny Studio
Winter Greenery DIes
Shop at:
Sunny Studio
All Is Bright Paper
All Is Bright Paper
Shop at:
Sunny Studio

Friday, October 15, 2021

Christmas Critters Tags with Tammy and Audrey

Hello friends! Tammy here sharing these festive holiday gift tags, featuring the adorable set, Christmas Critters. 

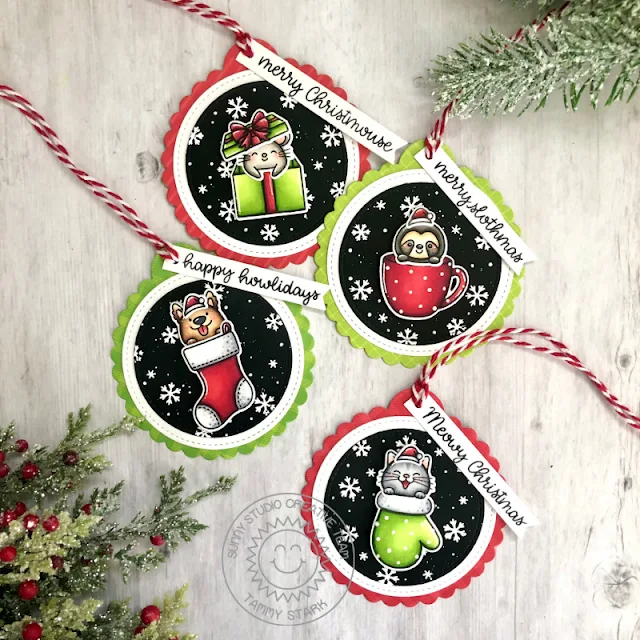
Sunny Studio Stamps: Christmas Critters Scalloped Tag Dies Critter Themed Christmas Tags by Tammy Stark

To begin, I stamped the images from Christmas Critters, colored with Copic markers, and die cut with the Christmas Critters Dies. Next, I cut the tag bases from the All Is Bright 6X6 Paper using the Scalloped Tag Circle Dies. I then cut a white circle using the Stitched Circle Dies and layered it onto the tag bases. Next, I cut a smaller circle from black cardstock, again using the Stitched Circle Dies. I white heat embossed snowflakes from Penguin Pals, then splattered some white acrylic paint onto each black circle to give them a nice snowy look before layering them onto the tags.

Sunny Studio Stamps: Christmas Critters Scalloped Tag Dies Critter Themed Christmas Tags by Tammy Stark

Next, I attached the colored images to the tags using foam tape for dimension. I stamped the punny sentiments from Christmas Critters and Merry Mice in black ink onto white cardstock strips.

Sunny Studio Stamps: Christmas Critters Scalloped Tag Dies Critter Themed Christmas Tags by Tammy Stark

Lastly, I added some red bakers twine and the sentiment strips for the finishing touch! These tags would be such a fun way to add a handmade touch to any package or treat! 

Thanks so much for stopping by. Have a wonderful weekend!

-----------------------------------

Hello there friends! Audrey here with a set of Christmas gift tags! 

Sunny Studio Stamps: Christmas Critters Sliding Window Dies Critter Themed Christmas Tags by Audrey Tokach

To create my tags, I started off by die-cutting one of the tags from the Sliding Window Die set from kraft cardstock four times. I inked the edges of each with Walnut Stain Distress Oxide ink. Then, I die cut the tag topper from four different patterns from the All is Bright 6x6 paper pad, and adhered a topper to each tag along with a hole reinforcer cut from coordinating cardstock. I stamped several images from the Christmas Critters stamp set, colored them with colored pencils, and die cut them with the coordinating Christmas Critters dies.

Sunny Studio Stamps: Christmas Critters Sliding Window Dies Critter Themed Christmas Tags by Audrey Tokach

I popped up an image and critter onto each tag with foam tape, and stamped tiny snowflakes from the stamp set in both white pigment ink and colored dye inks. To finish off the tags, I added some white Nuvo Drops, white gel pen accents and coordinating twine to each one.

Sunny Studio Supplies Used:

Christmas Critters Stamps
Shop at:
Sunny Studio
Christmas Critters DIes
Shop at:
Sunny Studio
Sliding Window Dies
Sliding Window Dies
Shop at:
Sunny Studio
Merry Mice Stamps
Merry Mice Stamps
Shop at:
Sunny Studio
Scalloped Tags-Circle
Shop at:
Sunny Studio
Penguin Pals Stamps
Penguin Pals Stamps
Shop at:
Sunny Studio
Stitched Circle Small Dies
Shop at:
Sunny Studio
All Is Bright Paper
All Is Bright Paper
Shop at:
Sunny Studio