Friday, July 19, 2019

Just Bee-Cause Cards with Rachel and Lexa

Hello everyone! It's Rachel here and I have a couple of cards to share with you today featuring the newly released Just Bee-cause Stamp Set.

Sunny Studio Stamps: Just Bee-cause Happy Harvest Window Trio Dies Frilly Frames Bee Themed Cards by Rachel Alvarado

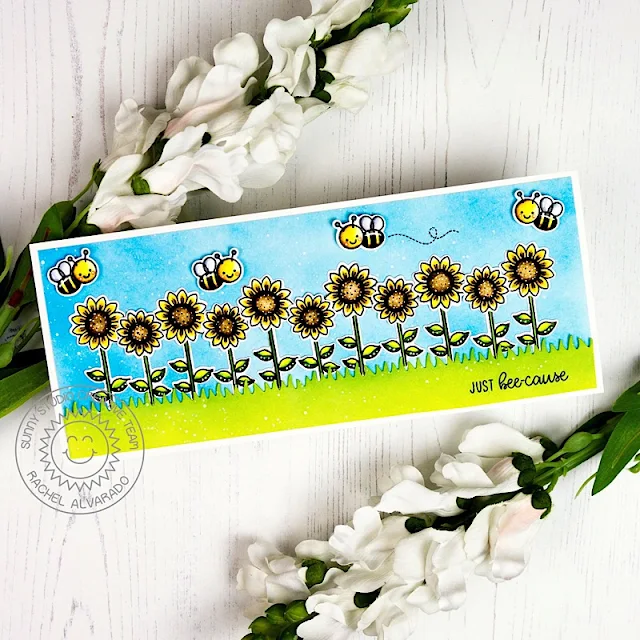
For my first card, I created a slimline card measuring at 8.5" x 3.5". I first blended the background with some Salty Ocean Distress Oxide Ink. I cut the long piece of grass from an 8.5" strip of smooth white card stock using the grass border die twice from the Sunny Sentiment Dies. I then blended this piece with both Twisted Citron and Mowed Lawn Distress Oxide Inks. 

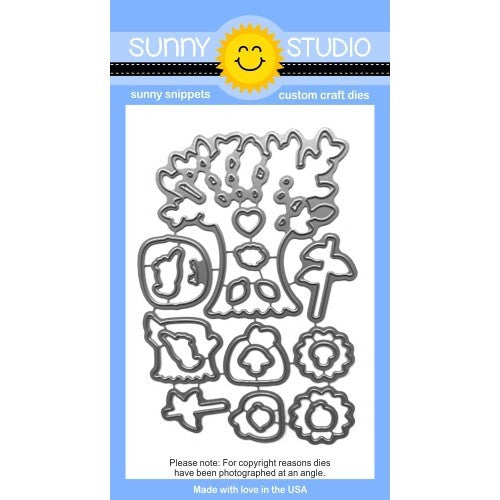
The sweet little sunflowers came from the Happy Harvest Stamp Set. I stamped all of my images onto a sheet of Neenah Solar White 110lb Card Stock and colored them with Copics. I then used the coordinating Happy Harvest Die Set to cut them all out. Lastly, I added the bees from the Just Bee-cause Stamp Set with some 3D Foam Adhesive Squares.

Sunny Studio Stamps: Just Bee-cause Happy Harvest Window Trio Dies Frilly Frames Bee Themed Cards by Rachel Alvarado

For my second card, I created a fun shaker card combining the Just Bee-cause Stamp Set along with the newly released Frilly Frames Hexagon Die Set. I added some yellow polka dot patterned paper to the back of my card using the Polka Dot Parade 6x6 Paper Pack.

Sunny Studio Stamps: Just Bee-cause Happy Harvest Window Trio Dies Frilly Frames Bee Themed Cards by Rachel Alvarado

In order to create the shaker portion of my card and use each hexagon as an individual window, I die cut 5 of these frames and adhered them together with some liquid adhesive.

Sunny Studio Stamps: Just Bee-cause Happy Harvest Window Trio Dies Frilly Frames Bee Themed Cards by Rachel Alvarado

I then filled each window with both White and Gold Microbeads to try and resemble the color of honey. However, I think that mini sequins would add a nice, sparkly touch.

Sunny Studio Stamps: Just Bee-cause Happy Harvest Window Trio Dies Frilly Frames Bee Themed Cards by Rachel Alvarado

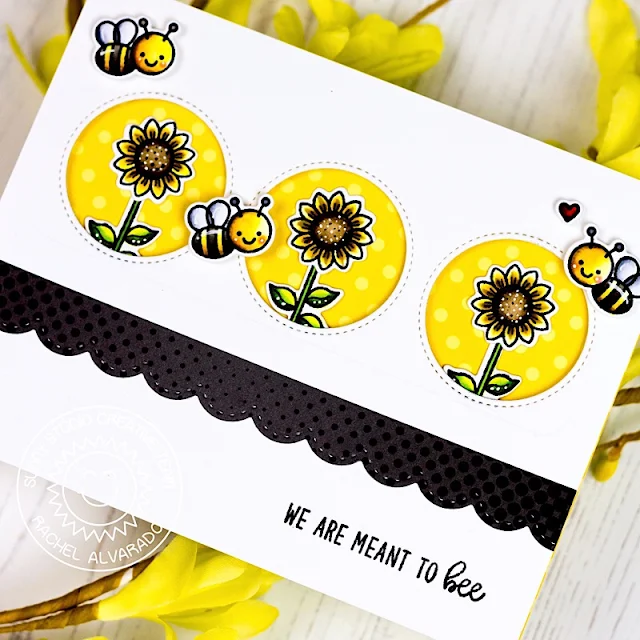
Lastly, I created a simple peek-a-boo window card using the Just Bee-cause Stamp Set along with the Window Trio Circle Dies. I added some more sunflowers from the Happy Harvest Stamp Set that I had laying around from my first card. For the black strip across the bottom portion of my card, I used the new Heroic Halftones Paper Pack and die cut a strip of it with the smaller of the Stitched Scallop Dies.

Thanks so much for taking the time to stop by! Have a lovely day!

------------------------------------------------------

Hi everyone! Lexa here today with a card that highlighting the brand new mini stamp set called Just Bee-Cause. It's an adorable 2x3 stamp set that will work out with other Sunny Studio older products, as I use on my project this time. I use Quilted Hexagon Stamps to create the background.

Sunny Studio Stamps: Just Bee-cause Quilted Hexagons Bee Themed Birthday Card by Lexa Levana

I stamped the images and color them with markers. Then use the coordinating dies to cut all of the cute little bees and beehive. I stamped the hexagons in yellow and orange with mixed patterns which I think look pretty together. The lines are stamped with dark brown dye ink.

Sunny Studio Stamps: Just Bee-cause Quilted Hexagons Bee Themed Birthday Card by Lexa Levana

After finished with the hexagons, I cut it to create the border then adhere it on a piece of burlap patterned paper. Instead of stamp the bee's trails, I use black twines to create them. It adds more texture and dimensions to the card. The sentiment is stamped with the same dark brown dye ink and I fussy cut it then adhere it with foam tapes. I finished my card with some beautiful yellow jewels from Pretty Pink Posh. 

Thank you so much for stopping by today. I hope you have an amazing day!

Sunny Studio Supplies Used:

Stitched Scallop Dies
Shop at:
Sunny Studio
Sunny Sentiments Dies
Shop at:
Sunny Studio
Quilted Hexagon Stamps
Shop at:
Sunny Studio
Window Trio- Circles Die
Shop at:
Sunny Studio
Polka-dot Parade 6x6 Paper
Shop at:
Sunny Studio
Happy Harvest Stamps
Shop at:
Sunny Studio
Happy Harvest Dies
Happy Harvest Dies
Shop at:
Sunny Studio
Heroic Halftones 6x6 Paper
Shop at:
Sunny Studio
Just Bee-cause Stamps
Shop at:
Sunny Studio
Just Bee-cause Dies
Just Bee-cause Dies
Shop at:
Sunny Studio
Frilly Frames Hexagon Dies
Shop at:
Sunny Studio

Thursday, July 18, 2019

Plane Awesome Cards with Anja and Vanessa

Hi everyone, Anja here and I'm excited to share my Fall Release projects the upcoming weeks. Today, I'm showcasing the fun Plane Awesome Stamps.

Sunny Studio Stamps: Plane Awesome Fluffy Clouds Borders Frilly Frames Dies Cards by Anja Bytyqi

I started off with a white A2 card base and die cut an aqua panel with the stitched scalloped die from the previously released Frilly Frames Stripes set. To create a window, I used a circle die. Next, I die cut the Fluffy Clouds Borders from white cardstock and inked the edges with Tumbled Glass Distress Oxide Ink. I adhered them with a piece of yellow sunburst paper (Spring Sunburst 6x6 Paper) behind the circle window.

Sunny Studio Stamps: Plane Awesome Fluffy Clouds Borders Frilly Frames Dies Cards by Anja Bytyqi

I stamped the images in Memento Tuxedo Black Ink, colored them with Copic Markers and used the coordinating dies to cut them out. The sentiment and stitched swirl were directly stamped onto the scalloped panel using VersaFine Onyx Black Ink. Finally, I added two of the Primary Star Confetti clay embellishments next to the sentiment.

Thank you so much for stopping by! Hope to see you again next week!

---------------------------------------------------------

Hello everyone! Vanessa here with a card using the super cute new set Plane Awesome. This adorable stamp set makes me smile, it is perfect for creating the loveliest scenes!

Sunny Studio Stamps: Plane Awesome Fluffy Clouds Borders Dies Birthday Card by Vanessa Menhorn

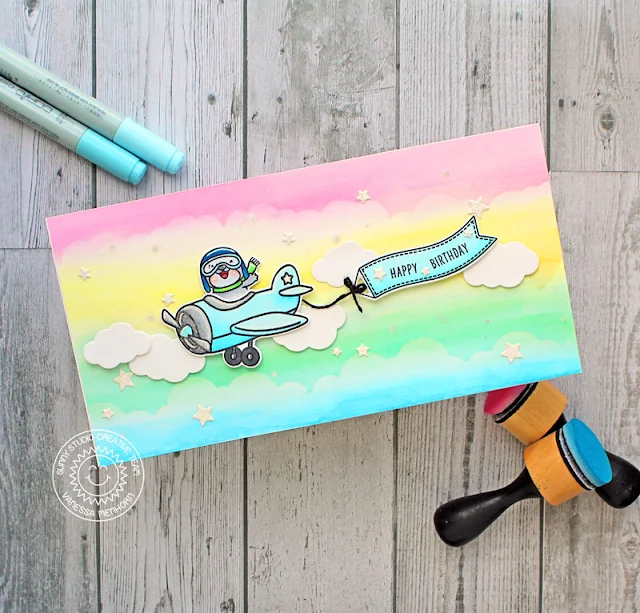
First, I created my own stencil with the Fluffy Clouds Border Dies and inked the background of my card with Distress Oxide Inks. Then I used a watertank brush to blend the inks. After everything was dried, I applied droplets of a glitter pen.

Now I stamped the images, colored them with Copics, die-cut the elements with the matching dies and adhered everything with foam tape.

Sunny Studio Stamps: Plane Awesome Fluffy Clouds Borders Dies Birthday Card by Vanessa Menhorn

I die-cut the clouds from white paper and the stars from glitter cardstock and adhered them. Finally, I attached a string to the banner and the plane.

I am so excited about this wonderful release! Mendi did an amazing job, don't you agree? Thanks for stopping by today, see you next week!

Sunny Studio Supplies Used:

Spring Sunburst 6x6 Paper
Shop at:
Sunny Studio
Frilly Frames Stripes Die
Shop at:
Sunny Studio
Plane Awesome Stamps
Shop at:
Sunny Studio
Plane Awesome Dies
Plane Awesome Dies
Shop at:
Sunny Studio
Fluffy Clouds Border Dies
Shop at:
Sunny Studio

Wednesday, July 17, 2019

Elegant Leaves Cards with Ana and Franci

Hello everyone! It's Ana here today sharing three cards featuring gorgeous Elegant Leaves stamps and coordinating dies as well as patterned paper packs from the newest fall 2019 release.

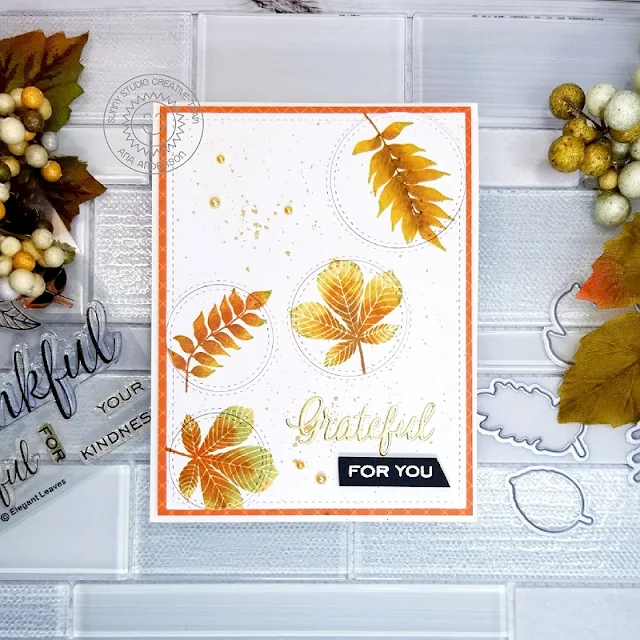
Sunny Studio Stamps: Elegant Leaves Staggered Circles Stitched Ovals Autumn Themed Cards by Ana Anderson

For my first card I have used Elegant Leaves stamp set and Staggered Circles Dies. To start, I have placed Staggered Circles Die on a piece of white cardstock and penciled the placement of each circle. I aligned the stamps onto each circle next, then used mini ink pads to create multiple colors on each leaf.

Sunny Studio Stamps: Elegant Leaves Staggered Circles Stitched Ovals Autumn Themed Cards by Ana Anderson


This technique is easy to achieve if you have a stamping platform and don't mind getting your fingers inky! As I stamped each color, I wiped off the rough edges mini ink cubes created. I started with the darkest color in the middle of each image and worked my way out to the lightest, making sure the colors mix. I did not clean the stamp between each color.

For the colors, I used several different brands of inks in dark and medium browns, rust, mustard, dark yellow and green.

Sunny Studio Stamps: Elegant Leaves Staggered Circles Stitched Ovals Autumn Themed Cards by Ana Anderson

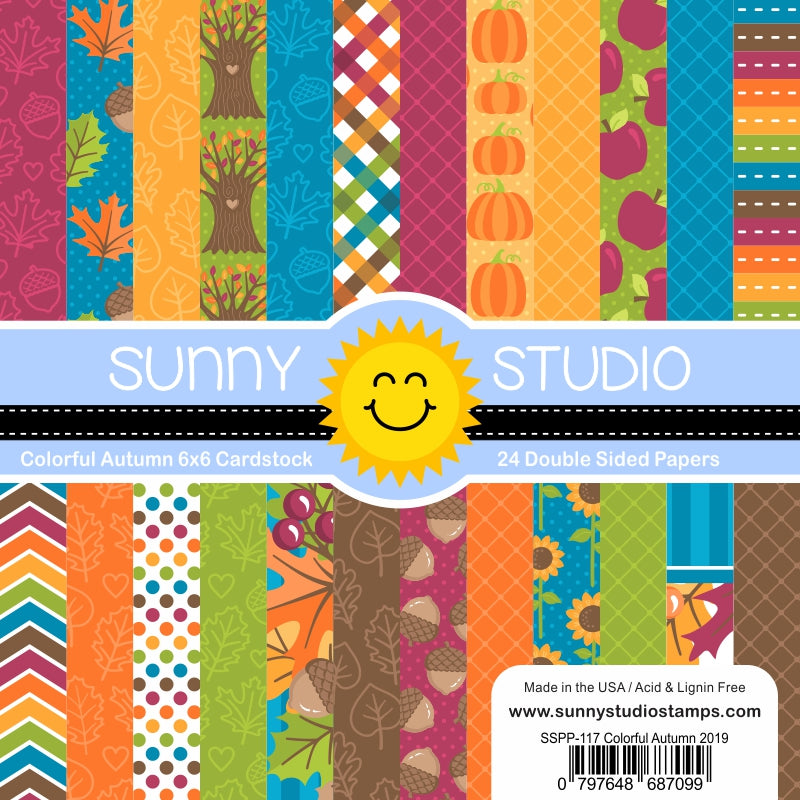
Once all the stamping was done, I die cut circles using Staggered Circles Dies and adhered the panel on a piece of beautiful patterned paper from Colorful Autumn Paper PackI heat embossed the sentiments, added some splatter and few pearls to finish the card.

Sunny Studio Stamps: Elegant Leaves Staggered Circles Stitched Ovals Autumn Themed Cards by Ana Anderson

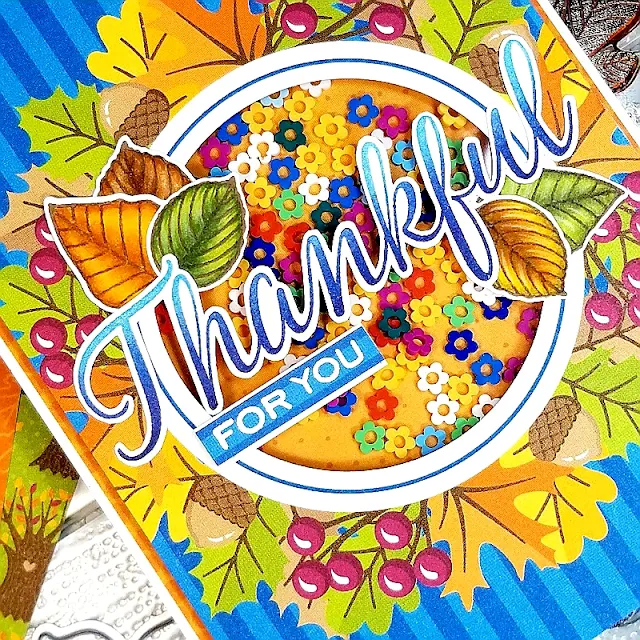
I decided to make a shaker card for my second project. I used Colorful Autumn Patterned paper for the background. I die cut a circle in the middle creating a shaker opening and backed the panel with patterned paper from Heroic Halftones Patterned Paper pack. For my shaker elements, I used rainbow Clay Flower Confetti

Sunny Studio Stamps: Elegant Leaves Staggered Circles Stitched Ovals Autumn Themed Cards by Ana Anderson

I stamped the Thankful sentiment (from Elegant Leaves stamp set) with 3 shades of blue ink, creating an ombre effect, then fussy cut it out. The leaves were stamped with brown ink, colored with alcohol markers then tucked behind the sentiment. I white heat embossed the rest of the sentiment.

Sunny Studio Stamps: Elegant Leaves Staggered Circles Stitched Ovals Autumn Themed Cards by Ana Anderson

Completed panel was adhered to A2 size card base.

Sunny Studio Stamps: Elegant Leaves Staggered Circles Stitched Ovals Autumn Themed Cards by Ana Anderson

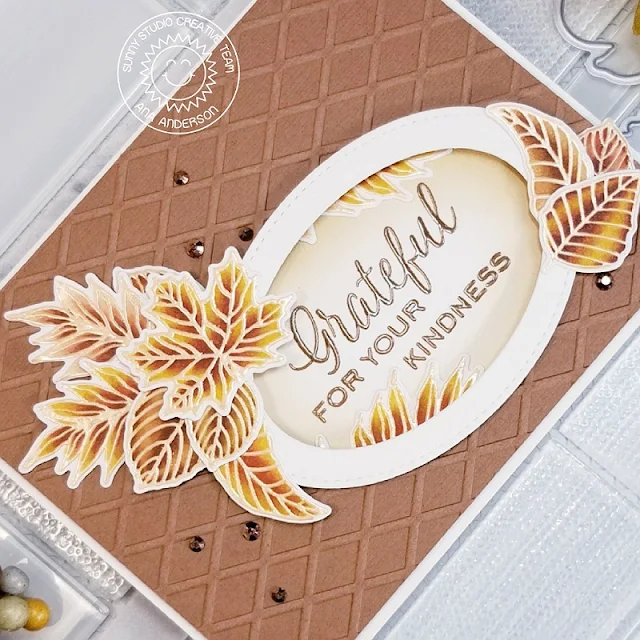
For my third card I used Stitched Oval Dies to create white oval frame as well as an opening in the brown background panel. I used Dapper Diamonds Embossing Folder to create the pattern on the background panel then added white oval frame with foam tape.

Sunny Studio Stamps: Elegant Leaves Staggered Circles Stitched Ovals Autumn Themed Cards by Ana Anderson

I heat embossed the sentiment directly on the card base, added some shading with Vintage Photo Distress Ink around the sentiment, then adhered the background panel to the card base.

Sunny Studio Stamps: Elegant Leaves Staggered Circles Stitched Ovals Autumn Themed Cards by Ana Anderson

I heat embossed the leaves from Elegant Leaves stamp set, colored them with alcohol markers and die cut with coordinating dies. I arranged the leaves around the oval frame, tucked few inside of the frame, them embellished the card with brown gems.

Thank you so much for visiting today! I really hope you liked the cards I have shared today and got inspired. Have a wonderful day!

----------------------------------------------------------

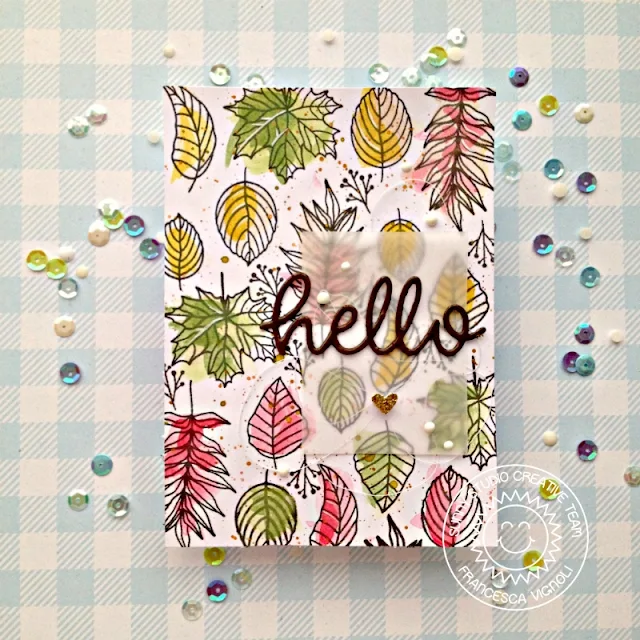
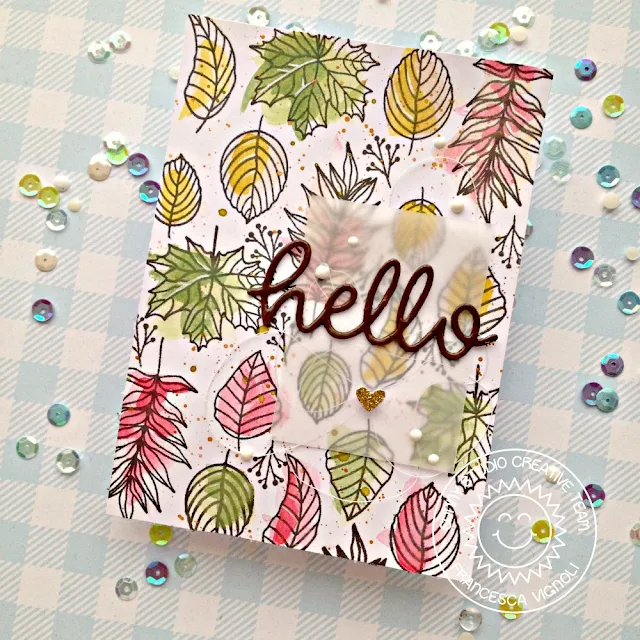
Hello there and happy Wednesday! Franci here with you today with my first card featuring the new release which I adore!! Here I'm showcasing the new Elegant Leaves set with a special card, totally out of my comfy zone but super fun to make!

Sunny Studio Stamps: Elegant Leaves Hello Word Die Autumn Themed Hello Card by Franci Vignoli

First of all I stamped all the leaves on to my white panel, I let them dry completely and I watercolored them with light colors. I also added some sparkle watercolors splatters here and there. I had this idea in my mind: making a dreamy fall leaves patterned paper - I'm so happy about how it turned out.

Sunny Studio Stamps: Elegant Leaves Hello Word Die Autumn Themed Hello Card by Franci Vignoli

Then I die cut the word Hello twice out of chocolate cardstock, I glued the layers together and added a coat of Glossy Accents. I also die cut a little heart out of sparkle gold paper using the mini die included in the Comic Strip Everyday Dies set


Sunny Studio Stamps: Elegant Leaves Hello Word Die Autumn Themed Hello Card by Franci Vignoli

I glued my panel on to a white card base, I added some white twine, some vellum and glued everything down. Finally I also added some white embellishments.

Hope you like my card and thank you so much for stopping by! 

Sunny Studio Supplies Used:

Hello Word Die
Hello Word Die
Shop at:
Sunny Studio
Comic Strip Everyday Dies
Shop at:
Sunny Studio
Dapper Diamonds Embossing
Shop at:
Sunny Studio
Stitched Oval Dies
Stitched Oval Dies
Shop at:
Sunny Studio
Staggered Circles Die
Shop at:
Sunny Studio
Heroic Halftones 6x6 Paper
Shop at:
Sunny Studio
Colorful Autumn 6x6 Paper
Shop at:
Sunny Studio
Elegant Leaves Stamps
Shop at:
Sunny Studio
Elegant Leaves Dies
Elegant Leaves Dies
Shop at:
Sunny Studio

Tuesday, July 16, 2019

Super Duper Cards with Angelica and Juliana

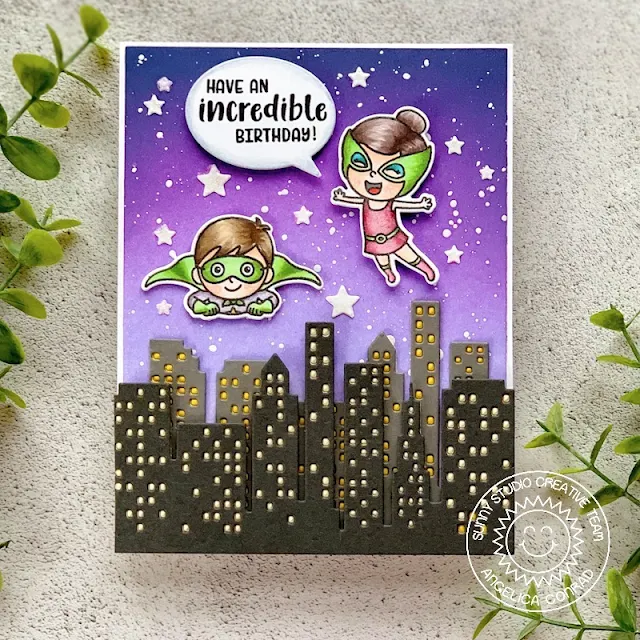
Hello crafty friends, Angelica here, and I am super excited to share my first project from the fantastic new Fall 2019 Release! I used Super Duper stamp set to make this superpower birthday card.

Sunny Studio Stamps: Super Duper Cityscape Border Comic Strip Speech Bubble Super Hero Themed Birthday Card by Angelica Conrad

I started with the background first. I blended Shaded Lilac, Wilted Violet, and Chipped Sapphire Distress Oxide inks onto white card stock. Next, I splattered Copic Opaque White Ink over the night sky. I set the panel aside to dry, and started working on my scene.

Sunny Studio Stamps: Super Duper Cityscape Border Comic Strip Speech Bubble Super Hero Themed Birthday Card by Angelica Conrad

I picked out two superheroes to stamp and color, then used the coordinating dies to cut them out. I made a skyline using the Cityscape Border Die, and backed the die-cut buildings with yellow card stock to light up the windows. I adhered the inked background to a card base, then added the skyline and superheroes with foam squares. I die-cut white stars and a speech bubble from Comic Strip Speech Bubbles Dies

Sunny Studio Stamps: Super Duper Cityscape Border Comic Strip Speech Bubble Super Hero Themed Birthday Card by Angelica Conrad

I stamped a sentiment inside the speech bubble with words from Super Duper, attached it to the card with foam squares, and glued on the stars. My final touch was shimmer and Crystal Glaze to the stars for shine.

I hope I have helped give you ideas on how to use the new Super Duper stamp set. That’s all that I have for today. Thanks for stopping by!

----------------------------------------------------

Hello friends! It's Juliana here today to share a card using the new Super Duper Stamp Set! I've combined it with some of the other products from the new release to create a shaker card!

Sunny Studio Stamps: Super Duper Cityscape Border Fancy Frames Super Hero Themed Friendship Card by Juliana Michaels

To get started, I created the shaker frame using the inside die from the largest Fancy Frames Rectangle Dies. I cut this 5 time from white cardstock and adhered each layer, one on top of the other. I then cut a piece of clear acetate to cover the opening and adhered that on top of the frame. I then cut one more of the Fancy Frames Rectangles and adhered that on top of the acetate.

Sunny Studio Stamps: Super Duper Cityscape Border Fancy Frames Super Hero Themed Friendship Card by Juliana Michaels

For the background of the shaker, I cut a piece of blue paper from the Heroic Halftone Paper and trimmed to to cover the back of the shaker frame. Next, I cut a piece of black cardstock using the Cityscape Border Die and adhered that on to the blue patterned paper and trimmed off the excess. Once the background was complete, I poured Primary Star Confetti and some gold star sequins onto the center of it and then adhered the shaker frame on top to complete the shaker.

Sunny Studio Stamps: Super Duper Cityscape Border Fancy Frames Super Hero Themed Friendship Card by Juliana Michaels

I then took the Super Duper Stamp Set and selected several of the cute super heroes to use for the scene. I colored them with Copic Markers and then die cut them using the Super Duper Dies. I also used the speech bubble and added the word “Wow” to the center of it. I adhered these images to the top of the shaker frame. I choose to put them on the outside so they wouldn't get covered up by the confetti on the inside. I then attached the entire shaker to a piece of coordinating blue cardstock.

Sunny Studio Stamps: Super Duper Cityscape Border Fancy Frames Super Hero Themed Friendship Card by Juliana Michaels

For the inside of the card, I used a scrap from the inside of the Fancy Frames Rectangles (used to create the shaker frame) and layered it onto a piece of blue cardstock. I then added another super hero image and the sentiment.

Sunny Studio Stamps: Super Duper Cityscape Border Fancy Frames Super Hero Themed Friendship Card by Juliana Michaels

I hope you enjoyed learning about how I created this shaker card featuring the Super Duper Stamp Set! Thanks so much for stopping by today!

Sunny Studio Supplies Used:

Oceans of Joy Dies
Oceans of Joy Dies
Shop at:
Sunny Studio
Oceans of Joy Stamps
Shop at:
Sunny Studio
Sunny Sentiments Dies
Shop at:
Sunny Studio
Cruising Critters Stamps
Shop at:
Sunny Studio
Cruising Critters Dies
Shop at:
Sunny Studio
Cityscape Border Dies
Shop at:
Sunny Studio
Fluffy Clouds Border Dies
Shop at:
Sunny Studio
Frilly Frames Hexagon Dies
Shop at:
Sunny Studio