Wednesday, October 14, 2015

Harvest Happiness Thanksgiving Card with Audrey

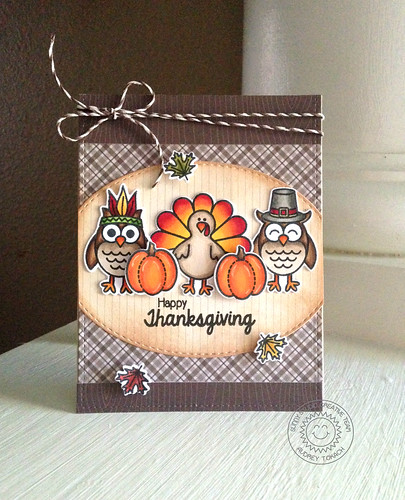
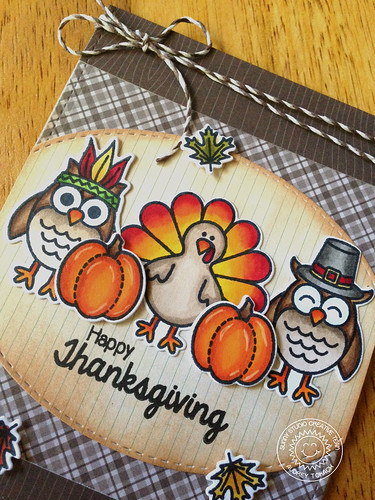
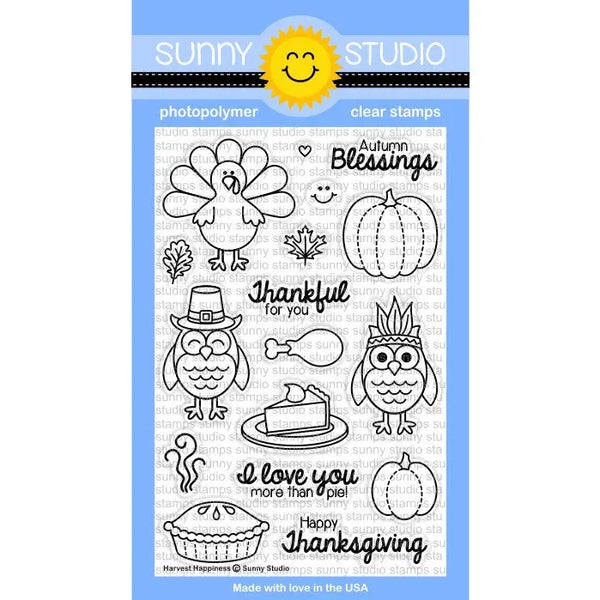
Hi there!  Audrey here with a Thanksgiving card using the new Harvest Happiness stamp set and coordinating dies!  I just love these adorable fall images!  This is perfect for scene building too, which is one of my favorite things to do when making a card!  I used a mix of patterned papers as a backdrop for my images, which I colored with Copic markers.  

Sunny Studio

By adding distress ink to the oval that grounds my focal point, it dulled down the bright white of the paper, and allowed my brightly colored images to really pop!  And while some of my images are adhered with a glue pen, others are popped up with foam tape adding lots of fun dimension.  Accents with a white gel pen help to make images have more life, too!

Sunny Studio

That's all for me today!  I hope you enjoyed my card!  Thanks for stopping by! :)  Be sure to check back again tomorrow for more inspiration from the design team!

Follow my blog with Bloglovin

Tuesday, October 13, 2015

Thanksgiving Place Cards Featuring "Happy Harvest" with Heidi

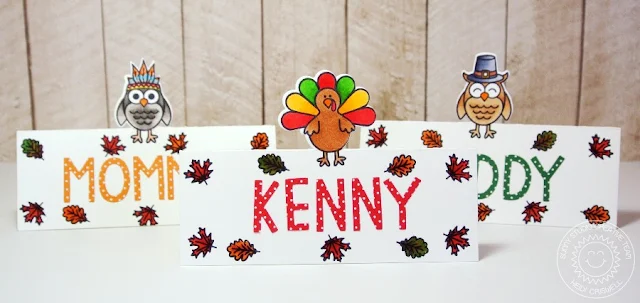
Hello everybody!  Heidi here with some inspiration for your Thanksgiving dinner table. I made place cards and silverware pockets for the Thanksgiving table.


Using the partial die cut technique I created this place cards for my Thanksgiving table, I just love those cute images from the Harvest Happiness stamp set. The Indian owl is favorite, that's what I chose it for my place card, and my son chose the turkey, so my husband will get the pilgrim. I stamped the leaves from the same stamp set and colored them with Copic markers.  Finally I adhered the letters to form the names from a die cut set that I have on hand. 


For these silverware pockets I used more images from the "Happy Harvest" stamp set and its coordinated dies with some leaves that come in the "Happy Harvest" coordinated die set. I love these added bonus dies.  They make cute little add-ons for your projects. 


It is very easy to make Thanksgiving projects using the Harvest Happiness stamp set, you could even have your kids help you! Your table will be so friendly and sweet for your Thanksgiving dinner. 

I hope you enjoyed today's inspiration, come back tomorrow for more inspiration using the Harvest Happiness stamp set, and don't forget to tag your projects in social media using the #SunnyStudioStamps so so you could be feature on our Sunny Saturday Share. Have a lovely day!

Thanks so much for stopping by! 


Monday, October 12, 2015

Harvest Happiness Autumn Blessings Turkey Card with Melissa

Hello everyone, Melissa here. Today I have a card to share with you focusing on the Happy Harvest stamp set! I love making fall cards, the colors are so pretty! I think this turkey is so cute I had to use him for my card. To create this card I first got a piece of watercolor paper and inked it up using Tim Holtz Distress Inks -Spiced Marmalade, Mustard Seed and Squeezed Lemonade for the sky. I then die-cut a little arch which would act as the grassy hill. I inked that up using Mowed Lawn and Crushed Olive Distress Inks. I then stamped, colored and die cut the pumpkins, turkey and leaves. 


I arranged the pieces where I wanted and stuck them down, leaving the turkey and a few of the leaves. I then cut an oval out of a piece of white card stock and laid that down over my scene. Then I stuck the turkey and the remaining leaves on the outside of the white border. To finish the card I stamped the sentiment on a little flag of patterned paper and added a border of the same patterned paper. 


I hope you like it.  Thanks for stopping by!

Sunday, October 11, 2015

Stretching Your Stamps to Create Halloween Cards with Mendi

Hello there!  I hope you are enjoying your Sunday.  It's Mendi here today with a fun share.  This coming week the team is going to share all sorts of wonderful ideas using our Harvest Happiness stamp set so I thought it would be fun to show how you can stretch that same stamp set (and several others) to work for Halloween cards as well.

Sunny Studio Cat & Pumpkins with Moon Bokeh Halloween Card (using Furever Friends & Harvest Happiness Stamps)

My first card features a bokeh inking technique that was inspired by the great Sandy Allnock which she shared on her blog HERE. I was so inspired that I sat down and inked up some backgrounds the very same day I watched this.  

The only trouble was I didn't have the magnets and my Copic airbrush on hand at the crop I was at that day so I improvised with some circles die-cut from vinyl (you know the type that you would adhere to your wall with home decor phrases) and some distress inks.  I simply laid down the circles inked on one color, moved the circles inked on a second color and repeated until I had the look I was going for.  I didn't have any purples on hand so I mixed in some worn lipstick with shaded lilac, chipped sapphire and black soot.

For the focal point images I colored in a cat from Furever Friends and the pumpkins from Harvest Happiness in with Copic Markers.


Up next I have a card that turns the house from Happy Home into a Haunted Mansion.  ;)  I love that with some simple color choices, this house easily takes on a completely different mood.

I inked up my background using scattered straw Distress ink for the moon (with a crude stencil I created by punching a piece of cardstock with a circle punch). I then set to work inking the background with wild honey, spiced marmalade, ripe persimmon distress inks, and my favorite Tsukineko Jumbo dauber.  When I was done I dropped some drops of water which I dabbed off with a paper towel to lift some of the color and then flicked on some watered-down spiced marmalade ink from the re-inker bottle.

Sunny Studio Haunted Mansion House Halloween Card (using Happy Home & School Time Stamps, Fishtail Banner Dies)

For my stars, I heat embossed 5 stars from the School Time stamp set and then added three more mini wood veneer stars which I inked up with VersaFine ink and set with some clear embossing powder.  I love how easy it was to change up the look of them.

For my little trees, I used the free download found here, but you could also get the same results by stamping the tree from the Happy Home set and cutting off the leaf portion of the tree. 


I finished off my card with a handmade sentiment using white letters in a black text box in Microsoft Word and then cut the end into a "v" using the Fishtail banner diesSince none of the sets have Halloween sentiments I printed my own using my printer and the free font called Marketing Script.

I hope I've inspired you to see what fun combinations you can create with a little creative thinking.  I would love to see what you come up with.  I am dying to see your projects using any of our products--all skill levels are welcome.  You can share your creations with us on our facebook page, upload them to our Flickr Group, or share a link to your project here on the blog.  :)


Supplies Used:
Fishtail Banner Dies
Shop at:
Sunny Studio
Furever Friends Stamps
Shop at:
Sunny Studio
Happy Home Dies
Happy Home Dies
Shop at:
Sunny Studio
Happy Home Stamps
Happy Home Stamps
Shop at:
Sunny Studio

Harvest Happiness Stamps
Shop at:
Sunny Studio
School Time Stamps
School Time Stamps
Shop at:
Sunny Studio
Memento Tuxedo Black Ink Pad
Shop at:
Sunny Studio
Memento Tuxedo Black Marker
Shop at:
Sunny Studio
Tsukineko Jumbo Dauber
Shop at:
Sunny Studio
Versafine Onyx Black Ink
Shop at:
Sunny Studio
Sleek Stripes Paper
Sleek Stripes Paper
Shop at:
Sunny Studio
Hero Arts White Detail
Shop at:
Sunny Studio
Harvest Happiness Dies
Shop at:
Sunny Studio
VersaMark Watermark Ink
Shop at:
Sunny Studio

Friday, October 9, 2015

School Time Teacher Thank You Card and Tag with Marion

Hello! It's Marion here. Today I have some more inspiration for you using the School Time stamp set. Being a teacher myself, I know how far a little thanks can go. And trust me, sometimes that's all it takes to turn a challenging day into a good day.

So today I have created a thank you card and a little tag for a teacher.


I've made the apples really glossy and sparkly - first with a layer of the clear Wink of Stella brush pen, and then with a layer of Glossy Accents.


And what teacher doesn't love chocolates? I know these are one of my favourites - Large Jaffas (orange flavoured chocolate if you haven't heard of these). Perfect with a cup of coffee after school.


Supplies used:
 Thanks for visiting today.

Marion