Friday, January 27, 2023

Spring Bouquet Cards with Vanessa and Tina

Hello to you! Vanessa here with a mini slimline card using the gorgeous Spring Bouquet set.

Sunny Studio Stamps: Spring Bouquet Floral Hello Card by Vanessa Menhorn

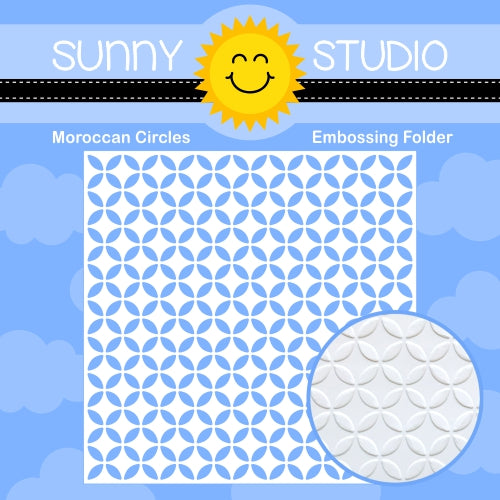
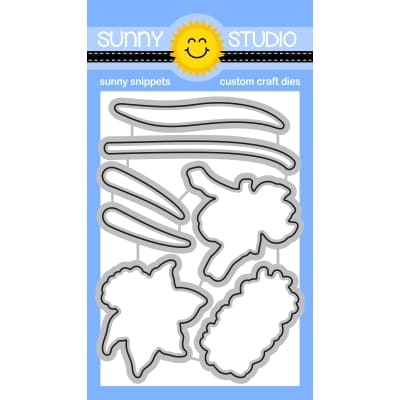
I trimmed a panel of light blue cardstock slightly smaller than my white card base and embossed it with the Moroccan Circles Embossing Folder before adhering it to the card. Then I stamped the flowers, die-cut the pieces with the matching dies and adhered them with foam tape.

Sunny Studio Stamps: Spring Bouquet Floral Hello Card by Vanessa Menhorn

Now I die-cut the banner from Fancy Frames Rectangle Dies from white cardstock, stamped the hello, trimmed the strip and adhered it.

I hope you like today's spring card! Have a wonderful weekend, see you next week!

------------------------------------------

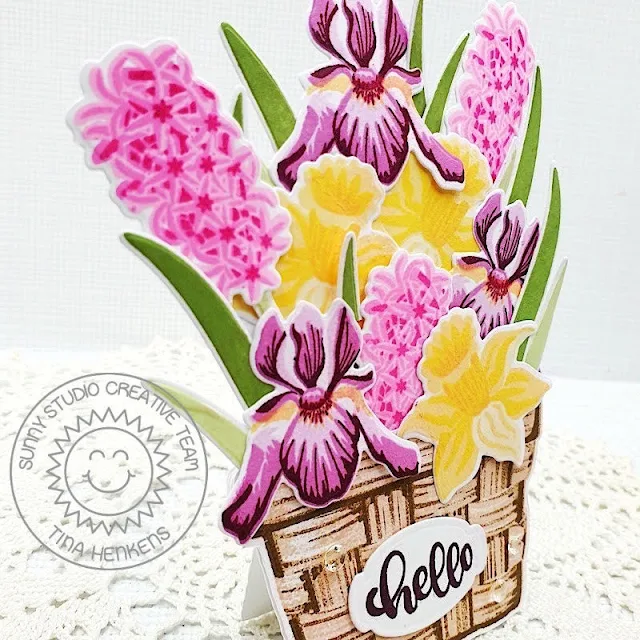
Hello crafty friends, it’s Tina with a colorful selection of flowers for you today! Each year, after putting away the Christmas decorations our house feels a bit empty, so I bring in some cheerful Spring flowers. The new Spring Bouquet stamp and die set is perfect to create your own happy floral arrangements! I combined it with the Layering Basket and made a fun shaped card.

Sunny Studio Stamps: Spring Bouquet Floral Hello Card by Tina (featuring Layered Basket)

First, I stamped all my flowers three times using different inks from my stash for the individual layers. This is where having ink swatches comes in handy! I used two green tones for the stems and leaves. Next, I die cut all these images with the coordinating dies.

The basket was stamped in shades of brown. After die cutting the inked basket, I cut 5 extra basket shapes from white cardstock. For the sentiment I went with the beautiful scripty ‘Hello’ from the Spring Bouquet set and used a small die from my stash that framed the word really well. All my stamped elements were now ready, and I could start assembling the shaped card.

To create the base, I took one of the white baskets and scored it at about a ¼ inch from the top. I added a strip of strong score tape to that top part and glued the piece to a second white piece. That gave me the ‘standing basket’ shape you see in the above picture. I had three more white basket shapes left, I cut the middle part out of all of them, creating three sided frames. These were all stacked onto the base, creating room for the stems of the flowers. Finally, I added the ‘stamped basket’ as a top layer.

Sunny Studio Stamps: Spring Bouquet Floral Hello Card by Tina (featuring Layered Basket)

Then it was time to create the bouquet! Glue dots are your best friend during this stage, since they allow you to easily shift the flowers around while you are doing the arrangement. I glued a few flowers to the stems to get the height I needed. Leaves were added randomly.

To gives extra support to the bouquet, I added white die cuts to the back. Lastly, I adhered the sentiment label to the basket and sprinkled a few Chrystal Clear jewels.

This shaped card was so much fun to make, and I hope you give this idea a try! Thank you for joining me and happy crafting!

Sunny Studio Supplies Used:

Fancy Frames- Rectangles
Shop at:
Sunny Studio
Moroccan Circles Embossing
Shop at:
Sunny Studio
Layered Basket Stamps
Shop at:
Sunny Studio
Layered Basket Dies
Layered Basket Dies
Shop at:
Sunny Studio
Spring Bouquet Stamps
Shop at:
Sunny Studio
Spring Bouquet Dies
Spring Bouquet Dies
Shop at:
Sunny Studio

Thursday, January 26, 2023

Build-a-Birdhouse Die Focused Cards with Marine and Waleska

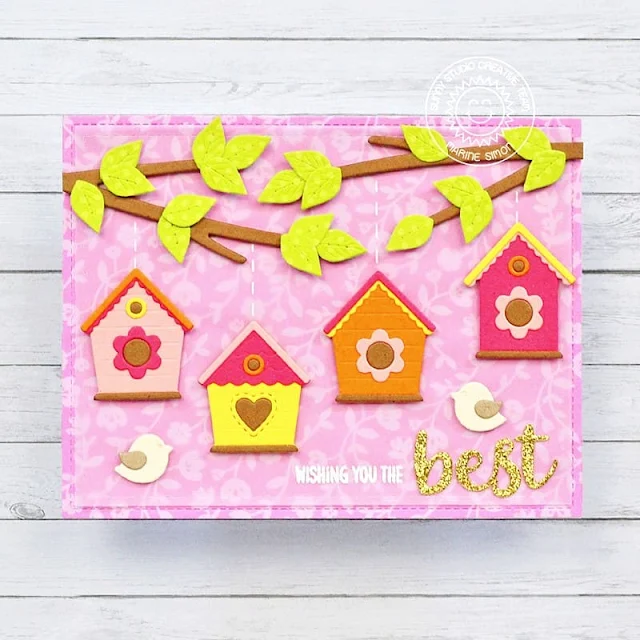
Hello crafty friends, Marine here with you today, I'm super happy to be back on the blog with a cute spring card showcasing the brand new and ever so cute Build-a-Birdhouse die set. It's not that usual for me to only use die cuts on my projects, I'm more of a busy-scene-with-critters kind of crafter, but I really enjoyed creating and assembling this lovely card!

Sunny Studio Stamps: Build-A-Birdhouse Missing You Card by Marine Simon (featuring Out On A Limb Dies)

I wanted the birdhouses to be super colorful, so I started off by cutting all the different elements and birds out of several plain colored cardstock. The Build-a-Birdhouse die set comes with a pole die to place the houses on, but I wanted them to be hanging from a tree, so I used the Out On a Limb die set to cut two branches out of some brown cardstock, and some leaves out of a green dotted pattern paper from the new Spring Fever paper pack.

Next I cut a 5,5" x 4,25" pink floral panel using another paper from the Spring Fever paper pack, as well as a slightly smaller vellum panel. I temporarily taped the vellum panel to the pink one using washi tape, I assembled the birdhouses, and glued them on the vellum along with the branches, leaves and birds using foam squares.

Sunny Studio Stamps: Build-A-Birdhouse Missing You Card by Marine Simon (featuring Out On A Limb Dies)

For my greeting, I first white heat embossed the words "Wishing you the" from Country Carnival, and I cut some gold glitter letters to form the word "Best" and finally read "Wishing you the best". Next I removed the washi tape that was keeping the pink panel and vellum panel together, I flipped the vellum panel over and applied liquid glue at the back of each die cut element, and then I attached that vellum panel to the pink floral one. And finally I added stitched lines above each birdhouse using a white gel pen to connect them to the branches.

And that's it! Feels like spring already, right? Thank you so much for stopping by, and see you next week!

------------------------------------------

Hey friends, Waleska here! I am excited to share today's card featuring the new Build-a-Birdhouse dies. They are perfect to create all kinds of scenes they can be spring, summer or even winter.  

Sunny Studio Stamps: Build-A-Birdhouse Birthday Card by Waleska Galindo (featuring Out On A Limb Dies)

I started my card die cutting and coloring the bird houses, I used oxide inks in colors Shaded Lilac, Kitsch Flamingo and Peacock Feathers, some details I leave them white and others I used copic markers to color them. I then started working on the background. I used a cloud stencil and the same colors I used for the bird houses. I mix the oxide inks with a little bit of water and splash the sky and the houses. I really wanted to incorporate the birds to this scene so I die cut two branches from the Out on a Limb dies with kraft cardstock as well as some leaves that I color with copic markers.

Sunny Studio Stamps: Build-A-Birdhouse Birthday Card by Waleska Galindo (featuring Out On A Limb Dies)

I started to assemble my card using all the elements, I also cut and color two birds and adhered them on the tree branches. I added a frame from the Fancy Frames Rectangle dies and cut a kraft base for my card and a white card as a base. The fun sentiment is from the A Bird's Life Stamp set. This is one of my favorite dies from the latest release. What dies were your favorite?

Thank you for stopping by! Enjoy the rest of your day!

Sunny Studio Supplies Used:

A Bird's Life Stamps
Shop at:
Sunny Studio
Fancy Frames- Rectangles
Shop at:
Sunny Studio
Out on A Limb Dies
Out on A Limb Dies
Shop at:
Sunny Studio
Country Carnival Stamps
Shop at:
Sunny Studio
Build-A-Birdhouse Dies
Shop at:
Sunny Studio
Spring Fever Paper
Spring Fever Paper
Shop at:
Sunny Studio

Wednesday, January 25, 2023

Big Bold Greetings Cards with Marie and Catherine

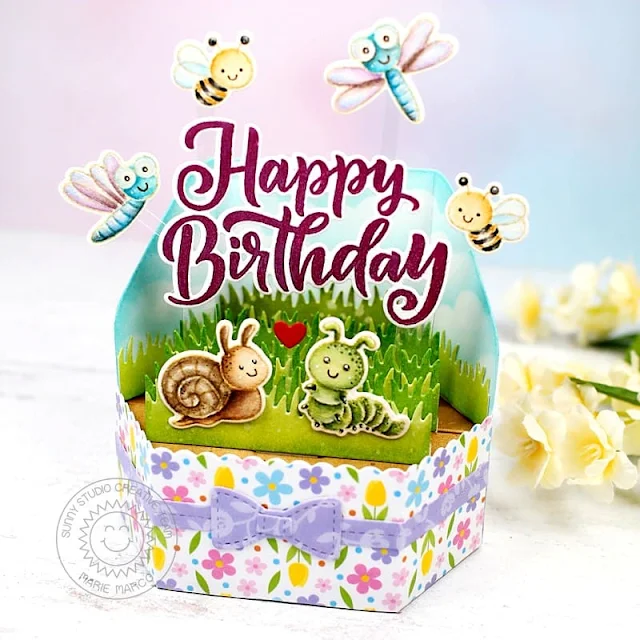
Hello Crafty Friends! It's Marie here for another pop-up platform box project inspiration! I am a little obsessed with these pop - up boxes by Lawn Fawn because they are the perfect size for showcasing the small images in Sunny Studio's Stamp sets. Today's Birthday Platform Pop-up feature the Big Bold Greetings Stamp from their latest Spring 2023 release as well as their new Garden Critters Stamps.

Sunny Studio Stamps: Big Bold Greetings Birthday Card by Marie Marco (featuring Garden Critters)

I started off my card by stamping all my images from the Garden Critters Stamps with Antique Linen Distress ink onto watercolor paper. Using Faber Castell watercolor pencils, I colored all my images and cut them out using the Garden Critters Dies.  I then stamped my Big Bold Greeting sentiment onto Neenah Solar white 110lb cardstock using Seedless preserves Distress Oxide ink and cut out the sentiment using the corresponding Big Bold Greetings Dies.

Next step is to die cut all the pop-up platform components and ink blend the panels. For the background panel, I used a cloud stencil with Salvaged Patina Distress Ink. For all the grass panels, I ink blended them using Twisted Citron Distress Ink and Mowed Lawn Distress Ink. And finally the "dirt" was inked using Vintage Photo and Walnut Stain Distress Inks.

Sunny Studio Stamps: Big Bold Greetings Birthday Card by Marie Marco (featuring Garden Critters)

After Assembling my box, I decided to decorate the side panels of the base using the new Spring Fever Paper. I trimmed the paper and wrapped it around the box using Bearly Art Precision Craft Glue. Then I positioned the Big Bold Happy Birthday sentiment in the middle of the box. To create the floating illusion, I placed sturdy acetate strips on either side and adhered it using double sided tape adhesive. I did the same to the adorable flying garden critters. Finally as a finishing touch, I added a small die cut heart in the center, and presto! Another super simple interactive pop-up card that's perfect for spring birthdays!! Thank you so much for joining me today!! Until next time, Happy Crafting and Cardmaking! 

-----------------------------------------

Hello Crafty Friends, Catherine here! I hope you everyone is having a good week so far.  Today, I am sharing a birthday card featuring Big Bold Greetings and the ever so cute Panda Party!

Sunny Studio Stamps: Big Bold Greetings Birthday Card by Catherine Cohen (featuring Panda Party, Comic Strip Everyday Dies, Make A Wish)

To start, I die cut a frame with confetti cardstock from Surprise Party using Comic Strip Everyday Dies. Next, I placed the frame over A2 white cardstock and gently traced the horizontal lines on the frame. I used the lines as a guide to ink blend the background. I removed the the frame and started ink blending my background working from bottom to top using Abandoned Coral, Squeezed Lemonade, and Salty Ocean Distress Oxide Inks. I splattered water onto the background and added specks of orange, yellow and blue water color.

I stamped “Make a Wish” from Big Bold Greetings Stamp with Versamark Ink and heat embossed it with pink embossing powder. I then die cut the sentiment with the coordinating die Big Bold Greetings Dies.

Sunny Studio Stamps: Big Bold Greetings Birthday Card by Catherine Cohen (featuring Panda Party, Comic Strip Everyday Dies, Make A Wish)

I stamped the cute pandas from Panda Party, birthday cake from Make A Wish Stamps. I borrowed some presents from Happy Owlidays, balloons from Oceans of Joy, and the party hats from Party Pups. I die cut the images with the coordinating dies and colored them with Copic Markers listed in the link in my blog below.

I adhered the frame to the background of the card followed by all the images. I used foam tape for extra dimension.

Thanks so much for joining me today and I hope you like my card! For more inspiration, I would love to have you visit me at Craft-Cat!

Sunny Studio Supplies Used:

Oceans of Joy Dies
Oceans of Joy Dies
Shop at:
Sunny Studio
Oceans of Joy Stamps
Shop at:
Sunny Studio
Party Pups Stamps
Party Pups Stamps
Shop at:
Sunny Studio
Party Pups Dies
Party Pups Dies
Shop at:
Sunny Studio
Comic Strip Everyday Dies
Shop at:
Sunny Studio
Happy Owlidays Stamps
Shop at:
Sunny Studio
Happy Owlidays Dies
Happy Owlidays Dies
Shop at:
Sunny Studio
Make A Wish Stamps
Make A Wish Stamps
Shop at:
Sunny Studio
Make A Wish Dies
Make A Wish Dies
Shop at:
Sunny Studio
Surprise Party 6x6 Paper
Shop at:
Sunny Studio
Big Bold Greetings Stamps
Shop at:
Sunny Studio
Big Bold Greetings Dies
Shop at:
Sunny Studio
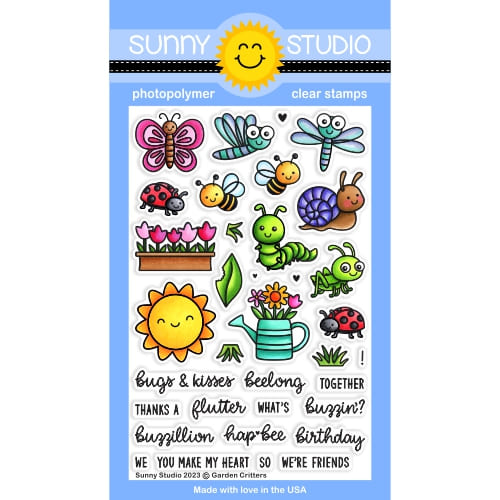
Garden Critters Stamps
Shop at:
Sunny Studio
Garden Critters Dies
Shop at:
Sunny Studio
Panda Party Stamps
Panda Party Stamps
Shop at:
Sunny Studio
Panda Party Dies
Panda Party Dies
Shop at:
Sunny Studio
Spring Fever Paper
Spring Fever Paper
Shop at:
Sunny Studio

Tuesday, January 24, 2023

Wonderful Windows Die Focused Cards with Isha and Lien

Hello everyone! Isha today with a fun card featuring the new Wonderful Windows dies. I paired these dies with a few older and new products. For this card I decided to not add the sentiment as we all need some general cards in our stock. 

Sunny Studio Stamps: Wonderful Window Die Focused Everyday Card by Isha Gupta (featuring Little Birdie, Garden Critters, Bunnyville, Country Scenes)

I started by adhering the blue pattern paper from the Spring Fever paper pack to a white card base. Next, I die-cut the windows using white card. Adhere vellum behind the window grid panel. Stamp the images, color and die-cut using the coordinating dies.

Twig, bird - Little Birdie Stamps and Dies
Tulip cluster, bees, caterpillar - Garden Critters Stamps and Dies
Bunnies, tulips - Bunnyville Stamps and Dies
Mountain, trees - Country Scenes Stamps and Dies

Sunny Studio Stamps: Wonderful Window Die Focused Everyday Card by Isha Gupta (featuring Little Birdie, Garden Critters, Bunnyville, Country Scenes)

Die-cut the fence using the Picket Fence Border Dies. Now die-cut the grass from the Flirty Flowers paper pack using the grass die. Color the pot we die-cut from the Wonderful Windows dies and adhere the tulip cluster behind this.

Assemble everything together. Thank you for stopping by and have a nice day!

-------------------------------------------

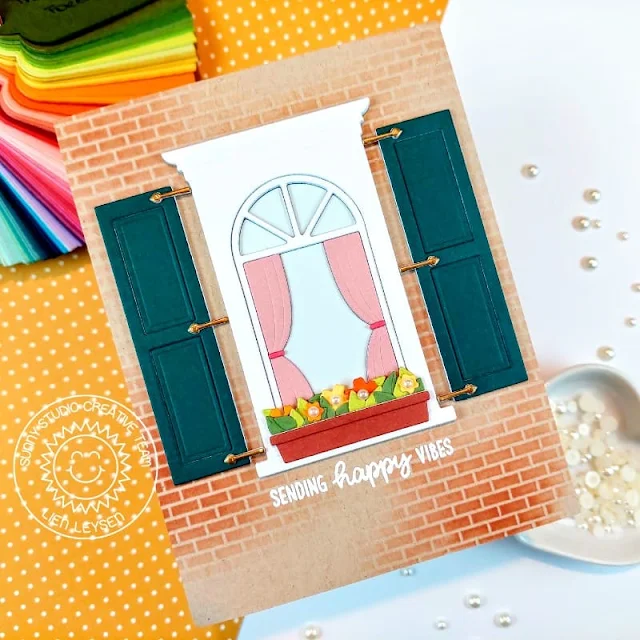
Hi crafty friends! It's Lien here back with a sleek modern card design, perfect to welcome someone to their new home or to your neighborhood!

Sunny Studio Stamps: Wonderful Window Die Focused Everyday Card by Lien Leysen

For this card I'm using the Wonderful Windows die set. This is definitely one of my favorites from the spring release because it's so wonderfully versatile. I really wanted to make a simple card that could go for any recipient to welcome them to the neighborhood. The way I'm making my simple window stand out is with dimension.

I cut the main window piece 5 times out of white cardstock and stacked them all together with liquid glue. The shutters I cut out 4 times out of white and once from colored cardstock, when stacking these together I left out one layer from the inside rectangle panels. I even layered up the hinges, die cut once from white and once from matte gold cardstock.

Sunny Studio Stamps: Wonderful Window Die Focused Everyday Card by Lien Leysen

I chose fairly muted colors throughout the design but I made sure the flowers were quite bright. For the background panel I used Neenah Desert Storm and a Honey Bee's Perfect Bricks Stencil, I blended some brick red ink in a few spots on the card panel, a fully stenciled background would have been too busy. To finish this card before actually adding any of the die cuts, I stamped the sentiment from the Panda Party stamp set in VersaMark clear ink and embossed it with bright white embossing powder.

I added all the die cut pieces, starting with the main window because once that is centered on the card, everything else will fall in place. I only added a few pearls as the center of the flowers and no other embellishments.

Sunny Studio Supplies Used:

Picket Fence Border Dies
Shop at:
Sunny Studio
Flirty Flowers 6x6 Paper
Shop at:
Sunny Studio
Country Scenes Stamps
Shop at:
Sunny Studio
Country Scenes Dies
Country Scenes Dies
Shop at:
Sunny Studio
Bunnyville Stamps
Bunnyville Stamps
Shop at:
Sunny Studio
Bunnyville Dies
Bunnyville Dies
Shop at:
Sunny Studio
Little Birdie Stamps
Shop at:
Sunny Studio
Little Birdie Dies
Little Birdie Dies
Shop at:
Sunny Studio
Garden Critters Stamps
Shop at:
Sunny Studio
Garden Critters Dies
Shop at:
Sunny Studio
Panda Party Stamps
Panda Party Stamps
Shop at:
Sunny Studio
Wonderful Windows Dies
Shop at:
Sunny Studio
Spring Fever Paper
Spring Fever Paper
Shop at:
Sunny Studio

Monday, January 23, 2023

Panda Party Cards with Bobbi and Cathy

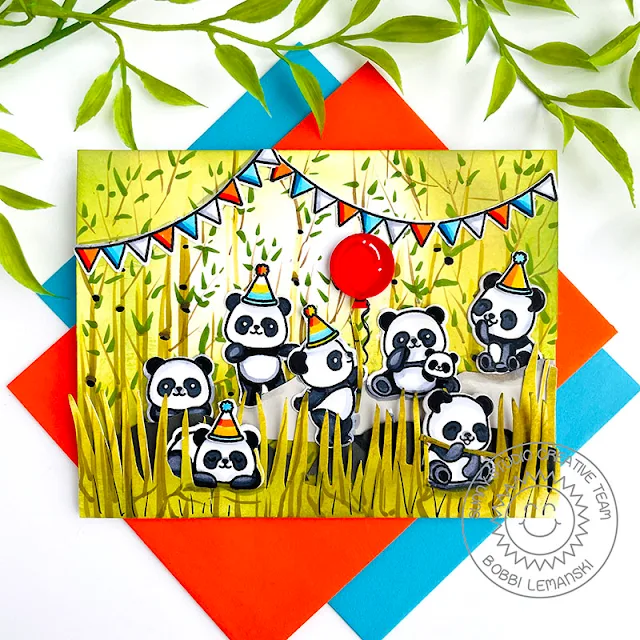
Hello Sunny friends. It’s Bobbi sharing a Panda Party in the forest! Panda bears are known to live in the mountainous, bamboo forests of China and feast on bamboo. Did you know that in a single day, a panda can eat between 20 to 30 pounds of bamboo? After learning this, I decided to surround these cute bears in their favorite habitat, a rocky environment surrounded by bamboo. I'm using the new Panda Party stamp set  and coordinating dies by Sunny Studio Stamps. 

Sunny Studio Stamps: Panda Party Birthday Card by Bobbi Lemanski

To create this A2-sized card, I used Neenah 80lb cardstock for the card base and card front panel. I blended on green ink using Ranger Distress Oxide Inks in Mowed Lawn, Peeled Paint and Rustic Wilderness. I used blender brushes to apply green all around the outer edge of the card front panel. Next, I free-handed some simple bamboo trees/plants to the background using Copic Markers in YG99, YG95, YG93, (for the trunks) E44 (branches) and YG67 (leaves).

To create a foreground area for my pandas, I added a grassy border at the bottom of the front panel. This also allowed me to tuck in some rocky surfaces behind the grassy area. I hand cut both the rocks (from two colors of gray) and the tall grasses.

Sunny Studio Stamps: Panda Party Birthday Card by Bobbi Lemanski

Every party needs some pandas so I added in a number of the bears from the set to the scene. Colorful party hats and pennant banners decorate the party scene in vivid blues, yellows, and oranges. I used YR09, YR68, B05, B04, B02, Y15, Y08, C3 and C1 Copic colors. I had an open space in the middle of the scene and thought the one standing bear should have a balloon in hand so I punched out a 3/4″ circle from red cardstock and added shadowing, highlights and a string using my white Gelly Roll pen, black marker and Copic R29 marker.

Sunny Studio Stamps: Panda Party Birthday Card by Bobbi Lemanski


This set has some really unique and fun panda-themed sentiments so I stamped a few inside. I also had an extra panda and banner so I added both above the phrases to keep the fun going inside, too!

Thanks for stopping by today. If you want to see more ideas and inspiration from me, subscribe to my blog, BobbiHartDesign.com. I’ll send you updates on new posts! You can also find me on Instagram as @BobbiHartDesign and on Facebook as BobbiHartDesign.

-------------------------------------------------

Hey friends! Cathy here today sharing a cute and fun birthday card featuring the new Panda Party Stamps!


Sunny Studio Stamps: Panda Party Birthday Card by Cathy Chapdelaine (featuring Ribbon & Lace Border Dies)
 

To start this card, I cut a piece of white cardstock 3 1/2" x 4 1/4" and created a confetti effect by splattering a little watered down Distress inks with a paintbrush. I used Picked Raspberry, Peacock Feathers, Fossilized Amber and Twisted Citron. I heat embossed the sentiment in the upper right corner and adhered this piece to the top of an A2 card base.


Next, I cut a piece of patterned paper from the Dots & Stripes Jewel Tones Paper 2” x 4 1/4" and adhered it to the bottom of the card front. I then cut 1” x 4 1/4" strips from 3 more of the papers and die-cut the bottom edge of each using one of the Ribbon & Lace Border Dies. I overlapped and adhered these pieces below the white cardstock. I used the Ribbon & Lace Border Dies again to die-cut a piece of black cardstock, cut it to 4 1/4" long and adhered it across the bottom of the white cardstock.


Sunny Studio Stamps: Panda Party Birthday Card by Cathy Chapdelaine (featuring Ribbon & Lace Border Dies)
 

For the present, I cut a rectangle 1” x 1 1/4" from white cardstock and die-cut a bow using the Sweet Treat House Add-on Dies. I used the windowpane portion of the Wonderful Windows Dies for the ribbon, adhered the die-cut piece to the rectangle and trimmed off the excess along the edges. I colored these elements with Copics.


To finish, I stamped the images on Neenah Classic Crest 80lb solar white cardstock, colored them with Copics and die-cut them using the coordinating dies. I used the following stamps and dies:

Panda Party Stamps and Dies

Bear Hugs Stamps and Dies (balloons)


I hope you enjoyed and thanks for stopping by today! For more inspiration, please visit my blog www.inkredibleadventures.com and you can also find me on Instagram as @cathy.chapdelaine.


Sunny Studio Supplies Used:

Bear Hugs Stamps
Bear Hugs Stamps
Shop at:
Sunny Studio
Bear Hugs Dies
Bear Hugs Dies
Shop at:
Sunny Studio
Dots & Stripes Jewel Tones 6x6 Paper
Shop at:
Sunny Studio
Sweet Treats House Add-on
Shop at:
Sunny Studio
Panda Party Stamps
Panda Party Stamps
Shop at:
Sunny Studio
Panda Party Dies
Panda Party Dies
Shop at:
Sunny Studio
Ribbon & Lace Dies
Ribbon & Lace Dies
Shop at:
Sunny Studio
Wonderful Windows Dies
Shop at:
Sunny Studio