Thursday, March 21, 2019

Puppy Dog Kisses Cards with Vanessa and Anja

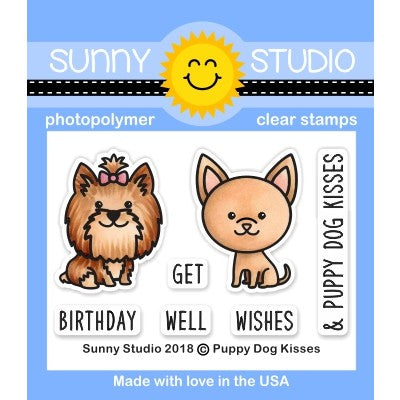
Hi everybody! Vanessa here with a card using the adorable Puppy Dog Kisses Stamps. I am still in the mood for spring, so my puppies are standing in a bed of flowers.

Sunny Studio Stamps: Puppy Dog Kisses Fancy Frames Dies Woodland Borders Dies Happy Birthday Card by Vanessa Menhorn

First, I inked the front of a white card base with a cloud stencil and Distress Oxide Inks. Then I die-cut the Woodland Borders Die from green cardstock and adhered it. Now I die-cut the Fancy Frames Rectangle Dies from pink patterned paper from the Flirty Flowers Paper and adhered the frames. 

Sunny Studio Stamps: Puppy Dog Kisses Fancy Frames Dies Woodland Borders Dies Happy Birthday Card by Vanessa Menhorn

After I had stamped the sentiment from the Party Pups set, I stamped the flowers and dogs onto white cardstock. I colored the images with Copics, die-cut them with the matching dies and adhered everything, popping up some parts with foam tape.

These cuties are adorable, don't you agree? Love their faces :) Thank you for visiting, see you next week!

--------------------------------------------------

Hello everyone, Anja here today with an interactive card. I rarely create these kind of cards but the Sliding Window Die makes it soo easy!

Sunny Studio Stamps: Puppy Dog Kisses Fancy Frames Dies Sliding Window Dies Happy Birthday Card by Anja Bytyqi

First, I created an A2 card base from aqua cardstock. I die cut a stitched rectangle from the violet grid patterned paper (Gingham Pastels 6x6 Paper) which is slightly smaller. Next, I used the sliding window die to create the interactive part. It's a flap with three folds that can be popped up – but the card can be mailed flat into an envelope. Make sure to only put adhesive to the outside frame when adhering it to your card.

Sunny Studio Stamps: Puppy Dog Kisses Fancy Frames Dies Sliding Window Dies Happy Birthday Card by Anja Bytyqi

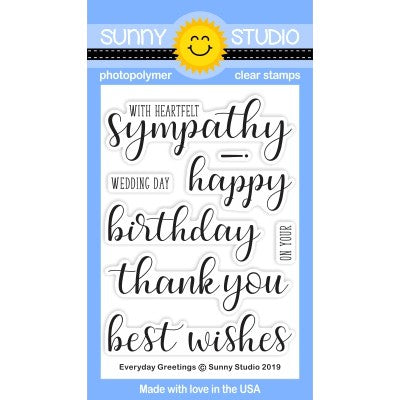
I kept the design of my card front pretty simple and decorated it with a white heat embossed birthday sentiment (Everyday Greetings Stamps), a cake (Make A Wish Stamps) and three die cut hearts (Basic Mini Shape Dies).

Sunny Studio Stamps: Puppy Dog Kisses Fancy Frames Dies Sliding Window Dies Happy Birthday Card by Anja Bytyqi

When you fold the flap up, the inside will be revealed. And here is my fun surprise – the two cute dogs from the Puppy Dog Kisses set are ready to celebrate and they brought a pile of gifts, too.

Sunny Studio Stamps: Puppy Dog Kisses Fancy Frames Dies Sliding Window Dies Happy Birthday Card by Anja Bytyqi

The gifts are from two other stamp sets (Alpaca Holiday Stamps and Foxy Christmas Stamps). I stamped all images in Memento Tuxedo Black Ink and colored them with Copic Markers. In the background, I blended together two Distress Oxide Inks (Shaded Lilac and Tumbled Glass) on a piece of Strathmore Bristol Smooth Cardstock.

I loved creating this interactive card – it looks really sweet on display :-) Thank you so much for stopping by! Have a wonderful day!

Sunny Studio Supplies Used:

Fancy Frames- Rectangles
Shop at:
Sunny Studio
Party Pups Stamps
Party Pups Stamps
Shop at:
Sunny Studio
Party Pups Dies
Party Pups Dies
Shop at:
Sunny Studio
Happy Harvest Stamps
Shop at:
Sunny Studio
Happy Harvest Dies
Happy Harvest Dies
Shop at:
Sunny Studio
Sliding Window Dies
Sliding Window Dies
Shop at:
Sunny Studio
Woodland Borders Dies
Shop at:
Sunny Studio
Mini Basic Shape Dies
Shop at:
Sunny Studio
Alpaca Holiday Stamps
Shop at:
Sunny Studio
Alpaca Holiday Dies
Alpaca Holiday Dies
Shop at:
Sunny Studio
Foxy Christmas Stamps
Shop at:
Sunny Studio
Foxy Christmas Dies
Foxy Christmas Dies
Shop at:
Sunny Studio
Gingham Pastels 6x6 Paper
Shop at:
Sunny Studio
Flirty Flowers 6x6 Paper
Shop at:
Sunny Studio
Make A Wish Stamps
Make A Wish Stamps
Shop at:
Sunny Studio
Make A Wish Dies
Make A Wish Dies
Shop at:
Sunny Studio
Puppy Dog Kisses Stamps
Shop at:
Sunny Studio
Puppy Dog Kisses Dies
Shop at:
Sunny Studio
Everyday Greetings Stamps
Shop at:
Sunny Studio

Wednesday, March 20, 2019

Staggered Circles Dies Cards with Franci and Mona

Hello there! Franci here with you today with a happy card featuring the Staggered Circles set. I decided to create a rainbow inspired card with these fun circles and I'm so happy about how it turned out!

Sunny Studio Stamps: Staggered Circle Dies Rainbow Word Die Over The Rainbow Card by Franci Vignoli

First of all I created a standard size card and I cut down a coordinated panel both out of white cardstock. I placed the die onto my panel at an angle and passed it through my big shot machine. Then I colored all my circles in rainbow colors with Distress inks and I also inked the backs of all my "circle windows" onto the front of my card to make it even more colorful :)

Sunny Studio Stamps: Staggered Circle Dies Rainbow Word Die Over The Rainbow Card by Franci Vignoli

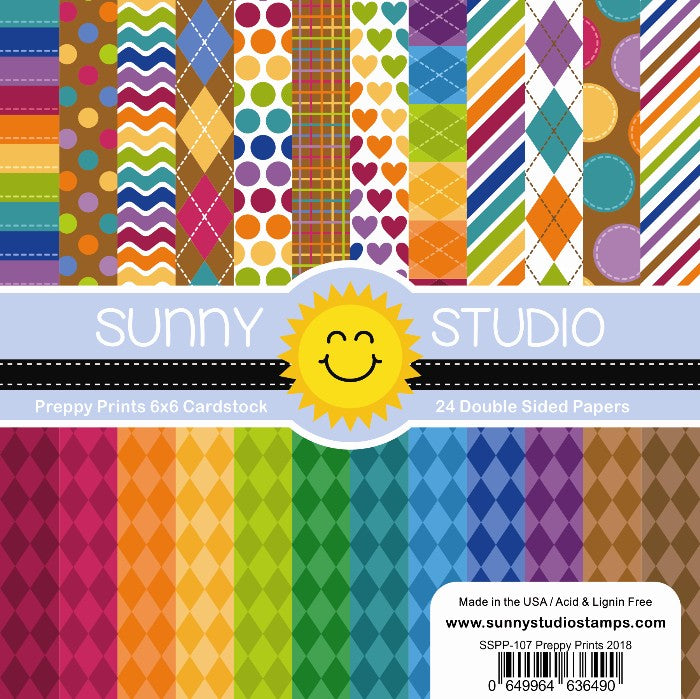
I glued down all my circles and the panel with foam adhesive then I die cut the Rainbow word and these little hearts out of some Preppy Prints paper and added them to my design.

Finally I stamped my sentiment from the Over the Rainbow stamp set and the card is complete! Hope you like it too and thank you so much for stopping by today, have a lovely day! 

-------------------------------------------------

Hi crafty friends! It's Mona here, today I am showing you a sweet card featuring Breakfast Puns Stamp Set and Staggered Circle Dies.

Sunny Studio Stamps: Staggered Circle Dies Breakfast Puns Punny Card by Mona Toth

I started the cardmaking with die-cutting. I used the Staggered Circle Dies to create a fun look in the background. When it was done I made dry-embossing with Dapper Diamonds Embossing Folder. When it was done I colored it with brown watercolors and it turned to ice cream wafer.


Sunny Studio Stamps: Staggered Circle Dies Breakfast Puns Punny Card by Mona Toth

Next I made ink blending in the background. I used my Distresses in the following order: Festive Berries, Picked Raspberry, Spun Sugar and the result is a fresh "jelly" color look in the background.

The next step was heat embossing. I stamped the sentiment to the background from the Breakfast Puns and heated with white embossing powder.


Sunny Studio Stamps: Staggered Circle Dies Breakfast Puns Punny Card by Mona Toth

The last process on my card was stamping and coloring. I stamped many cute strawberries hearts and cute toasts with the Breakfast Puns Stamp Set and colored them with Copic Markers.

Copic Markers used: 0, RV52, RV02, RV04, RV06, RV55, RV66, R20, R24, R29, R59, YG01, YG03, YG93, E42, E43, E30, E33, E35, E44, E47


Sunny Studio Stamps: Staggered Circle Dies Breakfast Puns Punny Card by Mona Toth

I styled my card, adhered the parts together and finished my card. In the end I added a little sparkle to the white die-cuts with Wink of Stella clear brush marker. 

Thank you very much for reading through my post, I hope that you have enjoyed it and I have inspired you! If you like my creations let's be friends on Instagram. :)

Sunny Studio Supplies:

Breakfast Puns Stamps
Shop at:
Sunny Studio
Breakfast Puns Dies
Breakfast Puns Dies
Shop at:
Sunny Studio
Preppy Prints 6x6 Paper
Shop at:
Sunny Studio
Dapper Diamonds Embossing
Shop at:
Sunny Studio
Over The Rainbow Stamps
Shop at:
Sunny Studio
Rainbow Word Die
Rainbow Word Die
Shop at:
Sunny Studio
Staggered Circles Die
Shop at:
Sunny Studio

Tuesday, March 19, 2019

Frilly Frames Dies Cards with Juliana and Angelica

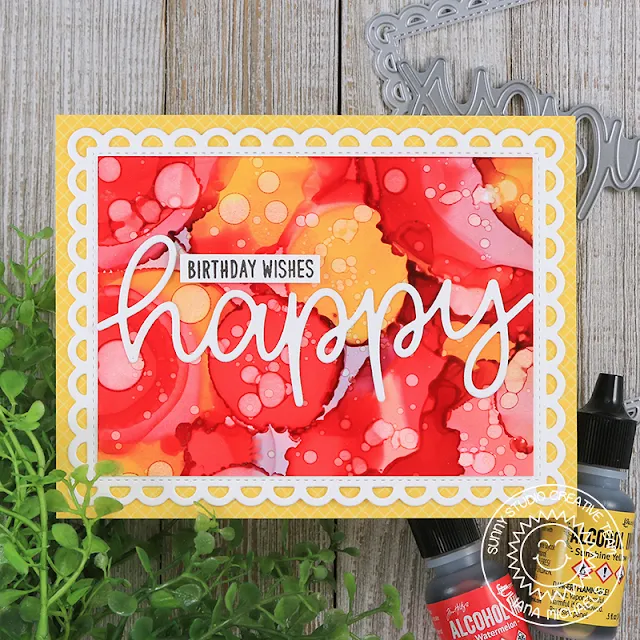
Hello friends! It's Juliana Michaels with you and today I'm sharing a birthday card featuring the Frilly Frames Lattice Die and the Happy Word Die. I combined them with a fun alcohol ink background to create a bright and cheerful birthday card.

Sunny Studio Stamps: Frilly Frames Dies Happy Word Die Happy Birthday Cards by Juliana Michaels

To get started I cut a piece of Yupo paper to size so that the Frilly Frames Lattice Die would layer on top of it. I then squirted Ranger Alcohol Ink in a mix of pink, red and yellow colors. I added small splatters of Alcohol Blending Solution using a small paint brush to help blend the colors and create the cells in the design.

Once the background was finished, I die cut a piece of white cardstock using the scalloped mat from the Frilly Frames Lattice Die. I then adhered this on top of the Alcohol Ink background.

Sunny Studio Stamps: Frilly Frames Dies Happy Word Die Happy Birthday Cards by Juliana Michaels

I then adhered this entire piece on to a piece of yellow patterned paper from the Classic Gingham 6x6 Paper PadFor the sentiment, I die cut a piece of white cardstock using the Happy Word Die. To finish it off, I stamped “birthday wishes” from the Puppy Dog Kisses Stamp Set onto a strip of white cardstock.

I really love how Frilly Frames Lattice Die creates the perfect frame for the custom Alcohol Ink I created. What will you frame using the Frilly Frames Dies? We can't wait to see what you create and share with us.

-----------------------------------------------------

Hi friends! Angelica here, and I have a card to share with you today that I made using the Frilly Frames Lattice die set. This set has two dies - a scallop rectangle die, and a lattice die to cut out the middle of the rectangle. I decided to use the lattice die a little different for this card.

Sunny Studio Stamps: Frilly Frames Dies Happy Happy Thoughts Happy Word Die Happy Birthday Cards by Angelica Conrad

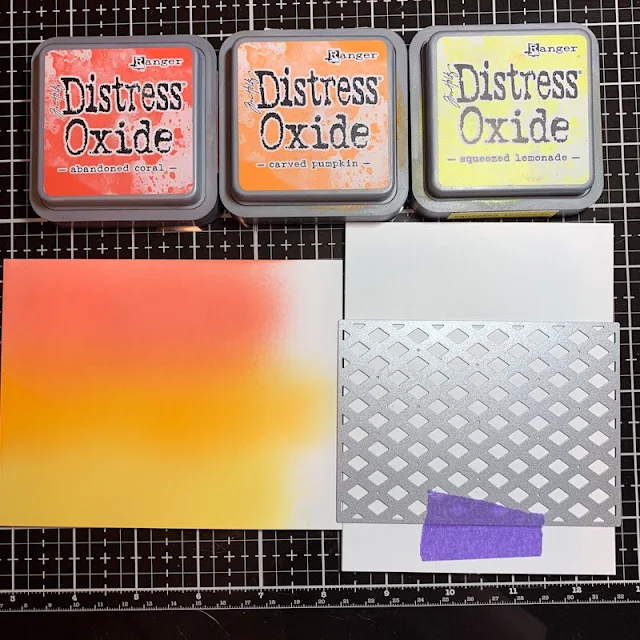
I cut two panels of card stock to 4.2 5x 5.5. On one of the panels, I added double-sided adhesive to the back. I taped the lattice die to the panel and ran it through my die cut machine. On the other panel, I ink-blended Abandoned Coral, Carved Pumpkin, and Squeezed Lemonade.

Sunny Studio Stamps: Frilly Frames Dies Happy Happy Thoughts Happy Word Die Happy Birthday Cards by Angelica Conrad

I removed the backing of the adhesive and carefully placed the white panel on the inked panel, lattice over the ink. I trimmed the panel down to 4 x 5.25. I ran the panel again through my die cut machine to firmly push the papers together. Next, I used the Happy Word Die to cut out Happy 3 times from dark pink card stock. I glued and stacked them for height.

Sunny Studio Stamps: Frilly Frames Dies Happy Happy Thoughts Happy Word Die Happy Birthday Cards by Angelica Conrad

I picked out two sentiment stamps from the Happy Thoughts stamp set (You Make / My Heart), lined them up in my MISTI, and stamped onto coral card stock with embossing ink. I then heat-embossed with white embossing powder. I adhered everything together, and attached the foam-mounted panel to a white A2 card base. My final touch was adding three die-cut hearts from the Comic Strip Everyday Dies, then adding shimmer and Crystal Glaze to the hearts and Happy.

That's all I have for today. Thanks for stopping by!

Sunny Studio Supplies Used:

Classic Gingham 6x6 Paper
Shop at:
Sunny Studio
Comic Strip Everyday Dies
Shop at:
Sunny Studio
Happy Thoughts Stamps
Shop at:
Sunny Studio
Happy Word Die
Happy Word Die
Shop at:
Sunny Studio
Puppy Dog Kisses Stamps
Shop at:
Sunny Studio
Frilly Frames Lattice Dies
Shop at:
Sunny Studio

Monday, March 18, 2019

Chubby Bunny Cards with Eloise and Leanne

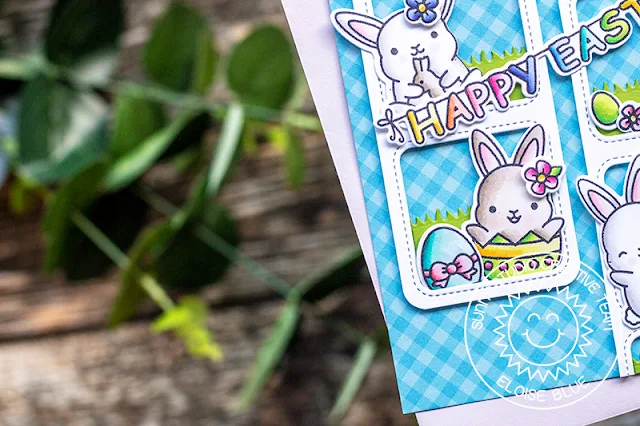
Hello friends, Eloise here and today we are featuring the Chubby Bunny Stamp Set. I’ll be pairing it with Window Trio Square Dies to create a grid design.

Sunny Studio Stamps: Chubby Bunny Window Trio Dies Easter Card by Eloise Blue

I started off with stamping out my images from Chubby Bunny and coloured them with Copic Markers. I used very similar colours to last time I used this set since I loved them so much. I die cut them out using the coordinating dies and set them off to the side. I then took the Window Trio Square Dies and cut it twice out of some white cardstock.

Sunny Studio Stamps: Chubby Bunny Window Trio Dies Easter Card by Eloise Blue

(Copic Markers – Y11, Y13, Y15, Y17 / YR00, YR02, YR12, YR18 / R000, R00, R30, R21, R22 / RV10, RV13, RV25, RV19 / B63, BV02, BV04, BV08 / B41, B21, B24, B26 / BG10, BG11, BG13, BG49 / YG01, YG03, YG07, YG09 / E41, E42, E43, E44 / W00, W0, W1, W3 / 0)

Sunny Studio Stamps: Chubby Bunny Window Trio Dies Easter Card by Eloise Blue

I then added foam tape onto the back and adhered them onto some blue patterned paper from the Gingham Pastels Paper Pad. I then took some green cardstock and cut the same Window Trio Square Dies from it. I used the insides and then used the Comic Strip Everyday Dies and used the grassy border from it and die cut them. I adhered them inside of the squares flat. 

I lastly added foam tape onto the backs of all the images and adhered them into place as well as the sentiment.  

Thanks for stopping by today and I’ll see you next week.

---------------------------------------------------------

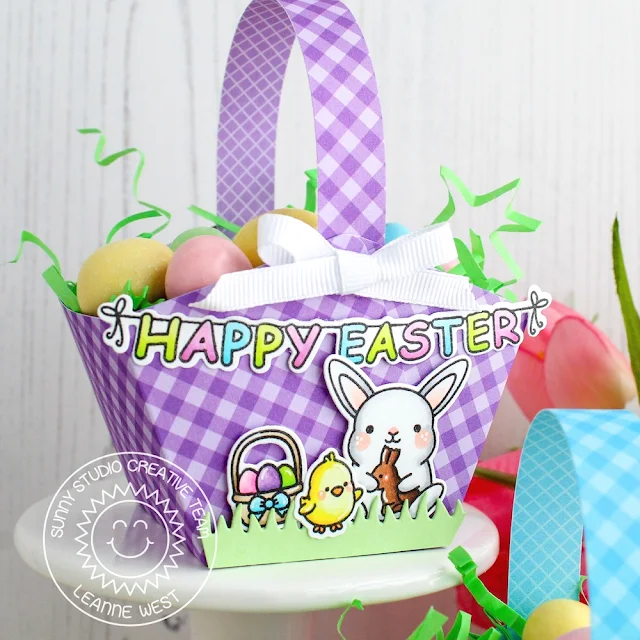
Hi there! Leanne here and I’m happy to be sharing a fun Easter project with you today. I’ve made some little treat baskets using an old school method that requires no special dies. I learned to make these baskets years ago. They are super quick and easy to make and I’ve used some adorable images from Chubby Bunny to decorate them.  

Sunny Studio Stamps: Chubby Bunny Comic Strip Everyday Dies Easter Treat Box by Leanne West

For the basket, I used three different colors of pattern paper from the Gingham Pastel paper pack. The weight of paper is perfect for this project.  

Sunny Studio Stamps: Chubby Bunny Comic Strip Everyday Dies Easter Treat Box by Leanne West

I started by rounding all four corners with a corner rounder punch. I then used a scoring board to score the paper in both directions at 2 inches and 4 inches. I then cut right along the scores lines on two sides. Cut only to where the the score lines intersect. Fold all the non cut score lines and you will see the basket start to take shape. Bring the two non cut sides together until the corners meet and secure with a strong adhesive. I cut a skinny strip of the paper for a handle. I used an 1/8 inch hole punch and a small brad to attach the handle to the basket.  

Sunny Studio Stamps: Chubby Bunny Comic Strip Everyday Dies Easter Treat Box by Leanne West

To decorate the basket, I stamped and Copic colored several images from Chubby Bunny including the Happy Easter banner image for each basket. I die cut a grass border from light green card stock using a die from the Sunny Sentiments coordinating die set. I created a different scene for each and adhered to the front of the baskets with some low profile foam squares.

As an optional step, I added a ribbon bow with hot glue on the front to cover the brad. I filled the baskets with green crinkle cut paper shred and some egg shaped chocolates. Of course any small Easter treat would fit inside. The opening of the basket measures 3.5 inches long by 2 inches wide.  

Sunny Studio Stamps: Chubby Bunny Comic Strip Everyday Dies Easter Treat Box by Leanne West

I plan on using these baskets to give to some of our neighbors and as a special treat for my kid’s teachers. They would also be perfect for adding to your Easter table for a festive decoration by easy place setting. Be sure to stop by the blog next Monday. I’ll be sharing one more fun Easter project idea. 

Sunny Studio Supplies Used:

Sunny Sentiments Dies
Shop at:
Sunny Studio
Window Trio- Square Die
Shop at:
Sunny Studio
Comic Strip Everyday Dies
Shop at:
Sunny Studio
Gingham Pastels 6x6 Paper
Shop at:
Sunny Studio
Chubby Bunny Stamps
Chubby Bunny Stamps
Shop at:
Sunny Studio
Chubby Bunny Dies
Chubby Bunny Dies
Shop at:
Sunny Studio