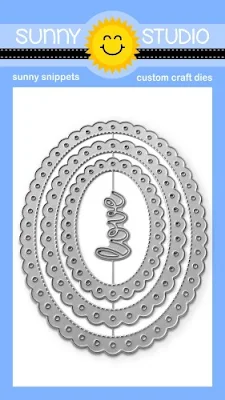
Today I am sharing our new Crisp Autumn Stamps and dies which feature two layered mini pumpkins, a maple leaf, a birch leaf and a chestnut leaf, along with a beautiful "happy Autumn" scripty greeting. I also am showcasing our new Words of Gratitude Stamps which is chocked full of great sentiments, our new Thank You Word Dies and 4 brand new mix and match Oval die sets which compliment our previously released Fancy Frames Oval Dies and Stitched Oval Dies.
Card No. 1: For my first card of the day I created a set of simple cards forming a wreath using the two mini pumpkins and two of the three leaves from our new Crisp Autumn Stamps and dies. I started by die-cutting a circle from white cardstock using the 2-7/8" circle from our Stitched Circle Large Dies which I mounted onto 4-1/4" x 5.5" panels cut from our Dots & Stripes Jewel Tones Paper packs.
My die-cut circle not only gave me a contrasting color for my opening, but also really helped me form my wreaths and keep them somewhat symmetrical. I started each card by laying my pumpkins on card and then tucking the leaves behind them centers on the seam of my circle's edge using liquid adhesive which is more forgiving if I want to slide or push it over a wee bit. I completed my cards using the "happy autumn" greeting from the set which I die-cut using the coordinating dies.
Card No. 2: Up next is a card showcasing all three of the leaves from our Crisp Autumn Stamps which I used to create a pattern for my background. When I was done arranging and adhering the leaves to my white cardstock panel. I trimmed them down using our Stitched Rectangle Dies which I then mounted onto an orange cable knit patterned paper from our new Sweater Weather Paper pack.
For my greeting, I die-cut a strip of orange striped paper using our Striped Silly Paper, adding stitching to the edges with our Slimline Basic Border dies. For my "thankful" greeting I stamped the word from our Elegant Leaves Stamps using VersaFine Clair Acorn Ink which I then heat embossed with Hero Arts Ultra Fine Clear Embossing Powder.
Card No. 3: This card started as a background which I created using our new Icing Border Dies (which I will be sharing more of later in the week). I cut my ric-rac inspired borders from a rainbow of fall colors and mounted them onto a dark brown cardstock panel cut down to 5.5" x 4.25". For my focal point, I paired the new mini pumpkins from our Crisp Autumn Stamps with our older Pretty Pumpkins Stamps for a fun fall arrangement. For my frame I used our new Scalloped Oval Mat 2 Dies, layered over our Scalloped Oval Mat 1 dies cut from white cardstock and then topped them both with our original Stitched Oval Dies. I finished my card by stamping a banner from our Banner Basics Stamps using PinkFresh Studio Mermaid Cove Ink and heat embossed a sentiment from our Fall Kiddos Stamps.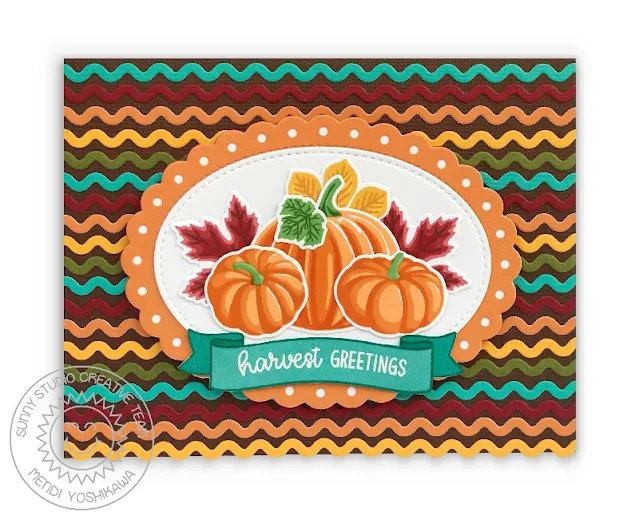
Card No. 4: For this card I created another fall arrangement, but this time pairing the leaves and pumpkins from the Crisp Autumn Stamps with the leaves, flower and bumblebee from our Elegant Leaves Stamps and Sunflower Fields Stamps. I mounted my arrangement onto a piece of blue vine print paper from our new Sweater Weather Paper pack and finished off my card using our new Thank You Word Dies and a sentiment from our Words of Gratitude Stamps (which were stamped with VersaMark ink and heat embossed using Hero Arts White Detail Embossing Powder).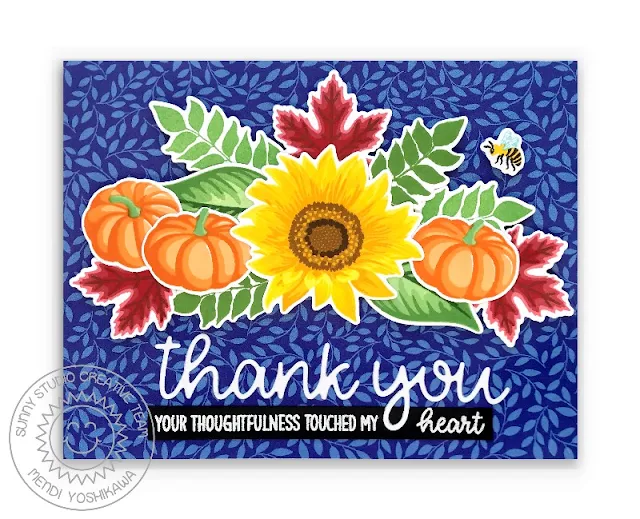
Card No. 5: For this card I started by embossing my background by running a piece of 4.25" x 5.5" maroon cardstock through my die-cutting machine using our Cable Knit Embossing Folder. I then cut an oval from white cardstock using our Scalloped Oval Mat 1 dies which I stamped using a greeting from our Words of Gratitude Stamps with VersaFine Clair Acorn Ink and added the word "thanks" die-cut from dark brown cardstock with our Thank You Word Dies. For my leaves, I used those same new layered Crisp Autumn Stamps which I adhered to the back of my oval with some liquid adhesive which gave me the flexibility to move them around a bit as I filled in the spaces around my oval.
At this point my card could have been complete, but I was feeling like it was a bit top-heavy and missing something so I decided to trim off 3/8" off the bottom of my cable knit card panel and added a thin strip of brown paper from our Gingham Jewel Tones Paper pack and a brown rainbow stripe from our new Sweater Weather Paper pack behind it, to the bottom of my top folding card base.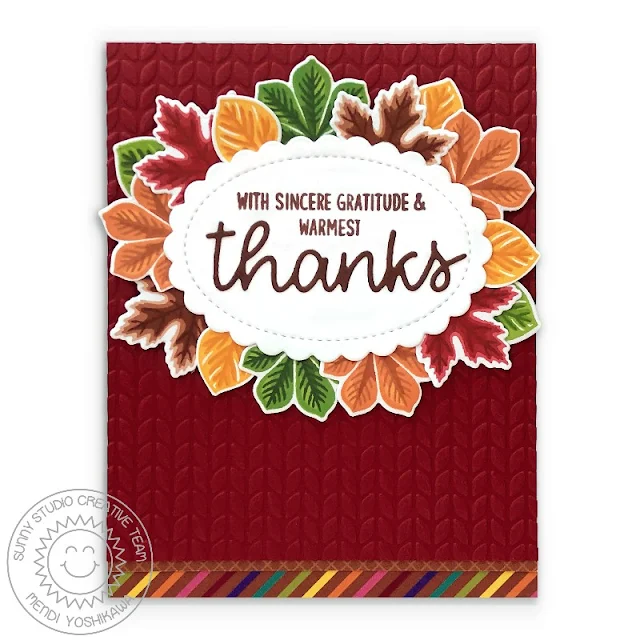
Card No. 6: For my next card, I started by die-cutting an oval from my white cardstock panel using our new Stitched Oval 2 dies which I then embossed using our Woodgrain Embossing Folder and filled the opening behind it with some orange vine print paper from our Sweater Weather Paper pack. I then added our decorative scalloped oval over the top using our Fancy Frames Oval Dies. For my scene I combined the leaves and pumpkins from both our Pretty Pumpkins Stamps and Crisp Autumn Stamps to create a cute fall grouping.
Finally, I cut a pennant for my sentiment using our Slimline Pennant Dies (inverted on itself and run a second time through my die-cutting machine) cut from the diagonal grid print paper from our Classic Sunburst Paper pack and heat embossed my greeting using our Words of Gratitude Stamps. Despite using 9 different products on this one card, I love how clean and fresh this design feels with the white. After using embossing folders for these last two cards, it has made me fall in love with them all over again. I love the rich texture they add to fall cards!
Card No. 7: For this card I started by die-cutting the word thanks using our Thank You Word Dies from a bunch of different white cardstock scraps I had sitting on my desk. In the beginning I knew I wanted to create a repeated background with them, but I still wasn't sure what colors I would be using for my finished card. After going back and forth for quite some time with complete indecision, I decided to ink up each word with some Spiced Marmalade distress ink using my favorite Jumbo Dauber and cut an extra set from green cardstock to stand out on my background. For my patterned paper background, I used more of that orange cable knit print from our new Sweater Weather Paper pack and a little rainbow striped print along the bottom from our Colorful Autumn Paper pack, using our new Icing Border dies to bridge the seam between the two.
For my finishing touches I added a heat embossed greeting from our Words of Gratitude Stamps, a cluster of pumpkins & leaf from our Crisp Autumn Stamps and a scattering of our Orange Topaz Jewels.
Card No. 8: My last card of the day puts our new Words of Gratitude Stamps and Thank You Word Dies center stage as the focal point, framing them with both our original Stitched Oval Dies and our new Stitched Oval 2 Dies. For the pink cable knit and pretty floral background, I used patterns from our new Sweater Weather Paper pack, paired with the yellow gingham print from our Classic Gingham Paper pack. To complement the flowers in my background, I die-cut and layered flowers with a similar feel using our Botanical Backdrop Dies which I topped with rhinestones using our Rubellite Pink Jewels and Orange Topaz Jewels. I then used the reverse side of that same yellow gingham paper to add a small scalloped edge to my card using our new Icing Border Dies.
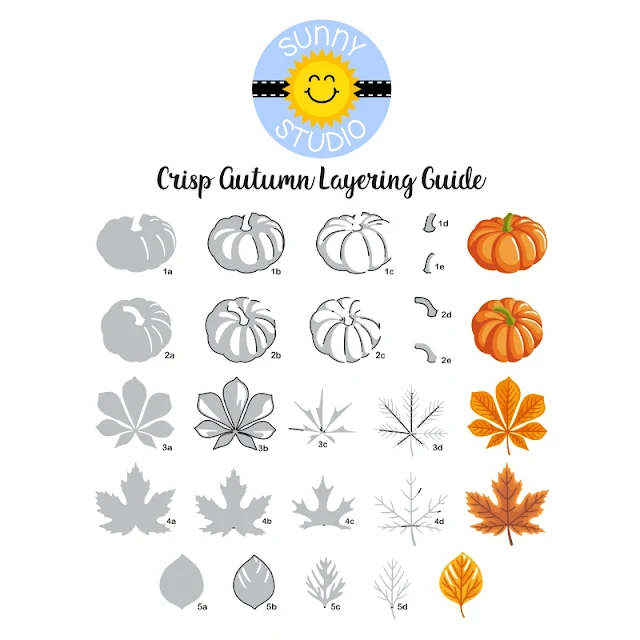
I frequently am asked which ink colors I used for my layered images. While I think there are so many great options out there, these are the colors I used today for my stamped images from light to dark:
Pumpkins (card no.3, 4 and 6)
PinkFresh Studio Apricot
PinkFresh Studio Clementine
Concord & 9th Marmalade
Hero Arts Green Hills
Hero Arts Fresh Lawn
Darker Pumpkins (card no.1 and 7)
Hero Arts Orange Soda
Concord & 9th Marmalade
PinkFresh Studio Persimmon
Hero Arts Fresh Lawn
PinkFresh Studio Olive
Red Leaf
PinkFresh Studio Passion Fruit
Hero Arts Red Royal
Concord & 9th Cranberry
Gina K. Warm Cocoa
Yellow Leaf
Concord & 9th Buttercup
Hero Arts Butterbar
PinkFresh Studio Apricot
Gina K. Sweet Mango
Green Leaf
PinkFresh Studio Grassy Knoll
Gina K. Lucky Clover
PinkFresh Studio Olive
PinkFresh Studio Evergreen
Brown Leaf
PinkFresh Studio Warm Buff
PinkFresh Studio Doe
Gina K. Warm Cocoa
PinkFresh Studio Gathered Twigs
To help you line up our layered stamps like a pro I've created a special layering guide (you can click on the photo below to view it larger). The guide shows the stamps starting with the lightest ink color, working towards the darkest, but sometimes I find it easier to start backwards. They both work depending on what your preference is. The black outline indicates where that layer touches the previously stamped layer. :)
That wraps up today's sneak peeks. I'm so happy you've joined us for our 6th birthday celebration! Today as part of our birthday blog hop each designer is giving away a $25 gift code to our store plus we'll be giving away another new prize each day this week ($425 in total prizes) so I hope you will visit all the stops in the hop and keep checking back all this week for more peeks & prizes. All the contests run through Friday, August 27th at Midnight PST with winners announced here on Sunday, August 29th. Enter for our prize for the day by using the rafflecopter below. :)
a Rafflecopter giveaway
In honor of our birthday we also have a special sale! Use the discount code SIXYEARS at checkout to save 20% off on Sunny Studio Branded products (excluding our clearance and new release items) through August 30, 2021 at Midnight PST. Limit one discount code per order.
Sunny Studio (you are here)
Vanessa
Anja
Ashley
Audrey
Franci
Isha
Julia
Kavya
Marine
Mayra
Tammy
Here's a closer look at the our new Crisp Autumn Stamps & Dies, Words of Gratitude Stamps, Thank You Word Dies, Scalloped Oval Mat Dies and Sweater Weather Paper used today (which are available for pre-order as part of our birthday festivities and will officially begin shipping on August 27th):
Other Sunny Studio Supplies Used:
 Stitched Rectangle Dies Shop at: Sunny Studio |
 Icing Border DIes Shop at: Sunny Studio |
 Pretty Pumpkins Dies Shop at: Sunny Studio |
 Pretty Pumpkins Stamps Shop at: Sunny Studio |
|
 Striped Silly 6x6 Paper Shop at: Sunny Studio |
 Gingham Jewel Tones 6x6 Paper Shop at: Sunny Studio |
 Dots & Stripes Jewel Tones 6x6 Paper Shop at: Sunny Studio |
 Fall Kiddos Stamps Shop at: Sunny Studio | |
 Cable Knit Embossing Shop at: Sunny Studio |
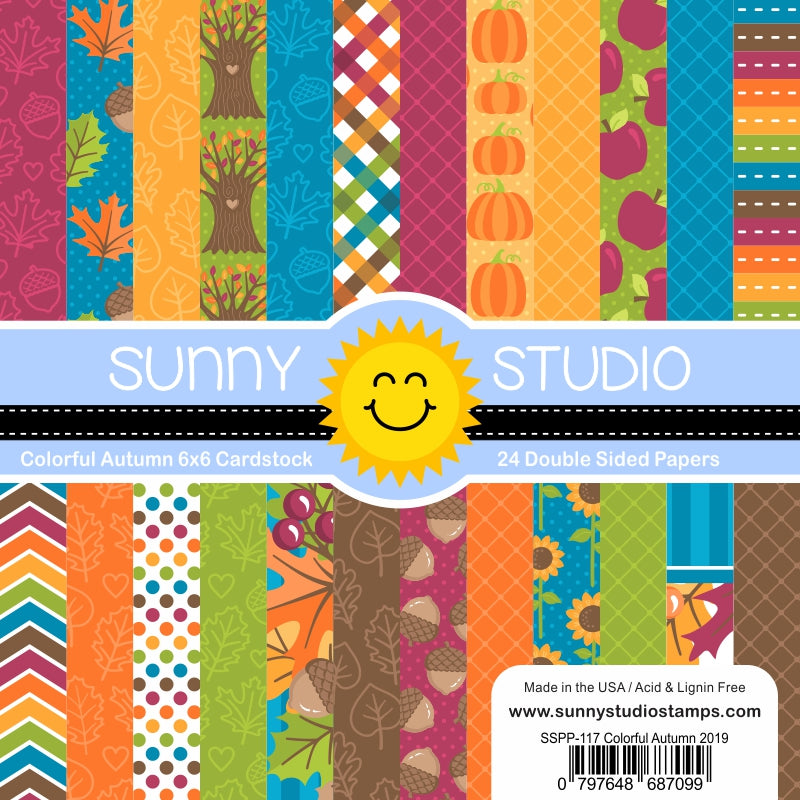 Colorful Autumn 6x6 Paper Shop at: Sunny Studio |
 Elegant Leaves Stamps Shop at: Sunny Studio |
 Elegant Leaves Dies Shop at: Sunny Studio | |
 Sunflower Fields Stamps Shop at: Sunny Studio |
 Sunflower Fields Dies Shop at: Sunny Studio |
 Banner Basics Stamps Shop at: Sunny Studio |
 Banner Basics Dies Shop at: Sunny Studio | |
 Blooming Frame Die Shop at: Sunny Studio |
 Sweater Weather Paper Shop at: Sunny Studio |
 Rubellite Pink Jewels Shop at: Sunny Studio |
 Orange Topaz Jewels Shop at: Sunny Studio | |
 Versafine Clair Ink- Acorn Shop at: Sunny Studio |
 Hero Arts Ultra Fine Clear Shop at: Sunny Studio |
 Hero Arts White Detail Shop at: Sunny Studio |
 VersaMark Watermark Ink Shop at: Sunny Studio |
|
 Fancy Frames- Ovals Shop at: Sunny Studio |
 Woodgrain Embossing Shop at: Sunny Studio |
 Classic Sunburst Paper Shop at: Sunny Studio |
 Slimline Pennant Dies Shop at: Sunny Studio |
|
 Classic Gingham 6x6 Paper Shop at: Sunny Studio |
 Botanical Backdrop Die Shop at: Sunny Studio |


