Hi crafty friends, Sara here! Today I am really
thrilled to be here, guesting for Sunny Studio again! I find their products
really interesting and fun, and I know you think the same because you are here
on their blog! For my guesting spot, I made three cards, using their recent
Holiday release. So, let’s dive into the first one!
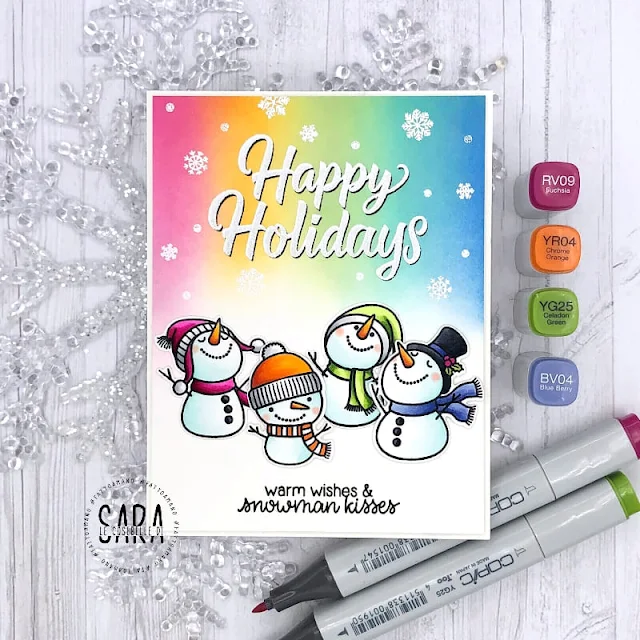
Look how cute are those snowmen from the Snowman Kisses stamp set! I wanted to feature them all on my card and I had the idea
to color their accessories using rainbow colors. What’s happier than rainbows?
I stamped them on some Neenah Solar White
cardstock and then I colored them up with copics. It didn’t took a while, since
they are almost white! I then die cut them using coordinating dies.
I then moved into the background, which I ink
blended with rainbow colors too! I used some blending brushes, they work really
well when blending from color to white. I then stamped the “Happy Holidays”
sentiment from Holidays Greetings stamp set using black ink. I knew I wanted
a white sentiment, but I used the black to create a sort of halo: in fact,
using the stamping tool I slightly moved the sentiment and I white heat
embossed it (twice). I also added a few of the snowflakes included in the Snowman Kisses stamp and I white heat embossed them too.
To complete the card, I added the four snowmen
using a combination of liquid glue and foam tape, and I stamped on of the
sentiment included in the same set at the bottom of the card. I cut the rainbow
panel to 4”x5,25” and I matted it using a white A2 panel to complete my design.
And here’s the finished result!
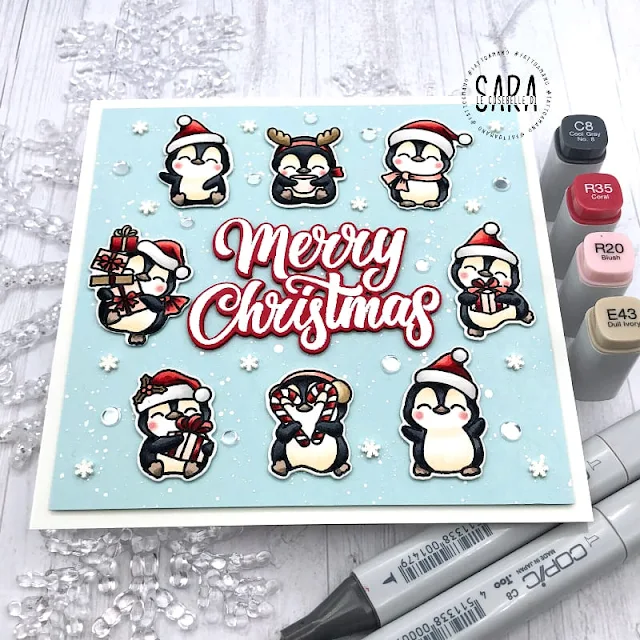
My second inspiration features the Penguin Party stamp set, which has the most adorable penguins ever! I created a 5,5”x5,5” square card, with a bold
sentiment at the centre and many penguins around.
I stamped all the penguins on some Neenah
Cardstock (it is my favorite one when I have to copic color) and I colored them
all at once, it really didn’t take a lot. I then cut them with coordinating dies
and let them aside while working on the rest of the card.
I white heat embossed the “Merry Christmas”
words (from Holiday Greetings stamp set) on red cardstock: I really love those
hand-lettered sentiments, and they have coordinating dies too. I usually stamp
those kind of sentiments using colored ink on white cardstock, but I am glad I
tried to use white on red cardstock because I really love the result!
I kept the background really simple: starting
from a light blue cardstock (which measures 5 1/8”x 5 1/8”) I splattered some
white acrylic paint and I let it dry. Then I started adding the sentiment and
the penguins I had prepared.
I had too much empty space, and since I am a
“more is better” cardmaker, I added some Majestic Clear Confetti and some White
Snowflake Confetti. To finish off the card, I matted it with a 5,5”x5,5” white
panel too.
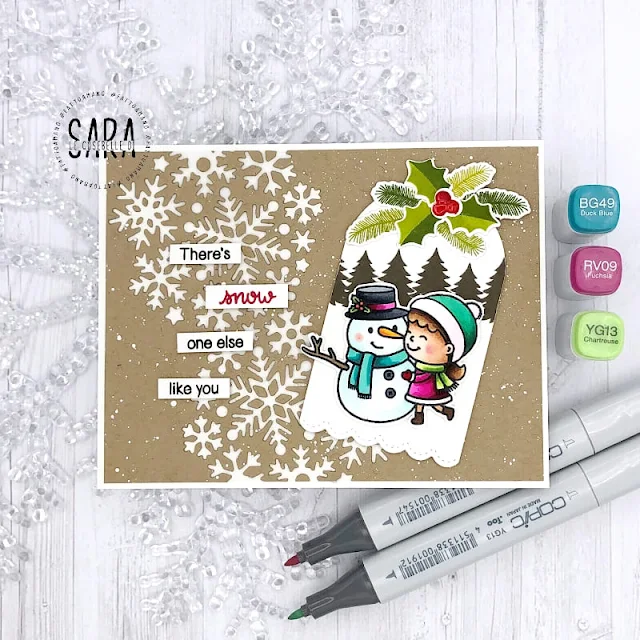
And here’s my third and last inspiration, using
the Snow One Like You stamp set and the Mini Mat & Tag 2 Dies. I remember when I saw this cute stamp last
year, I think it was a freebie with Black Friday Sale and I wished I had lived
in America to get it. But now it is available for purchase and I couldn’t
resist!
I stamped the cute image on some Neenah
cardstock and colored with copics. I created a mini scene on the tag (included
in the Mini Mat & Tag 2 Dies), I used the trees from Here Comes Santa. I
also decorated the tag with some of the greenery included in the Holiday Greetings stamp set.
I took a piece of Kraft Cardstock and I
splattered some white acrylic paint. I then wanted to add a few snowflakes but
when I looked into my stash I found the Snowflake Circle Frame Die, which has
a gorgeous circle of snowflakes. And I cut it twice from my background,
creating a lot of interest in my background panel.
I added the tag on the right side of the card,
I added 4 small strips with the stamped sentiment on the left. I also matted
the background with an A2 white panel. And here’s a finished result!
Thanks for stopping by! I really hope you have
found my projects inspiring!
Sunny Studio Supplies Used:


