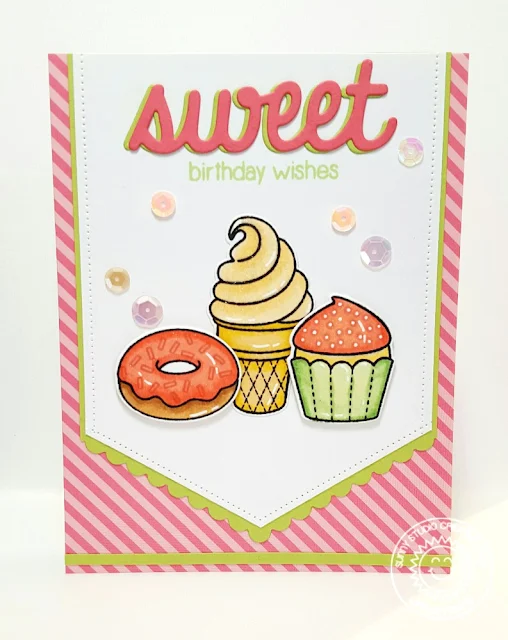
Hello, Lindsey here today sharing a birthday card using the fun and yummy set Sweet Shoppe stamps as well as the coordinating dies, new Fishtail Banners 2 and Sweet word die. I love all the sentiment combinations in this set and that it coordinates with the new Sweet word die. There are so many options! Let's get started on how I created this "sweet" birthday card.
I started with an A2 size card base of pink patterned paper. I then cut a green piece of cardstock with the scalloped Fishtail Banner 2. Then, I cut a piece of white cardstock and embellished it with the dot detail from the Fishtail Banner 2 die set. I wanted to use the Sweet word die so I made it part of my sentiment. I cut it from both pink and green cardstock and layered them together. I stamped the rest of the sentiment from the Sweet Shoppe set using some green dye ink.
I also stamped the donut, ice cream cone, and cupcake from the set. I colored all my images with Copic markers and used the coordinating dies to cut them out. I adhered the sweets to the white part of my card, popping up the donut and cupcake with foam tape. Finally, I added a small strip of green cardstock to the bottom of the card to pull it all together. I added some Wink of Stella to all the sweets and some sequins for a little extra interest and shine.
I love how this card turned out, and I can't wait to see what you come up with! Thanks so much for reading. Be sure to check back to the blog for more inspiration with this cute set!
Wednesday, July 13, 2016
Baby Bear, City Streets, & Sweet Shoppe Cards with Mendi
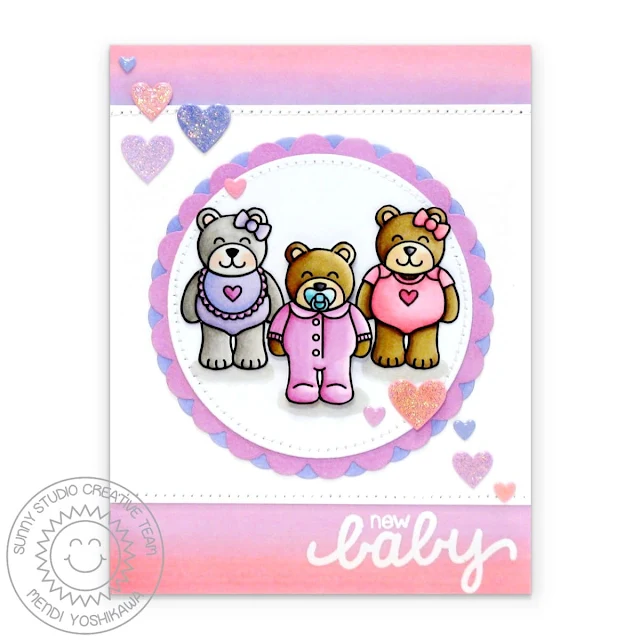
Hi there! It’s Mendi here today and I’m so happy to be back sharing some fun ideas with the latest release. Up first I have a card using our new Baby Bear set. I started my card by stamping the images from the set and just having fun coloring. These images are so much fun because you can use the bears as they are in a little diaper or dress them up with the bib, bow, sleeper and onesie images. The set also comes with quite a few tiny images designed to personalize the front of the bibs and onesies for endless combinations.
I hope I’ve inspired you to get inky today!
When I was done playing I had a moment where I was completely stumped feeling like the colors I had selected didn’t go together. To solve the issue, I created a custom background by blending those same Copic colors on two strips of cardstock to adhere to the top and bottom of my card. Truth be told when I was done with that, I still wasn’t quite happy. The colors felt a bit too bright for a baby card. To resolve that I heat embossed my sentiment on vellum and then added vellum over the top of both strips. Finally it was starting to take shape!
To complete my card I colored a handful of mini hearts and two offset scalloped circles along the edges using the same Copic markers. For my final touch I added some Diamond Stickles, topped with some Glossy Accents for a bit of sparkle.
For my next card I created a little downtown scene using our new City Streets stamps. I thought it would be fun to color each of the buildings with a monochromatic color scheme that would create fun pops of color when paired together.
For my 3.75″ x 5″ card panel, I inked it up the background with Tumbled Glass and Twisted Citron distress inks using my favorite Jumbo Dauber, rounded the corners with my Corner Chomper and then stitched around the perimeter with my sewing machine. To add a little interest to my scene I decided to adhere the shops at an angle, trimming off the extra parts that fell of the edges with my scissors. To finish my card I heat embossed my sentiment on some black cardstock using white embossing powder. Love how they pop!
My final card use our new Sweet Shoppe set. This set comes with 15 unique sentiments all revolving around the word sweet as well as several “sweet” images like candy, ice cream, cupcakes, donuts and all sorts of sprinkles and toppings for you to personalize them. For my card today I chose to decorate the cupcake image, pairing one of the sentiments with the matching Sweet Word Die. Using another Jumbo Dauber I created an ombre effect by applying my ink from the bottom and using a lighter touch along the top.
To create the oversized scallop along the bottom of my card, I die-cut three 1-1/4″ circles and then hid the other half of the circle beneath my brown cardstock strip. I then cut three 1-1/4″ x 3-3/4″ strips of cardstock for the upper portion of my card to give the illusion that they are one continuous piece. I inked them up with a mix of inks to match my Copic coloring and then stitched around the edges of each before adhering my entire card panel to a card base.
Sunny Studio Supplies Used:
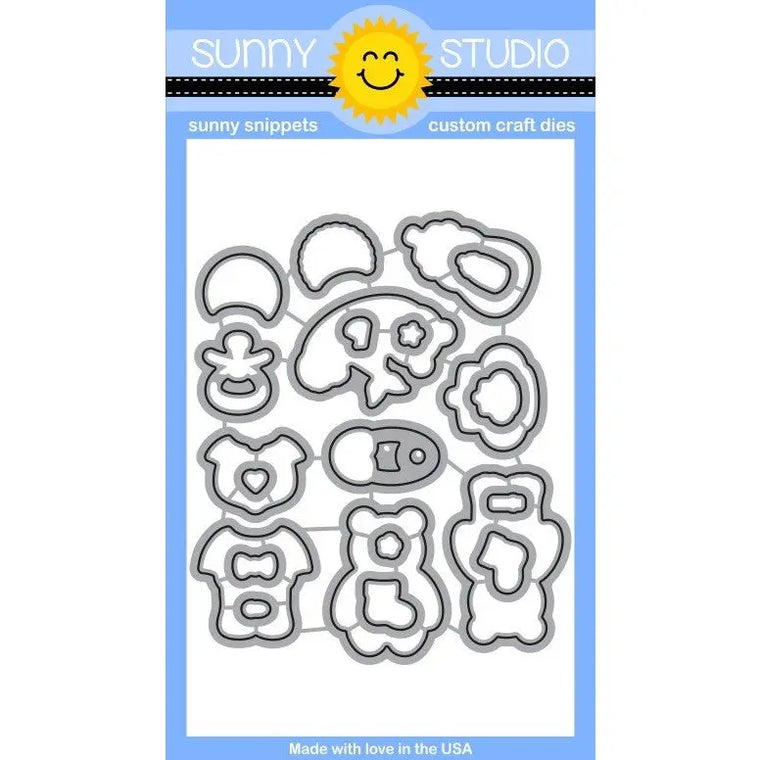 Baby Bear Dies Shop at: Sunny Studio |
 Baby Bear Stamps Shop at: Sunny Studio |
 Basic Mini Shape Dies Shop at: Sunny Studio |
 City Streets Dies Shop at: Sunny Studio |
 City Streets Stamps Shop at: Sunny Studio |
 Sweet Shoppe Dies Shop at: Sunny Studio |
 Sweet Shoppe Stamps Shop at: Sunny Studio |
 Sweet Word Die Shop at: Sunny Studio |
 Basic Mini Shape Dies 2 Shop at: Sunny Studio | |
Tuesday, July 12, 2016
Sweet Shoppe: A Very Sweet Set of Cards by Anni
Hey stampers, Anni here! Today I have a set of three cards for you. All three were made using the set Sweet Shoppe (there are also coordinating dies available).
I started by coloring three watercolor pieces in various color schemes. I used Ken Oliver's Color Burst. For every card I used three colors.
After drying I stamped the cupcakes on these pieces. I chose the parts of the paper that looked the most like icing! I stamped the cupcakes on white paper and colored the lower part with Copics. After that I fussy cut all the images.
I die cut some squares from white cardstock and created three matching backgrounds by inkblending and spritzing some water droplets on the paper. Than I stamped the sentiments in Versafine black ink, the best ink for sentiments and detailed images.
For every color combo I chose a matching patterned paper and assembled the cards.
To make the toppings of the cupcakes look more realistic I added some Wink of Stella and Glossy Accents.
If you choose the same design for all your cards, it is easy to make a few cards at the same time.
Thanks for stopping by and have a sunny week.
Anni
Monday, July 11, 2016
Sweet Shoppe Thank You Card with Eloise
Hello everyone! Eloise here today and I'm here to show you my card for the new Sweet Shoppe stamp set. This set is so fun with all the different sweets inside and I had a blast making this card.
To begin my card today I actually started off with the background. I used four colours of Distress Inks along with some thin washi tape and masked off the stripes on my background piece. I then blended two stripes per colour. Once it was blended I carefully removed the washi tape and then used some water on a brush to flick water on top of the ink to give it that water splotch look that I love so much!
Now I was inspired with my colour choices to colour in my images. So I used various Copic Markers to colour in my images in similar colours - or at least the best I could find. I then die cut them out using the coordinating dies.
Now I had to figure out my sentiment. So I die cut the word 'sweet' from the new Sweet Word Die out of some more watercolour paper, the same as the background and used some orangey Distress Ink to colour it and then used the same water flicking technique to match the background also. I also cut the word out of fun foam also so it could be dimensional. Before adhering it to the card I quickly stamped down the rest of my sentiment, I took some black ink and the 'thanks for being so' stamp from the same Sweet Shoppe stamp set and stamped it down in one of the white stripes and then I adhered down my sentiment. I used foam adhesive to adhere my images down in a way I liked.
To finish up my card I adhered my panel onto some fun foam and then onto a grey cardbase. I then took a Wink Of Stella clear glitter pen and added some sparkle onto the images and sentiment and that finished up the card for today.
I hope you enjoyed my card today and got inspired. Make sure you stop by the blog this week to see all the other ladies fabulous cards!
- Eloise
Sunny Studio Supplies Used:
Saturday, July 9, 2016
Guest Designer Spotlight: Sweet Shoppe Cards with Juliana Michaels
Hi everyone! It's Juliana Michaels and I'm so happy to be a guest with you here again on the Sunny Studio Stamps blog. I created four cards to share with you today using the new Sweet Shoppe Stamp Set.
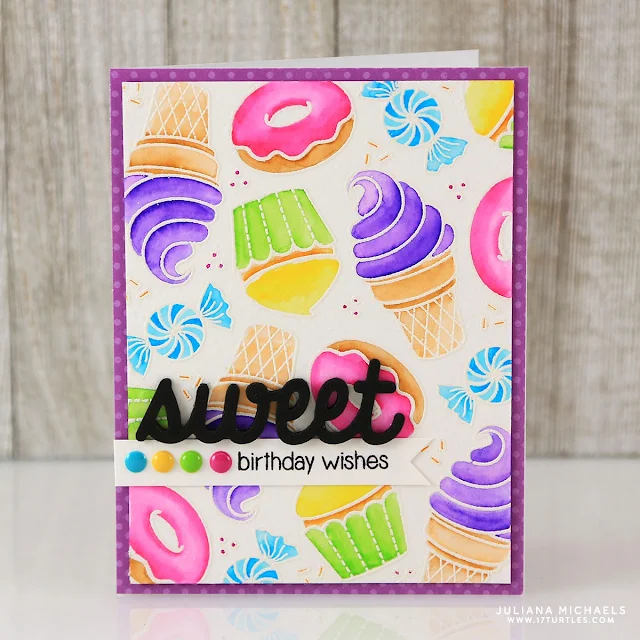
For my first card, Sweet Birthday Wishes, I randomly stamped the images onto watercolor paper using Versamark Ink and embossed them with white embossing powder. I then colored them with Zig Clean Color Real Brush Markers. To create the sentiment, I used the Sweet Word Die and cut it from a piece of black fun foam. I then stamped “birthday wishes “ onto a piece of white cardstock and cut it into a banner shape.
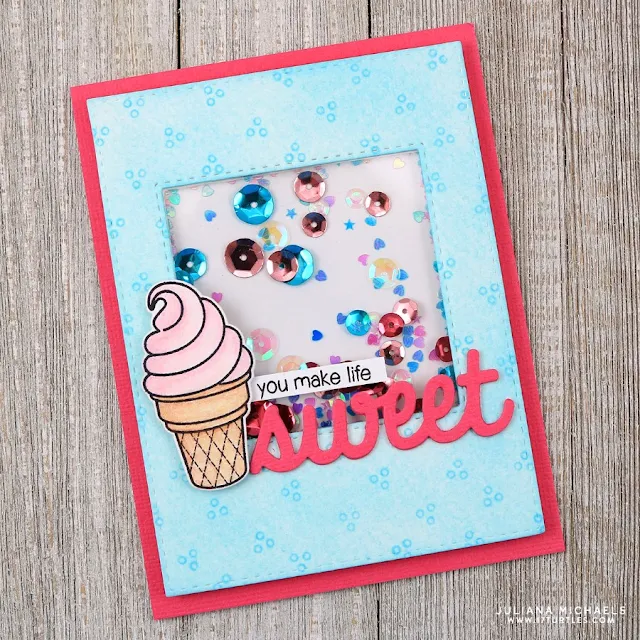
The sweetness continued on my second card, You Make Life Sweet. For this card, I created a shaker card that I embellished with the super cute ice cream cone stamp. I stamped the image onto white cardstock, colored it with colored pencils and then cut it out using the Sweet Shoppe coordinating dies. The sentiment was created using one of the many great sentiments in this stamp set and the Sweet Word Die.
To create my Thanks For Being So Sweet card, I used a pencil and ruler to draw diagonal lines on watercolor paper. I then used these guidelines to stamp the adorable donuts using a Distress Ink Pad in Pumice Stone. To color in the images, I used Zig Clean Color Real Brush Markers. To create the sentiment, I used the Sweet Word Die and cut it from a piece black cardstock. I then stamped “thanks for being so” on black cardstock and heat embossed it with white embossing powder.
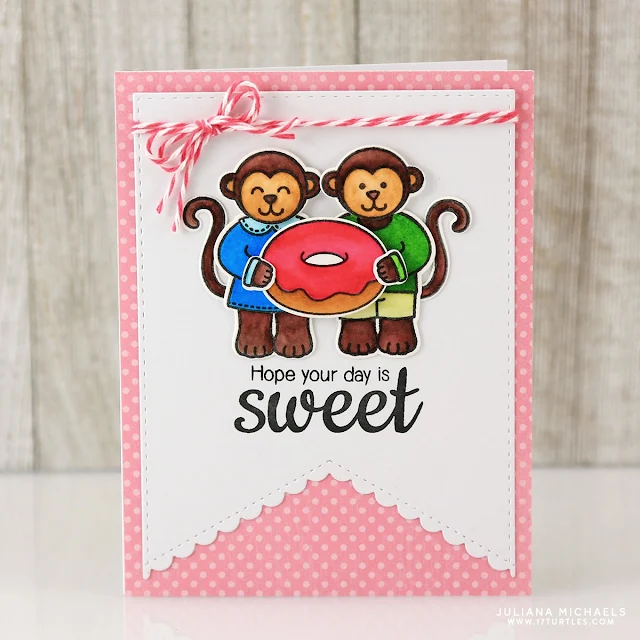
On my final card, Hope Your Day Is Sweet, I combined the Sweet Shoppe set with the Comfy Creatures stamp set. I thought it would be fun to have a couple critters holding a donut! After stamping and coloring each of the images, I used the coordinating dies to cut out each of the elements . I then layered them to give them a little dimension. I cut the banner using the new Fishtail Banner II Dies and then tied on a piece of bakers twine before adhering it to the card front.
Thanks so much for stopping by today and I invite you to check out my blog, 17turtles, for one more card I created using the Sweet Shoppe Stamp Set!
Juliana
Sunny Studio Supplies Used:
Subscribe to:
Comments (Atom)

