Sunday, December 24, 2023

Dashing Dachshund Holiday Tags with Tammy

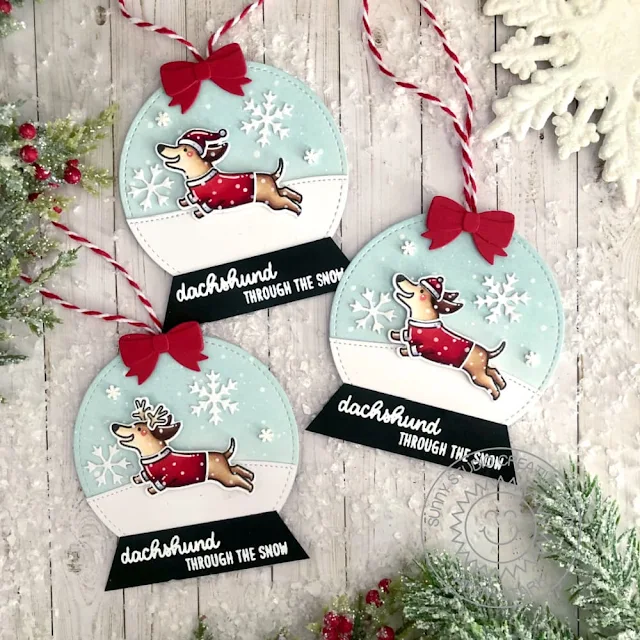
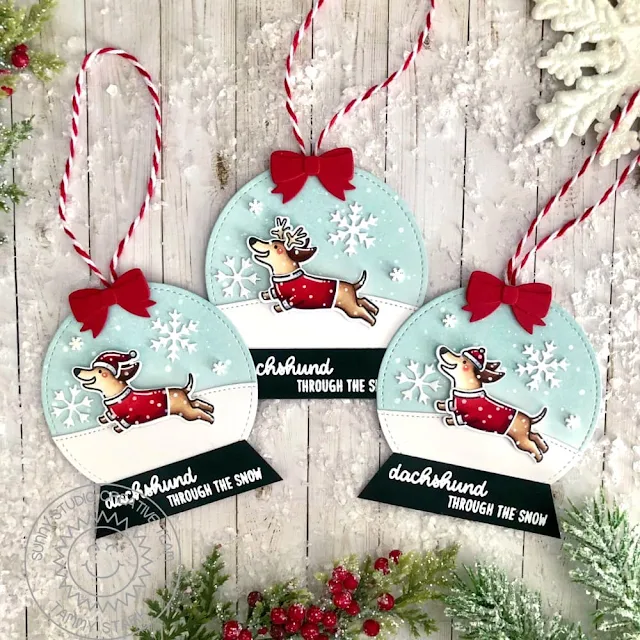
Hello friends, Tammy here! I'm on the blog today sharing my last holiday project of the year! I always enjoy making handmade gift tags for Christmas, and thought the Dashing Dachshund stamp set would make the cutest snow globe tags!

Sunny Studio Stamps: Dashing Dachshund Holiday Tags by Tammy Stark (featuring Stitched Circle Dies, Slimline Dies)

To begin, I stamped the images from Dashing Dachshund , colored with Copic markers, and die cut with the Dashing Dachshund Dies. 

Next, I cut 3 circles from Bristol smooth cardstock using the Stitched Circle Large Dies. I inked the circles with Speckled Egg Distress Oxide ink, then spattered them with white acrylic paint that was thinned with water, and set aside to dry. 

Sunny Studio Stamps: Dashing Dachshund Holiday Tags by Tammy Stark (featuring Stitched Circle Dies, Slimline Dies)

Next, I cut 3 snowy hills, using first the Stitched Circle Large Die, then running it through my die cut machine again with the Slimline Nature Borders DiesI attached the snowy borders to each tag, then attached the dachshunds with foam tape. I cut a strip of black cardstock to fit along the bottom of the tags to create a snow globe base, then white heat embossed the sentiment from the Dashing Dachshund stamp set.

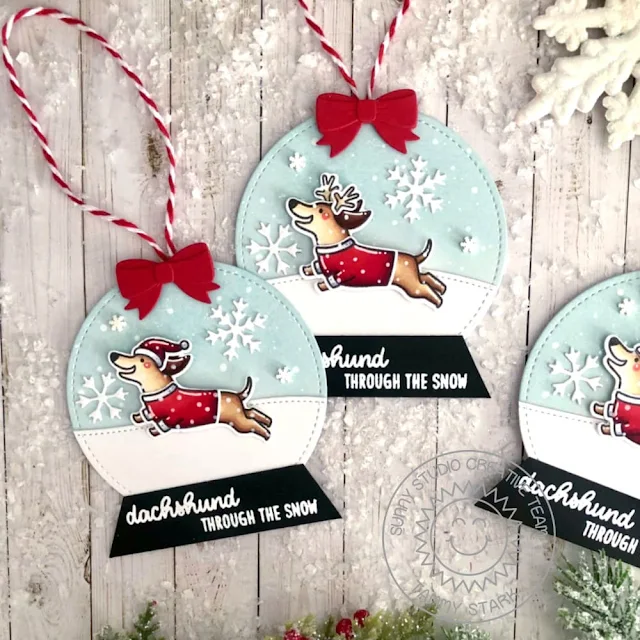
Sunny Studio Stamps: Dashing Dachshund Holiday Tags by Tammy Stark (featuring Stitched Circle Dies, Slimline Dies)

I added some white snowflakes, die cut using the Basic Mini Shapes Dies 2Additionally, I added some white clay snowflakes. Lastly, I added a red bow, die cut from the Santa's Stocking Dies, to the top of each tag for a finishing touch. I tucked some red bakers twine underneath the bows to complete my tags.

Thanks so much for stopping by! Wishing everyone a wonderful holiday and Happy New Year! See you in 2024!

Sunny Studio Supplies Used:

Santa's Stocking Dies
Shop at:
Sunny Studio
Basic Mini Shape Dies 2
Shop at:
Sunny Studio
Slimline Nature Borders
Shop at:
Sunny Studio
Stitched Circle Large Dies
Shop at:
Sunny Studio
Dashing Dachshund Stamps
Shop at:
Sunny Studio
Dashing Dachshund Dies
Shop at:
Sunny Studio

Saturday, December 23, 2023

Sunny Saturday Share: More Holiday Themed Customer Cards


Hey everyone, how are you all doing this weekend? I'm so excited to be popping in today with a Sunny Saturday Share. There have been so many amazing cards popping up on Instagram that have made my jaw drop so I couldn't wait to share them with all of you! 


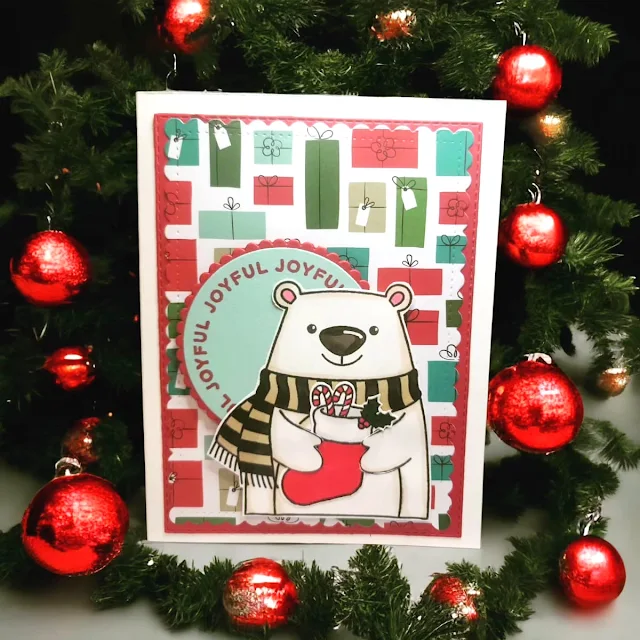
Sunny Studio Stamps: Dashing Duchshund Holiday Themed Customer Card by Danielle Dunlop (featuring Santa Claus Lane, Cozy Christmas)


Sunny Studio Stamps: Santa Claus Lane & Cozy Christmas Holiday Themed Customer Card by Danielle Dunlop


Sunny Studio Stamps: Gingerbread House Holiday Themed Customer Card by Amanda Wilcox

Woolen Mitten gift card holder by Amanda Wilcox

Sunny Studio Stamps: Woolen Mitten Holiday Themed Customer Card by Amanda Wilcox


Sunny Studio Stamps: Holiday Hugs & Woolen Mitten Holiday Themed Customer Card by Marliessa


Sunny Studio Stamps: Holiday Hugs Holiday Themed Customer Card by Tisha Hayter


Sunny Studio Stamps: Pretty Poinsettia Holiday Themed Customer Card by Lee McMinn-Murphy


Sunny Studio Stamps: Sweater Vest Holiday Themed Customer Card by Cindy Major

Thank you for sharing all these fabulous ideas with us! I hope you will continue to share your gorgeous projects with us--It always makes my day to see them. You can tag us on instagram with the hashtag #sunnystudiostamps or share your projects with us in our flickr group or on our facebook page. ☺


Sunny Studio Supplies Used:

Gingerbread House Dies
Shop at:
Sunny Studio
Alpaca Holiday Stamps
Shop at:
Sunny Studio
Alpaca Holiday Dies
Alpaca Holiday Dies
Shop at:
Sunny Studio
Build-A-Tag #1 Dies
Build-A-Tag #1 Dies
Shop at:
Sunny Studio
Sweater Vest Dies
Sweater Vest Dies
Shop at:
Sunny Studio
Santa Claus Lane Stamps
Shop at:
Sunny Studio
Santa Claus Lane Dies
Shop at:
Sunny Studio
Scenic Route Stamps
Scenic Route Stamps
Shop at:
Sunny Studio
Scenic Route Dies
Scenic Route Dies
Shop at:
Sunny Studio
Slimline Nature Borders
Shop at:
Sunny Studio
Country Scenes Stamps
Shop at:
Sunny Studio
Country Scenes Dies
Country Scenes Dies
Shop at:
Sunny Studio
Cozy Christmas Stamps
Shop at:
Sunny Studio
Cozy Christmas Dies
Cozy Christmas Dies
Shop at:
Sunny Studio
Snowman Kisses Stamps
Shop at:
Sunny Studio
Snowman Kisses Dies
Snowman Kisses Dies
Shop at:
Sunny Studio
Woolen Mitten Dies
Woolen Mitten Dies
Shop at:
Sunny Studio
Dashing Dachshund Stamps
Shop at:
Sunny Studio
Dashing Dachshund Dies
Shop at:
Sunny Studio
Holiday Hugs Stamps
Holiday Hugs Stamps
Shop at:
Sunny Studio
Holiday Hugs Dies
Holiday Hugs Dies
Shop at:
Sunny Studio
Pretty Poinsettia Stamps
Shop at:
Sunny Studio
Pretty Poinsettia Dies
Shop at:
Sunny Studio

Friday, December 22, 2023

Truckloads of Love Card with Tina

Hello crafters, it’s Tina and today I am featuring the sweet Truckloads of Love stamp and die set again. But this time we go holiday themed. I love that this set is so versatile, it can be used all year round. And how cute are the critters!!

Sunny Studio Stamps: Truckloads Of Love Winter Themed Holiday Card by Tina Henkens (featuring Holiday Greetings, Ribbon & Lace Border Dies)

For this festive card I selected one of the ornament dies from my stash and cut it from white Neenah paper. You can create this shape yourself with any circle die you have and a rectangle for the topper. The scalloped edge can be achieved with several dies like the Ribbon & Lace Border DiesI inked the inside of the ornament with pink Distress Oxide inks Kitsch Flamingo and Worn Lipstick, leaving the bottom part white. Of course, I had to add splatters too!

Since this is a winter Holiday card, I wanted to replicate a snowy, frosty look around the borders of the ornament. First, I glued the pink panel into place and added an acetate layer on top. Next, I added the white circle border with topper. I searched through my stash to find a white pigment ink, which I then applied all around the borders of the circle with a small blending brush. This also gave me an indication of how wide I wanted my frosty border to be. Next, I used a glue bottle with a fine tip and glue that dries clear. Then it was time for the fun part: adding all the sparkly glitter (I use a dedicated box for this, if not my desk is a real mess!!).

Sunny Studio Stamps: Truckloads Of Love Winter Themed Holiday Card by Tina Henkens (featuring Holiday Greetings, Ribbon & Lace Border Dies)

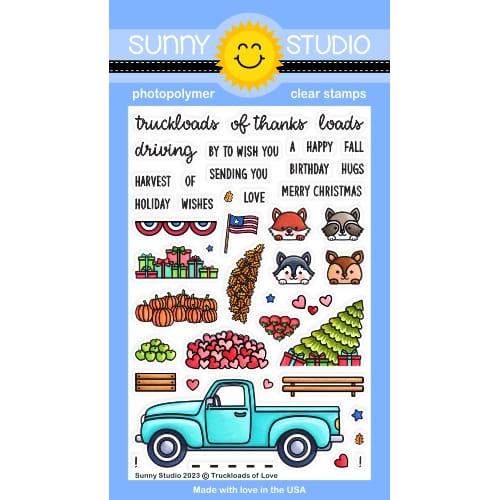
While the glue was drying, I selected my images from the Truckloads of Love stamp set. I chose the truck, the Christmas tree, and the cute raccoon. All the coloring was done with Copic Markers, and I added some snowflakes with a white gel pen.

The large Merry Christmas sentiment was stamped with red ink from my stash and cut with the matching dies (Holiday Greetings stamp and die set). I mounted the images and sentiment onto the ornament shape with foam tape. The topper was cut from white glitter paper, and I added a little pink bow to make the card extra festive!

Thank you for joining me and I am wishing you a wonderful holiday season!

Sunny Studio Supplies Used:

Holiday Greetings Stamps
Shop at:
Sunny Studio
Holiday Greetings Dies
Shop at:
Sunny Studio
Ribbon & Lace Dies
Ribbon & Lace Dies
Shop at:
Sunny Studio
Truckloads of Love Stamps
Shop at:
Sunny Studio
Truckloads of Love Dies
Shop at:
Sunny Studio

Thursday, December 21, 2023

Woolen Mitten Die Focused Tag with Marine

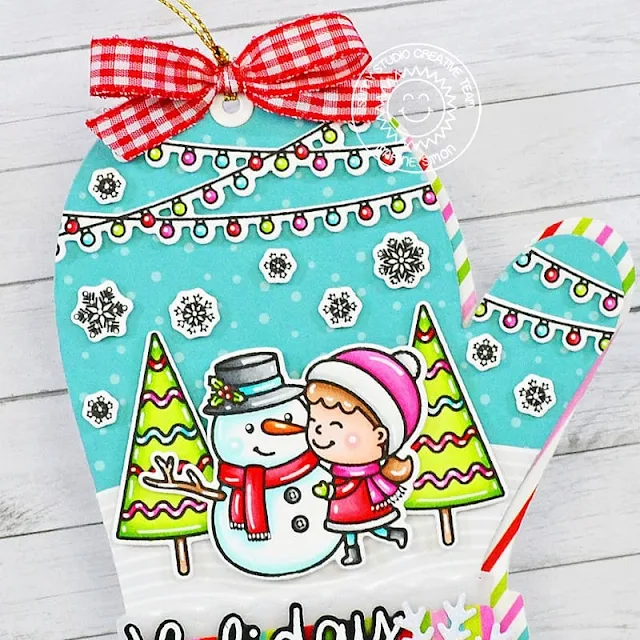
Hello crafty friends, Marine here, I'm back to share my last Christmas card of the year with you, which is actually a big tag. Holiday projects are my favorite, so it's always kind of a bittersweet moment for me, but I'm very excited about 2024 and the new crafty adventures it will bring to us!

Sunny Studio Stamps: Woolen Mitten Die Focused Holiday Tag by Marine Simon (featuring Scenic Route, Snow One Like You, Feeling Frosty)

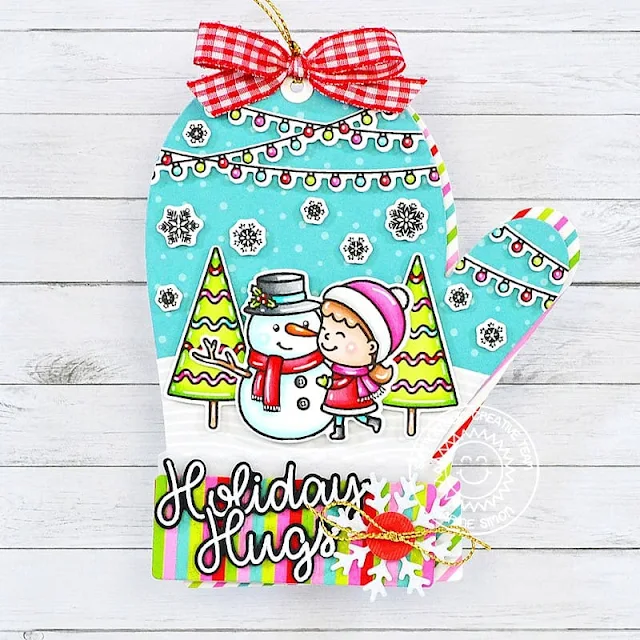
For today's little scene, I used the Woolen Mitten as a base to create a wintery landscape. I cut a first mitten out of a snowy sky paper from All Is Bright, a second one out of a grey wavy paper from Subtle Grey Tones, and a third one out of a striped paper from All Is Bright. I trimmed the grey mitten into a wavy border that I stuck at the bottom of the snowy sky mitten, and then attached the striped mitten behind the snowy sky mitten using 1mm foam squares.

Sunny Studio Stamps: Woolen Mitten Die Focused Holiday Tag by Marine Simon (featuring Scenic Route, Snow One Like You, Feeling Frosty)

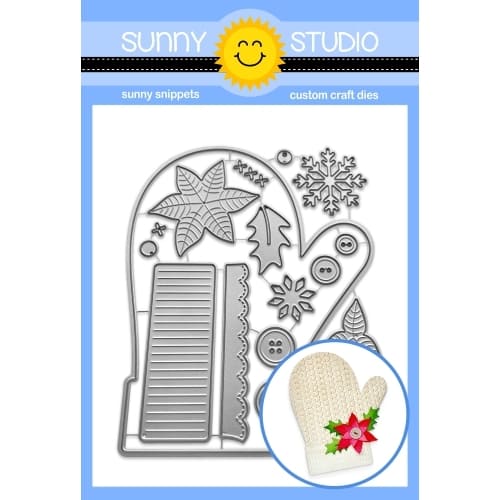
Next I decorated the bottom of the mitten using more Woolen Mitten items such as the fold-down piece that I cut out of another striped paper from All Is Bright, the ruffle piece out of vellum, a button out of a red paper from All Is Bright again, and a snowflake out of white glitter cardstock. I also white heat embossed my "Holiday Hugs" greeting from Holiday Hugs on black cardstock, and cut it using the coordinating dies. I added gold thread and tied a bow on the button, and then attached all those pieces on the bottom part of the mitten using 1mm foam squares.

I stamped a few images on 80lb Neenah solar white cardstock using an alcohol marker friendly black ink, cut them using the matching dies, and colored everything using my Ohuhu markers, Spectrum Noir Illustrator markers and Graph'it brush markers. Here is the detailed list of the stamp sets I used:

• Snow One Like You - snowman & girl

• Feeling Frosty - trees

• Snowman Kisses - snowflakes

• Scenic Route - lights

Sunny Studio Stamps: Woolen Mitten Die Focused Holiday Tag by Marine Simon (featuring Scenic Route, Snow One Like You, Feeling Frosty)

Once the coloring was done, I attached the images on the mitten using 1mm and 2mm foam squares. Next I worked on the top of the tag to finish it nicely and started off by punching a hole using my crop-a-dile. I cut two white eyelets using a die from Sliding Window, attached the first one on the front of the mitten, and the second one at the back. I added golden thread, tied a bow using ribbon from my stash, and attached it using liquid glue. And finally I added highlights and details to the images using a white gel pen.

And that's it for my last Christmas project of 2023! I hope you like it! Thanks so much for stopping by, and see you next time.

Sunny Studio Supplies Used:

Sliding Window Dies
Sliding Window Dies
Shop at:
Sunny Studio
Subtle Grey Tones Paper
Shop at:
Sunny Studio
Feeling Frosty Stamps
Shop at:
Sunny Studio
Feeling Frosty Dies
Feeling Frosty Dies
Shop at:
Sunny Studio
Scenic Route Stamps
Scenic Route Stamps
Shop at:
Sunny Studio
Scenic Route Dies
Scenic Route Dies
Shop at:
Sunny Studio
All Is Bright Paper
All Is Bright Paper
Shop at:
Sunny Studio
Snowman Kisses Stamps
Shop at:
Sunny Studio
Snowman Kisses Dies
Snowman Kisses Dies
Shop at:
Sunny Studio
Snow One Like You Stamps
Shop at:
Sunny Studio
Snow One Like You Dies
Shop at:
Sunny Studio
Woolen Mitten Dies
Woolen Mitten Dies
Shop at:
Sunny Studio
Holiday Hugs Stamps
Holiday Hugs Stamps
Shop at:
Sunny Studio
Holiday Hugs Dies
Holiday Hugs Dies
Shop at:
Sunny Studio