Showing posts with label Woolen Mitten Die. Show all posts

Friday, November 3, 2023

Woolen Mitten Die Focused Card with Tina

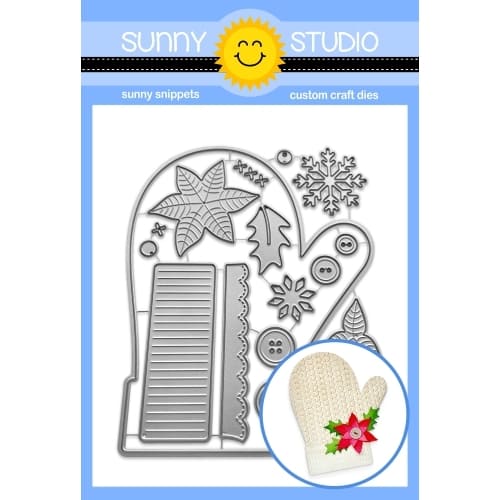
Hello crafty friends, Tina here featuring the gorgeous Woolen Mitten Die set! I am a huge fan of shaped cards and I love that this mitten is big enough to add lots of details to it. Such as the festive wreath I am creating today.

Sunny Studio Stamps: Woolen Mitten Holiday Card by Tina Henkens (featuring Winter Wreaths, Winter Greenery, Ribbon & Lace Border Dies)

I am kicking off this project by creating a white mitten card base by folding a sheet of white card stock in two and using the mitten die, making sure the top part stayed intact. Next, I cut another mitten from a beautiful snowflake paper (Joyful Holiday) and added some dimension by inking the edges with a blending brush and Distress Oxide Uncharted Mariner.

I did the same for the cuff of the mitten which I created with a polka dot paper (Joyful Holiday). A small white border (Ribbon & Lace Border dies) was added as extra embellishment. After gluing all the elements of the mitten to my shaped card base, I was ready to work on my wreath.

Sunny Studio Stamps: Woolen Mitten Holiday Card by Tina Henkens (featuring Winter Wreaths, Winter Greenery, Ribbon & Lace Border Dies)

The smallest wreath die from Winter Wreaths was the perfect size for my base. This immediately gives you the perfect circle shape to add the branches from Winter Greenery Dies. I stacked two layers of branches in the same teal blue color as my base. I also cut three extra branches from a shiny white card stock to give some contrast with the blue mitten.

I used the smallest Poinsettia leaf die from the Woolen Mitten set and cut it from red, pink and white card stock. This creates the most adorable little flowers with a small white gem from the Pure White Jewels as a center. I added the flowers to the wreath with some foam tape and glued the whole piece onto the mitten shape. Finally, I stamped a sentiment from Feeling Frosty to a small white strip using Versafine Onyx black ink and added it to the cuff of the mitten.

I am sure you will love this beautiful mitten die as much as I do!

Sunny Studio Supplies Used:

Feeling Frosty Stamps
Shop at:
Sunny Studio
Winter Greenery DIes
Shop at:
Sunny Studio
Winter Wreaths Stamps
Shop at:
Sunny Studio
Winter Wreaths Dies
Winter Wreaths Dies
Shop at:
Sunny Studio
Joyful Holiday Paper
Shop at:
Sunny Studio
Ribbon & Lace Dies
Ribbon & Lace Dies
Shop at:
Sunny Studio
Woolen Mitten Dies
Woolen Mitten Dies
Shop at:
Sunny Studio

Sunday, October 29, 2023

Holiday Hugs Tags with Tammy

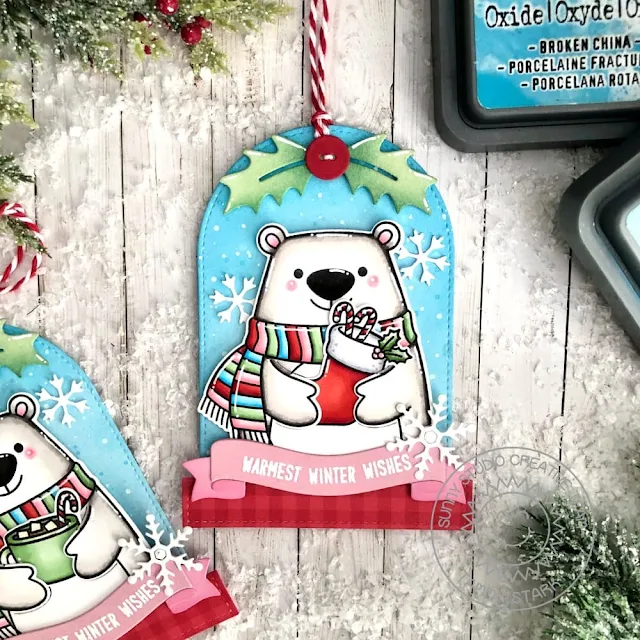
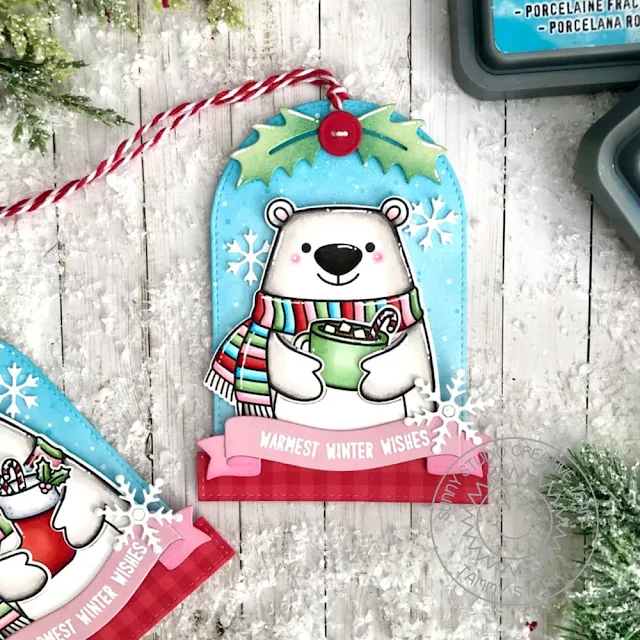
Hello friends! Tammy here with some fun snow globe tags, featuring the adorable set, Holiday Hugs.

Sunny Studio Stamps: Holiday Hugs Christmas Tags by Tammy Stark (featuring Stitched Arch Dies, Lacy Snowflake Dies, Brilliant Banner Dies)

To begin, I stamped the images from Holiday Hugs, colored with Copic markers, and die cut with the Holiday Hugs Dies.  Next, I die cut the tags from Bristol smooth cardstock using the largest die from the Stitched Arch Dies. I ink blended the tags using Broken China and Tumbled Glass Distress Oxide inks. I splattered some white acrylic paint, thinned with water, onto the background to create a snowy look. 

Sunny Studio Stamps: Holiday Hugs Christmas Tags by Tammy Stark (featuring Stitched Arch Dies, Lacy Snowflake Dies, Brilliant Banner Dies)

I used the smallest pennant from the Slimline Pennant Dies to create the snow globe bases. I die cut the red gingham paper from the Joyful Holiday Paper using the smallest pennant die. I ran it through my die cut machine twice, moving the die to use the square end of the die to shorten it and to create the rectangular base.

Sunny Studio Stamps: Holiday Hugs Christmas Tags by Tammy Stark (featuring Stitched Arch Dies, Lacy Snowflake Dies, Brilliant Banner Dies)

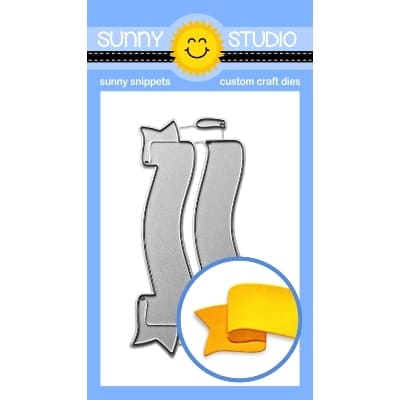
I attached snow globe bases to the bottom of the stitched arches, then the bears to the tags with foam tape for dimension. Using the Brilliant Banner 1 DiesI die the sentiment banners from pink cardstock, then white heat embossed the sentiment and attached them to the tags with foam tape. I added some die cut white snowflakes using the Lacy Snowflake Dies and Basic Mini Shape Dies 2.

Sunny Studio Stamps: Holiday Hugs Christmas Tags by Tammy Stark (featuring Stitched Arch Dies, Lacy Snowflake Dies, Brilliant Banner Dies)

Next, I punched a hole at the top of the tags, then added the holly and berry, die cut from the Woolen Mitten Dies. I added some red and white bakers twine to complete my snow globe tags.

Thanks so much for stopping by! See you next time!

Sunny Studio Supplies Used:
  

Lacy Snowflakes Die
Lacy Snowflakes Die
Shop at:
Sunny Studio
Basic Mini Shape Dies 2
Shop at:
Sunny Studio
Stitched Arch Dies
Stitched Arch Dies
Shop at:
Sunny Studio
Slimline Pennant Dies
Shop at:
Sunny Studio
Joyful Holiday Paper
Shop at:
Sunny Studio
Brilliant Banner 1 Dies
Shop at:
Sunny Studio
Woolen Mitten Dies
Woolen Mitten Dies
Shop at:
Sunny Studio
Holiday Hugs Stamps
Holiday Hugs Stamps
Shop at:
Sunny Studio
Holiday Hugs Dies
Holiday Hugs Dies
Shop at:
Sunny Studio

Sunday, October 15, 2023

Woolen Mitten Die Focused Gift Card Holders with Tammy

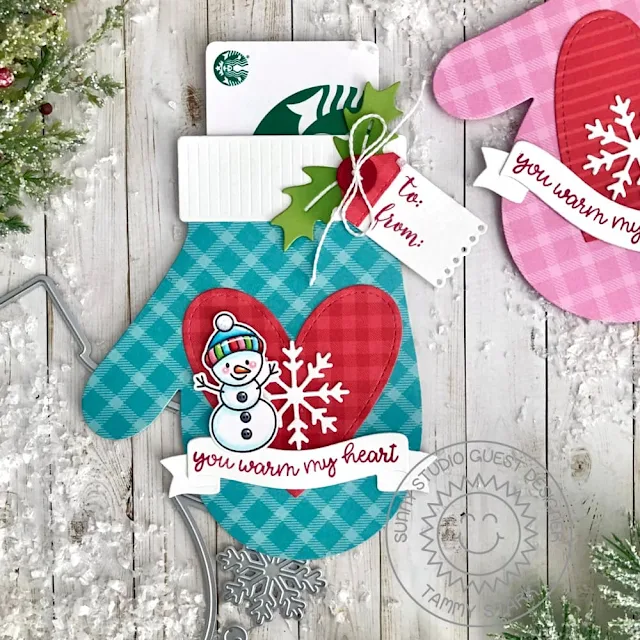
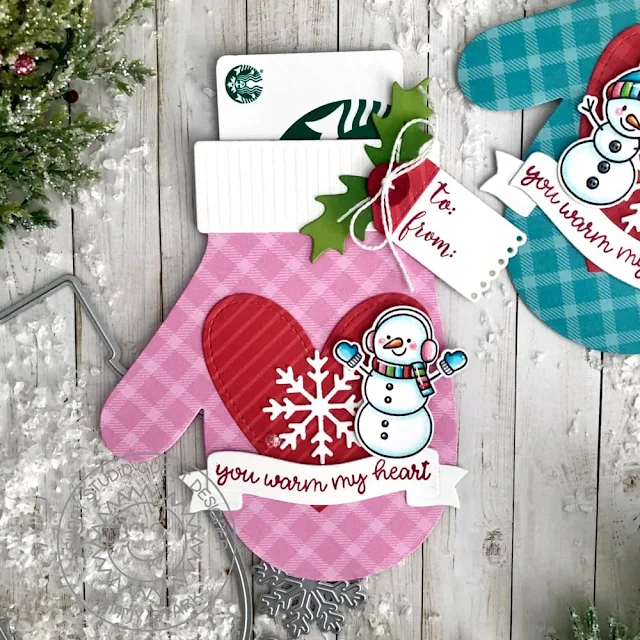
Hello friends! Tammy here with a fun project featuring the adorable Woolen Mitten Dies. Since the holidays are quickly approaching, I made a couple of gift card holders with a homespun feel!

Sunny Studio Stamps: Woolen Mitten Holiday Gift Card Holders by Tammy Stark (featuring Season's Greetings, Feeling Frosty, Brilliant Banners Dies)

To begin, I stamped the cute snowman images from Feeling Frostycolored with Copic markers, and die cut with the Feeling Frosty Dies. Next, I die cut the mittens from the All Is Bright 6X6 Paper Pad using the Woolen Mitten Die. I also cut 2 mittens from heavy white cardstock, attaching them together to create a pocket. I lined the edges of the mitten with thin sticky tape, making sure to leave the opening at the top to insert a gift card.

Sunny Studio Stamps: Woolen Mitten Holiday Gift Card Holders by Tammy Stark (featuring Season's Greetings, Feeling Frosty, Brilliant Banners Dies)

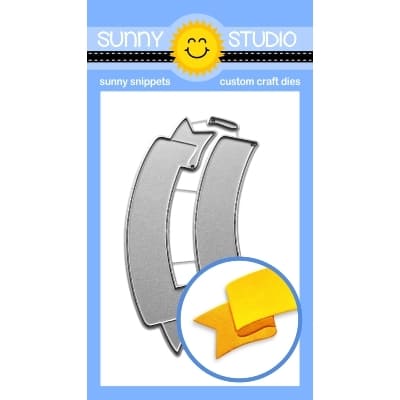
Next, I die cut the hearts from red patterned paper (Joyful Holiday Paper and Very Merry 6X6 Paper) using the Stitched Heart 2 DiesI die cut the cuff and snowflake from white cardstock using the Woolen Mitten Dies, then attached them to the front of each mitten, using foam tape to adhere the snowmen. I cut white banners using the Brilliant Banner 1 Die and stamped the sentiment from Feeling Frosty in red ink and attached them to the mitten, tucking underneath the snowmen.

Sunny Studio Stamps: Woolen Mitten Holiday Gift Card Holders by Tammy Stark (featuring Season's Greetings, Feeling Frosty, Brilliant Banners Dies)

Next, using the Woolen Mitten Dies, I cut the holly leaves from green cardstock and the cute button from red cardstock. I cut mini white tags from the Window Quad Square Diesadding red patterned paper (leftover from hearts) on the top of the tags. I stamped the 'to' and 'from' in red ink from the Season's Greeting Stampthen threaded the buttons with white string, adding the tags and tying them up. I attached the holly leaves to the cuff of the mitten, then adhered the tags, using foam tape for dimension to complete my mitten gift card holders!

Thanks so much for stopping by! See you soon!

Sunny Studio Supplies Used:

Very Merry 6x6 Paper
Shop at:
Sunny Studio
Season's Greetings Stamps
Shop at:
Sunny Studio
Feeling Frosty Stamps
Shop at:
Sunny Studio
Feeling Frosty Dies
Feeling Frosty Dies
Shop at:
Sunny Studio
Window Quad Square Die
Shop at:
Sunny Studio
All Is Bright Paper
All Is Bright Paper
Shop at:
Sunny Studio
Stitched Heart 2 Dies
Shop at:
Sunny Studio
Joyful Holiday Paper
Shop at:
Sunny Studio
Brilliant Banner 2 Dies
Shop at:
Sunny Studio
Woolen Mitten Dies
Woolen Mitten Dies
Shop at:
Sunny Studio

Saturday, October 7, 2023

Guest Designer Spotlight: Holiday Cards with Dana Kirby

Hello crafty friends! It's Dana Kirby here today and I am so excited to be a guest on the Sunny Studio blog. I created a Christmas card and gift card holder to share with you all. So let's get started.

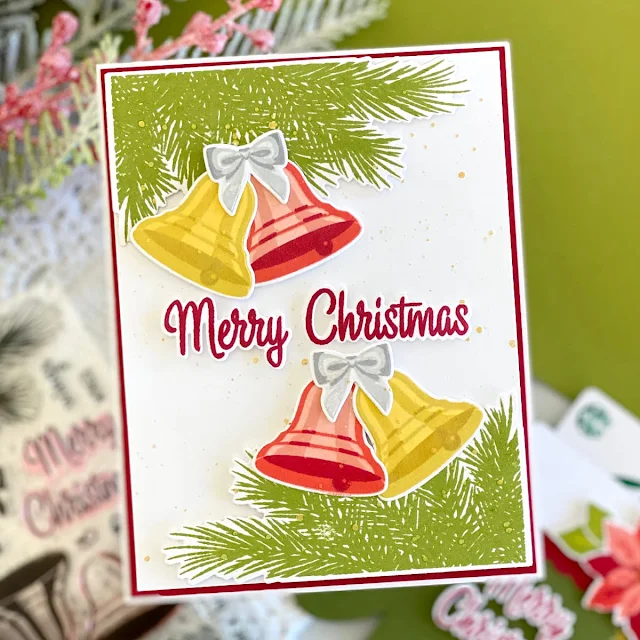
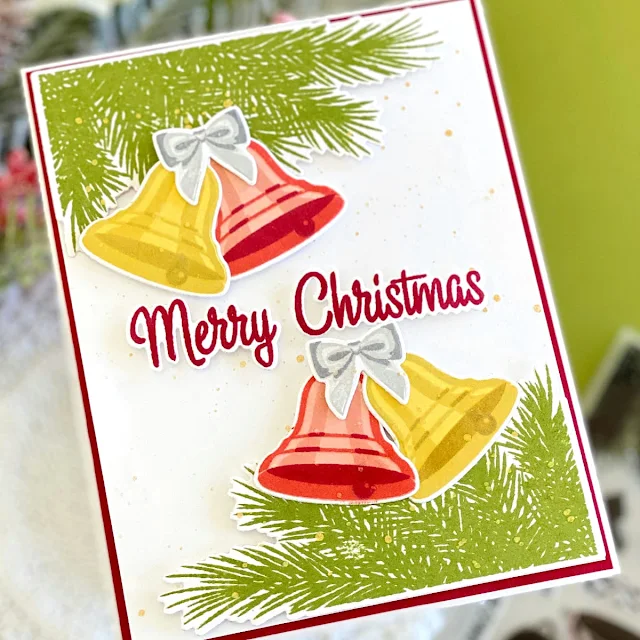
Sunny Studio Stamps: Bells & Baubles Holiday Card by Dana Kirby

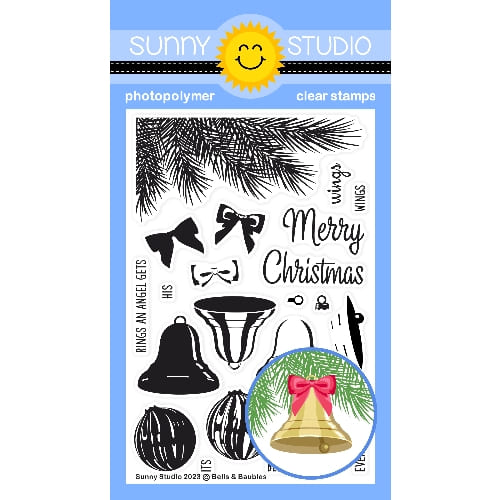
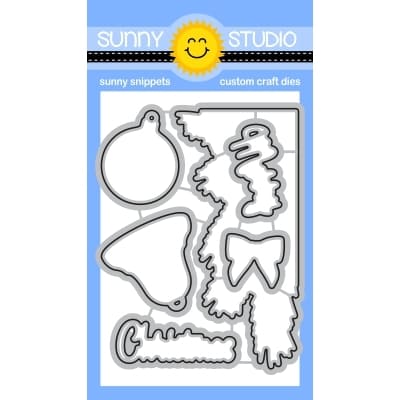
For my card, I used the Bells & Baubles stamp and coordinating dies. I started my card by die cutting my images first. I then used my Misti and did all of my stamping. I love the detail on these layered images, so pretty!

Sunny Studio Stamps: Bells & Baubles Holiday Card by Dana Kirby

Next, I attached my stamped images to my card panel with foam adhesive to give my card some dimension. I then added a few gold splatters with watercolor paint for a little extra detail.

Sunny Studio Stamps: Bells & Baubles Holiday Card by Dana Kirby

Lastly, I again used the Bells & Baubles stamp and coordinating dies for my sentiment. I just love the "classic" Christmas images included in this set!

Sunny Studio Stamps: Woolen Mittens Gift Card Holder by Dana Kirby (featuring Petite Poinsettias)

For my gift card holder, I used the Woolen Mittens die set. This is a fun set of dies that create the most adorable mitten!! I die cut the mitten two times and then applied a strong adhesive around the edges to create a pocket. A gift card slides in and out of the opening perfectly. 

Sunny Studio Stamps: Woolen Mittens Gift Card Holder by Dana Kirby (featuring Petite Poinsettias)

Now the fun part, decorating your mitten! The Woolen Mittens die set includes all sorts of fun details to decorate your mitten. So many possibilities! I decided to use the cuff and the scalloped edge to decorate the top of my mitten. I then used the Pretty Poinsettia stamp and coordinating dies to create my floral accent. 

Sunny Studio Stamps: Woolen Mittens Gift Card Holder by Dana Kirby (featuring Petite Poinsettias)

Lastly, I used the Bells & Baubles set for my sentiment. I love that you can use the mitten for a gift card holder, but I also think it will make the most adorable gift tags!

Thanks for joining me today! I hope you enjoyed my card and gift card holder and that I inspired you to create one of your own.

Sunny Studio Supplies Used:

Petite Poinsettias Stamps
Shop at:
Sunny Studio
Petite Poinsettias Dies
Shop at:
Sunny Studio
Woolen Mitten Dies
Woolen Mitten Dies
Shop at:
Sunny Studio
Bells & Baubles Stamps
Shop at:
Sunny Studio
Bells & Baubles Dies
Shop at:
Sunny Studio

Wednesday, October 4, 2023

Woolen Mitten Die Card with Gladys

Hello crafty friends! Gladys here and I'm back to share two fun projects using the awesome Woolen Mitten dies!! Let's get started shall we.

Sunny Studio Stamps: Woolen Mitten Winter Themed Holiday Card and Tag by Gladys Marcelino (featuring Cable Knit Embossing Folder, Mini Mat & Tag Dies)

First, I created a shape card using the mitten cut from blue cardstock. To add more interest, I used the Cable Knit embossing folder. Then ink blended white pigment ink on the raised pattern. For more depth I inked the edges with chipped sapphire and splattered white paint using a small paint brush. To complete the assembly, I glued the cuff and stitch on the mitten. Finally, I stamped the sentiment from Holiday Hugs stamp set and used the coordinating dies to cut them out.

Sunny Studio Stamps: Woolen Mitten Winter Themed Holiday Card and Tag by Gladys Marcelino (featuring Cable Knit Embossing Folder, Mini Mat & Tag Dies)

For my next project I made a tag using the poinsettia dies from the Woolen Mitten set. I used the Mini Mat & Tag 3 cut from the same blue cardstock and added lots of details like the mitten card. I cut the poinsettia petals from white cardstock and ink blended using spun sugar and picked raspberry distress oxide inks. For details I splattered white paint and glued a silver pearl and vellum leaves to add some elegance. 

That is all for me, I had a blast creating these projects! Thank you for stopping and I hope you found some inspiration. Have a wonderful day!

Sunny Studio Supplies Used:

Cable Knit Embossing
Shop at:
Sunny Studio
Mini Mat & Tag 3 Dies
Shop at:
Sunny Studio
Woolen Mitten Dies
Woolen Mitten Dies
Shop at:
Sunny Studio
Holiday Hugs Stamps
Holiday Hugs Stamps
Shop at:
Sunny Studio
Holiday Hugs Dies
Holiday Hugs Dies
Shop at:
Sunny Studio