Showing posts with label Classy Christmas. Show all posts

Friday, December 9, 2022

Mini Mat & Tag Die Focused Projects with Vanessa and Tina

Hello to you! Vanessa here with a set of Christmas tags using the Mini Mat & Tag dies.

Sunny Studio Stamps: Mini Mat & Tag Die Focused Projects by Vanessa Menhorn (featuring Rustic Winter Dies, Winter Greenery Dies, Classy Christmas)

These dies are such fun to play with! I die-cut tags, rectangles, stars, shapes etc from white, black, vellum and gold cardstock and combined these to create various tags. 

Sunny Studio Stamps: Mini Mat & Tag Die Focused Projects by Vanessa Menhorn (featuring Rustic Winter Dies, Winter Greenery Dies, Classy Christmas)

For an interactive feature, I die-cut a window from two rectangles, adhered vellum to both sides and filled the inside with small stars and sequins.

Sunny Studio Stamps: Mini Mat & Tag Die Focused Projects by Vanessa Menhorn (featuring Rustic Winter Dies, Winter Greenery Dies, Classy Christmas)

Onto some of the tiny tags I stamped "noel" and added a little star to replace the diereses.

These sets were used:
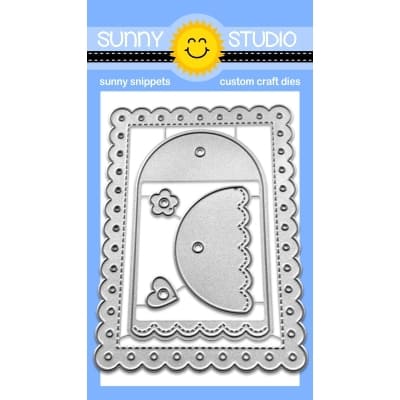
Mini Mat + Tag 1
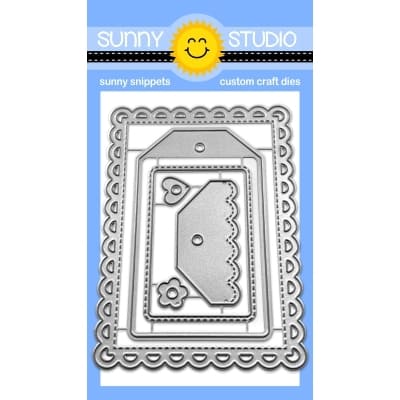
Mini Mat + Tag 3
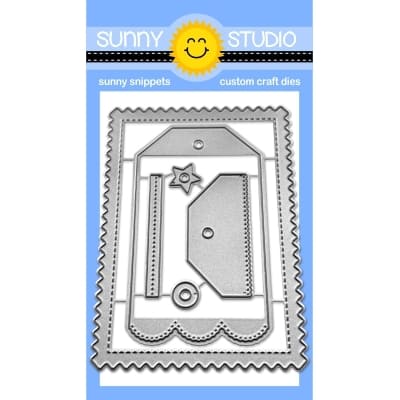
Mini Mat + Tag 4
Rustic Winter Dies
Stitched Rectangle Dies
Window Quad Square Dies
Winter Greenery Dies
Classy Christmas Stamps

Sunny Studio Stamps: Mini Mat & Tag Die Focused Projects by Vanessa Menhorn (featuring Rustic Winter Dies, Winter Greenery Dies, Classy Christmas)

I enjoyed creating these immensely! Have a lovely weekend and thanks for stopping by!

------------------------------------------------

Hello crafty friends, it’s Tina with two mini cards for you today. I love making this smaller size card because it always looks so cute! Especially for the holiday season, it’s fun to create something different than the standard A2 size.

Sunny Studio Stamps: Mini Mat & Tag Die Focused Projects by Tina (featuring Autumn Tree Dies, Reindeer Games, Santa Claus Lane)

There are 4 beautiful mini mats with tags in the new release, today I am featuring the rectangle dies from Mini Mat & Tag 2 and Mini Mat & Tag 3. I used a smaller rectangle from the Infinity set to create a frame from both mats. Next, I also created two rectangle panels from Neenah card stock and ink blended the sky portion with a soft green combination of Distress Oxide Cracked Pistachio and Lucky Clover. Since these are Christmas cards, of course I had to do some splattering with water and white paint droplets to give the illusion of snowflakes. To finish the background panel, I cut two snowbanks from a shiny white card stock I had in my stash.

Sunny Studio Stamps: Mini Mat & Tag Die Focused Projects by Tina (featuring Autumn Tree Dies, Reindeer Games, Santa Claus Lane)

I stamped all my images using Reindeer Games (the cute reindeer), Santa Claus Lane (stockings) and the Penguin Party set (stars). All the coloring was done with Copic markers, adding snow details with a white gel pen.

The Autumn Tree die was perfect as branches to hang the stockings. Since these are mini cards, I only needed to cut one tree and divided it in half for each of the cards. I wanted the branches to look frosted, so I only added some warm grey tones in a few spots. The sentiment from Reindeer Games was stamped onto two skinny strips of white card stock.

Sunny Studio Stamps: Mini Mat & Tag Die Focused Projects by Tina (featuring Autumn Tree Dies, Reindeer Games, Santa Claus Lane)

I created two white mini card bases and glued a dark teal panel to both. Next, I worked on my background panel, gluing the branches in place, adding the snowbanks and finally the reindeer, stockings, and stars. Then, I mounted the Mini Mat frames to the backgrounds with foam tape for dimension. After adhering the sentiments, I could glue the mini mat frames to the card bases.

These mini cards turned out so cute, and they were a lot of fun to make! Thank you for joining me and happy crafting!

Sunny Studio Supplies Used:

Stitched Rectangle Dies
Shop at:
Sunny Studio
Rustic Winter Dies
Rustic Winter Dies
Shop at:
Sunny Studio
Santa Claus Lane Stamps
Shop at:
Sunny Studio
Santa Claus Lane Dies
Shop at:
Sunny Studio
Window Quad Square Die
Shop at:
Sunny Studio
Classy Christmas Stamps
Shop at:
Sunny Studio
Winter Greenery DIes
Shop at:
Sunny Studio
Penguin Party Stamps
Shop at:
Sunny Studio
Penguin Party Dies
Penguin Party Dies
Shop at:
Sunny Studio
Reindeer Games Stamps
Shop at:
Sunny Studio
Reindeer Games Dies
Reindeer Games Dies
Shop at:
Sunny Studio
Autumn Tree Die
Autumn Tree Die
Shop at:
Sunny Studio
Mini Mat & Tag 1 Dies
Shop at:
Sunny Studio
Mini Mat & Tag 2 Dies
Shop at:
Sunny Studio
Mini Mat & Tag 3 Dies
Shop at:
Sunny Studio
Mini Mat & Tag 4 Dies
Shop at:
Sunny Studio

Wednesday, November 30, 2022

Holiday Greetings Cards with Marie and Alma

Hello Crafty Friends, Marie here. It is officially the Holiday Season! I am sure by now, most of us are busy preparing for the Holidays and that includes Holiday Cardmaking! Today I am sharing a card design that I think is perfect If you don't have much time to create but still want something super festive, simple, and classy. Today's card features our Holiday Greetings stamps which creates beautiful bold Holiday sentiments in a gorgeous cursive font! I absolutely adore them! I also used the Classy Christmas stamps which features the classic super festive poinsettias that paired perfectly with the Holiday Greetings stamps. 

Sunny Studio Stamps: Holiday Greetings Christmas Card by Marie Marco (featuring Classy Christmas)

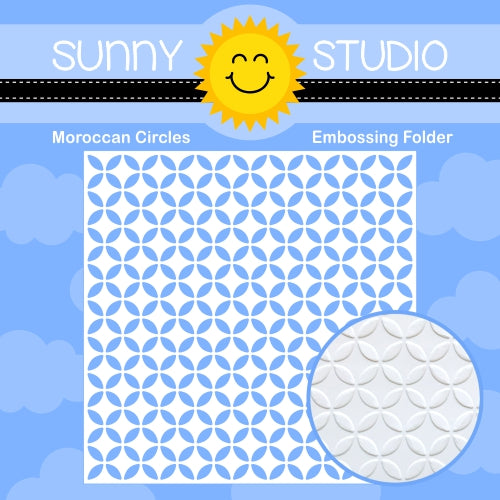
To get started with my card, I die-cut an A2 size panel using 110 lb Neenah Solar White heavyweight cardstock.  I then cut an A2 sized panel from the All Is Bright 6x6 pattern paper pack. I used the candy cane striped pattern paper and adhered that to my heavyweight cardstock. I then die-cut another slightly smaller rectangle from 110lb cardstock and used the Moroccan Circles 6x6 embossing folder to create a very simple but elegant texture to my card background. After embossing, I inked the outer edges with Distress Ink in the Colors Vintage Photo, and Walnut Stain. I created a gold accent frame for my sentiment by die-cutting a very thin frame from 2 oval dies. 

I stamped my Seasons Greetings Sentiment using the Holiday Greeting stamps and cut out my sentiment using the Holiday Greetings coordinating dies which is such an amazing feature of this entire set! I really love how you can cut out the sentiments because it makes placing them so easy!!! I stamped my poinsettia images from the Classy Christmas stamps using Distress Ink in the color Antique Linen onto watercolor paper. I used Derwent Inktense water soluble pencils to color my images. Then I cut out my colored images using the Classy Christmas coordinating dies.  

Sunny Studio Stamps: Holiday Greetings Christmas Card by Marie Marco (featuring Classy Christmas)

After coloring, I put together my card by adhering my Moroccan embossed panel to the A2 paper panel using double sided tape adhesive. I then centered my Sentiment and glued it down using Bearly art Precision Craft Glue. I placed my gold oval frame around my sentiment and framed that using the two poinsettia images and leaves. Finally, I adhered my poinsettias using foam strips to create dimension and placed the leaves just underneath them. 

That concludes my simple Holiday card inspiration for this week! Thank you so much for joining me today on another card adventure! I hope you have an amazing week! Until next time, happy crafting and cardmaking!!!

--------------------------------------

Hello, my dears! It's Alma and I'm really getting into the Christmas spirit! I love to wrap presents beautifully and today I want to show you an XL gift tag that I made with the Santa's Stocking Dies.

Sunny Studio Stamps: Holiday Greetings Christmas Card by Alma Störk (featuring Santa's Stocking Dies, Deck The Halls, Winter Greenery, Window Quad Dies, Showflake Circle Frame Dies)

First I punched out the individual sock elements in red and white three times. This gives the tag more stability when you glue it together later. I embossed the red sock part with the Lots of Dots Embossing Folder. This gives the socks a happy and fun pattern. Then I glued the individual sock elements together, also using 3D adhesive pads to make the tag look more lively.

To decorate my stocking, I decided to use the 
Deck the Hall Stamps images and stamped three of them, coloured and cut them out with the Deck the Halls DiesNow we come to the most important thing! The stuffing of the stocking! I punched the candy canes from the Santa's Stocking Dies and the Winter Greenery Dies and coloured them with Copics.

Sunny Studio Stamps: Holiday Greetings Christmas Card by Alma Störk (featuring Santa's Stocking Dies, Deck The Halls, Winter Greenery, Window Quad Dies, Showflake Circle Frame Dies)

Also snowflakes from the Snowflake Circle Frame Die should not be missing. To make a present, I used a die-cut window from the Window Quad Square Dies in kraft paper, painted white dots on it and tied it with red paper ribbon. A mini tag from the same set perfects the Christmas sock! Now I glued everything together and add stars and hearts from the Basic Mini Shape Dies 3.

Finally - and as a special highlight - I stamped the Merry Christmas from the Holiday Greeting Stamps in red and punched it out with the Holiday Greeting Dies. At the end I attached the text to the waistband of my socks, put an eyelet so that the tag can be tied with a bow - and the gift-giving can begin!

Sunny Studio Supplies Used:

Deck The Halls Stamps
Shop at:
Sunny Studio
Deck The Halls Dies
Deck The Halls Dies
Shop at:
Sunny Studio
Santa's Stocking Dies
Shop at:
Sunny Studio
Lots of Dots Embossing
Shop at:
Sunny Studio
Moroccan Circles Embossing
Shop at:
Sunny Studio
Snowflake Circle Frame
Shop at:
Sunny Studio
Window Quad Square Die
Shop at:
Sunny Studio
Classy Christmas Stamps
Shop at:
Sunny Studio
Classy Christmas Dies
Shop at:
Sunny Studio
Mini Basic Shape Dies 3
Shop at:
Sunny Studio
Winter Greenery DIes
Shop at:
Sunny Studio
All Is Bright Paper
All Is Bright Paper
Shop at:
Sunny Studio
Holiday Greetings Stamps
Shop at:
Sunny Studio
Holiday Greetings Dies
Shop at:
Sunny Studio

Tuesday, November 15, 2022

Snowman Kisses & Snow One Like You Cards with Kavya and Isha

Hi folks! Kavya on the blog here with another fun card inspired by a movie that you might have watched once or twice (if you have kids!) - Frozen! This adorable Snowman Kisses stamp set reminded me of Olaf and I just had to figure out a way to create a Frozen themed card!

Sunny Studio Stamps: Snowman Kisses Winter Card by Kavya (featuring Enchanted, Country Scenes)

I started off by stamping and coloring a bunch of images from Snowman KissesEnchanted Stamps and Country Scenes Stamps. I then ink blended a soy using blue and purple dye inks. 

Sunny Studio Stamps: Snowman Kisses Winter Card by Kavya (featuring Enchanted, Country Scenes)

Adhered the images and added a heat embossed sentiment to finish off my card!

Hope you like this card :) Happy crafting!

----------------------------------------

Hello everyone! Isha here with a card featuring the Snow One Like You stamps and dies. This is one of the cutest stamps in my collection :)

Sunny Studio Stamps: Snow One Like You Winter Card by Isha Gupta (featuring Classy Christmas, Holiday Greetings, Circle Snowflake Frame Dies)

I decided to frame this by stamping the pine leaves from the Classy Christmas stamp set all around the mat layer. Sponge slightly all around. Flick white paint to it. Stamp the image, colour using copic markers and die-cut using coordinating dies.

Sunny Studio Stamps: Snow One Like You Winter Card by Isha Gupta (featuring Classy Christmas, Holiday Greetings, Circle Snowflake Frame Dies)

Stamp the sentiment from the Holiday Greetings stamp set and die-cut using the coordinating diesDie-cut the frame from the Snowflake Circle Frame die. Adhere to the layer. Adhere the sentiment and the images using 3D foam.

Thank you for dropping by and have a nice day!

Sunny Studio Supplies Used:

Snowflake Circle Frame
Shop at:
Sunny Studio
Enchanted Stamps
Enchanted Stamps
Shop at:
Sunny Studio
Enchanted Dies
Enchanted Dies
Shop at:
Sunny Studio
Classy Christmas Stamps
Shop at:
Sunny Studio
Classy Christmas Dies
Shop at:
Sunny Studio
Country Scenes Stamps
Shop at:
Sunny Studio
Country Scenes Dies
Country Scenes Dies
Shop at:
Sunny Studio
Holiday Greetings Stamps
Shop at:
Sunny Studio
Holiday Greetings Dies
Shop at:
Sunny Studio
Snow One Like You Stamps
Shop at:
Sunny Studio
Snow One Like You Dies
Shop at:
Sunny Studio

Monday, November 14, 2022

Joyful Holiday Paper Focused Cards with Cathy and Bobbi

Hey friends! Cathy here today with a card featuring some of my favorite papers from the Joyful Holiday Paper. I just love the beautiful bold poinsettia prints in this paper pack and the colors are so fun and fresh for the Holidays!

Sunny Studio Stamps: Joyful Holiday Paper Focused Christmas Card by Cathy Chapdelaine (featuring Icing Border Dies, Frilly Frame Dies, Rustic Winter Dies, Reindeer Games, Classy Christmas)

To start, I cut the pink poinsettia paper 3” x 5 1/2", centered a Stitched Semi-Circle Die along the bottom 5 1/2" edge and die-cut the paper. I adhered this piece to the top of an A2 card base. I die-cut the gray snowflake paper using the same die. Before I adhered it to the card front, I die-cut a tree from the Rustic Winter Dies from white and dark gray cardstock and adhered the tree to the left side trimming the excess along the top edge of the semi-circle.

Next, I cut the pink polka dot paper 1” x 5 1/2" and adhered it to the bottom of the card front. To create the double scalloped edges, I cut a piece of white glitter cardstock and dark brown cardstock 1 “ x 5 1/2" and die-cut the bottom edge of each piece using the Icing Border Dies. I overlapped the pieces and adhered them across the bottom of the semi-circle. For extra interest, I cut a piece of gray cardstock 5/8” x 5 1/2" and die-cut along the center of the strip using an Frilly Frame Eyelet Lace Die. I adhered this across the top edge of the glitter cardstock. I love that little bit of extra detail.

Sunny Studio Stamps: Joyful Holiday Paper Focused Christmas Card by Cathy Chapdelaine (featuring Icing Border Dies, Frilly Frame Dies, Rustic Winter Dies, Reindeer Games, Classy Christmas)

I stamped the cute reindeer from the Reindeer Games Stamps on Neenah Classic Crest 80lb solar white cardstock, colored it with Copics and die-cut it using the coordinating dies. The large poinsettia from the Classy Christmas Stamps goes beautifully with the poinsettia paper and I decided to fussy cut the image and pop it up with foam tape to really make it stand out.

To finish, I die-cut the gray/white plaid paper using the tag die from the Stitched Semi-Circle Dies, heat embossed the sentiment and added a Pure White Jewel over the hole in the tag.

I hope you enjoyed and thanks for stopping by today! For more inspiration, please visit my blog www.inkredibleadventures.com and you can also find me on Instagram as @cathy.chapdelaine.

---------------------------------------------------

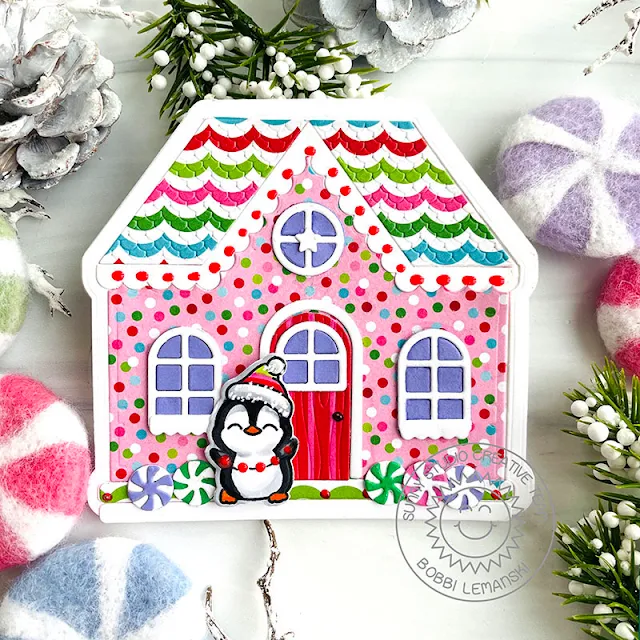
Hello crafty friends. It’s Bobbi here and I’m sharing a few peppermints and shiny candies on this cute gingerbread house covered in fun holiday papersI’m using the Gingerbread House dies with the new Joyful Holiday pattern paper pack and the cute penguins from the Penguin Party stamp set and dies. Inside, I also used one of the sentiments from the Holiday Greetings stamps and dies.

Sunny Studio Stamps: Joyful Holiday Paper Focused Christmas Card by Bobbi Lemanski (featuring Gingerbread House Dies, Penguin Party, Holiday Greetings)

To make this gingerbread house, I cut the elements from the vibrant and coordinating paper from the Joyful Holiday Paper pack and Neenah 80lb. Classic Crest Solar White cardstock for the white elements. I also used a blue-violet color cardstock for the window insets and green and pink for the peppermints, too.  To make the white card base, I scored an 8-1/2″ X 5-1/2″ piece of white cardstock and placed the largest house die on top of the folded cardstock, ensuring the top cutting line (i.e., the rooftop line) was above the folded edge. This keeps the fold line intact and creates a scored card base.

Sunny Studio Stamps: Joyful Holiday Paper Focused Christmas Card by Bobbi Lemanski (featuring Gingerbread House Dies, Penguin Party, Holiday Greetings)

In addition to adding the many cute accent elements from the gingerbread die set, I also applied Pearl Pen (similar to Nuvo Drops) to add red, glossy candies around the roof line and on the bottom. Next, I stamped and colored a cute penguin using the Penguin Party stamp set and dies. I colored the penguin using Copic Sketch markers in 100, C7, C5, C3, C1, YR68, YR09, RV09, RV55 and YG03. I added a garland of red candies between the penguin’s hands, too. I used a white gel pen to add extra “fluff” to the penguin’s Santa hat.

Sunny Studio Stamps: Joyful Holiday Paper Focused Christmas Card by Bobbi Lemanski (featuring Gingerbread House Dies, Penguin Party, Holiday Greetings)

Inside the card, I added an outline of the pink confetti paper (cut out using the two different sizes of house outlines in the die set)two more penguins and a script phrase using the Holiday Greetings stamps and dies. I used blue ink for the script. Using my Copic markers, I added tiny confetti dots of color around the sentiment and penguins to match the pink pattern paper. I kept them tiny so that they would not bleed through the white paper. I used the following Copic Sketch markers to color the penguins: 100, C7, C5, C3, C1, YR68, YR09, RV09, RV55, RV02, R29, and YG03.


Thanks for stopping by today. If you want to see more ideas and inspiration from me, subscribe to my blog, BobbiHartDesign.com. I’ll send you updates on new posts! You can also find me on Instagram as @BobbiHartDesign and on Facebook as BobbiHartDesign.


Sunny Studio Supplies Used:

Gingerbread House Dies
Shop at:
Sunny Studio
Icing Border DIes
Icing Border DIes
Shop at:
Sunny Studio
Rustic Winter Dies
Rustic Winter Dies
Shop at:
Sunny Studio
Frilly Frames-Eyelet Lace
Shop at:
Sunny Studio
Stitched Semi-Circle Dies
Shop at:
Sunny Studio
Classy Christmas Stamps
Shop at:
Sunny Studio
Holiday Greetings Stamps
Shop at:
Sunny Studio
Holiday Greetings Dies
Shop at:
Sunny Studio
Penguin Party Stamps
Shop at:
Sunny Studio
Penguin Party Dies
Penguin Party Dies
Shop at:
Sunny Studio
Reindeer Games Stamps
Shop at:
Sunny Studio
Reindeer Games Dies
Reindeer Games Dies
Shop at:
Sunny Studio
Joyful Holiday Paper
Shop at:
Sunny Studio