Saturday, June 11, 2016

Guest Designer Spotlight: Summer Cards with Juliana Michaels


Hi everyone! It's Juliana and I'm so happy to be sharing with you today as a guest on the Sunny Studio Stamps blog. 

For my Have A Sunshiny Day card, I used the Tropical Paradise, Island Getaway and Sunny Sentiments stamps. I love how all of these stamps from different sets coordinate so well together. I stamped each image using archival ink onto watercolor paper, colored them with Zig Clean Color Real Brush pens and then fussy cut each image. To create the background I made a mask with the waves stamps. I then applied Distress Ink with a sponger applicator in various shades of blue for the sky and brown for the sand. The final touch to background was a bit of water splatter and then a splatter of ink to give it some added interest.


Sunny Studio Stamps: Flamingo Summer card by Juliana Michaels (using Tropical Paradise, Island Getaway & Sunny Sentiments)

The tropical theme continued with my next card - Cheers To You. For this card, I used the Tropical Paradise stamp set. I created masks of each image using a Post-it note and then created a festive little scene with the flowers and drinks. I stamped the images onto watercolor paper with archival ink and then colored it in using Zig Clean Color Real Brush pens.


Sunny Studio Stamps: Tropical Paradise Summer card by Juliana Michaels.

To create my One In A Melon card, I used the new Fresh and Fruity stamp set. I stamped the watermelons and the sentiment with black pigment ink onto watercolor paper, sprinkled them with clear embossing powder and then heat set the powder. I love how it gave the watermelons and the sentiment a bit of wet and juicy look! To color in the images, I used Zig Clean Color Real Brush pens.


Sunny Studio Stamps: Fresh & Fruity Watermelon card by Juliana Michaels.

For the Thanks A Bunch card, I used the Fresh and Fruity set along with the pineapple from the Tropical Paradise set. I created masks for each of the images and then created a fruity scene by stamping them onto watercolor paper using a Distress Ink Pad in Pumice Stone. I then colored in each image using Zig Clean Color Real Brush pen.


Sunny Studio Stamps: Tropical Paradise and Fresh & Fruity Thank You card by Juliana Michaels.

Thanks so much for stopping by today and I invite you to check out my blog, 17turtles, for one more card I created using the Fresh and Fruity Stamp Set and a fun watercolor bleaching technique.

HUGS!
Juliana

   http://www.sunnystudiostamps.com/shop/clear-stamps/sunny-sentiments/#cc-m-product-12983187629

Friday, June 10, 2016

Fresh and Fruity Birthday Card with Lexa

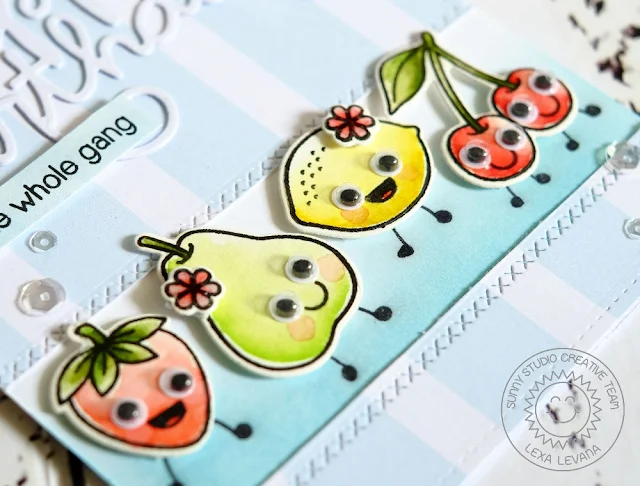
Hi everyone! Lexa here with the whole fruity gang to share a birthday card starring the Fresh and Fruity stamp set and coordinating dies. Don't you think that they are the cutest gang everrr??

Sunny Studio Stamps: Fresh & Fruity Googly Eyes Fruit Birthday Card by Lexa Levana.

I started with a panel of 4.25"x 5.5" white cardstock and a blue striped patterned paper in the same size. I had the thought of giving these fruits legs (since they already have the smiley faces, why not?) and they were dancing together. So drew some legs for them, and I think it makes them even cuter. I lightly blended Tumbled Glass Distress Ink in the bottom part of my card.

I stamped all the images with Versafine Onyx Black and watercolored them with Distress Markers, my favorite!  The pink flowers on the lemon and the pear are from Comfy Creatures, I love to add extra details every time. The sentiment also comes from the same set. And you know that I love sequins, right? This various size clear sequins from Pretty Pink Posh are so pretty. Here's a closer look at the gang...

Sunny Studio Stamps: Fresh & Fruity Googly Eyes Fruit Birthday Card by Lexa Levana.

I can't get enough of googly eyes in my life. LOL in fact I really love to shake and see them moving, so much fun! I hope you like today's card as much as I do. Have a wonderful weekend. xx


Thursday, June 9, 2016

Fresh & Fruity Thanks A Bunch Card with Vanessa

Hi everyone! Vanessa here with a bright card using Fresh & Fruity (and the coordinating dies). I wanted the card to be happy and sunny and chose my favorite color combo for this.

Sunny Studio Stamps: Fresh & Fruity Thanks A Bunch Pear, Lemon & Orange Card by Vanessa Menhorn.

Yellow and aqua work so well together, don't you think? I started with a panel of white cardstock that I had trimmed a bit smaller than my card base and inked the bottom part with yellow dye ink, the top part with the aqua dye ink. Then I applied tiny drops of aqua with a paint brush. I stamped the sentiment and adhered the panel to a card that I had covered with a yellow striped patterned paper. Now I stamped, colored and die-cut the fruits and adhered them (using foam tape for the lemon and the pear). Finally, I added clear and yellow sequins.

Sunny Studio Stamps: Fresh & Fruity Thanks A Bunch Pear, Lemon & Orange Card by Vanessa Menhorn.

This set is so fun to play with, it always makes me want to go and eat fresh fruits! I hope you liked today's card! Thanks for visiting :)

Vanessa

Wednesday, June 8, 2016

Fresh & Fruity Fruit Starburst Thank You Card with Lindsey

Hi there! Lindsey here today with a card featuring Fresh and Fruity. This stamp set has lots of fun fruits and cute sentiments to accompany them. Today I decided to use lots of the fruits to make a sort of "star burst," using fruit. LOL. Let's get started!

Sunny Studio Stamps: Fresh & Fruity Thank You Card by Lindsey Sams

To begin, I arranged the fruit in a sort of circular pattern on a white stitched square. Once I had all my fruit stamped out, I colored the images with Copic markers. I decided to make the little cherry in the set into a blueberry. I simply covered the part of the stamp I didn't want to show before I stamped it. I backed my stamped panel onto an orange piece of cardstock, and then used foam tape to pop the panel up on a larger plaid  stitched square. I stamped my sentiment from Fresh and Fruity onto a gingham strip of paper which I flagged at the end. I attached the sentiment to the stamped panel using some foam squares. To add a little sparkle, I placed a few iridescent sequins onto the stamped panel and added Wink of Stella to all the fruit. 

Sunny Studio Stamps: Fresh & Fruity Thank You Card by Lindsey Sams

That's it for me today! I hope I've inspired you to create something fun with this cute set! Remember to check back to the blog for more inspiration. I can't wait to see what you create!

Tuesday, June 7, 2016

Fresh & Fruity: Hi Sweetie Lemon Card by Anni

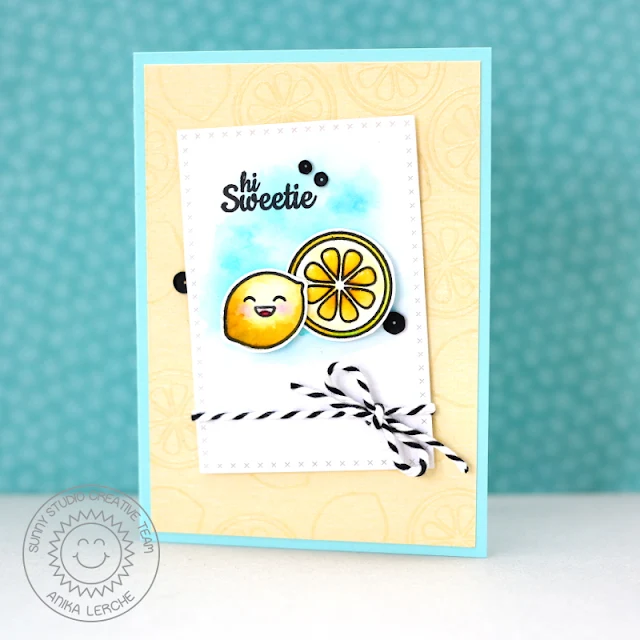
Hey stampers, Anni here!  Today's card is featuring the very healthy stamp set Fresh & Fruity (and coordinating dies)

Sunny Studio Stamps: Fresh & Fruity Hi Sweetie Lemon Card by Anni Lerche.


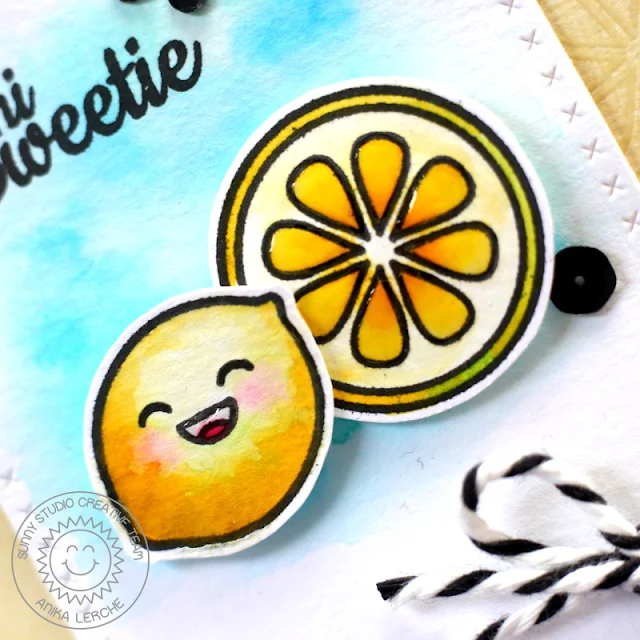
I love watercolors for backgrounds but I always struggle to use it for coloring images. But for this card I challenged myself to do just that. And I have to say I am quite happy how it turned out.  I used Peerless watercolors. The colors are bright and I find them easy to use. I also used them to add a little bit of color behind the lemons.

For the background I stamped the lemons randomly and embossed them with clear embossing powder on a light yellow cardstock.

I chose an aqua cardbase and assembled the card. For a little bit of contrast I added black sequins and black and white twine as finishing touches.

Sunny Studio Stamps: Fresh & Fruity Hi Sweetie Lemon Card by Anni Lerche.

Thanks for stopping by and have a sunny week.
Anni

Monday, June 6, 2016

Fresh & Fruity Layered Fruit Card with Eloise

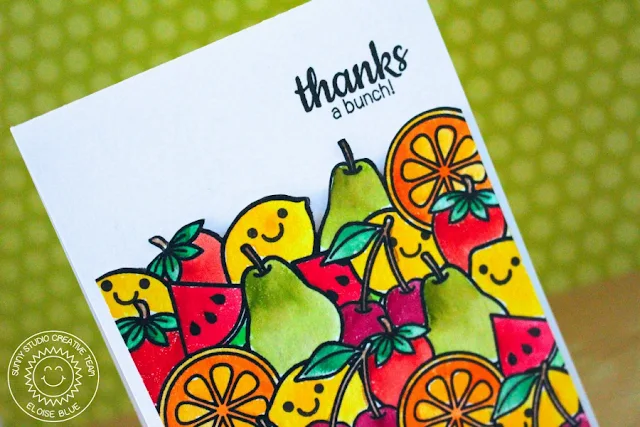
Hello everyone, Eloise here again today and I’m going to be making another fun card featuring the new Fresh and Fruity stamp set. Today I have a fun sort of layered fruit card.

Sunny Studio Stamps: Fresh & Fruity Thanks A Bunch Layered Fruit Card by Eloise Blue.


To begin my card today I started off with creating a ton of masks. I stamped out all the fruit from the Fresh and Fruity stamp set aside from the half watermelon on some full sticky post it notes and then trimmed them all out on the line. I made sure I had two of each, as I figured I would then have enough to mask it all.

Now that I had all my masks ready I began stamping my background. I started off with a piece of watercolour cardstock and started at the bottom of it and started stamping all the way to around the ¾” mark of the piece, using my masks in between so there would be no gaps and they’d all be butted up against each other. I’m also stamping in Versafine Onyx Black ink so I can clear emboss when I’m done. I also decided it would be fun to stamp the little smiley face on top of the lemons. Once I finished all my stamping, I poured over some clear embossing powder and heat set it all.

Sunny Studio Stamps: Fresh & Fruity Thanks A Bunch Layered Fruit Card by Eloise Blue.

To colour in my images today I wanted to use some watercolours, so I used my Peerless watercolours – they’re so much fun and I love watercolouring fruit images. Once the colouring was finished I decided I would fussy cut the top portion of the card, so I could have just all the coloured fruit popped up. So I cut along the lines at the top of the fruits and then outlined them with a black marker.

I grabbed a white card base and then adhered my watercoloured fruits piece on top with some fun foam sheets. I then stamped out the sentiment ‘thanks a bunch!’ also from the Fresh and Fruity set and stamped that with the same black ink onto the top of the card base above the fruits panel. That finished up my card for today.

I hope you enjoyed and make sure you stop by the blog tomorrow and the rest of the week for more inspiration!


Sunny Studio Products Used:

Saturday, June 4, 2016

Guest Designer Spotlight: Summer Picnic Card with Stephanie Klauck


Hello everyone, it's Stephanie here with a card to share using the awesome Summer Picnic stamp set. This is a great stamp set for spring and summer and includes a lot of great images to create endless card designs.

Sunny Studio Stamps: Summer Picnic Card by Stephanie Klauck.

To create my card, I first stamped all of the images that I wanted to use onto a piece of white cardstock with Memento Tuxedo Black ink and then I coloured them in with Copic markers. I coloured the picnic blanket and the napkin to match, using aquas and greys and then I coloured the tree and all of the food items in a traditional colour scheme. Once I had all of the colouring done, I cut out the images using my scissors and set them aside to create my background panel.

Sunny Studio Stamps: Summer Picnic Card by Stephanie Klauck.

To create the background I used Cracked Pistachio, Mowed Lawn and Peacock Feathers ink and blended them all together on the right side of the cardstock panel. Once the inking was done, I spritzed water onto the panel and then covered it with a paper towel to soak up the water leaving water spots in the ink. I love the look of this and think it adds so much texture to a background.

I let the panel dry for a few minutes and then I adhered all of the images to create my picnic scene. I positioned everything to the right side of the card like I had done with the ink and then I trimmed off the parts of the images that went over the side of the panel. I finished the card by stamping the sentiment under the picnic blanket and also stamped a couple of ants in the scene. 

Thanks so much for joining me today!