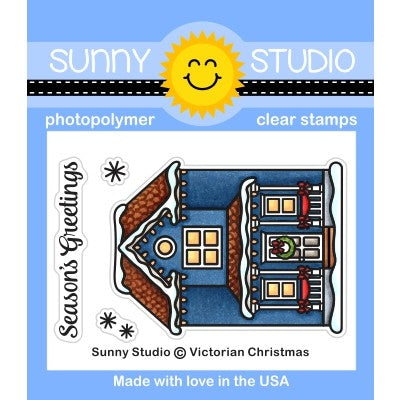
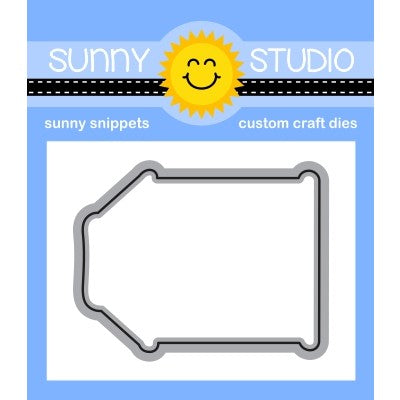
Showing posts with label Victorian Christmas. Show all posts

Monday, December 7, 2020

Victorian Christmas Cards by Ashley and Mayra

Hi friends! It's Ashley with a nighttime Christmas scene featuring the Victorian Christmas mini set. This card has a special surprise too - press the snowflake, and the moon lights up to illuminate Santa and his reindeer!

Sunny Studio Stamps: Victorian Christmas Here Comes Santa Winter Scenes Winter Holiday Card by Ashley Ebben

I started by blending a night sky background with Distress Oxides in Wilted Violet, Blueprint Sketch, Chipped Sapphire, and Black Soot. I splattered the piece with white acrylic paint for stars and zapped it with a heat gun to set. I used the small circle tag die in Sliding Window dies to cut out the moon, then backed it with vellum. I stamped the Santa and reindeer from Here Comes Santa across the sky and moon with Versafine Onyx Black ink and embossed with clear embossing powder to prevent smearing on the vellum.

I stamped the house from Victorian Christmas and one of the background scenes from Winter Scenes on white cardstock in Lawn Fawn Jet Black ink and colored with Copics. I also blended a bit of Pinkfresh Studio Ocean Breeze ink to the snow on the bottom of the scene to save some time. I cut them out with the matching dies and adhered them to the card. I stamped a sentiment from Inside Greetings Holiday in Versafine Onyx Black and embossed with clear. I also stamped a snowflake from Winter Scenes in VersaMark and embossed with white to mark where to press for the lights.

Sunny Studio Stamps: Victorian Christmas Here Comes Santa Winter Scenes Winter Holiday Card by Ashley Ebben

On a white card base, I created my light up mechanism using Chibitronics lights and a Pear Blossom Press Power Pack. I placed the lights just outside the edge of the moon to soften the effect a bit. Once I had my circuit set up correctly and the lights were working, I added a border of thick foam tape around the card base. All that was left was to add my card front on top! Before sending this card, I will put a note inside to tell the recipient to press the snowflake for a surprise! 

Thank you so much for stopping by! Have a wonderful day!

---------------------------------------------------

Happy Monday everyone, Mayra here with you today. I have a CAS Christmas card that I am sharing with you. I used the lovely Victorian Christmas stamp set. 

Sunny Studio Stamps: Victorian Christmas Frilly Frame Die Winter Holiday Card by Mayra Duran-Hernandez

I began by coloring my images using Copic markers. For the dark gray areas, I used W3, W5, and W7. For the red areas, I used R05, R17, and R46. And for the greens, I used YG17. I added a bit of E40, E41, C1, and W3 to the areas that are off white. 

Sunny Studio Stamps: Victorian Christmas Frilly Frame Die Winter Holiday Card by Mayra Duran-Hernandez

I then die cut the panels for my card base. The scalloped rectangle is from the Frilly Frames Eyelet die set. This was such a fun and quick card to put together. I hope you enjoy this inspiration. 

Thank you very much for taking the time to stop by. I pray you each have a wonderful and blessed day. 

Sunny Studio Supplies Used:

Sliding Window Dies
Sliding Window Dies
Shop at:
Sunny Studio
Here Comes Santa Stamps
Shop at:
Sunny Studio
Frilly Frames-Eyelet Lace
Shop at:
Sunny Studio
Inside Greetings-Holidays
Shop at:
Sunny Studio
Victorian Christmas Stamps
Shop at:
Sunny Studio
Victorian Christmas Dies
Shop at:
Sunny Studio
Winter Scenes Stamps
Shop at:
Sunny Studio
Winter Scenes Dies
Winter Scenes Dies
Shop at:
Sunny Studio

Tuesday, November 10, 2020

Classy Christmas Cards with Juliana and Isha

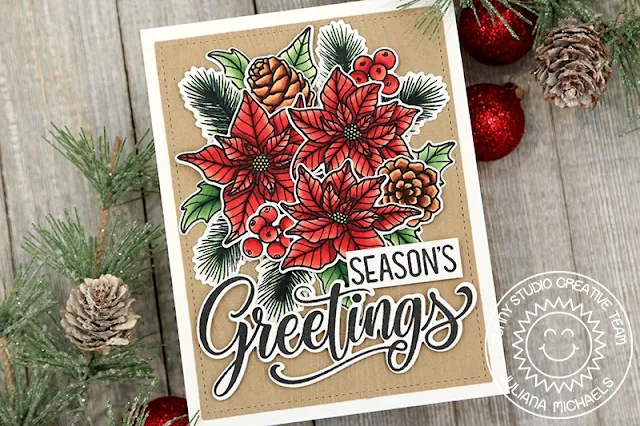
Season's Greetings Sunny Studio friends! It's Juliana and today I'm sharing a Christmas card I created using the beautiful Classy Christmas Stamp Set.

Sunny Studio Stamps: Classy Christmas Season's Greetings Christmas Themed Card by Juliana Michaels

I began by stamping and coloring the images from the Classy Christmas Stamp Set using Copic Markers. I then die cut them using the coordinating die set. Next, I stamped the sentiment using the Season's Greetings Stamp Set and die cut the word greetings using the Season's Greetings Word Die Set.

Sunny Studio Stamps: Classy Christmas Season's Greetings Christmas Themed Card by Juliana Michaels

As I played around with creating the floral cluster I ended up needing to stamp some extra pine boughs and leaves. To create the background, I took a piece of kraft cardstock and die cut it using the stitched die from the Frilly Frames Herringbone Die Set. I then embossed it using the Woodgrain Embossing Folder.

Thanks so much for stopping by today and I hope you enjoyed this bit of inspiration using the Classy Christmas Stamp Set.

-----------------------------------------------

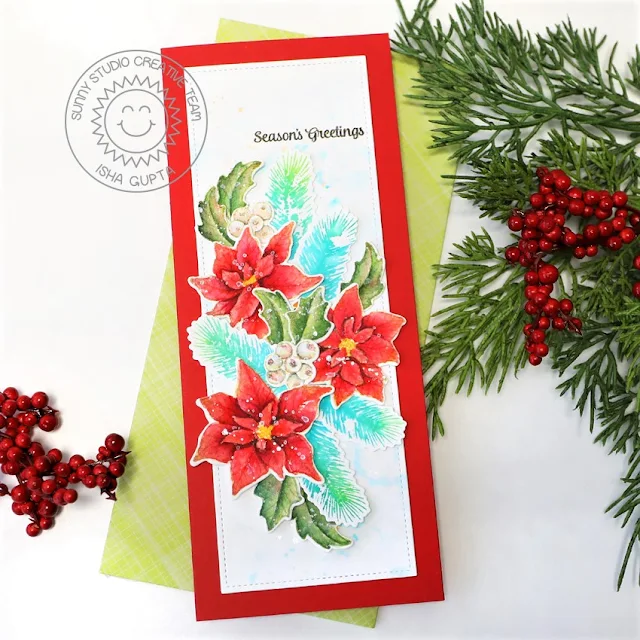
Hello everyone! Isha with you today sharing a no-line watercoloring slimline card featuring the Classy Christmas stamp set. I really love these classic poinsettia images which are perfect for various techniques.

Classy Christmas Slimline Dies Christmas Themed Card by Isha Gupta

I started by stamping the images onto watercolor paper using antique linen distress inks. I then colored them using Schminke watercolors. Die-cut using the coordinating dies. Next, I stamped the pine leaves using various Distress inks. Add a touch of water using a damp brush. Die-cut them.

Now, I die-cut a panel using Slimline Scalloped Frame die from white cardstock. I added a little Peacock Feathers Distress ink to this panel and added a few splatters of gold and silver.

Classy Christmas Slimline Dies Christmas Themed Card by Isha Gupta

Create a floral cluster of your liking and adhere all the images to the panel. Stamp the sentiment from the Victorian Christmas stamp set. Adhere this panel to a red card base.

Thanks for dropping by. Have a nice day!

Sunny Studio Supplies Used:

Woodgrain Embossing
Woodgrain Embossing
Shop at:
Sunny Studio
Season's Greetings Stamps
Shop at:
Sunny Studio
Season's Greetings Dies
Shop at:
Sunny Studio
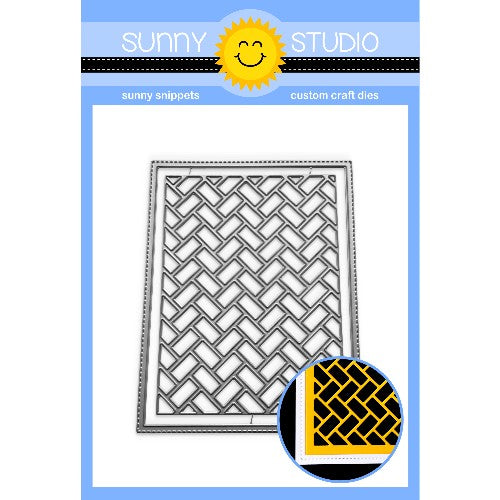
Frilly Frames Herringbone
Shop at:
Sunny Studio
Slimline Scalloped Frame
Shop at:
Sunny Studio
Classy Christmas Stamps
Shop at:
Sunny Studio
Classy Christmas Dies
Shop at:
Sunny Studio
Victorian Christmas Stamps
Shop at:
Sunny Studio

Friday, November 6, 2020

Victorian Christmas Cards with Rachel and Candice

Hello friends! It's Rachel here with a single-layer card featuring the new Victorian Christmas Stamp Set. I combined this set with the Christmas Home Stamp Set to create a fun winter scene.

Sunny Studio Stamps: Victorian Christmas Christmas Home Christmas Card by Rachel Alvarado

To start, I first stamped my images using a masking technique onto a 4.5" X 5.75" piece of Neenah Solar White 110lb Card Stock. I used some Gina K. Designs Magic Masking Sheets to mask my images as I worked so that I could ink blend my background.

For my background, I blended some Tattered Rose, Spun Sugar, Milled Lavender, and Mermaid Lagoon Distress Oxide Inks. I used a #4 round brush to splatter some water on this piece and then quickly blotted it dry with a clean paper towel. I then splattered it again with some diluted opaque white and purple paint for a snowy effect.

Sunny Studio Stamps: Victorian Christmas Christmas Home Christmas Card by Rachel Alvarado

Copic Color Combos Used: Window Trim and Door : BG72, BG75; Reds: R14, R46, R89; Greens: YG01, YG06, YG17; Warm Grays: W00, W0, W2, W4; Roof: W5, W7; Browns: E41, E42, E43; Snow: B0000, B000, B00, B02; Cool Grays: C00, C1

Once finished with that step, I then removed my masking sheets and set my panel aside to dry. Once dry, I trimmed my panel down to 4.25" x 5.5" and then colored my images with Copic Markers.

I hope you enjoyed my card today! Wishing you all a lovely day and happy weekend!

------------------------------------------------------

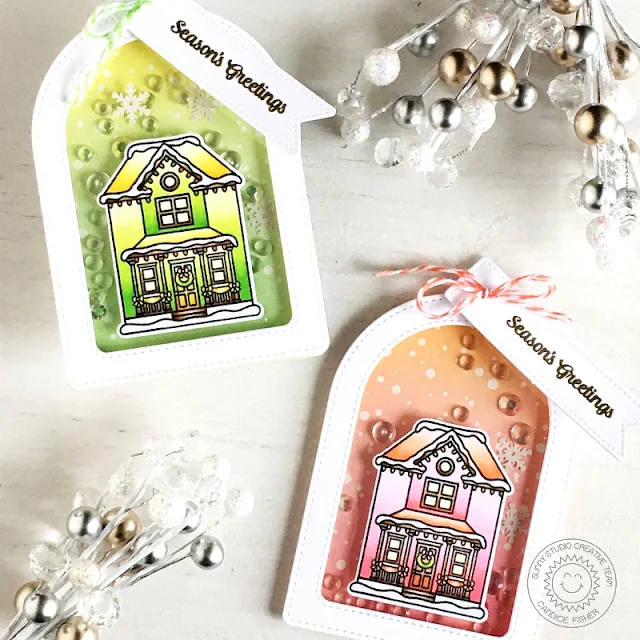
Hello! Candice here with you today! I love this Victorian Christmas house for making beautiful Christmas tags!

Sunny Studio Stamps: Victorian Christmas Frosty Flurries Stitched Arch Dies Christmas Tags Candice Fisher

I used these Sunny Studio products for my shaker tags:

For the tag base, I first die cut the two medium stitched arch dies taped together to create my frames. I then took the larger of the two and die cut the back from Bristol Smooth cardstock.

I heat embossed the snowfall in white and then inked one with Worn Lipstick and Dried Marigold and the other with Cracked Pistachio and Squeezed Lemonade. To create the shaker, I first put the acetate behind the window and then added double layer of foam tape on the back of the frame. I placed my sequins in the center and attached the frame to the background.

Sunny Studio Stamps: Victorian Christmas Frosty Flurries Stitched Arch Dies Christmas Tags Candice Fisher

Next, I stamped the the Victorian houses, colored them with Copic markers and then used the coordinating dies to cut them out and adhered them to the acetate with strong adhesive. To finish the tags, I cut 2 stitched banners, heat embossed the sentiment with gold and used colored twine to tie them to the tag tops!

I hope you are inspired to make fun Holiday tags for your gifts this year! Thank you for visiting today!

Sunny Studio Supplies Used:

Christmas Home Stamps
Shop at:
Sunny Studio
Christmas Home Dies
Christmas Home Dies
Shop at:
Sunny Studio
Frosty Flurries Stamps
Shop at:
Sunny Studio
Fancy Frames- Rectangles
Shop at:
Sunny Studio
Stitched Arch Dies
Stitched Arch Dies
Shop at:
Sunny Studio
Victorian Christmas Stamps
Shop at:
Sunny Studio
Victorian Christmas Dies
Shop at:
Sunny Studio

Thursday, October 29, 2020

Victorian Christmas Cards with Vanessa and Anja

Hello to you! Vanessa here with a wintery Christmas card using the lovely little house from Victorian Christmas.

Sunny Studio Stamps: Victorian Christmas Petite Poinsettias Winter Scene Christmas Card by Vanessa Menhorn

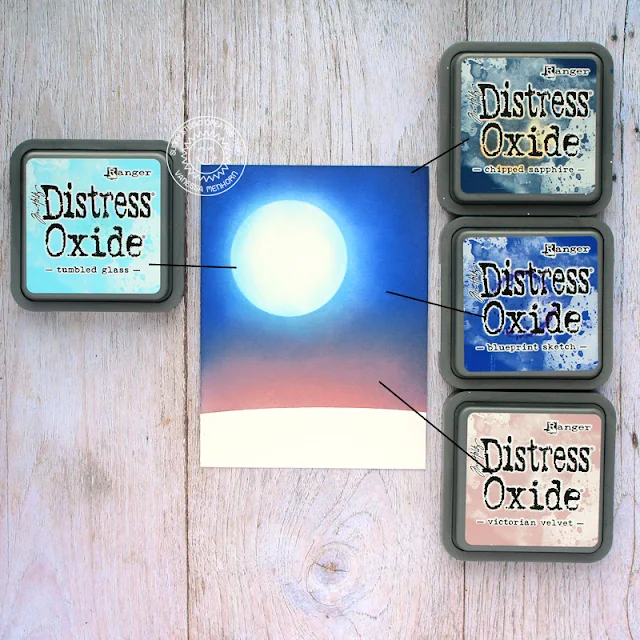
I created a night sky using various Distress Oxide Inks. First, I masked off a circle for the moon. Then I applied the inks with an ink blending tool. After removing the mask, I softly blended light blue ink towards the center of the moon. Here you can see what inks I've used:

Sunny Studio Stamps: Victorian Christmas Petite Poinsettias Winter Scene Christmas Card by Vanessa Menhorn

Stamps and dies used:
Victorian Christmas stamps
Petite Poinsettias stamps
Winter Scene dies

After I had stamped the sentiment from Petite Poinsettias into the moon, I die-cut the snow using the Winter Scene dies, inked it with light blue Distress Oxide Ink, adhered it to the panel and the panel to the card. Now I stamped the house onto white cardstock, colored it with Copic markers, fussy-cut the image and adhered it to the card with foam tape. Finally, I added snow with a white gel pen.

Thank you for visiting today! Have a wonderful day!

----------------------------------------------------

Hello everyone, Anja here today with another holiday card made with the Victorian Christmas mini stamp set.

Sunny Studio Stamps: Victorian Christmas Winter Scene Season's Greetings Christmas Card by Anja Bytyqi

This darling house which is decorated for the holidays can be used with the older Christmas Home Stamps. Since I don't own this set, I used the City Street Stamps (car, lamp post and dog) instead to build my little winter scene.

For the night background, I blended together the Distress Oxide Inks Stormy Sky, Faded Jeans, Chipped Sapphire and Black Soot. I let it dry and sprinkled on white paint with a brush. Next, I die cut a snow hill using the stitched border from the Slimline Nature Borders Dies set. The sentiment was stamped in Barn Door Distress Oxide Ink and heat embossed with clear embossing powder.

Sunny Studio Stamps: Victorian Christmas Winter Scene Season's Greetings Christmas Card by Anja Bytyqi

I picked two tree images from other stamp sets (Winter Scenes and Scenic Route) and stamped everything in Memento Tuxedo Black Ink. I did some Copic coloring and cut out the images with the matching dies or with my scissors. Finally, I assembled my card using liquid glue and foam adhesive.

Thank you so much for stopping by! Have a wonderful day!

Sunny Studio Supplies Used:

City Streets Dies
City Streets Dies
Shop at:
Sunny Studio
City Streets Stamps
City Streets Stamps
Shop at:
Sunny Studio
Petite Poinsettias Stamps
Shop at:
Sunny Studio
Petite Poinsettias Dies
Shop at:
Sunny Studio
Scenic Route Stamps
Scenic Route Stamps
Shop at:
Sunny Studio
Scenic Route Dies
Scenic Route Dies
Shop at:
Sunny Studio
Slimline Nature Borders
Shop at:
Sunny Studio
Victorian Christmas Stamps
Shop at:
Sunny Studio
Victorian Christmas Dies
Shop at:
Sunny Studio
Winter Scenes Stamps
Shop at:
Sunny Studio
Winter Scenes Dies
Winter Scenes Dies
Shop at:
Sunny Studio