Showing posts with label Stitched Rectangles. Show all posts

Thursday, October 26, 2023

Pristine Poinsettia Die Focused Card with Marine

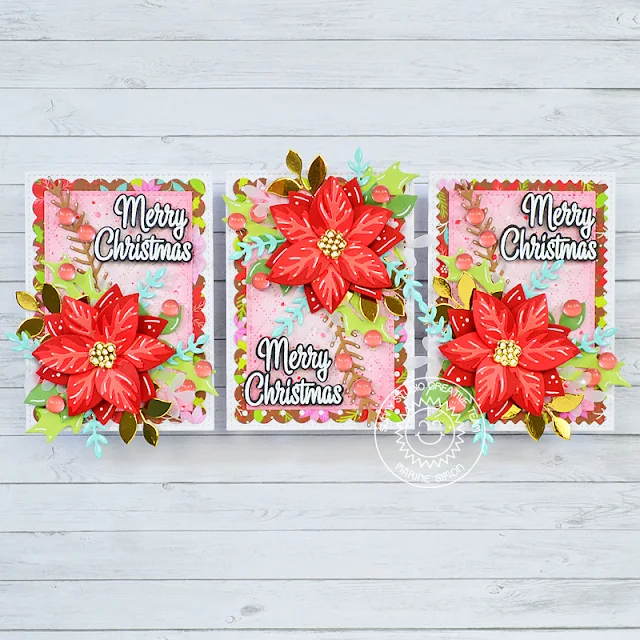
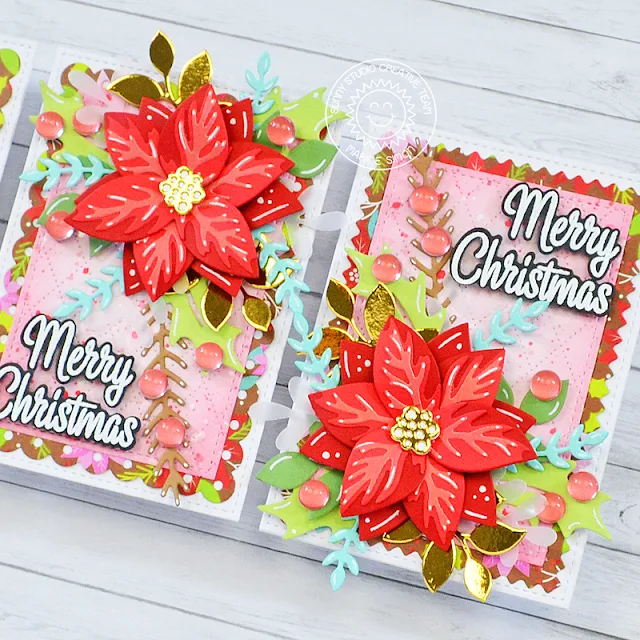
Hello crafty friends, Marine here, back again today with more poinsettias and those three bright and cheerful mini cards using the Pristine Poinsettia die set. Love this set so much! Last year I used that same set to make a cold and frosty holiday card, and this time I went for more traditional colors.

Sunny Studio Stamps: Pristine Poinsettia Christmas Cards by Marine Simon (featuring Mini Mat & Tag Dies, Winter Greenery Dies, Spring Greenery Dies, Dotted Diamond Dies)

I started off by creating and assembling three almost identical card bases following the same process:

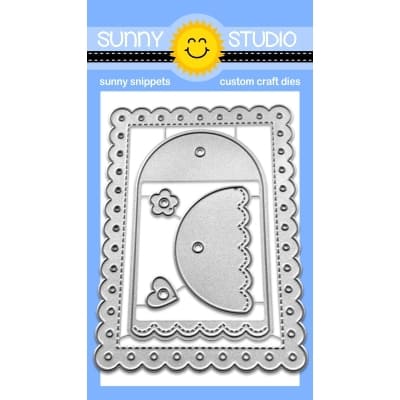
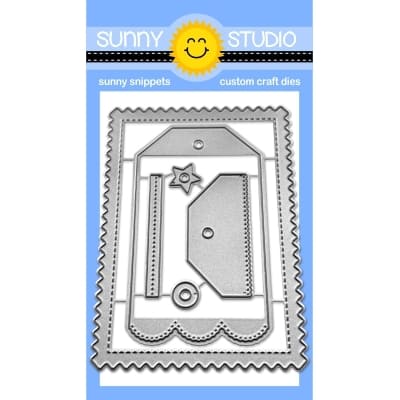
1. Cut three Stitched Rectangles out of white cardstock

2. Cut three All Is Bright panels using Mini Mat & Tag 1 + Mini Mat & Tag 2 + Mini Mat & Tag 4 dies

Sunny Studio Stamps: Pristine Poinsettia Christmas Cards by Marine Simon (featuring Mini Mat & Tag Dies, Winter Greenery Dies, Spring Greenery Dies, Dotted Diamond Dies)

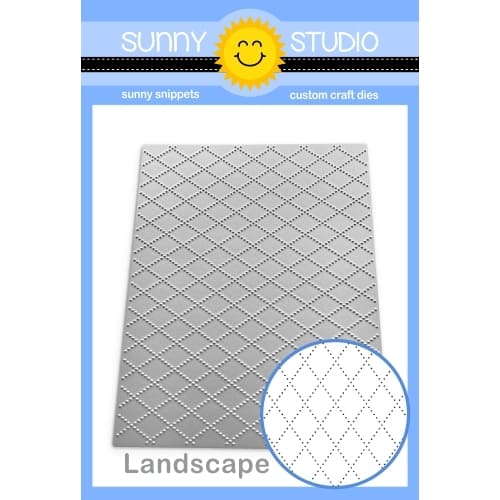
3. Cut two Dotted Diamond Landscape panels, and cut three small Stitched Rectangles out of those two panels. Color those three textured panels using spun sugar and worn lipstick distress inks. Add splatters using festive berries mixed water, and white ink mixed with water

4. Layer and attach the panels on top of each other, and then on card bases

Sunny Studio Stamps: Pristine Poinsettia Christmas Cards by Marine Simon (featuring Mini Mat & Tag Dies, Winter Greenery Dies, Spring Greenery Dies, Dotted Diamond Dies)

Next I cut all the flower, greenery and berry pieces using dies from Pristine PoinsettiaWinter Greenery and Spring Greenery. I cut the flower elements out of three different shades of red cardstock, and cut the greenery elements out of brown, aqua, green, white, vellum and gold cardstock.

I first started by layering and attaching the Pristine Poinsettia pieces together using liquid glue. Next I stuck a flower on each card base, and then added greenery around each one of them. I added berries here and there, and glued a clear droplet on each to bring more shine and dimension.

Sunny Studio Stamps: Pristine Poinsettia Christmas Cards by Marine Simon (featuring Mini Mat & Tag Dies, Winter Greenery Dies, Spring Greenery Dies, Dotted Diamond Dies)

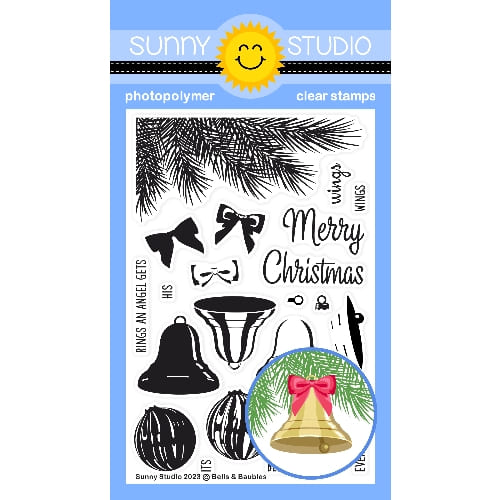
The last step was to create three greetings, and I used the "Merry Christmas" sentiment from Bells & Baubles that I white heat embossed on black cardstock, cut using the matching dies, and attached on the opposite corner of each poinsettia using 2mm foam squares. And finally I added highlights and details at some places using a white gel pen.

And that's it! As always I had a lot of fun making those mini cards, I love how bright and beautiful they turned out, and I hope that you like them. Thank you so much for stopping by, and see you next time.

Sunny Studio Supplies Used:

Stitched Rectangle Dies
Shop at:
Sunny Studio
Pristine Poinsettia Dies
Shop at:
Sunny Studio
Winter Greenery DIes
Shop at:
Sunny Studio
All Is Bright Paper
All Is Bright Paper
Shop at:
Sunny Studio
Spring Greenery Dies
Shop at:
Sunny Studio
Mini Mat & Tag 1 Dies
Shop at:
Sunny Studio
Mini Mat & Tag 2 Dies
Shop at:
Sunny Studio
Mini Mat & Tag 4 Dies
Shop at:
Sunny Studio
Dotted Diamond Landscape
Shop at:
Sunny Studio
Bells & Baubles Stamps
Shop at:
Sunny Studio

Tuesday, October 17, 2023

Love & Light Hanukkah Card with Isha

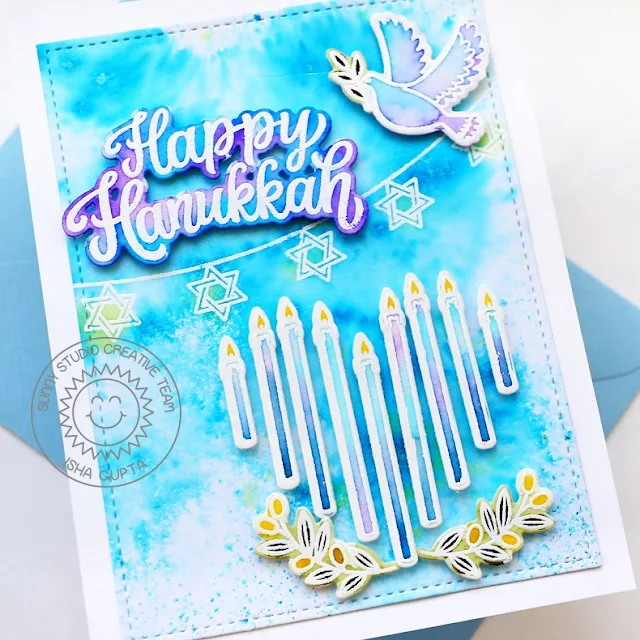
Hello everyone! Isha here today with a watercolor Hanukkah theme card featuring the Love & Light stamp stamps and coordinating dies. I normally don't make Hanukkah theme cards but really enjoyed creating this one.

Sunny Studio Stamps: Love & Light Hanukkah Card by Isha Gupta (featuring Stitched Rectangle Dies)

I started by creating the background using pigment powder, spritz with water to get desired effect. I used magicals by Lindys gang. Stamp the star banner with clear embossing ink, sprinkle WOW! opaque white power and heat set. add some yellow color. Die-cut this panel using Stitched Rectangle dies.

Sunny Studio Stamps: Love & Light Hanukkah Card by Isha Gupta (featuring Stitched Rectangle Dies)

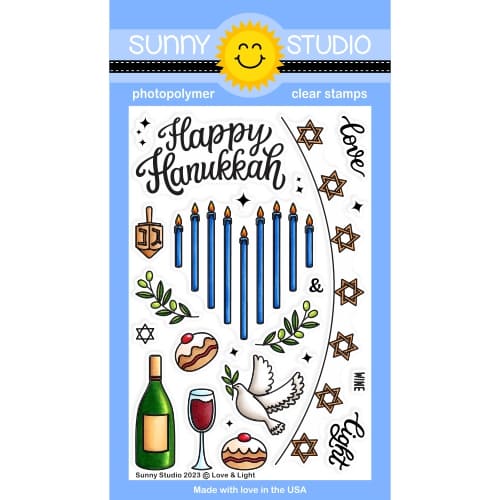
Stamp all the images from the Love & Light stamp set onto watercolor paper using clear embossing ink, use the embossing powder, heat set. Die-cut the images using the coordinating dies, add watercolor. Adhere the panel to a white card and then add images using 3d foam. 

Thank you for dropping by and have a nice day!

Sunny Studio Supplies Used:

Stitched Rectangle Dies
Shop at:
Sunny Studio
Love & Light Stamps
Love & Light Stamps
Shop at:
Sunny Studio
Love & Light Dies
Love & Light Dies
Shop at:
Sunny Studio

Sunday, September 3, 2023

Dotted Diamond Background Die Focused Card with Tammy

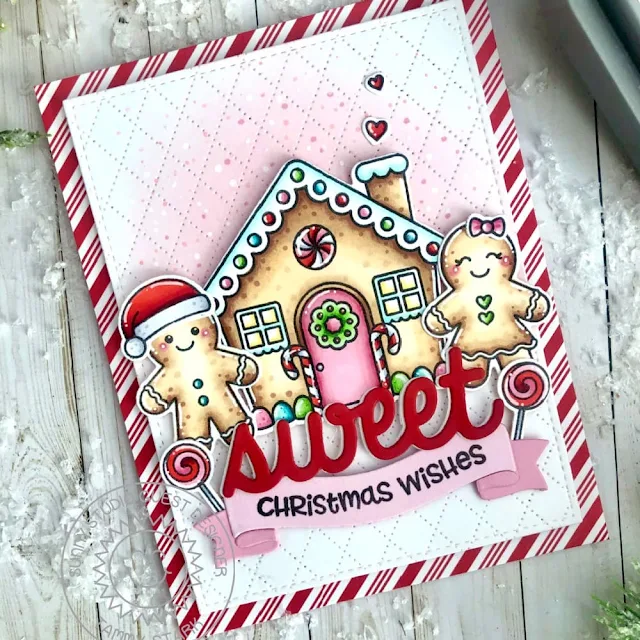
Hello friends! Tammy here sharing this festive card, featuring the new Dotted Diamond Portrait Die. This is such a fun and versatile die, adding the perfect texture to any project!

Sunny Studio Stamps: Dotted Diamond Background Die Focused Christmas Card by Tammy Stark (featuring Jolly Gingerbread, Brilliant Banner Dies)

To begin, I stamped the images from the Jolly Gingerbread Stamps, colored with Copic markers, and die cut with the Jolly Gingerbread Dies. Next, I die-cut white cardstock using the largest rectangle from the Stitched Rectangle Dies. I then placed the Dotted Diamond Portrait Die face down on top of the stitched rectangle and ran it through my die-cut machine. 

I lightly blended Spun Sugar Distress Oxide ink onto the top portion of the rectangle, then splattered it with water. I also splattered some Festive Berries Distress Oxide ink, thinned it with water, and then white acrylic paint to create some texture and interest to the background. 

Sunny Studio Stamps: Dotted Diamond Background Die Focused Christmas Card by Tammy Stark (featuring Jolly Gingerbread, Brilliant Banner Dies)

I arranged the stamped images onto the inked background and attached them with foam tape for interest. I then stamped the sentiment onto a pink banner, die cut using the Brilliant Banner 1 Die. I attached the banner to the bottom of my card using foam tape, then added the red 'SWEET' sentiment die cut using the Sweet Word Die. Lastly, I attached my dotted diamond layer to a piece of candy cane striped paper, from the All is Bright 6X6 Paper pad to complete my card. 

Thanks so much for stopping by!

Sunny Studio Supplies Used:

Sweet Word Die
Sweet Word Die
Shop at:
Sunny Studio
Stitched Rectangle Dies
Shop at:
Sunny Studio
Jolly Gingerbread Stamps
Shop at:
Sunny Studio
Jolly Gingerbread Dies
Shop at:
Sunny Studio
All Is Bright Paper
All Is Bright Paper
Shop at:
Sunny Studio
Brilliant Banner 1 Dies
Shop at:
Sunny Studio
Dotted Diamond Portrait
Shop at:
Sunny Studio

Sunday, August 6, 2023

Hawaiian Hibiscus Card with Cathy

Hey friends! Cathy here today sharing a card that has me dreaming of a tropical vacation featuring the gorgeous Hawaiian Hibiscus Stamps!

Sunny Studio Stamps: Hawaiian Hibiscus Card by Cathy Chapdelaine (featuring Summery Greenery Dies, Stitched Rectangle Dies, Radiant Plumeria)

I started this A2 card by using a fun technique with die-cuts to create an embossed look for the background panel. While I have a bunch of embossing folders and use them all the time in crafting, I love to use this tone-on-tone technique with dies to create unique patterns. I first cut a piece of kraft cardstock 4 1/4" x 5 1/2" and die-cut 10 fronds from kraft cardstock using the Summer Greenery Dies. I adhered these along the outside edges of the cardstock and then die-cut the cardstock piece with a Stitched Rectangle Die. I love the subtle tropical embossed look this gave it! I matted it on black cardstock and adhered it to a peach card front.

For my tropical scene, I cut a piece of white cardstock 2 1/4" x 3 1/2" and cut masks from post-it notes for the sand and horizon. I also punched a circle from Eclipse masking tape for the sun. The Distress inks I used are Brushed Corduroy for the sand, Dried Marigold and Speckled Egg for the ocean/sky and Scattered Straw for the sun. I stamped small palm trees in dark green ink using stamps from the Beach Babies Stamps and the Surfing Santa Stamps. I heat embossed the sentiment from the Tiki Time Stamps with black embossing powder.

Sunny Studio Stamps: Hawaiian Hibiscus Card by Cathy Chapdelaine (featuring Summery Greenery Dies, Stitched Rectangle Dies, Radiant Plumeria)

Next, I die-cut a piece of black cardstock using the smallest Stitched Rectangle Die as a mat for the tropical scene and adhered the combined piece to the card front. I also die-cut a photo corner from brown cardstock using the Notebook Photo Corners Dies to give it a photo or postcard look.

To finish, I stamped the hibiscus and leaves from the Hawaiian Hibiscus Stamps and die-cut them using the coordinating dies. I also heat embossed a flower from the Radiant Plumeria Stamps with white embossing powder, water colored a bit of the center with yellow ink and die-cut it using the coordinating dies.

I hope you enjoyed and thanks for stopping by! For more inspiration, please visit my blog www.inkredibleadventures.com and you can also find me on Instagram as @cathy.chapdelaine.

Sunny Studio Supplies Used:

Tiki Time Stamps
Tiki Time Stamps
Shop at:
Sunny Studio
Stitched Rectangle Dies
Shop at:
Sunny Studio
Beach Babies Stamps
Beach Babies Stamps
Shop at:
Sunny Studio
Hawaiian Hibiscus Stamps
Shop at:
Sunny Studio
Hawaiian Hibiscus  Dies
Hawaiian Hibiscus Dies
Shop at:
Sunny Studio
Radiant Plumeria Stamps
Shop at:
Sunny Studio
Radiant Plumeria Dies
Shop at:
Sunny Studio
Surfing Santa Stamps
Shop at:
Sunny Studio
Summer Greenery Die
Summer Greenery Die
Shop at:
Sunny Studio
Notebook Photo Corners Dies
Shop at:
Sunny Studio

Tuesday, August 1, 2023

Radiant Plumeria Card with Isha

Hello everyone! Isha here with a CAS mixed media card featuring the Radiant Plumeria stamp and coordinating dies. I love these layering stamps as it gives GORGEOUS results immediately.

Sunny Studio Stamps: Radiant Plumeria Card by Isha Gupta (featuring Frilly Frame Dies, Stitched Rectangle Dies)

First, I die-cut a panel using the Stitched Rectangle dies. Sponge with salvaged patina distress ink. Flick the same ink for a soft splatter look. Die-cut the herringbone part from the frilly Frilly Frame Herringbone dies. Use this die-cut as a stencil and apply crackle embossing paste to the panel through it. Let it dry.

Sunny Studio Stamps: Radiant Plumeria Card by Isha Gupta (featuring Frilly Frame Dies, Stitched Rectangle Dies)

Stamp the images from the Radiant Plumeria stamp using various inks by altenew, die-cut using the coordinating dies. Stamp the sentiment to the panel. Adhere the panel to a white cardbase. Adhere the images to the card.

Thanks for dropping by and have a nice day!

Sunny Studio Supplies Used:

Stitched Rectangle Dies
Shop at:
Sunny Studio
Radiant Plumeria Stamps
Shop at:
Sunny Studio
Radiant Plumeria Dies
Shop at:
Sunny Studio
Frilly Frames Herringbone
Shop at:
Sunny Studio

Sunday, July 16, 2023

A Cut Above Card with Cathy

Hey friends! Cathy here today and I’ve got a fun card to share featuring the A Cut Above Stamps. I probably need to make 100 of these to have on hand when I’ve had one of “those” kind of days!

Sunny Studio Stamps: A Cut Above Punny Card by Cathy Chapdelaine (featuring Notebook Dies, Stitched Rectangles Dies, Frilly Frame Dies)

This is an A2 card with a pretty simple design that works up quickly (just in case you might also need 100 of these on hand). I started by die-cutting a paper from the Dots & Stripes Jewel Tones Paper using the frame portion from the Frilly Frames Quatrefoil Die and adhered this to the card front. Next, I die-cut a silver metallic cardstock using the frame portion from the Frilly Frames Chevron Die. To create a frame from this piece, I die-cut the center of it using the second largest Stitched Rectangles Die. I cut a blue paper from the Dots & Stripes Jewel Tones Paper 3 1/2" x 4 3/4", adhered the silver cardstock frame to it and adhered the combined piece to the card front.

Sunny Studio Stamps: A Cut Above Punny Card by Cathy Chapdelaine (featuring Notebook Dies, Stitched Rectangles Dies, Frilly Frame Dies)

Next, I die-cut a piece of black cardstock using a Notebook Photo Corners Die and heat embossed the sentiment and white lines from the A Cut Above Stamps with white embossing powder. To add a scissor-like cut to the notebook paper, I die-cut it in multiple places using a Mini Mat & Tag 4 Die which also coordinates with the Frilly Frames Chevron Die.

To finish, I stamped the scissors from the A Cut Above Stamps and die-cut them using the coordinating dies.

I hope you enjoyed and thanks for stopping by today! For more inspiration, please visit my blog www.inkredibleadventures.com and you can also find me on Instagram as @cathy.chapdelaine.

Sunny Studio Supplies Used:

Stitched Rectangle Dies
Shop at:
Sunny Studio
Dots & Stripes Jewel Tones 6x6 Paper
Shop at:
Sunny Studio
Frilly Frames Chevron Die
Shop at:
Sunny Studio
Frilly Frames Quatrefoil
Shop at:
Sunny Studio
Mini Mat & Tag 4 Dies
Shop at:
Sunny Studio
A Cut Above Stamps
A Cut Above Stamps
Shop at:
Sunny Studio
A Cut Above Dies
A Cut Above Dies
Shop at:
Sunny Studio
Notebook Photo Corners Dies
Shop at:
Sunny Studio

Wednesday, July 12, 2023

Perfect Gift Boxes Card with Catherine

Hello Crafty Friends! It’s Catherine! Today, I’m sharing a colorful birthday card created with Perfect Gift Boxes Dies and Birthday Cat Stamps!

Sunny Studio Stamps: Perfect Gift Boxes Birthday Card by Catherine Cohen (featuring Birthday Cat, Stitched Rectangles Dies)

To start, I die cut white cardstock with the medium rectangle in Stitched Rectangle Dies. I lightly inked the panel with Squeezed Lemonade, Spun Sugar, and Salvaged Patina Distress Oxides. I splattered the panel with some yellow, pink and teal water colors.

I die cut the gift boxes using paper from Surprise Party Paper and Spring Sunburst Paper. I die cut the gift box lids with white cardstock and ink blended with Squeezed Lemonade, Mustard Seed, Spun Sugar, Kirsch Flamingo, and Tumbled Glass Distress Oxides.

I die cut the ribbon and bows with yellow, pink, and blue tissue paper. As tissue paper is quite thin, I folded the tissue paper into 4-5 layers and then I die cut. I adhered the ribbon and bows onto the lids. I added a glittery gold center onto each of the bows.

Sunny Studio Stamps: Perfect Gift Boxes Birthday Card by Catherine Cohen (featuring Birthday Cat, Stitched Rectangles Dies)

I stamped the cute kitties from Birthday Cat and die cut with Birthday Cat Dies. I colored the kitties with Copic Markers listed in my blog link below. I added some left over party hats from Party Pups Stamps. I adhered some mini pompoms on top of each party hat. I glued all the images onto the panel.

I die cut A2 sized paper from Spring Sunburst Paper and adhered white cardstock 3 ½” x 4 ¾” onto the paper. I then adhered the panel onto the background frame.

Thanks so much for joining me today! For a list of Copic Markers used, please visit me at Crafti-Cat. Have a lovely week!

Sunny Studio Supplies Used:

Stitched Rectangle Dies
Shop at:
Sunny Studio
Party Pups Stamps
Party Pups Stamps
Shop at:
Sunny Studio
Party Pups Dies
Party Pups Dies
Shop at:
Sunny Studio
Spring Sunburst 6x6 Paper
Shop at:
Sunny Studio
Surprise Party 6x6 Paper
Shop at:
Sunny Studio
Birthday Cat Stamps
Birthday Cat Stamps
Shop at:
Sunny Studio
Birthday Cat Dies
Birthday Cat Dies
Shop at:
Sunny Studio
Perfect Gift Boxes Dies
Shop at:
Sunny Studio