Showing posts with label Merry Word Die. Show all posts

Monday, October 30, 2017

Snow Flurries & Frosty Flurries Snowy Background Tags with Eloise

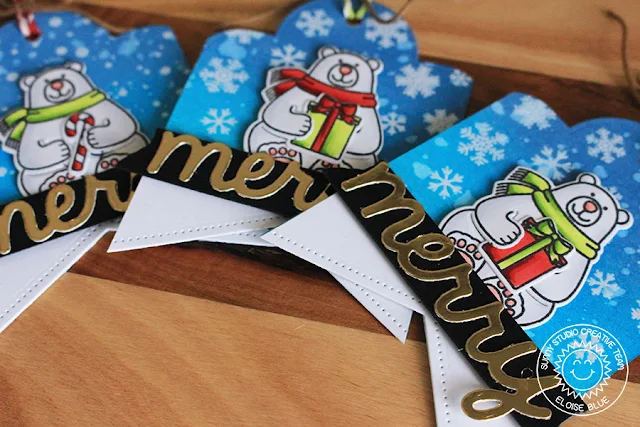
Hi everyone, Eloise here today and I'll be using the Snow Flurries and Frosty Flurries stamp sets to create some simple backgrounds for some tags. As well as the Playful Polar Bears, Tag Topper Crescent Dies, Fishtail Banners Dies and Merry Word Dies

Sunny Studio Stamps: Snow Flurries & Frosty Flurries Polar Bear Snowy Background Tags by Eloise Blue

To begin my tags, I first took some watercolour cardstock, cut them down to 2 3/4" wide and used the Tag Topper Crescent Dies and Fishtail Banners dies to cut the top and bottom of each tag. Once I cut all four tags, I took a hole punch and punched a hole in the top of each tag. I then went ahead and used the Snow Flurries and Frosty Flurries stamp sets to stamp onto each tag. I did two of each design. I then clear heat embossed them. 

Sunny Studio Stamps: Snow Flurries & Frosty Flurries Polar Bear Snowy Background Tags by Eloise Blue

Next up, I used Faded Jeans, Peacock Feathers and Salty Ocean a Distress Oxide Inks to ink blend on each of the tags. Leaving white at the bottom too resemble snow. Now my tag bases were done, I stamped out four Polar Bears sitting with four objects to hold in their hands. I coloured each with Copic Markers using traditional holiday colours. I then used the coordinating dies to cut the Bears and accessories out. I popped them up on foam tape and adhered them to the center on each tag. 

Sunny Studio Stamps: Snow Flurries & Frosty Flurries Polar Bear Snowy Background Tags by Eloise Blue

For my sentiment I used the Merry die and cut four Merry's out of gold foil cardstcok. Then because I felt like they got lost being adhered onto the tag without a backer, I cut strips of black cardstock to adhered behind them and adhered them on with foam tape also. To finish up the tags I threaded through some red and white and brown twine at the top and tied some bows. 

That finished up my tags for today. I hope you enjoyed! Thanks so much for stopping by and I'll see you next time. 

Sunny Studio Products Used: 

Fishtail Banner Dies
Shop at:
Sunny Studio
Merry Word Die
Merry Word Die
Shop at:
Sunny Studio
Tag Topper Dies-Crescent
Shop at:
Sunny Studio
Frosty Flurries Stamps
Shop at:
Sunny Studio
Playful Polar Bears Stamps
Shop at:
Sunny Studio
Snow Flurries Stamps
Shop at:
Sunny Studio

Monday, December 19, 2016

Simple Gleeful Reindeer Gift Tags with Eloise

Hello everyone, Eloise here and today I'm showing three simple tags using the Gleeful Reindeer stamp set along with the Semi Circle Dies, Fishtail Banner Dies (I and II) and the Merry Die as well. I love creating small scenes on tags - so much fun!

Sunny Studio Stamps: Gleeful Reindeer Christmas Gift Tags by Eloise Blue (using Sunny Semi Circle and Fishtail Banner Dies)

To begin my tags I took some blue cardstock and used the Semi Circles dies to cut off the top of my pieces. I then cut them down to size so I could create arched tags. I then took the Fishtail Banners dies and cut off the bottom of the tags making a upside down v shape on the bottom. Then I took some white cardstock pieces and did the same. I used the Fishtail Banners die on the bottom and then used the Fishtail Banners II set to give the little pierced edge to them, looks so fun! I then used my scissors to cut the top of the white piece, to give it a snowy hill look. I then adhered down the white pieces to the blue tags and cut off the excess. 

To finish up the background on my tags I took a white gel pen and added some dots to look like snow.  I then pulled out the Gleeful Reindeer stamp set and stamped out the reindeers and trees and used my Copic Markers to colour them in. I also used the matching dies to cut them all out. Once they were done I added foam tape and adhered them to my tags. 

Sunny Studio Stamps: Gleeful Reindeer Christmas Gift Tags by Eloise Blue (using Sunny Semi Circle and Fishtail Banner Dies)

For the sentiment I used the Merry die - I love this one and cut it from fun foam and then from silver glitter paper and adhered the two together and then to the bottom of my tags. To finish up my tags I punched a hole and added a silver reinforcer at the tops and then strung through some silver sparkle twine and added a twine bow around the top as well, to make them look a little more finished. I also added some clear wink of stella to my images as well - they have to sparkle, it's Christmas time! :)

Thanks for stopping by today - I hope you got inspired! Check out the rest of the week to see lots of other last minute tag ideas.

- Eloise

Sunny Studio Supplies Usesd:


- Gleeful Reindeer 
- Gleeful Reindeer Dies
- Semi Circles Dies
- Fishtail Banner Dies
- Fishtail Banner II Dies
- Merry Die

Thursday, December 15, 2016

Festive Holly & Candy Striped Merry Card with Vanessa

Hi everybody! Vanessa here with a shiny, glittery Christmas card using various stamps and dies. I had this metallic candy cane striped patterned paper in my stash and wanted to use it for a card base:

Sunny Studio Stamps: Merry Sentiments Holly Christmas Card by Vanessa Menhorn.

First, I stamped and heat-embossed the sentiment from Merry Sentiments onto a strip of black cardstock, trimmed it and adhered it to the card that I had made from the patterned paper. Now I applied Versamark ink onto a small piece of red cardstock, applied red glitter embossing powder and heat-embossed this. Then I die-cut the merry from it, as well as from black fun foam, layered the die-cuts and adhered them to the card. Using an ink blending tool, I applied green ink to a scrap of white cardstock, die-cut the holly leaves from it and adhered them. Finally, I added red "sequinberries" to the leaves. 

Sunny Studio Stamps: Merry Sentiments Holly Christmas Card by Vanessa Menhorn.

All that glitter. It's really difficult to show on a photo, but let me assure you, it is very festive irl :)

Thank you so much for stopping by today!

Wednesday, December 14, 2016

Wishing You A Merry Christmas Card With Lindsey

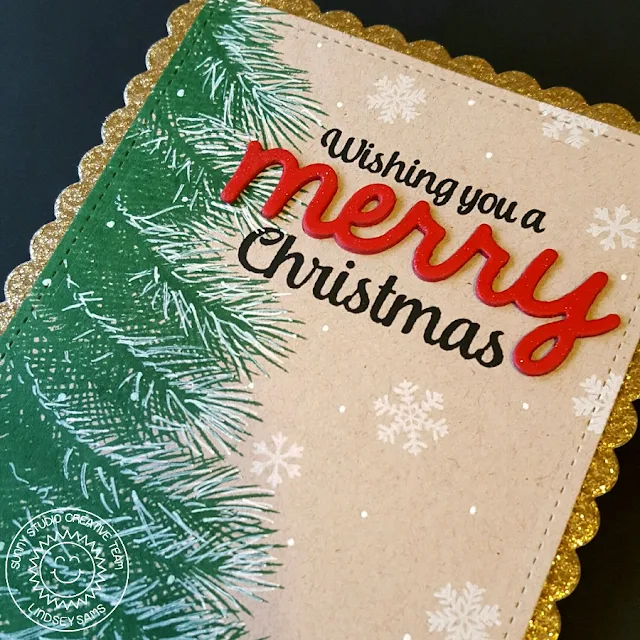
Hi, Lindsey here today sharing a card using Holiday Style, Merry Sentiments, and the new Merry word die. All the new holiday sets just work so well together. It's fun to mix and match them to create different looks. Let's get started on how this card came together.


Sunny Studio Stamps: Holiday Style and Merry Sentiments Christmas Card by Lindsey Sams.

I began by cutting a scalloped rectangle out of gold glitter paper. Then, I cut a smaller stitched rectangle from Kraft card stock. I used the branch from Holiday Style  to create an evergreen tree on the left side of the Kraft rectangle. After I finished the tree, I used a white gel pen to add "snow" to the edge of the branches. Then I stamped part of my sentiment from Merry Sentiments in black. I left a space for the Merry die cut in between. I cut the Merry die three times from red card stock and stacked them together to add some dimension to the card. To finish the card off, I added some snowflakes from the Bundled Up stamp set and some white dots with my gel pen.


Sunny Studio Stamps: Holiday Style and Merry Sentiments Christmas Card by Lindsey Sams.

I love how this card turned out. I think it looks very elegant with the gold trim and bright red "Merry" just popping off the card. It was relatively simple to create, and I hope you'll give these sets a try yourself. Thanks for reading and have a great day!

Sunny Studio Supplies Used:
    

Tuesday, December 13, 2016

Comfy Creatures Celebrate the Holidays with Video by Emily

Sunny Studio Stamps: Comfy Creatures & Merry Sentiments Eat, Drink & Be Merry Christmas Card by Emily Leiphart.

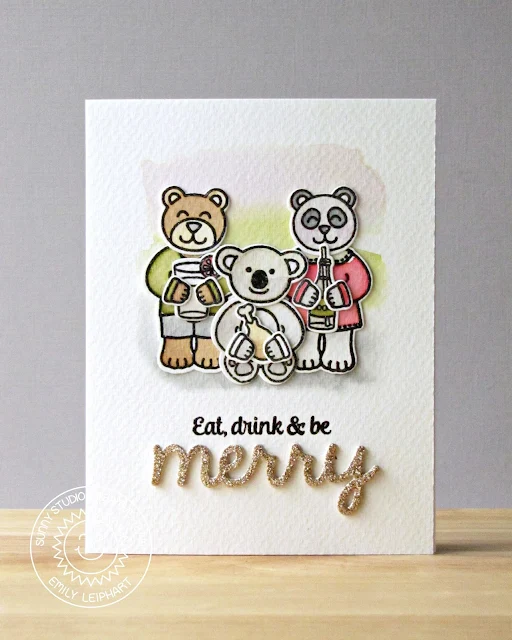
Today, I used four stamp sets and a stand-alone die to create a festive party! Oh, how I love those Comfy Creatures! I wanted to create a little family that mimics the Minecraft costumes my family made for Halloween. Since there was no beaver, I used the bear from Sending My Love. I almost drew in a couple of big teeth. LOL My son was a koala bear for his third Halloween and he used to call himself our little koala bear so that's what I used for him. Naturally, I'm a panda! ;)


Sunny Studio Stamps: Comfy Creatures & Merry Sentiments Eat, Drink & Be Merry Christmas Card by Emily Leiphart.

Since I didn't have the coordinating dies for Sending My Love, I used the panda head die and it worked very well. I know that the koala bear isn't wearing any clothes but my son is loving his winter mittens and gloves right now so I figured it looked enough like gloves to work. Plus, the drumstick looked odd sitting there without hands holding it.


Sunny Studio Stamps: Comfy Creatures & Merry Sentiments Eat, Drink & Be Merry Christmas Card by Emily Leiphart.

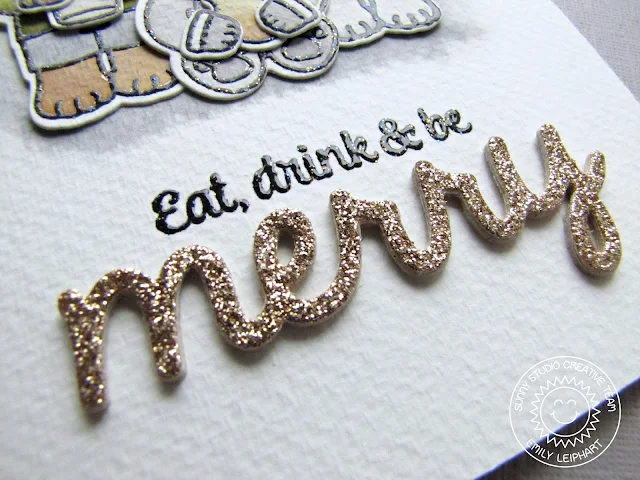
The stamped part of the sentiment is from Merry Sentiments. I layered the glitter gold Merry Word Die with two layers of craft-a-board to give it dimension to match the critters.


Sunny Studio Stamps: Comfy Creatures & Merry Sentiments Eat, Drink & Be Merry Christmas Card by Emily Leiphart.

The food items are from Summer Picnic and they work so well for this festive scene! All of the stamping was done with Versafine Onyx Black pigment ink and heat embossed with sparkle clear embossing powder. It adds glitter without making a mess! I used washes of colour in the background that mimics the colours I used to colour the critter family.


Sunny Studio Stamps: Comfy Creatures & Merry Sentiments Eat, Drink & Be Merry Christmas Card by Emily Leiphart.

Thanks so much for stopping by!

Sunny Studio Supplies Used:
            

Monday, December 5, 2016

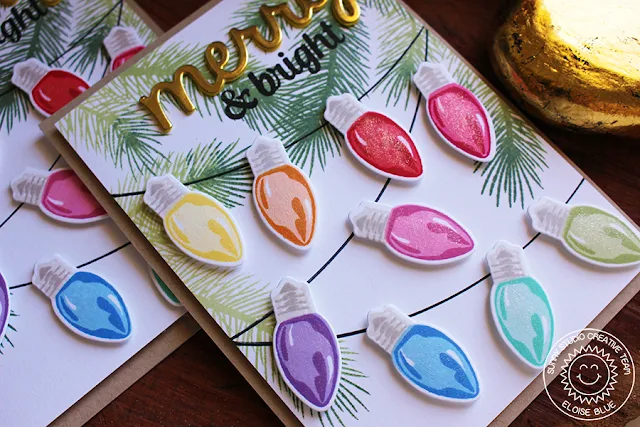
Merry Sentiments Rainbow Lights Card with Eloise

Hey everyone! Eloise here and today I'm making a rainbow string of lights card using the Merry Sentiments stamp set. My original idea for this card was to just have the three strings across a card, similar to how the card turned out this time and to just have a popped up sentiment over top, but when I did that.. I wasn't sure I liked it. It was too clean and simple and needed more colour and if you know me, I never have clean and simple cards. So I came up with this card.

Sunny Studio Stamps: Merry Sentiments and Holiday Style Rainbow Lights Card by Eloise Blue.

To begin my card I cut down a piece of white cardstock and stamped down some branches from the Holiday Style stamp set in various green inks. Just around the top of the card. I then took a plate and traced around the edge of it to create the lines for the lights to sit on. I then used various colours of rainbow coloured inks and stamped down the bulbs. I stamped down two of each in case I made a mistake, but these bulbs are so easy to line up! Once everything was stamped, I could die cut them out.

Now, since this die is solid, there was a little bit of an issue. So I used a trick I learnt from Michelle Short quite a while back. All you do first is die cut the die out of some plain cardstock. Then you use the negative piece and place it over your stamped image in the spot where it's equal on all sides. Then adhere it down with washi tape. Then place the die over top and it should just fall into place, then adhere that down and you're ready to run it through your big shot. When you run it through and take it out, your image should be perfectly centred! I love this trick, so handy.

Sunny Studio Stamps: Merry Sentiments and Holiday Style Rainbow Lights Card by Eloise Blue.

Anyway, once all my pieces were die cut I adhered down all my bulbs with foam tape, in my rainbow order. I always like to start with yellow first, I don't know why. But anyway, once they were all adhered I then stamped out the '& bright' portion of the sentiment at the top of the card in black ink. I then used the Merry die and die cut that out of gold cardstock and adhered it down above the '& bright' portion of the sentiment. To finish up my card I adhered down the panel with fun foam on a kraft card base and added some wink of stella all over the lights.

Hope you enjoyed my card today. Definitely wasn't what I was planning at all, But I love all the green  stamping at the top. I always love green on my cards! Thanks for stopping by today and check back the rest of the week for more inspiration.

- Eloise

Sunny Studio Supplies Used:
       

Saturday, December 3, 2016

Christmas Cards with Guest Designer Anika Lerche

Hey stampers, Anni here. I am back again as a guest designer and so happy that Mendi is such a kind person to let me come back for a few cards.

With Christmas just around the corner I have some Christmas cards to share with you!
I played with the super cuts sets called Christmas Icons and Mug Hugs. For the sentiments I used the set Merry Sentiments and the Merry Word Die.

I totally love the Merry Word Die - just like every word die Mendi creates! So I made it the star of the show on my first very clean and very simple card. I just watercolored some pointsettias from the set Christmas Icons. For the sentiment I die cut a few Merry and stacked them up. I free hand cut some leaves and assembled the card!


Sunny Studio Stamps: Christmas Icons Poinsettia Holiday Card by Anni Lerche.


Sunny Studio Stamps: Christmas Icons Poinsettia Holiday Card by Anni Lerche.


When I realized the Christmas Icons fit perfectly on the Hug Mugs I couldn't resist! I stamped, colored with Copics and fuzzy cut the images. I created a background with ink blending and splashes of water. Another simple card!


Sunny Studio Stamps: Christmas Icons & Mug Hugs Holiday Card by Anni Lerche.


Sunny Studio Stamps: Christmas Icons & Mug Hugs Holiday Card by Anni Lerche.

For my last card I stamped all the snowflakes from Mug Hugs and  heat embossed them on watercolor paper. I love these outline snowflakes so much! For the soloring I used some ZIG Clean Color Real Brush! Just add a die cut Merry from glitter cardstock and another festive card is done!


Sunny Studio Stamps: Mug Hugs Snowflake Christmas Card by Anni Lerche.

Hope you like the cards!
Thanks for stopping by and have a sunny week!
Anni


Sunny Studio Supplies Used: