Wednesday, March 24, 2021

Country Scenes Cards with Franci and Julia

Hello there! It's Franci here, showcasing the Country Scenes set.  Aww these images are soooo cute! 

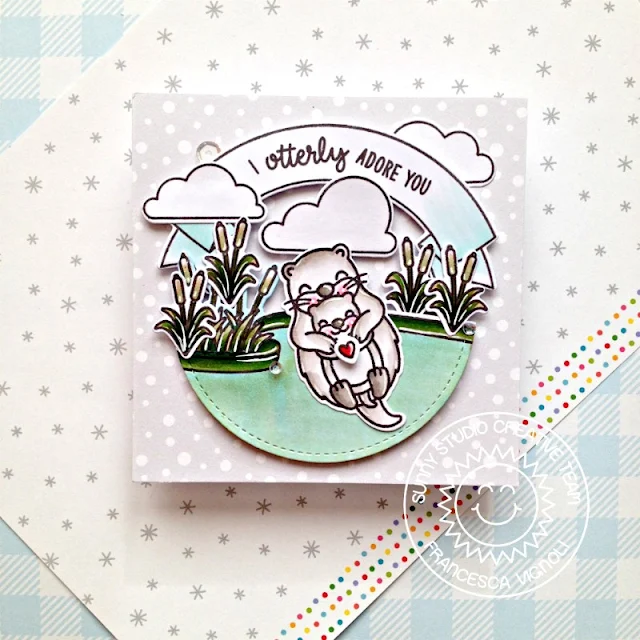
Sunny Studio Stamps: Country Scenes My Otter Half Stitched Circle Dies Card by Franci Vignoli

First of all I created my square card base out of white cardstock and I covered the front with some patterned paper from the Subtle Grey 6x6 paper set, then I die cut a circle out of white cardstock using the Stitched Circle Small Dies set and I stamped, colored with Copics and die cut my border out of it. 

Then I added more scene elements from these sets: My Otter Half coordinated diesBanner Basics coordinated diesSpring Showers + coordinated dies.

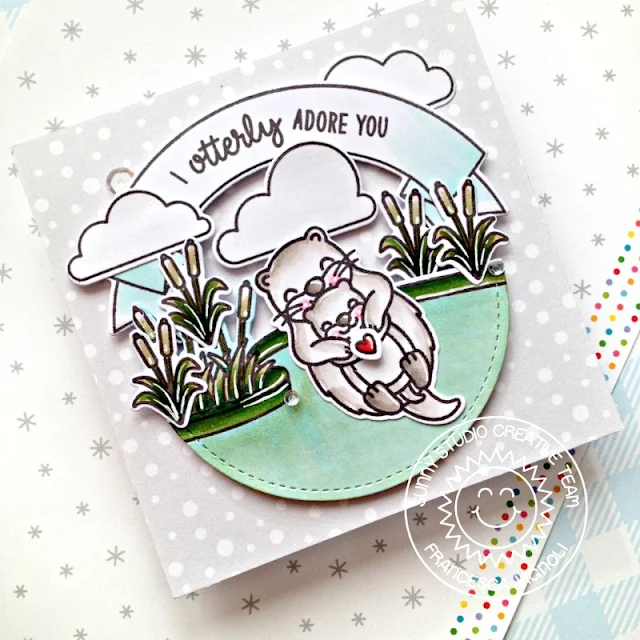
Sunny Studio Stamps: Country Scenes My Otter Half Stitched Circle Dies Card by Franci Vignoli

I colored everything with my Copics, added lots of details with a white gel pen and some sparkle with my Wink of Stella brush. I glued all the elements down with foam adhesive and added some clear sequins to finish up my design.

I hope you are now inspired to create and thanks a lot for stopping by today! 

------------------------------------------------

Hey crafty friends! It’s Julia here with a slimline scene card! Since it's is just around the corner, I really wanted to make another Easter card!

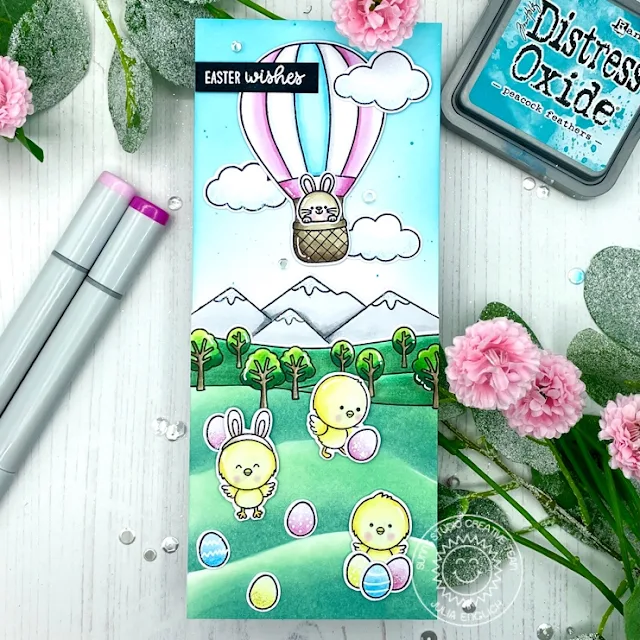
Sunny Studio Stamps: Country Scenes Balloon Rides Chickie Baby Card by Julia Englich


So, I started by stamping out my images from the Country Scenes, Balloon Rides, and Chickie Baby stamp sets. I really wanted to use just the mountain range from the Country Scenes behind hills, so I masked off the little trees in front with post it note tape, inked up the stamp and removed the tape, so that I could just stamp out the mountains. All the images were then colored in using Copic markers.

Sunny Studio Stamps: Country Scenes Balloon Rides Chickie Baby Card by Julia Englich


Then I cut down a panel of Bristol smooth cardstock to 3 1/2 x 8 1/2" and ink blended the top with Peacock Feathers and the bottom hills with Cracked Pistachio and Evergreen Bough. I attached my sweet little Easter bunny to the hot air balloon and the cute bunny ears to one of the chickies. I adhered all of the background images using liquid glue and for the hot air balloon and the chicks I used foam squares.

Sunny Studio Stamps: Country Scenes Balloon Rides Chickie Baby Card by Julia Englich

For my sentiment I stamped the word "Easter" from Eggs to Dye For and "wishes" from Garden Fairy and I heat embossed both in white onto black cardstock. To finish my card, I added lots of shimmer pen, white gel pen details, Stardust Stickles and a few clear sequins. I really hope you like it!

Copic Markers used: N0, N1, N3, N5, 0; E40, E42, E43, E44, E47; G02, G46; YG01, G14, G17, BG99; RV0000, RV52, RV55; Y000, Y00, Y02, Y17; BG0000; BG000; BG01, BG02.

Thank you so much for spending time with me today! Have a wonderful day!

Sunny Studio Supplies Used:

Subtle Grey Tones Paper
Shop at:
Sunny Studio
Banner Basics Stamps
Shop at:
Sunny Studio
Banner Basics Dies
Banner Basics Dies
Shop at:
Sunny Studio
Chickie Baby Stamps
Chickie Baby Stamps
Shop at:
Sunny Studio
Chickie Baby Dies
Chickie Baby Dies
Shop at:
Sunny Studio
Spring Showers Stamps
Shop at:
Sunny Studio
Spring Showers Dies
Spring Showers Dies
Shop at:
Sunny Studio
Balloon Rides Stamps
Shop at:
Sunny Studio
Balloon Rides Dies
Balloon Rides Dies
Shop at:
Sunny Studio
Country Scenes Stamps
Shop at:
Sunny Studio
Country Scenes Dies
Country Scenes Dies
Shop at:
Sunny Studio
Eggs To Dye For Stamps
Shop at:
Sunny Studio
Garden Fairy Stamps
Garden Fairy Stamps
Shop at:
Sunny Studio
My Otter Half Stamps
Shop at:
Sunny Studio
My Otter Half Dies
My Otter Half Dies
Shop at:
Sunny Studio
Stitched Circle Small Dies
Shop at:
Sunny Studio

Tuesday, March 23, 2021

Slimline Pennant Die Focused Cards with Kavya and Isha

Hi folks, Kavya here. I am back on the blog with another fun card inspired by another fairytale - Snow White and the Seven Dwarfs! I am featuring the newly released Slimline Pennant die but on an A2 card front … who doesn’t love to stretch their supplies?  For this card, my main color scheme is red, blue and yellow as these are the colors of Snow White’s dress. 

Sunny Studio Stamps: Slimline Pennant Dies Home Sweet Gnome Enchanted Inside Greetings Everyday Card by Kavya

I first started off by die cutting the largest pennant using blue cardstock and ink blended the top half using dark blue dye inks. I then die cut green cardstock using Slimline Pennant die first and then the Slimline Nature Border to create the grass. As always, I ink blended the edges using matching dye ink and splattered some white and green paint to give some texture. I also splattered blue and white paint on the sky to give it a starry look! 

Sunny Studio Stamps: Slimline Pennant Dies Home Sweet Gnome Enchanted Inside Greetings Everyday Card by Kavya

Later, I die cut various images from the Balloon RidesGarden FairiesEnchanted and Home Sweet Gnome stamp set and colored them using alcohol markers and colored pencils. I didn’t have space for seven dwarfs so I just stuck to two. I also tried to color the princess from the Enchanted stamp set to look like Snow White… I hope you could tell! Later, I die cut the yellow scalloped border using a die from the Slimline Pennant set. I then placed it on top of a red cardstock. Finally, I heat embossed a sentiment from Inside Greetings Birthday to finish off the card :) 

I hope you liked this! Be sure to check back for more inspiration.

---------------------------------------

Hello everyone! Isha today featuring our Slimline Pennants dies. This set has pennants in 4 sizes along with 2 scalloped borders, perfect to mix and match. I used the Inside Greetings-Birthday and the Captivating Camellias stamps and dies.

Sunny Studio Stamps: Slimline Pennant Dies Captivating Camellias Inside Greetings Everyday Card by Isha Gupta

To start, I die-cut the second biggest pennant using the wood-grain pattern twice from  the Subtle Grey Tones paper pad. I then die-cut the smaller scallops using black cardstock. Line the pennants from both the sides using the scallops. Take a white card base, adhere the pennants to both the sides by leaving a gap towards the lower 3rds of the card.

Sunny Studio Stamps: Slimline Pennant Dies Captivating Camellias Inside Greetings Everyday Card by Isha Gupta

Stamp the Camellias and the leaves using coral, red and mint inks by Altenew. Die-cut using the coordinating dies. Assemble the floral cluster and adhere to the card. Stamp the sentiment using Versafine black ink. To finish, add some Nuvo jewel drops.

Thanks for dropping by! Have a nice day.

Sunny Studio Supplies Used:

Home Sweet Gnome Stamps
Shop at:
Sunny Studio
Home Sweet Gnome Dies
Shop at:
Sunny Studio
Subtle Grey Tones Paper
Shop at:
Sunny Studio
Enchanted Stamps
Enchanted Stamps
Shop at:
Sunny Studio
Enchanted Dies
Enchanted Dies
Shop at:
Sunny Studio
Slimline Nature Borders
Shop at:
Sunny Studio
Balloon Rides Stamps
Shop at:
Sunny Studio
Balloon Rides Dies
Balloon Rides Dies
Shop at:
Sunny Studio
Captivating Camellias Stamps
Shop at:
Sunny Studio
Captivating Camellias Dies
Shop at:
Sunny Studio
Garden Fairy Stamps
Garden Fairy Stamps
Shop at:
Sunny Studio
Garden Fairy Dies
Garden Fairy Dies
Shop at:
Sunny Studio
Inside Greetings Birthday
Shop at:
Sunny Studio
Slimline Pennant Dies
Shop at:
Sunny Studio